November 19, 2015
Project Ideas: Advent Calendar Ideas
‘Tis the season to think about Advent Calendars again already. Can you believe it? And, since there are so many folks who love the idea of creating things themselves, but love quick and easy… we’ve got ideas for you!
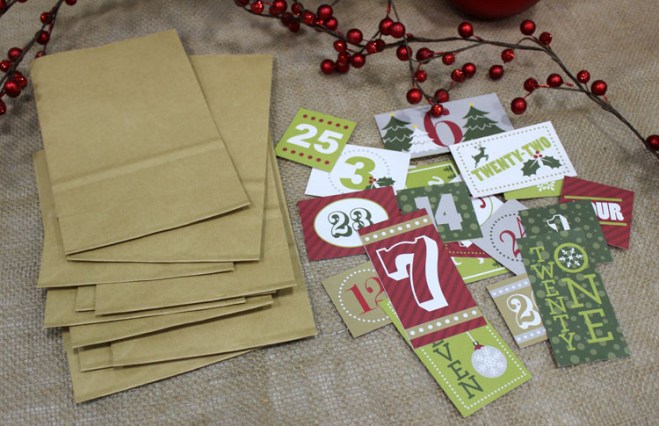
The totally fun gift-style Advent Calendar goodie bags you see above are perfecto! Stuff them with treats, tiny toys, lip gloss or even tiny sheets of paper with fun things written on them to do. Things like “make gingerbread cookies today” or “go sledding”. Just about any fun thing will do.
And now on to the good stuff… how do we do this?
Here’s what you’ll need to create them:
- 25 small paper bags
- Christmas Joy Paper Pack
- Paper Trimmer or Scissors
- Tape Runner
In the Christmas Joy Paper Pack, you’ll find two sheets of fun numbers designed so you can cut them up and use them in your scrapbook pages or paper craft projects. They’re totally cute:

Using a Paper Trimmer (you’ll need to be a bit strategic about this, but it’s not too difficult) or Scissors, cut apart each number. Hint: Set them next to the bags as we’ve done below so they’ve got a chance to get acquainted before you stick them onto the bags permanently. Like this:
The only step left is to cut scraps of Christmas Joy paper into 3″ square chunks. You’ll need 25 of them.

Next, adhere a square and a decorative number to each bag. Easy peezy!
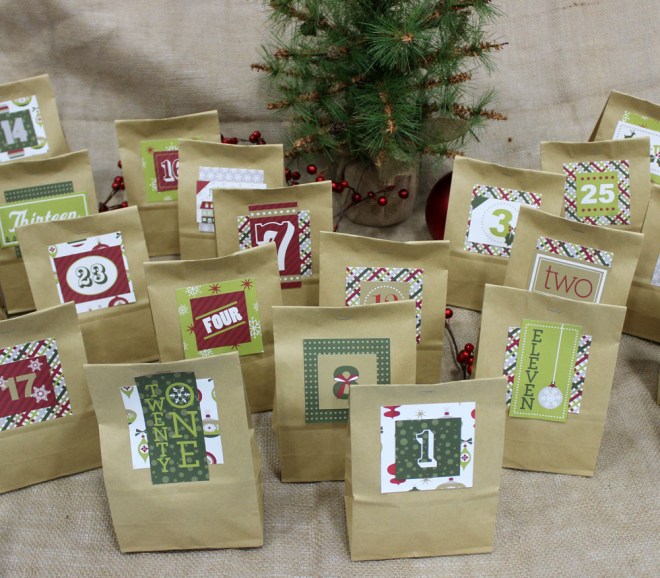
Once you’ve got each bag decorated, you’ll need to stuff a fun trinket inside each, then fold the top over and staple it shut. You can choose to drop in fun “to do” items, candy or treats, mini toys or anything else you can dream up. For
Here’s a clever way the folks over on Buzzfeed.com came up with on how to display an Advent Calendar such as the one we created:

Fun, easy and perfect if you don’t have tons of room!
Another totally fun idea is to create these cute little “crackers” – they’re so easy and everyone loves opening them!

These are easy peezy – you’ll just need a few supplies to create them. And the best part? They’re created using leftover t.p. tubes, and recycling something is very cool.
To create these, you’ll need:
- Christmas Joy Paper Pack
- Christmas Joy Stickers
- Paper Trimmer
- Scissors
- Tape Runner
- Toilet paper tubes
- White tissue paper
- Floss or twine
Start by cutting a piece of white tissue paper approximately 4″ wider than the t.p. tube and long enough to wrap around the tube completely with a bit to spare. Wrap it around and tape to secure:

Here’s the point where you’ll stuff them with something fun. Treats, trinkets, little toys, little messages, etc.
Next, gather along each end and tie with floss or twine, then trim ends.

All that’s left now is to decorate them! The paper strips we cut were approximately 3″ wide x 6″ long. Wrap around and tape them on! Decorate them with trimmed numbers from the number sheet (shown above) and use these as an Advent Calendar. Or simply decorate just a few with stickers (instead of the numbers). These make excellent stocking stuffers, too.
If you’re looking for something a bit more tiny, tidy and a super fun display we’ve got an idea for that, too!
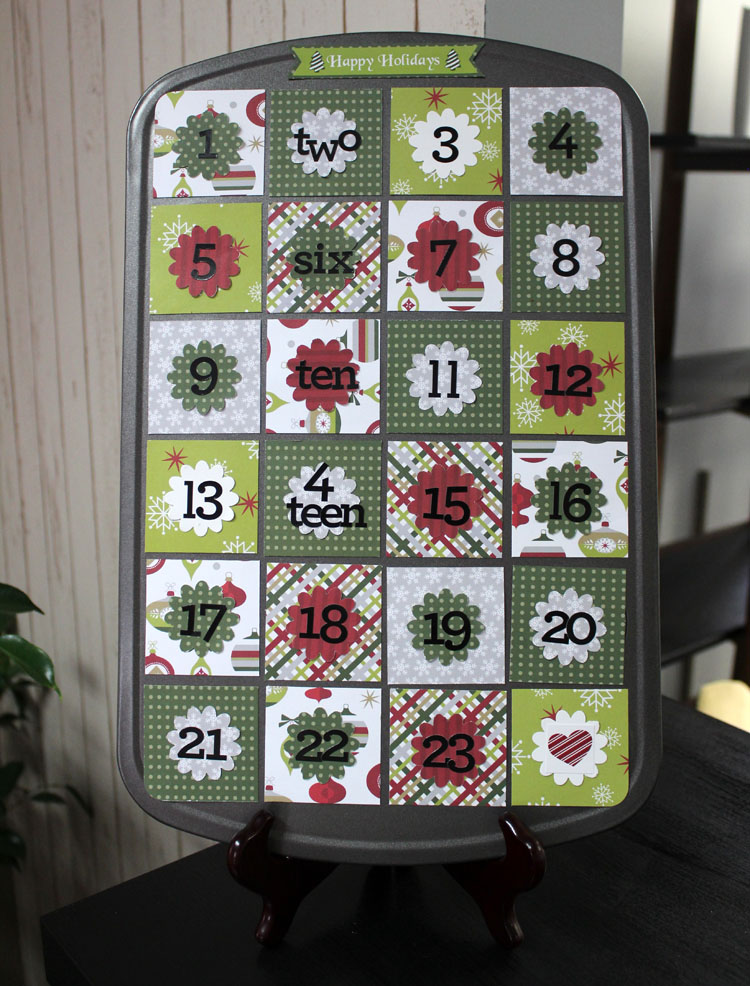
This totally fun muffin tin Advent Calendar is a bit more involved than the above ones, but well worth the extra effort!
To create this, you’ll need:
- Christmas Joy Paper Pack
- Blossom Place ‘n Punch
- Black ABC/123 Stickers
- Paper Trimmer
- Tape Runner
- 2-Way Corner Rounder
- 24-spot muffin tin
- Magnetic tape (available at craft stores, Wal-Mart, etc.)
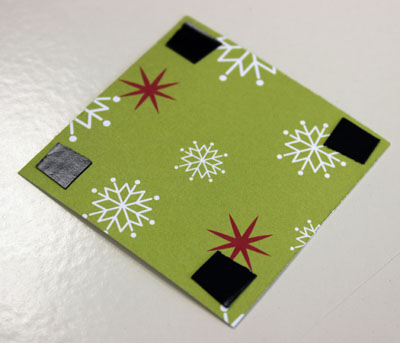
You’ll need to cut 24 squares of varying patterned paper to measure 2-1/4″ square. On the 4 corner squares, you’ll round just one corner (see pic). You’ll want to cut just one square first and make sure this size suits the pan you chose. Next, punch 24 blossom shapes using the Place ‘n Punch from varying patterned paper. Adhere one blossom shape to the center of each square, then adhere letter & number stickers as shown above. You’ll want to trim the heart sticker and adhere it on the 24th day.
Next, we’ll be adding just a bit of magnetic tape to the corner of each square like this:
Place a treat or trinket into each little space in the tin, then cover them up with your pretty squares!
We added a fun title – place the Happy Holidays sticker onto green paper, then trim around. Adhere magnetic tape across the back and stick to the top of the tin.
And last, but certainly not least, Advisor Candace Bouldin has done it again with a super cute countdown project idea on her blog, too.:

Love it? Hop on over to her blog, Scrappin’ Jpegs, and she’ll share full instructions on how to create it over there.
Happy creating!

Thank you for sharing theses wonderful ideas!