May 6, 2026
A Geometric Masterpiece to Make Your Memories Stand Out
Make your summer memories stand out with the Your Own Way collection. This bold, geometric two-page spread is a fun way to showcase sunny snapshots, family adventures and all the colorful moments that make the season feel special.
To create this layout, you will need:
- Your Own Way Paper Pack
- Your Own Way Tone-on-Tone Paper
- Your Own Way Stickers
- Your Own Way Mat Pack
- Your Own Way Embellishments
- Original Border Maker System
- Decorative Waves Border Maker Cartridge
- Hexagon Punch
- Custom Cutting System with Circle Patterns
- Bright White Cardstock
- Cornflower Blue Cardstock
- 12-inch Trimmer
- Photo Trimmer
- Repositionable Tape Runner
- Foam Squares
- Black Dual Tip Pen
Layout by Krislyn Mattei, Creative Memories Design Team Contributor

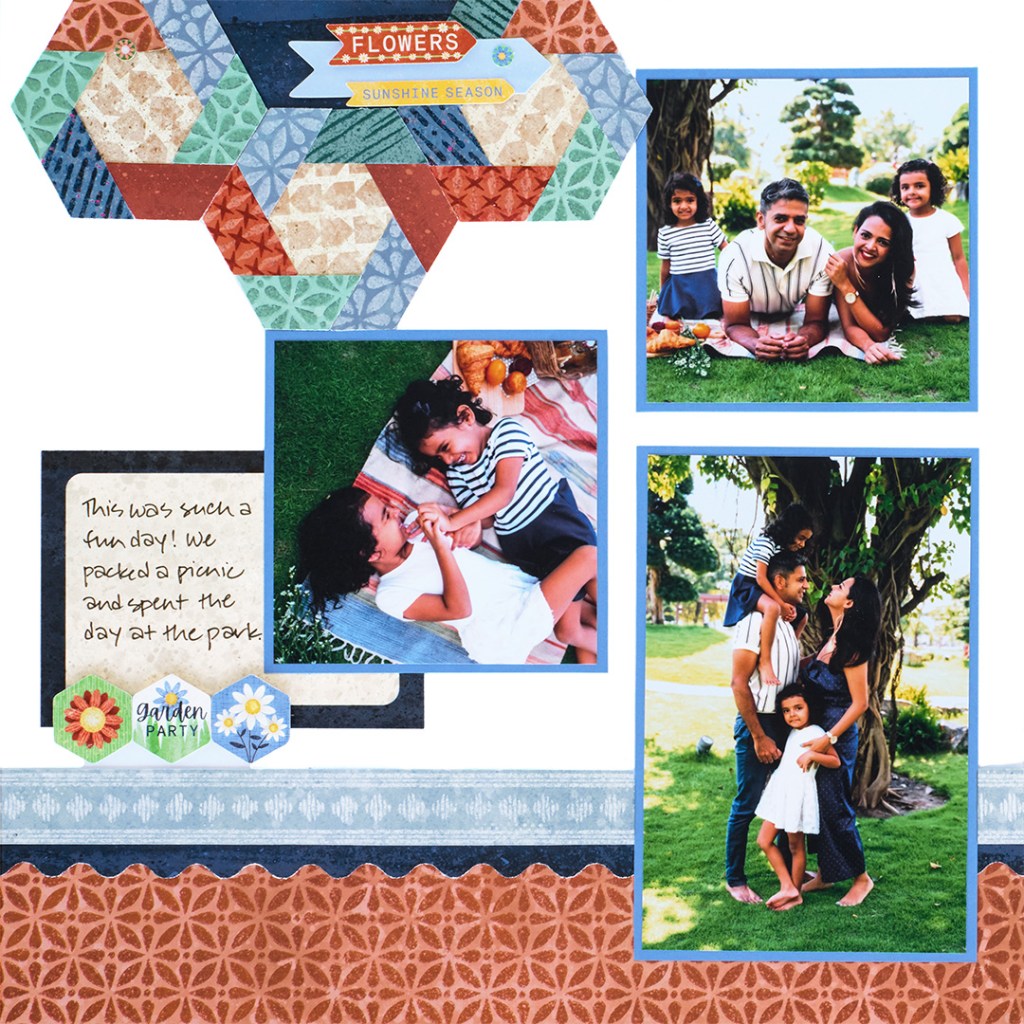
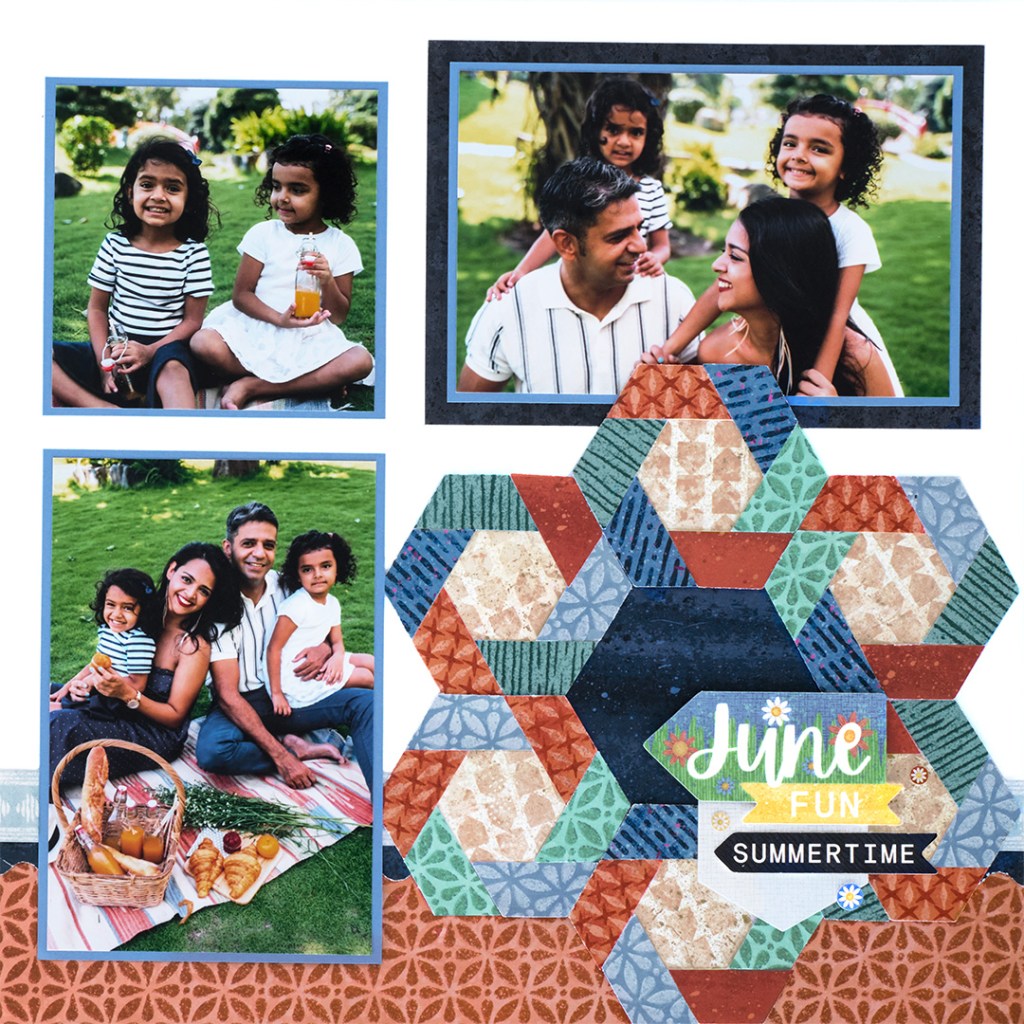
Step 1: Use two sheets of Bright White Cardstock as the base for this two-page layout. Cut two 12″ x 2″ strips from orange tile tonal paper and adhere them along the bottom of the layout.
Step 2: Using the Decorative Waves BMC, punch two borders from navy brushstrokes tonal paper, trimming each to 12″ x 1″. Cut two 12″ x 7/8″ strips from light blue crest stripes designer paper. Layer the punched borders behind the light blue strips and adhere to the layout with the top edges positioned 3″ from the bottom.
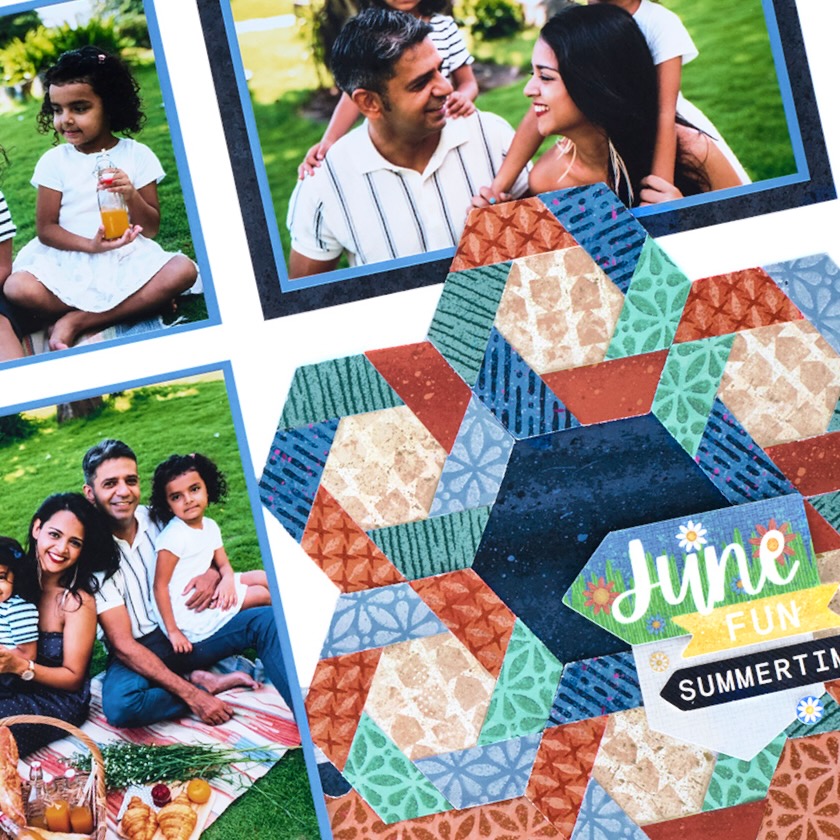
Step 3: Adhere one 6-1/2″ x 4-1/2″ navy mat to the top right of the layout. Cut one sheet of Cornflower Cardstock into three 4″ x 6″ mats and three 4″ x 4″ mats.
Step 4: Adhere one 6″ x 4″ mat to the navy mat. Crop one photo to 5-3/4″ x 3-3/4″ and mount on top. Adhere the remaining mats as shown. Crop two photos to 3-3/4″ x 5-3/4″ and three photos to 3-3/4″ x 3-3/4″ and adhere them to the mats.
Step 5: Cut one 4-1/2″ x 3-1/2″ navy mat and adhere it to the left side of the layout as shown.
Create the hexagon flowers:
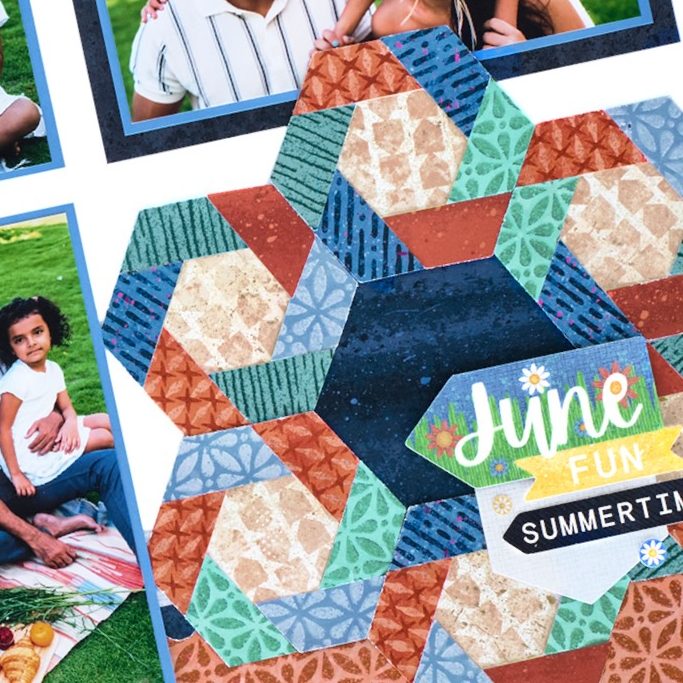
Step 6: Using the inside of the large circle pattern and the Red Blade, cut one circle from navy brushstrokes tonal paper, then cut the circle in half. Adhere the half circle along the top left edge of the layout, 2-1/2″ from the left edge. Adhere the full circle to the lower right of the layout, 2-1/4″ from the bottom and right edges.
Step 7: Using the inside of the medium circle pattern and the Red Blade, cut nine circles from beige tag stripes designer paper. Apply Repositionable Adhesive around the edges of each circle.
Step 8: Using the Hexagon Punch, punch shapes from a variety of designer papers and tonal papers. Cut each hexagon in half from tip to tip. Punch one additional hexagon from cardstock to use as a template. Apply a small amount of Repositionable Adhesive to the template and gently place it in the center of a circle.
Step 9: Position one half-hexagon on the circle so the long straight edge overlaps halfway onto the template hexagon edge and the side aligns evenly with the side of the template (see photo for reference). Continue placing half-hexagon pieces around the template to create a twisted pattern. Remove the template shape and repeat on the remaining circles until you have nine petals. Adhere three petals around the half circle and six petals around the full circle, as shown.
Step 10: Adhere embellishments and stickers, popping some up with Foam Squares for added dimension.
Step 11: Journal as desired.
What photos would you feature on this layout? Share your creation with us in the Virtual Crop Group!
P.S. Are YOU a member of the Virtual Crop Group? It’s your go-to place for MONTHLY Virtual Crops, MONTHLY Completed Album Challenges, QUARTERLY Secret Box Openings with project tutorials and so much more! We hope you’ll join our community of more than 52,000 fellow memory-keeping enthusiasts — you’ll feel right at home!

