December 6, 2015
12 Days of Christmas Ideas: Day 6 -Tips for using Punches in Layouts Part II

Today’s layout is the second in our three-part series featuring tips for using all those fancy punches in your stash. It’s a simple idea: use your punches in creative ways, then assemble into a fun border!
Here’s what you’ll need to create it:
- Snowflake paper and red scraps from Christmas Joy Paper Pack
- Christmas Joy Stickers
- Cardstock scraps: green, blue and white cardstock
- Shape Maker with Circle and Square Cartridges
- Border Maker System with Bubbles and Diamond Scroll Cartridges
- Star Place ‘n Punch
- 2-Way Corner Rounder
- Paper Trimmer
- Scissors
- Foam Squares
- Tape Runner and Mini Tape Runner Cartridge
Step 1: Using Border Maker with Bubbles Cartridge, punch along entire edge of blue cardstock.
Step 2: Flip Shape Maker with Circle Cartridge upside down, then insert bubble punched paper into maker and punch 4 circle shapes:
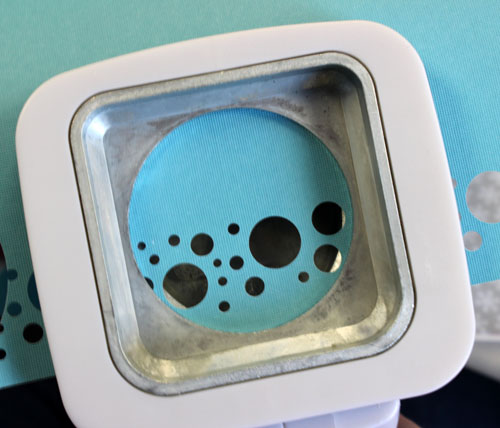
Punch one additional blue circle from an area of the blue cardstock that has not been punched with bubble design. NOTE: You’ll cut this last circle into 2 parts (one slightly larger than the other) and adhere each piece to the edge of page as shown on page.
Step 3: Using Shape Maker with Square Cartridge, punch 3 square shapes. Using Corner Rounder, round all corners on square shapes.
Step 4: To create snowflakes (original snowflake idea by Candace Bouldin): Using Border Maker with Diamond Scroll Cartridge, punch along entire edge of white cardstock. Using scissors, trim away small sections from center of each punched design:
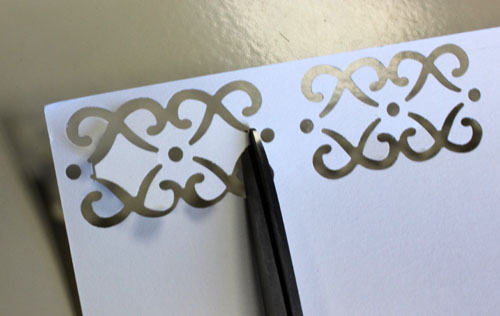
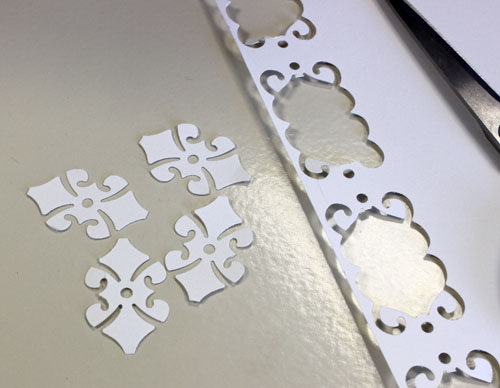
NOTE: you’ll need to cut 4 of the center designs for each snowflake, so to create 3 snowflakes, you’ll need to border punch along two 12″ edges of white cardstock.
Step 5: Create two sets of 2 center pieces layered together like this:

Adhere both sets of layers together, placing the top set offset by 45 degrees like this:

NOTE: as noted above, each snowflake consists of a total of 4 layers.
Step 6: Using Star Place ‘n Punch, punch 6 green star shapes. NOTE: You’ll cut 2 of these stars and adhere them along the corners of the page as shown on the page.
Step 7: Adhere grey snowflake paper to white page, then adhere all punched pieces to page as shown. Add dimension to pages by adhering some shapes to page using Foam Squares.
Step 8: Cut two pieces of red patterned paper to measure 6.5″ x 4.5″ and adhere to page.
Step 9: Adhere I <3 Christmas sticker to red patterned paper, then trim around. Adhere to page using Foam Squares for added dimension.
NOTE: Black cardstock was used to show where photos would go.

Love this page! What a creative way to use the punches! I’ll show this at my January crop.
The snowflake is just inspired. Well thought out and easy to duplicate!
I love how you “think outside the box” with the Bubble cartridge, and especially the way you’ve created a brand new shape with the Diamond Scroll!