February 24, 2016
Page Layouts in 10 Minutes or Less
The official topic for my blog today is “Naked Pages.” I toyed with several titles for this post…
- Let’s Get Naked!
- Scrapbook Skinny-dipping
- The Stripped-down Scrapper
In the end, I went with something less provocative, yet still designed to get your attention. (Did it work?)
Today I will share with you several layouts which you can whip together in a few minutes. Even lovers of stickers, 3-D elements, glitter and multi-layered photo mats need a creative break sometimes, and just need to get some pages finished! Think of these ideas like the recipes you see online with only four or five ingredients.
There are two major concepts to remember when doing a naked page: alignment and color. Because the layout is so simple, the alignment of photos and other page elements gives the viewer’s eye something to follow, and it should make sense. In other words, it’s best if the photos are symmetrical, are rectangular or square, and are lined up neatly.
Color is important because you have so little on the page. Instead of creating a themed, color-coordinated layout and then adding photos, a naked page looks best when it borrows colors from the photos, or at least compliments them.
Naked pages work nicely with landscape photos, as well as photos that have a lot going on (i.e., a scene with a crowd, or lots of intense colors). Let’s take a look!
One of the easiest ways to make a quick, naked page is to use really beautiful paper. Here, I literally cut 3 strips of paper from the Fresh Picks collection, stuck them on the page, and added my photos. The gorgeous colors and prints make the page look finished. Notice how the photos are lined up and only one is cropped.

The intense colors of these photos would compete with any paper or background other than white or something very dark. Again, I lined them up, kept them similar in size, and added just a few decorative elements: Watercolor Green ABC stickers, a Strut Your Stuff slide-in card for journaling, and a layered border. I layered the Diamond Scroll border (done with the Border Maker) over strips of paper. Both papers are from the Strut Your Stuff pack.

Creative Memories Natural and Spargo Refill Pages are ideal for making naked pages! The background is already done for you, and neutral enough to work with any photos. For this Natural page, I added torn-paper borders using CM cardstock from Shades of Blue and Shades of Green. I trimmed down my photos and arranged them to make an eye-pleasing square. (I admit to being inspired by my 1st-grader’s artwork for this layout; like many children, she colors a blue stripe on top of the page for the sky, and a stripe of green grass on the bottom). :)

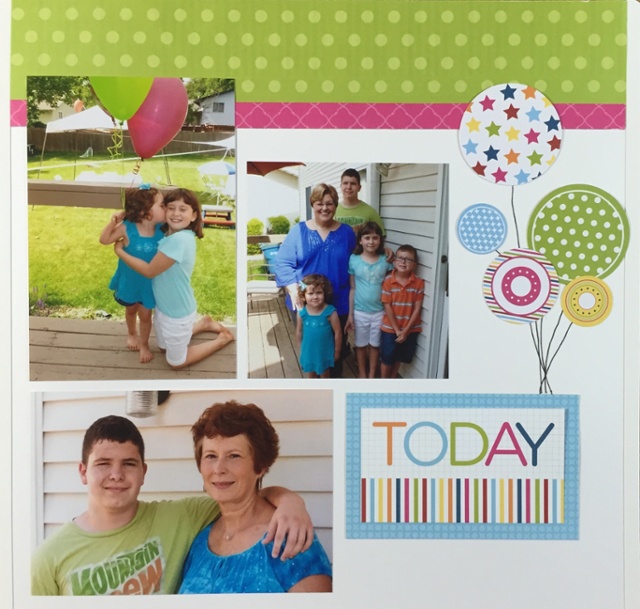
This layout is a tad more complex, but still pretty easy. The Look on the Bright Side paper pack and Slide-In cards, along with Bright Embellishments, perfectly coordinate with the cheery summer photos. I adhered a wide paper strip to the top, accented with a narrow one. I cut two slide-in cards to fit my page (matted the title with a piece from another card), and finished with “balloons” using Bright embellishments. That’s it!

For this super easy Easter layout, I cut four borders from Fresh Picks papers, using the Lace Flower Chain Border Maker Cartridge. I lined them up to make a wide border on top of the page. I cut another strip from a Fresh Picks paper for the bottom, and stuck my two, same-size photos onto the border. Navy Blue ABC stickers made a quick title.

When you are short on time and need some quick page ideas, the Creative Memories blog is a great place to start!

you are so right!! Keep it simple, back to basics, and get it done – I love your reminder!!
Page not found
On Thursday, June 9, 2016, CREATIVE MEMORIES BLOG wrote:
> Creative Memories posted: “The official topic for my blog today is “Naked > Pages.” I toyed with several titles for this post… Let’s Get Naked! > Scrapbook Skinny-dipping The Stripped-down Scrapper In the end, I went with > something less provocative, yet still designed to” >
Initial link broken as an old posting.
>