April 13, 2016
10 Scrapbook Album Making Tips for Busy Moms
I am thrilled with the release of Creative Memories’ gorgeous new Hello Baby products– and not just because I’m a product junkie! I’m thrilled because it means a whole new group of moms might be encouraged to create completed scrapbook albums for their little ones!
Many people actually begin scrapbooking because they want to do something with their photos of momentous, life changing events. I often hear from ladies who want to preserve the photos in an album about their wedding, the birth of a child or the life story of a family member, but they just don’t know where to start.


As a mom I know the exhaustion and feeling of being overwhelmed that a new baby brings, but once you feel up to it, it CAN be easy to create a baby book while baby is still a baby! Here are ten tips that can help.
- Choose Products that will make it EASY. It just doesn’t get any easier than the Fast2Fab Albums! Simply add photos to the pre-made pages and journal. It truly is the simplest way to create a beautiful keepsake album in the shortest possible time! Have a look at this video to be inspired! (Psst…Fast2Fab Albums are available in lots of other styles too, so you can put together that Wedding or Travel album just as easily!)
http://www.youtube.com/watch?v=I90zKDleyoI - Select Coordinating Products. Feeling creative? Not into a pre-designed album? No problem! Choose a coverset and page options, then create your own unique pages to cherish using the Hello Baby Paper Pack, Sticker and Die Cut Embellishments, Slide-In Cards and ABC/123 Stickers. I’m using the Hello Baby Boy collection for my son’s baby abum. I love that it all works beautifully together and makes it soooo easy to create a cohesive, coordinated album!

- Get (and Keep!) Your Photos Organized – you’re going to be taking a lot of them! Set up a folder on your computer or use an online photo organization/storage service to get and keep your photos all in one spot. If you plan on adding to the album while baby is growing, pencil in a 15-minute time slot to your calendar every month so you can go through and choose photos that you wish to include. Send them off to print in batches and add them to your album as soon as you get them back. Store extras in our photo safe Power Sort Box.

- Set Yourself up for Success. Gather products, tools and photos together and keep them handy so you can work on the album during nap times. Set up a location to keep information and memorabilia like cards and notes, or info such as weight, length etc. all together. Designate a basket, folder or box where you can stash it all and it will be easy to retrieve and use in the album.I gathered my Hello Baby Boy Papers, Slide-In Cards, Stickers and Embellishments and stored them together in a gallon size zip top bag. I also pulled my basic tools out of my cabinet – Personal Trimmer, Adhesive Tape Runner, Scissors, Corner Rounder and Dual-Tip Pen – and placed them all in a basket along with the photos I want to use. You could store a similarly stocked basket somewhere handy and bring it out to work on whenever you have a minute.


(Psst…Don’t forget that your basic tools all store neatly inside the handy drawer on the side of the Personal Trimmer! Love that!)
- Document on a Calendar…use your daytimer, a wall calendar, your phone calendar or the Year to Remember Calendar Pages to jot down daily/weekly/monthly milestones in baby’s growth and development as they happen. You can easily transfer the info to the baby album later on, or even add the calendar page to the album by slipping it into a Large Pocket Page.

- Journal on the go. Keep a black Dual-Tip Pen and a pack of the Hello Baby Slide-In Cards in your purse or diaper bag. Journal while you’re waiting at an appointment or when you get a chance to grab a coffee while baby is sleeping in the stroller. Later the journal card can be added directly to an album page or slipped into a Multi-Pocket Page along with some photos.

- Involve Dad. Daddy might not be interested in making pretty pages, but he might like to add some journaling about his thoughts, feelings and observations about baby. Ask him a few thought-provoking questions, then pass him a journal card & pen to record his answers on. When baby is all grown up he or she will love seeing daddy’s handwriting in their baby album! Or maybe he loves techy side of things and wants to transfer all the photos to the computer and set up an organizational system. At the very least he can cuddle and play with baby while you have some fun putting the album together!
- Make Naptime Creative Time. If you are keen to add a personal touch to your album, use naptime to create some easy additions – like borders – that you can to add to pages later. The baby products all coordinate so you can make some Fast2Fab pages, some decorative pages and some pocket pages and they will all look amazing together.I made a bunch of simple borders and embellishments in about 20 minutes using the border strip page from the Hello Baby Boy Paper Pack and a few sheets of coordinating solid cardstock.

I cut the border strip page into strips with my 12 Inch Straight Trimmer and then adhered them onto larger strips of solid cardstock – no border maker, no fancy trimming…just solid, straight strips! I also chose a few Die-Cut Embellishments and Stickers and added some solid circles and squares behind a few of them for contrast. Then I sorted through the Slide-In Cards and chose the cards that coordinated with my new borders. Now I have several unique and creative “sets” that I can use to make traditional pages in a snap!


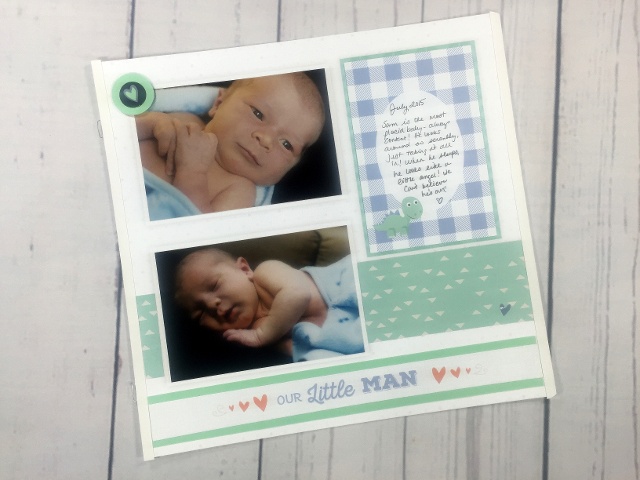
And here’s a page that literally took me three-and-a-half minutes to make using one of the sets I made above. So easy! You can do this! - Get Help. Your Creative Memories advisor has lots of ideas you can use and can offer suggestions when you have specific question or get “stuck”. Reach out to find an advisor in your area if you don’t already have one (or consider signing up yourself and getting your products at a discount!)
- Have Fun! Relive those precious moments through your photos. Know that you are creating a book that will be treasured forever. Enjoy working with pretty products and cute embellishments. Make sure to put some of your mama’s-love into every page!
————————————————————————–
But what if your baby is all grown up? Of course you can still use the Hello Baby products to put together an album for your child that they will love to look back on to revisit their childhood! Some of the tips above still apply, such as using products that coordinate and setting-up for success, but there are a few bonus tips that are specific to this type of album-making.
Narrow Your Focus – do you want to create an album of just the first year? Or the baby and toddler years? Determining the scope of your project ahead of time will make it easier to decide what will make it into the album.
Gather – hunt down all the photos, growth charts, notes from doctor’s visits etc. that pertain ONLY to the time frame you are working with. Now is not the time to sort through every artwork and report card that came home during your child’s school years…that may be a task for another album!
Group – group your photos and memorabilia into general categories such as birth/hospital stay, first days/weeks at home, 1st, 2nd, 3rd month, etc. Group into categories that make sense to you and the photos you have. Once you are organized you can get the album done fast using the time-saving tips above!
I hope these tips inspire you to create an album to cherish for your baby!
What tips have you discovered that may make a busy Mom’s life easier?
Noreen
