July 14, 2016
Ocean Waves Scrapbook Borders For Your Travel & Vacation Layouts
I’m loving Creative Memories’ new Ocean Waves Border Maker Cartridge! Used with the blues from Creative Memories’ Travel Cardstock or the Cool Serenity Collection it’s the perfect complement to your seaside scrapbook layouts.
I’m sure you can also think of other ways this cool new tool can dress up your summertime scrapbook pages. Today I’m going to share three borders I created with the Ocean Wave Border Maker Cartridge and the Cool Serenity Collection.
Here’s what you’ll need to create these borders:
- Cool Serenity Paper Pack
- Travel Solid 12 x 12 Cardstock
- Cool Serenity Embellishments
- Cool Serenity Slide-In Pack
- Cool Serenity Stickers
- Navy ABC/123 Stickers
- 12-Inch Straight Trimmer
- Border Maker System and Ocean Waves Cartridge
- Two-Way Corner Rounder
- Black Pen
- Tape Runner, Mini Tape Runner and Foam Squares
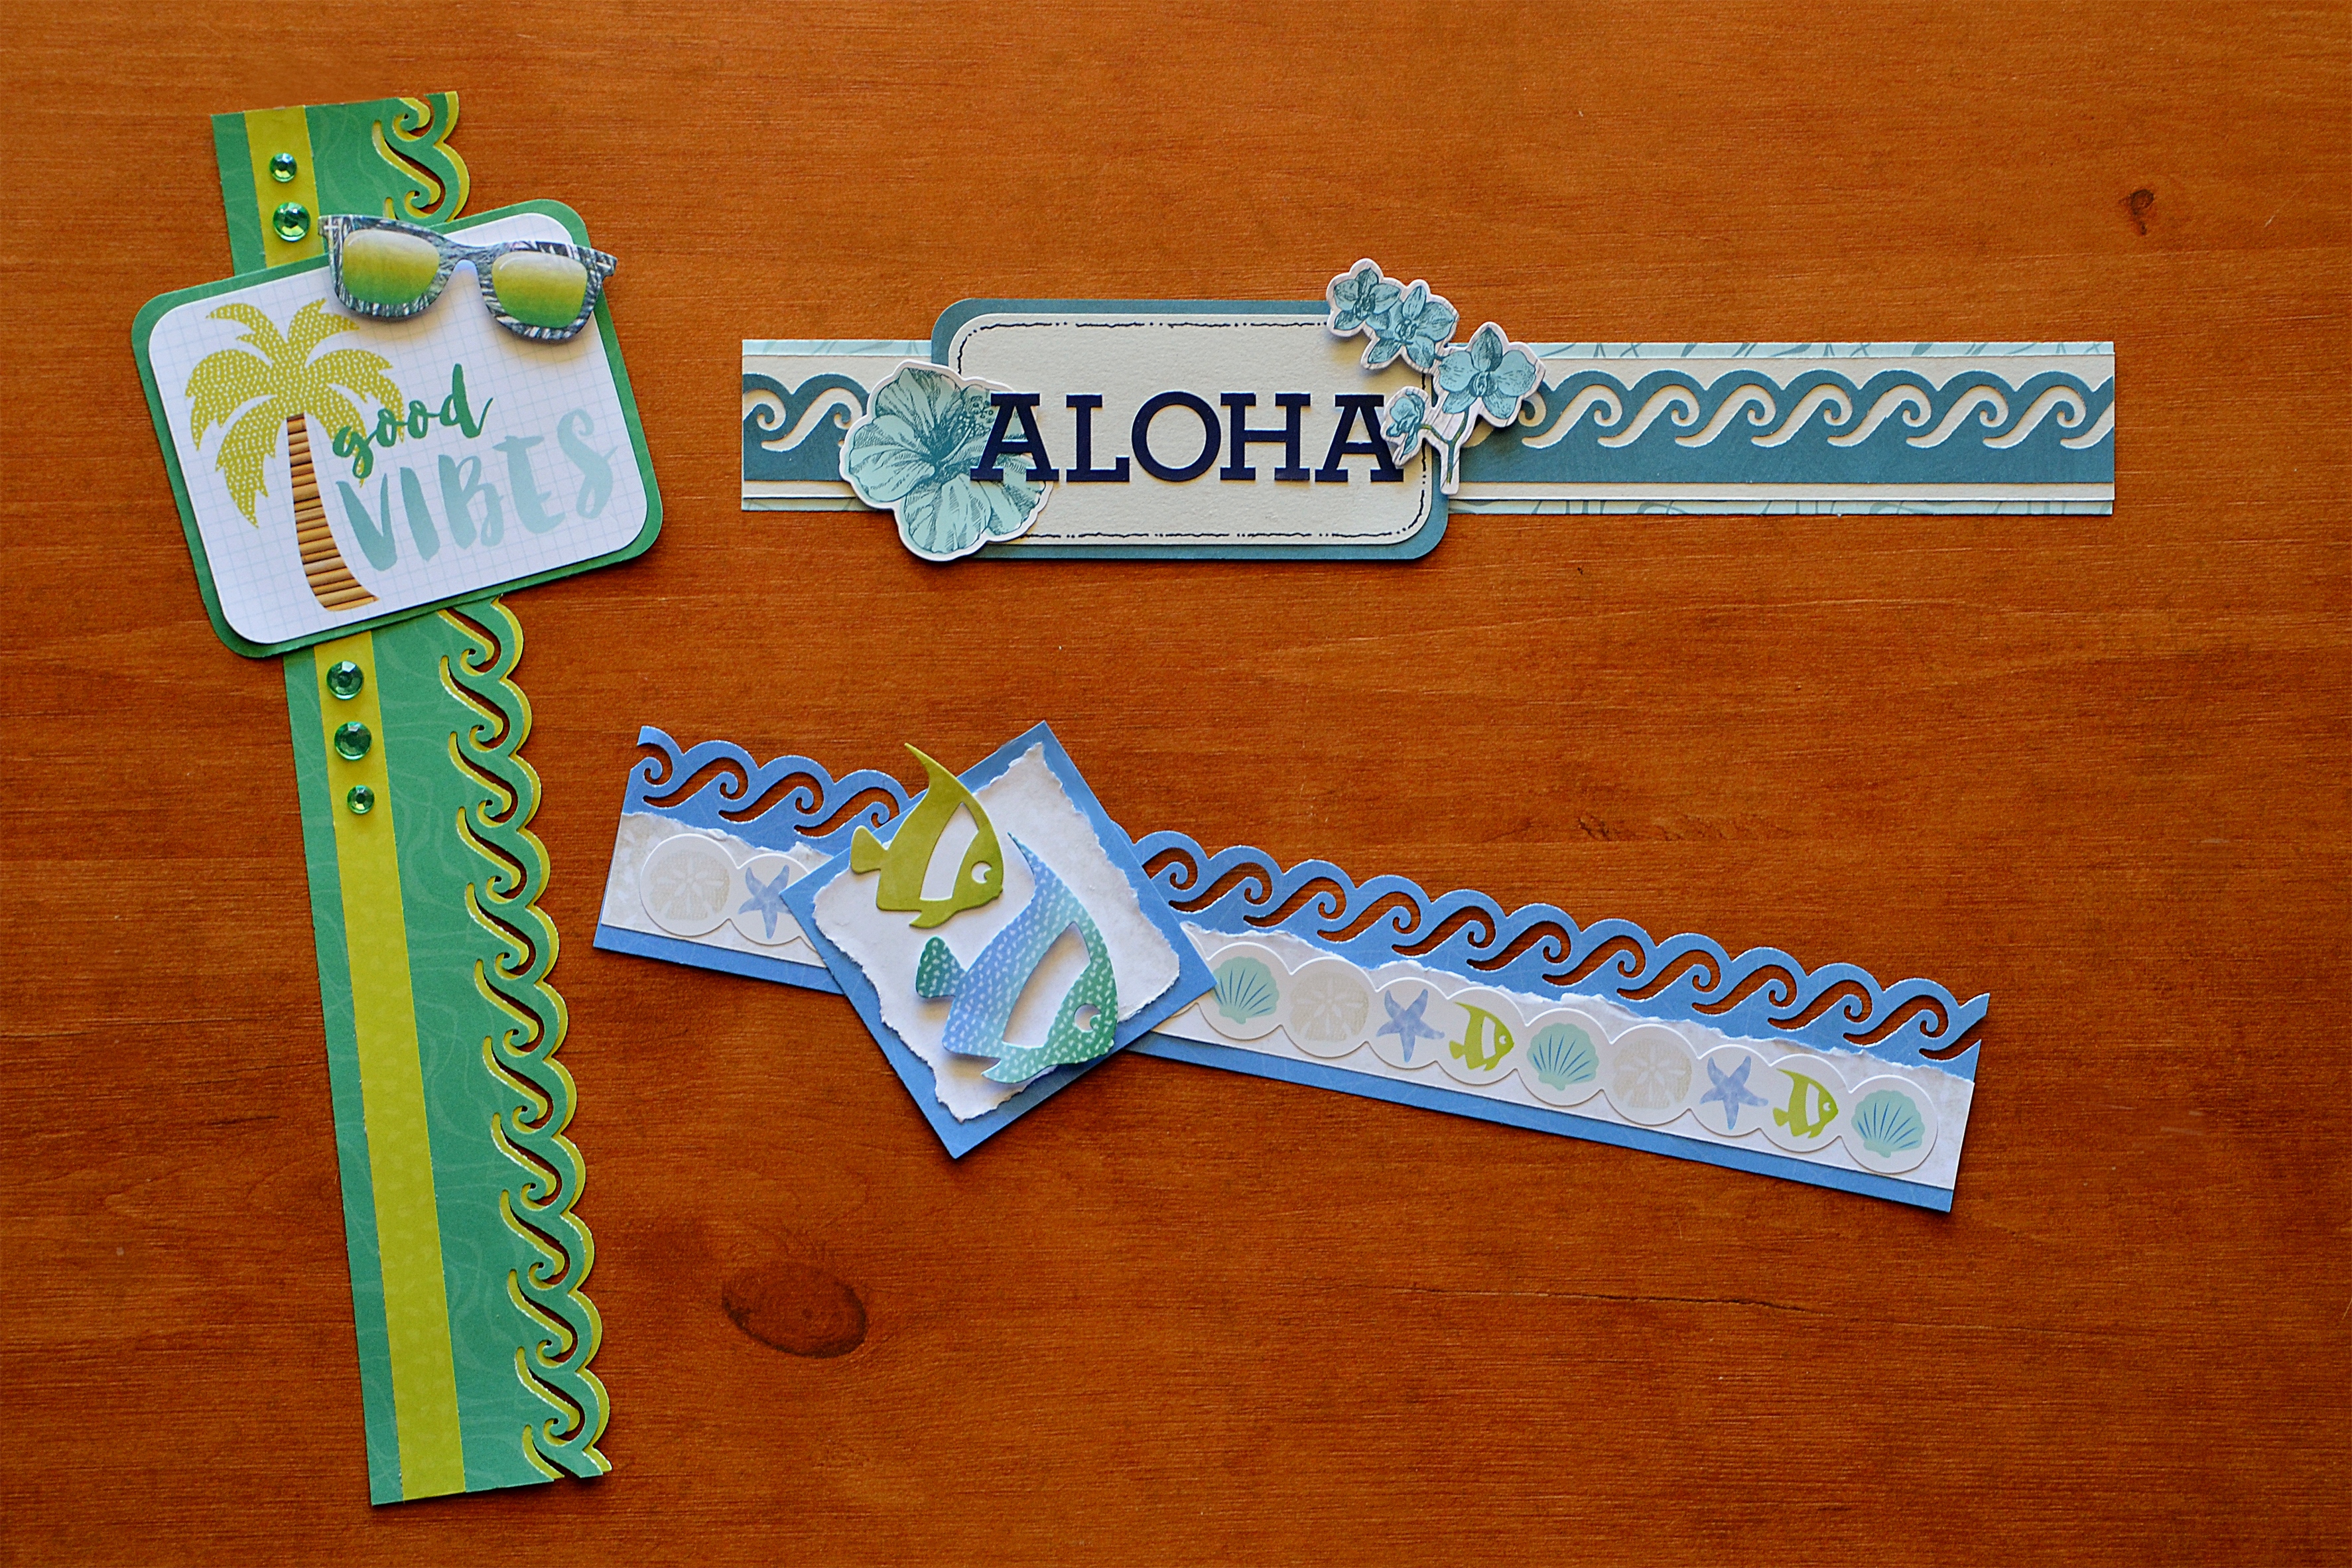
Good Vibes Border
Using the Border Maker with the Ocean Waves Cartridge, punch one border from green pattern paper and one from light green pattern paper. Using the Straight Trimmer, trim green border to 2″ x 12″ and the light green border to 1″ x 12 inches. Cut one 1/2″ x 12″ strip from light green pattern paper. Layer and adhere border strips as shown. Use the Straight Trimmer to cut “Good Vibes” slide-in card to 3″ x 3 3/4 inches. Mat with green pattern paper cut to 3 1/4″ x 4 inches. Use foam squares to adhere sun glasses to card and tape runner to adhere matted card to border strip. Add bling as shown.
Aloha Border
Using the Straight Trimmer, cut one 1 1/4″ x 12″ strip from sand cardstock and one 1 1/2″ x 12″ strip from light teal pattern paper. Use the Border Maker and Ocean Waves Cartridge to punch border from teal cardstock. Trim to 1″ x 12 inches. Layer and adhere strips as shown. Using the Straight Trimmer, cut one 2″ x 4 1/4″ rectangle from sand cardstock and one 2 1/4″ x 4 1/2″ rectangle from teal cardstock. Doodle around sand rectangle with black pen as shown and adhere to teal rectangle. Adhere rectangles to border strips as shown. Adhere flower sticker and letter stickers to rectangle as shown. Use foam squares to adhere flower embellishment.
Fish in the Sea Border
Using the Border Maker and Ocean Waves cartridge, punch a border from blue pattern paper. Trim to 2″ x 12 inches. Tear one end of sand pattern paper and trim to 1″ x 12 inches. Layer and adhere as shown and add sticker border. Using the Straight Trimmer, cut one 2 3/4″ square from blue pattern paper and one from sand pattern paper. Tear edges of sand square, layer with blue square and adhere to border strip as shown. Use foam squares to adhere large fish and tape runner to adhere small fish as shown.
There you go! Have fun creating borders for your travel and vacation scrapbook layouts!
Diana

These are awesome! Wish I was going to the Caribbean this winter.
These are so cute! Thank you for your great Ideas!!
I love these!! Can you show us more with the rest of the collection?!!!! Please and thank you!