November 4, 2016
What is a Virtual Crop?

Tomorrow is the day! Virtual Crop DAY!
Join us right on our Facebook Event Page! If you have not RSVP’d saying that you will join us — you can do so now!
However, before then, here are some tips to best prepare for the event:
Gather some HOLIDAY photos and scrappy supplies, stay comfy in your jammies, and crop the day away with us from the comfort of your home.
We will host several challenges throughout the day from our Facebook Event Page to inspire you at (all Central Time): 9am, 11am, 1pm, 3pm and 5pm.
After you complete each challenge, we encourage you to take a photo (nothing fancy, just a snapshot) and post it to the Facebook Event Page. By doing that, you will qualify for the prizes that will be given away every 2 hours-at the end of each challenge.
The link to each challenge will be posted on the event page (the challenges will remain on our blog for easy access later). A bonus to challenges being on the blog is that when you subscribe you’ll get an email with each new challenge. Enter your email on the blog to subscribe: https://blog.creativememories.com/
All of the ideas and inspiration will help you get projects completed – and it’s a ton of fun to connect with fellow scrappers across North America.
This Virtual Crop will focus on the Holidays: gift giving, home decor, cards, layouts and more.
You won’t want to miss it!
Stop in for one challenge or stay for all of them. We look forward to spending time with you!
We decided to give you a bonus sketch to get your creative juices flowing before morning.
***Create a scrapbook spread using this very basic sketch layout using holiday themed photos. When you are done, make sure to post on the event page for everyone to see!
BONUS SKETCH:
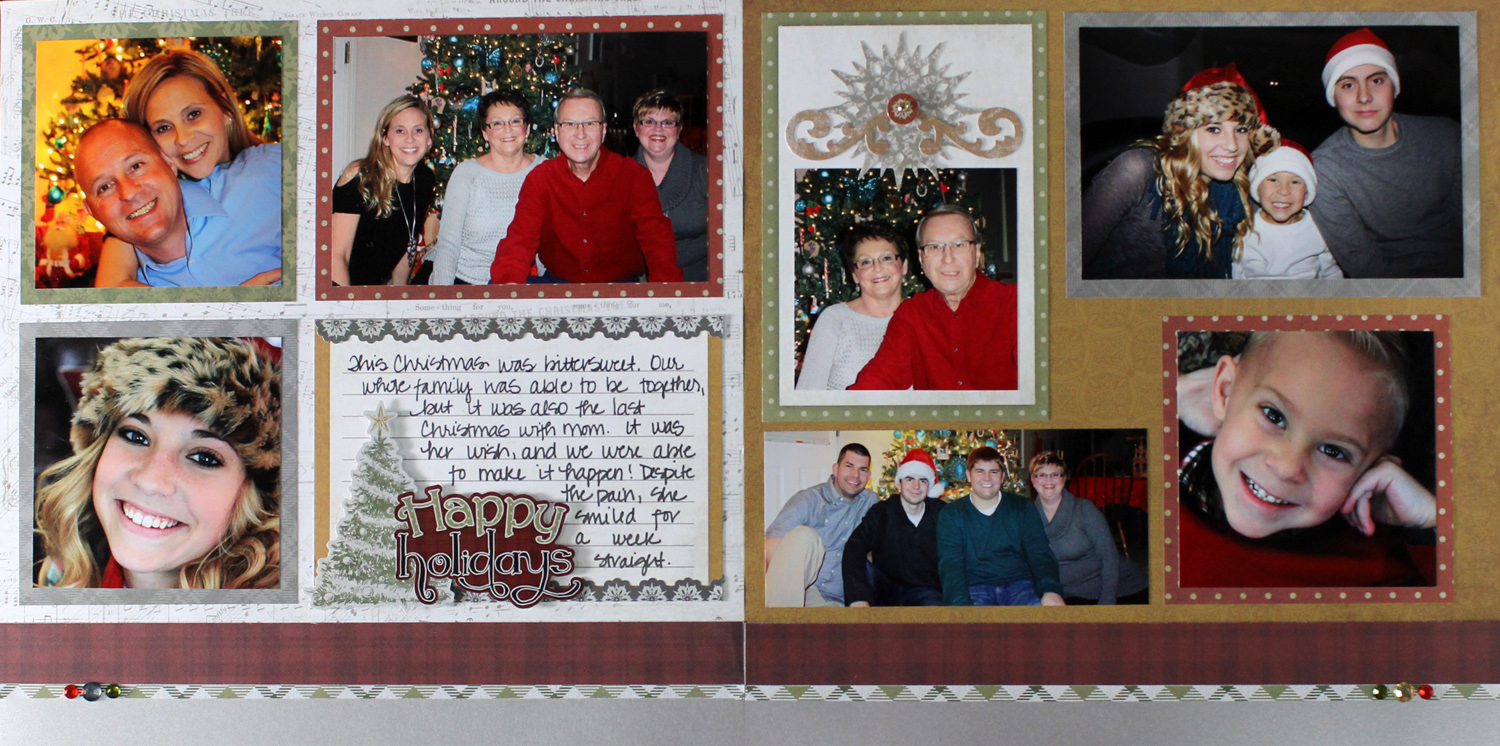
Spread created by Melissa Ullmann- US Home Office
Ingredients:
- Christmas Past Paper Pack US CAN
- Christmas Past Mat Pack US CAN
- Christmas Past Embellishments US CAN
- Christmas Past Stickers US CAN
- Silver Shimmer Cardstock US CAN
- Foam Squares US CAN
- 12″ Straight Trimmer US CAN
Instructions:
Step 1: Use the gold paper for the right side, and the music note paper for the left side of the spread.
Step 2: Cut 2 strips from the Silver Shimmer Cardstock to measure 12″ x 1″. Adhere to the bottom of both sides of the spread.
Step 3: Cut 2 strips from the ruby plaid paper to measure 12″ x 1-1/4″. Adhere above the silver cardstock.
Step 4: Using the 12″ Straight Trimmer, leaving the sticker on the sticker sheet, cut the green plaid border sticker in half length-wise. Adhere 1/2 to each side of the spread between the silver and ruby paper strips.
Step 5: Cut photo mats using the 12″ Straight Trimmer. Adhere to the spread incorporating mats from the Mat Pack.
Step 6: Adhere stickers to the journaling mat using foam squares.
Step 7: Journal using black pen.
Step 8: Adhere die cuts and rhinestones.

Created by Marja Deeth- Canada Home Office
Ingredients:
- Achievements Paper Pack US CAN
- White Solid 12X12 Cardstock US CAN
- Black Solid 12X12 Cardstock US CAN
- Cranberry Solid 12X12 Cardstock US CAN
- Silver Shimmer Cardstock US CAN
- Black ABC/123 Stickers US CAN
- 2-Way Corner Rounder US CAN
- Leaf Trio Punch US CAN
- Circle Pattern CCS US CAN
- Bubble Border Cartridge US CAN
- Foam Squares US CAN
- 12″ Straight Trimmer US CAN
- Silver Metallic Pen US CAN
Instructions to create ornaments:
Step 1: To create the Christmas ornaments simply cut three designs of the Achievements Paper Pack using the Circle Patterns with the Custom Cutting System using the RED blade.
Step 2: Next cut a mat for each of the ornaments in black cardstock using the BLUE blade.
Step 3: Cut a small rectangle for the tops of the ornaments with rounded corners out of the Silver Shimmer Cardstock.
Step 4: Cut strips measuring 1/8″ out of the Silver Shimmer Cardstock for the Christmas ornaments to hang on.
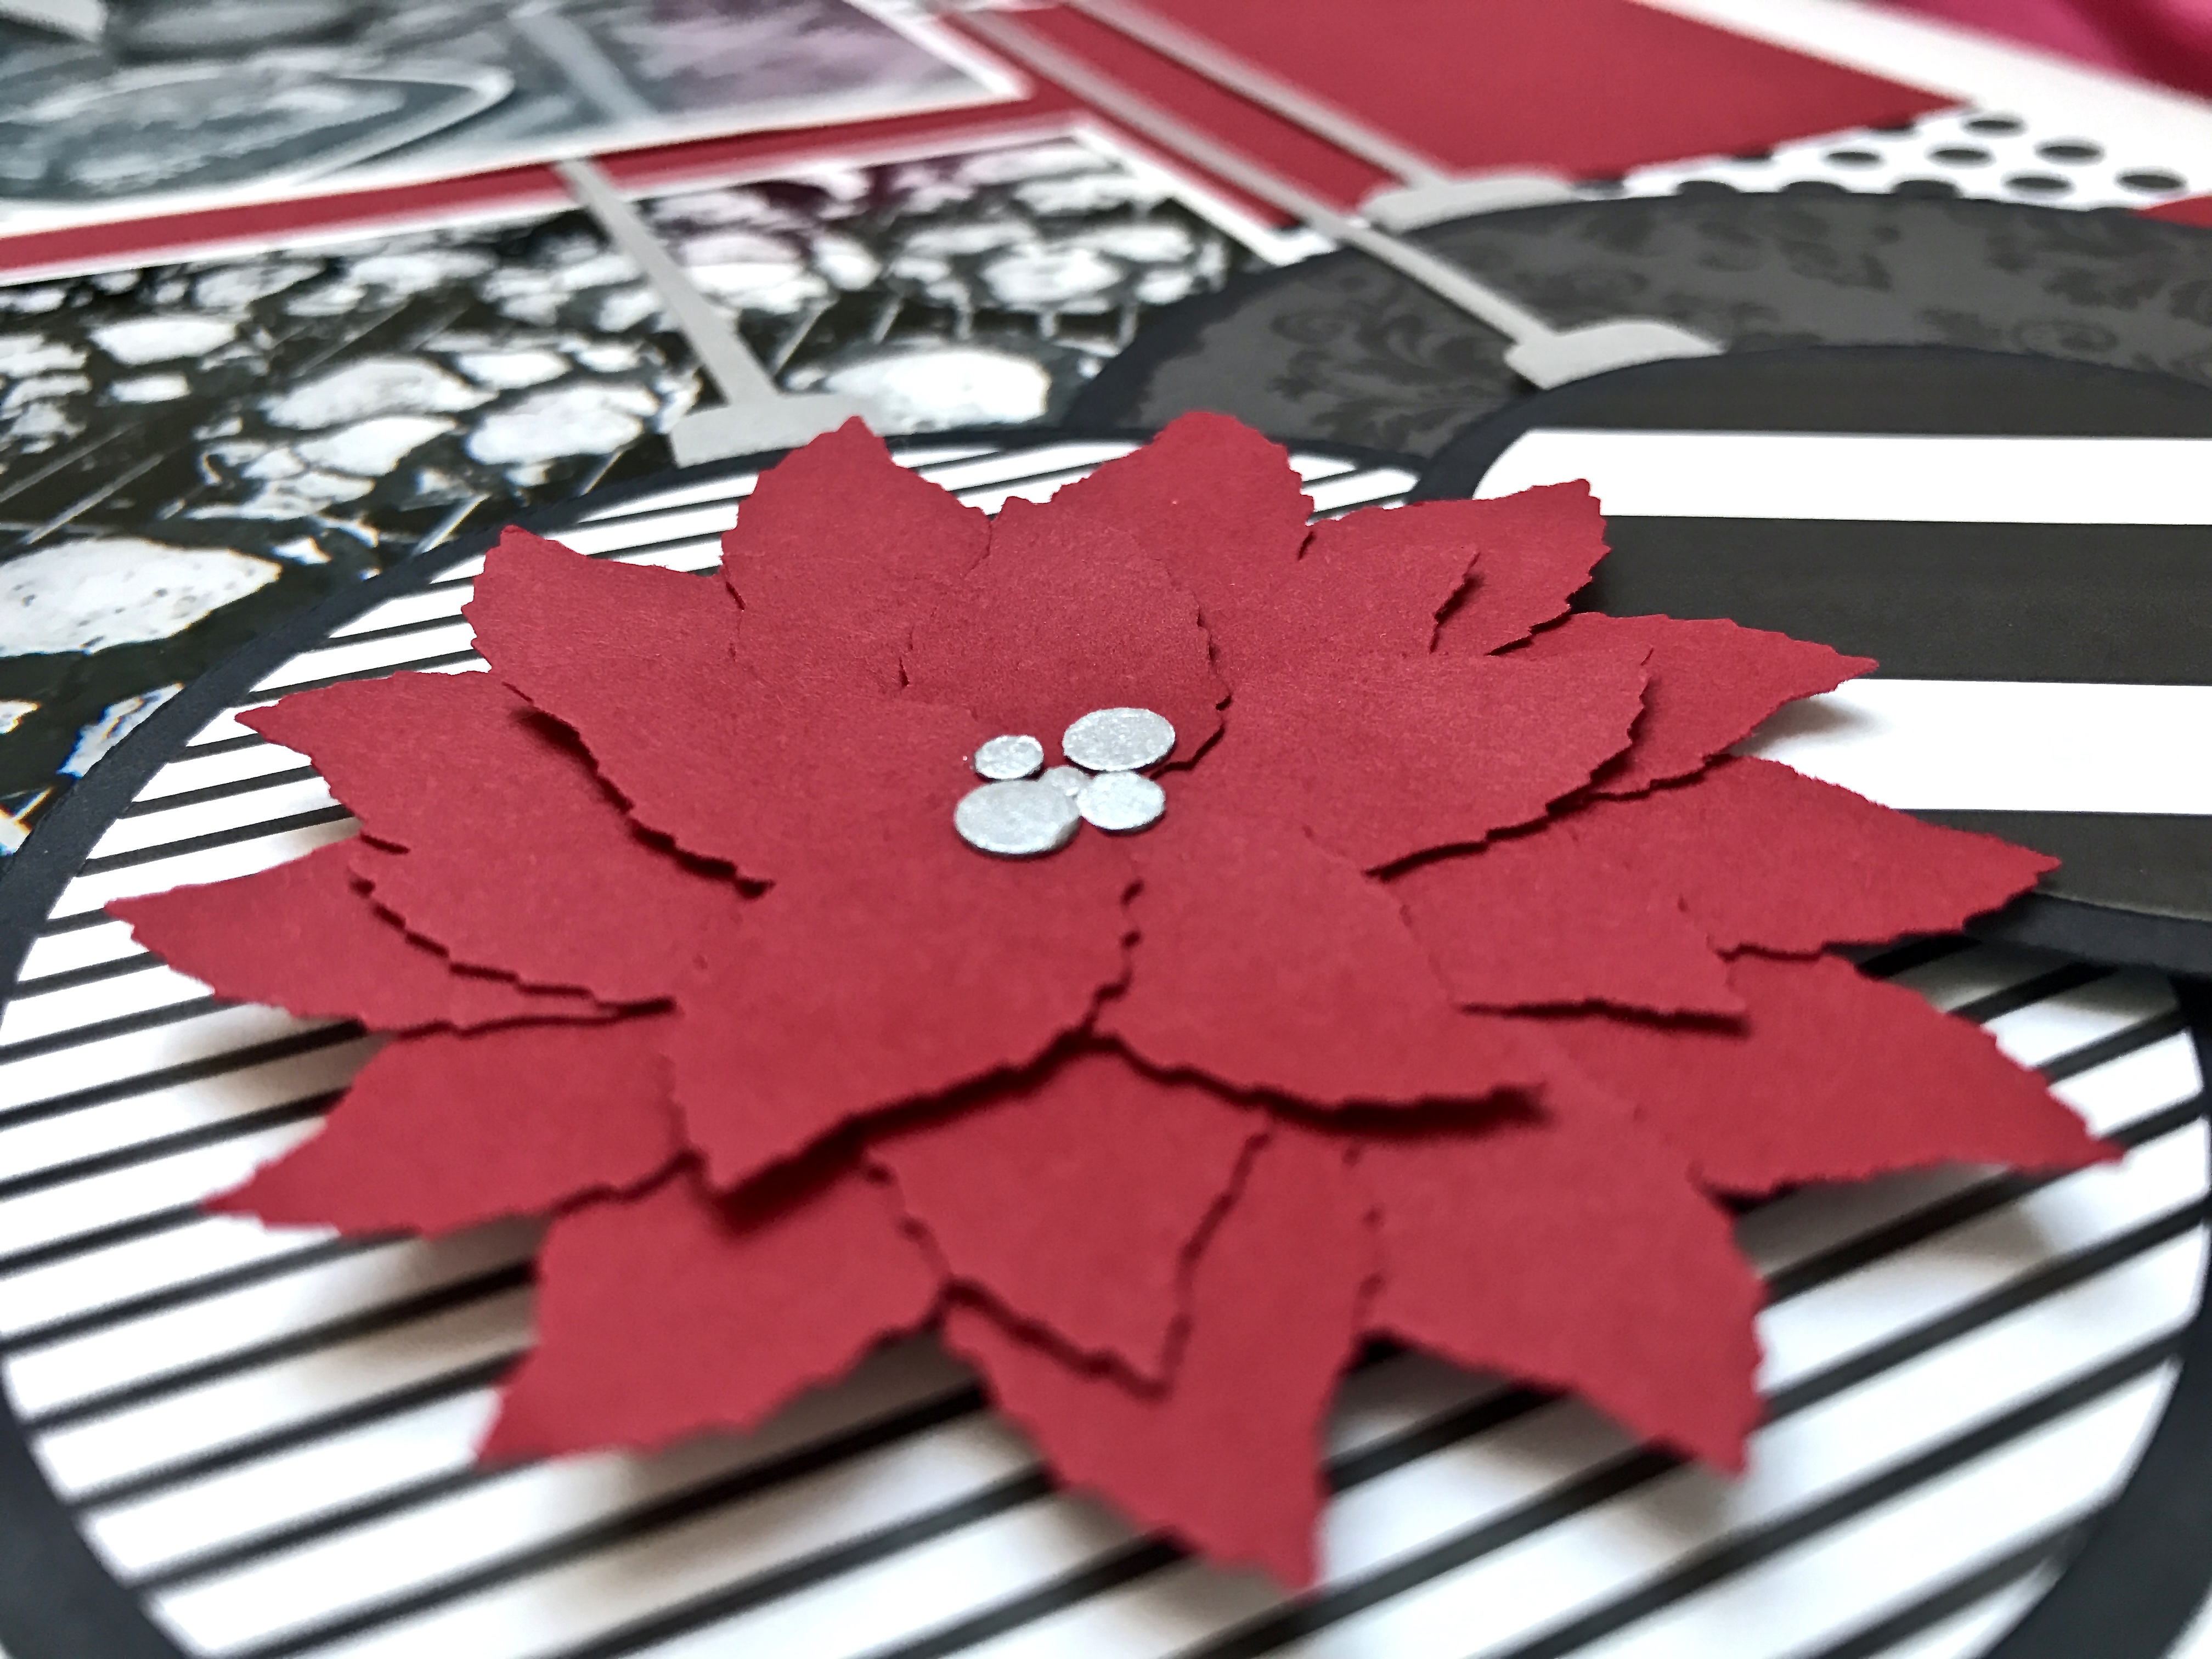
Step 5: To create the poinsettia punch 23 leaves out of the Trio Leaf Punch using Cranberry Cardstock. Use a small scrap piece of cardstock as your base and start with the centre of the flower – cut the stems off of 5 of the leaves and arrange them in a circle with the wide ends to the centre. Next put Tape Runner on the back of the flower and fill in the gaps with petals until all the leafs have been used up.
Step 6: Use the Bubbles Border Cartridge and some Silver Shimmer Cardstock to create little circles for the centre of the poinsettia.
Enjoy! We look forward to seeing you all in the morning!

and


Can digital scrapbookers participate?
Absolutely!!
I will try it never did virtual. I love doing Christmas and will join when I can
Hi Cathy! We look forward to seeing you in the morning!
WOW!!!!!! Love this! I am going to make that poinsettia asap!!!
Do the pics have to be from Christmas or does any holiday count?
Any theme! What we will be showing is geared towards the holidays, but we want everyone to join!
Would love to join
Two of my friends and I are getting together to spend the day doing this. We have never done this before and are looking forward to it.
Glad to have you Doris!!!
[…] might be asking yourself “What is a Virtual Crop, and WHY am I here?” Yesterday’s blog post helps describe the […]
Thank you for a good article about business, it was very interesting and informative.
[…] might be asking yourself “What is a Virtual Crop, and WHY am I here?” Yesterday’s blog post helps describe the […]
[…] might be asking yourself “What is a Virtual Crop, and WHY am I here?” Yesterday’s blog post helps describe the […]
[…] might be asking yourself “What is a Virtual Crop, and WHY am I here?” Yesterday’s blog post helps describe the […]