November 14, 2016
Create Borders using Christmas Past

The Christmas Past Collection recalls the tradition of holidays spent with family. The sounds, smells and feelings of the season evoke nostalgia for the warmth of gathering with those you love, all through your lives.
The new Christmas Past Collection will bring you back, connecting Christmases past with present, reminding you of the traditions that connect your family through the years.
These borders will work well with any Christmas photos you want to remember and feature in your albums.
These borders work perfectly with the pre-designed pages of the Christmas Past Fast2Fab Album and are a fun way to add a personal touch.
For these borders you will need:
Christmas Past Variety Mat Pack
Gold & Silver Shimmer 12×12 Cardstock
Tape Runner with Repositionable Tape Runner Refill
Hole punch
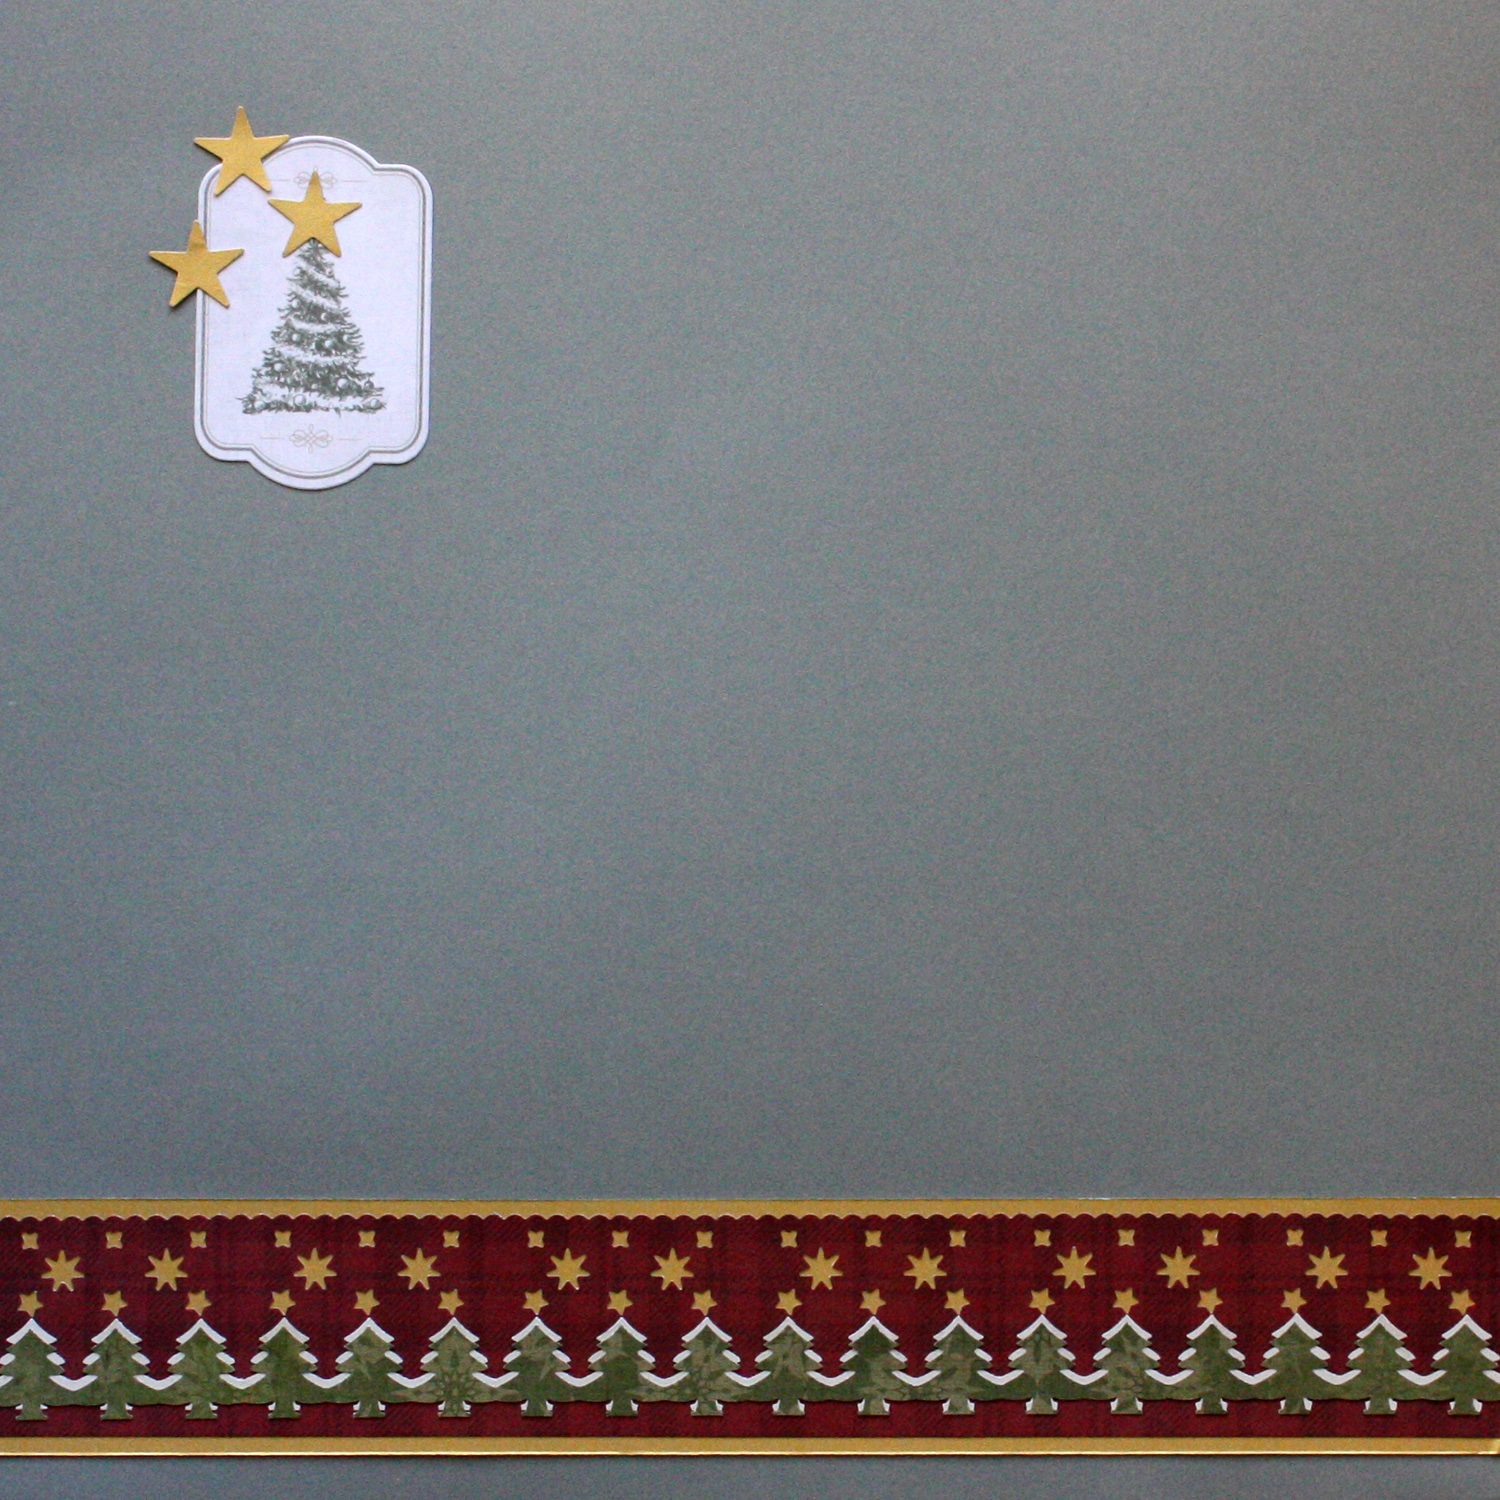
Star-Topped Christmas Trees Border
Cut a 2″ x 12″ base with gold shimmer paper.
Using the midnight star cartridge, punch a border with red plaid paper. Trim to 1-3/4″ x 12″ and adhere to base with repositionable tape.
Using the evergreen cartridge, punch a border with green paper and again with cream paper. Trim tree borders to 3/4″ x 12″. Mount green slightly beneath cream trees directly under the gold stars.

Holly Jolly Border
Cut a 3-1/4″ x 12″ base with candy stripe paper. Using the ocean waves cartridge, punch both long edges.
Cut a 2-1/2″ x 12″ border with green dot paper, and a 2-1/4″ border with large dot paper. Adhere all 3 borders as shown.
Trim out red dot tag. Using hole punch, add 2 holes as shown. Cut a 1/4″ x 12″ strip with gold shimmer cardstock. Trim ends at an angle to make “ribbon” and thread through tag as shown. Mount to center of border. Add Holly Jolly sticker to tag.
Using Christmas quartet punch, punch 5 snowflakes with silver shimmer cardstock. Adhere as shown to border.

Gingerbread Border
Cut a 2-1/4″ x 12″ base order with cream paper. Cut a 2″ x 12″ border with red/green plaid paper and adhere on top of base.
Using circle weave cartridge, punch 2 green and 1 red border. Adhere green borders, one slightly on top of other, to border. Align red border on top as shown.
Using Christmas quartet punch, punch 8 gingerbread men and add to border.
Trim out tan snowflake strip and add underneath as shown.
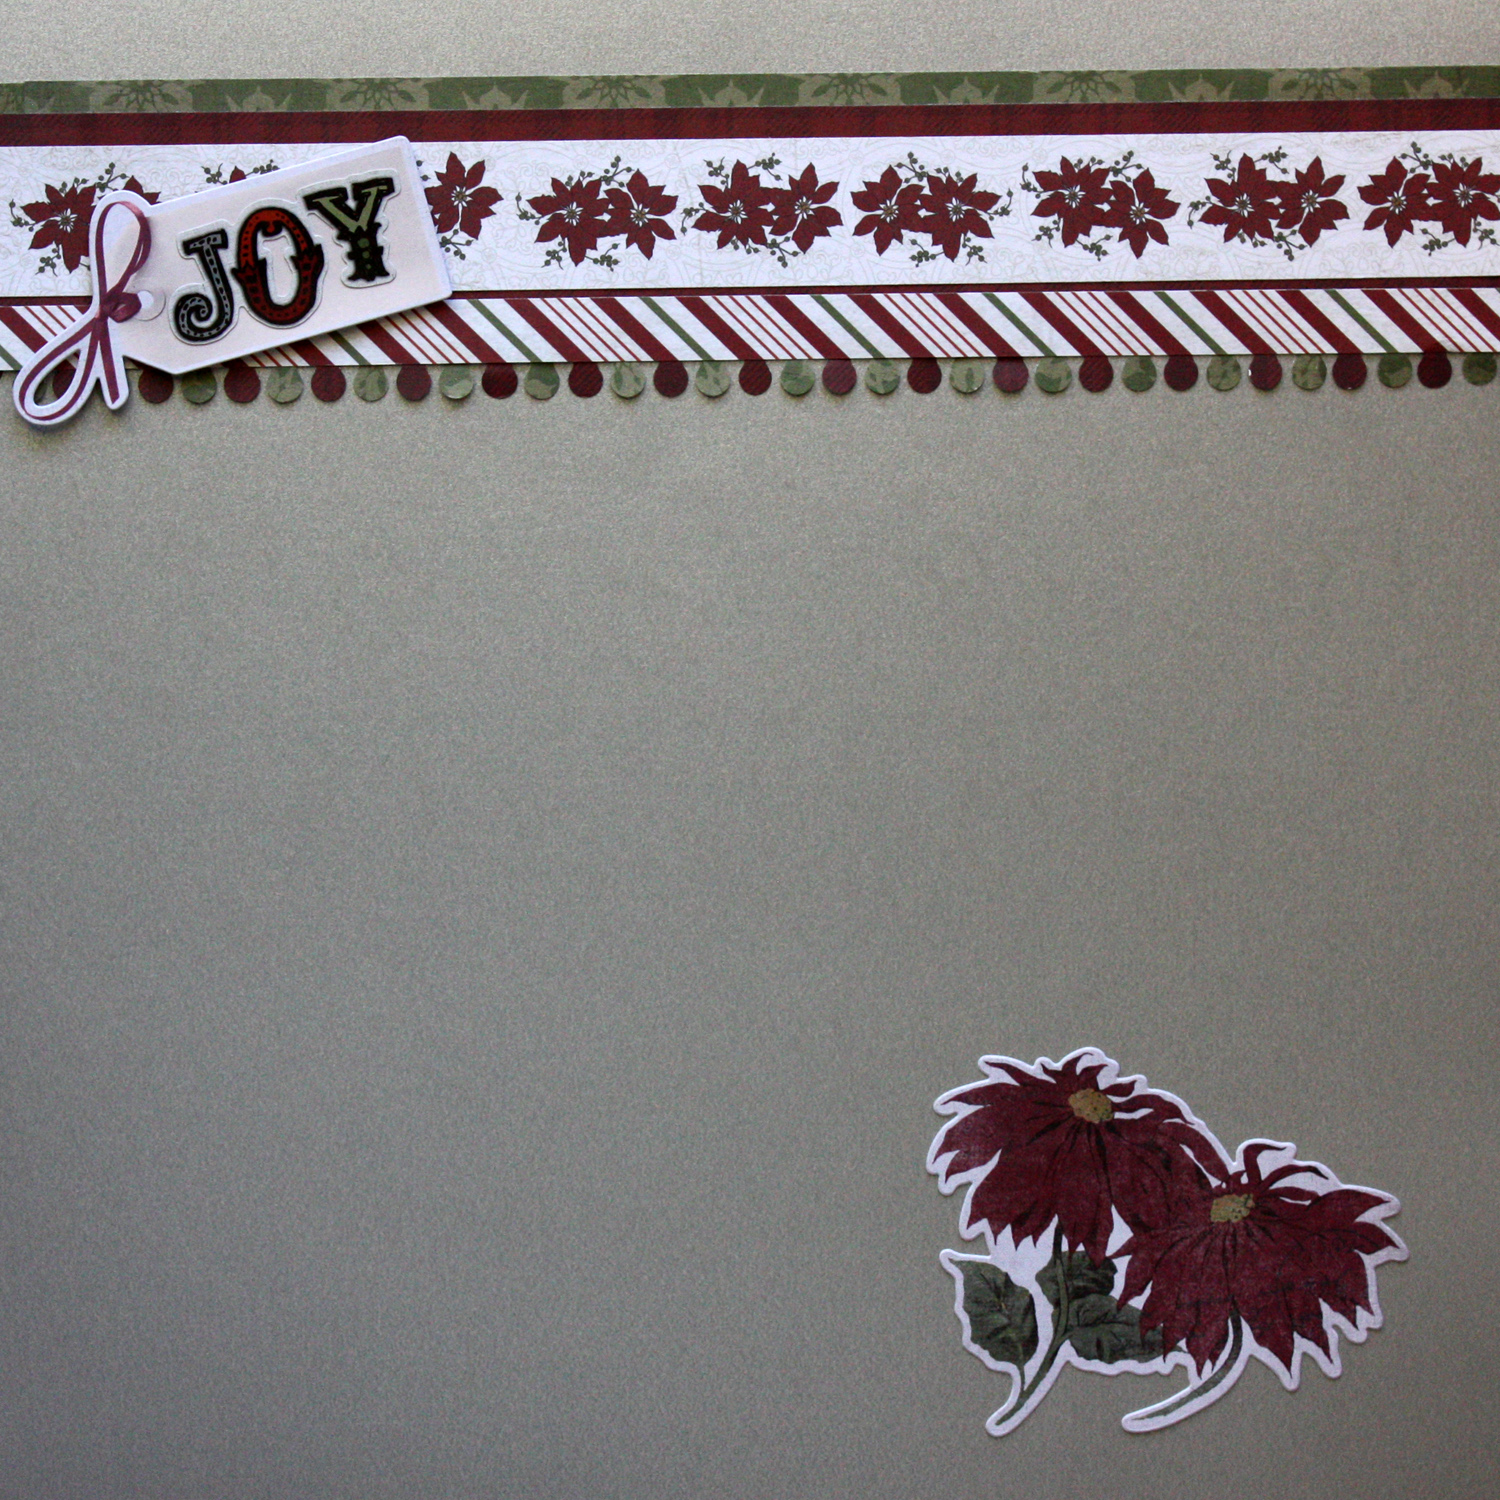
Joy Border
Using crown cartridge, punch a border with green paper; trim to 2-1/2″ x 12″. Punch a border with red plaid paper; trim to 2-1/4″ x 12″. “Jog” the crown tops as shown, trimming and adjusting border ends as needed.
Trim out candy stripe and poinsettia strips and adhere as shown to border.
Using foam square, add tag. Top with Joy sticker.

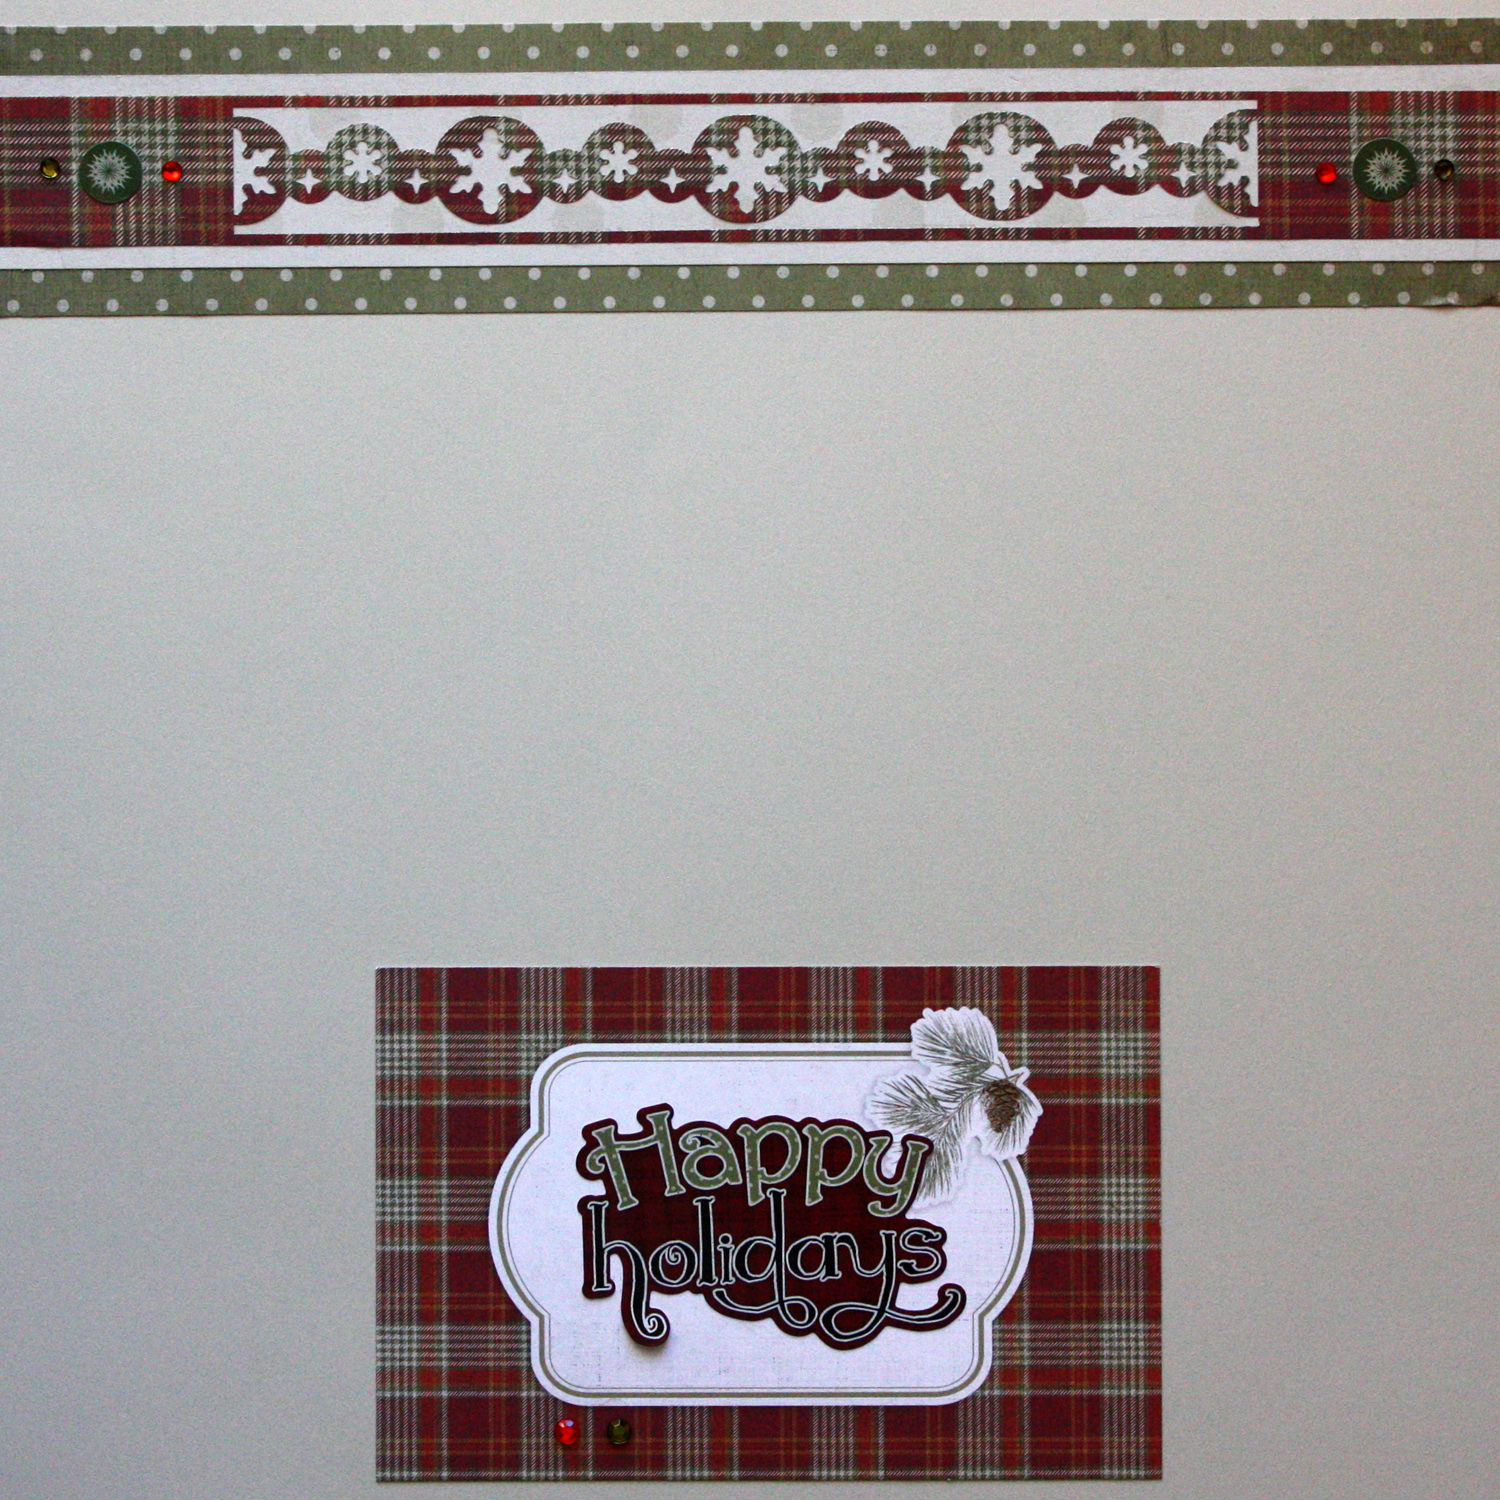
Golden Snowflakes Border
Cut a 2″ x 12″ base with green dot paper, a 1-1/2″ x 12″ border with gold shimmer cardstock and a 1-1/4″ x 12″ border with green/tan plaid paper. Adhere to each other as shown.
Using the snowflake chain cartridge, punch a border with red plaid paper. Using the custom cutting system with the smallest circle template and blue blade, cut six circles with gold shimmer cardstock. Adhere behind largest snowflakes. Mount snowflake border down the middle of plaid border.
Music and Film Border
Cut a 2″ x 12″ base with grey plaid paper. Using music notes cartridge, punch just the ends.
Cut a 1-1/2″ x 10″ border with green paper. Notch the ends with scissors and add to base.
Cut a strip of music note paper to 1-1/8″ x 9″. Using filmstrip cartridge, punch a border with red plaid paper. Trim to 9-1/4″ long and adhere to top of music note strip. Add as shown to base.
Apply red gems and music notes as shown.
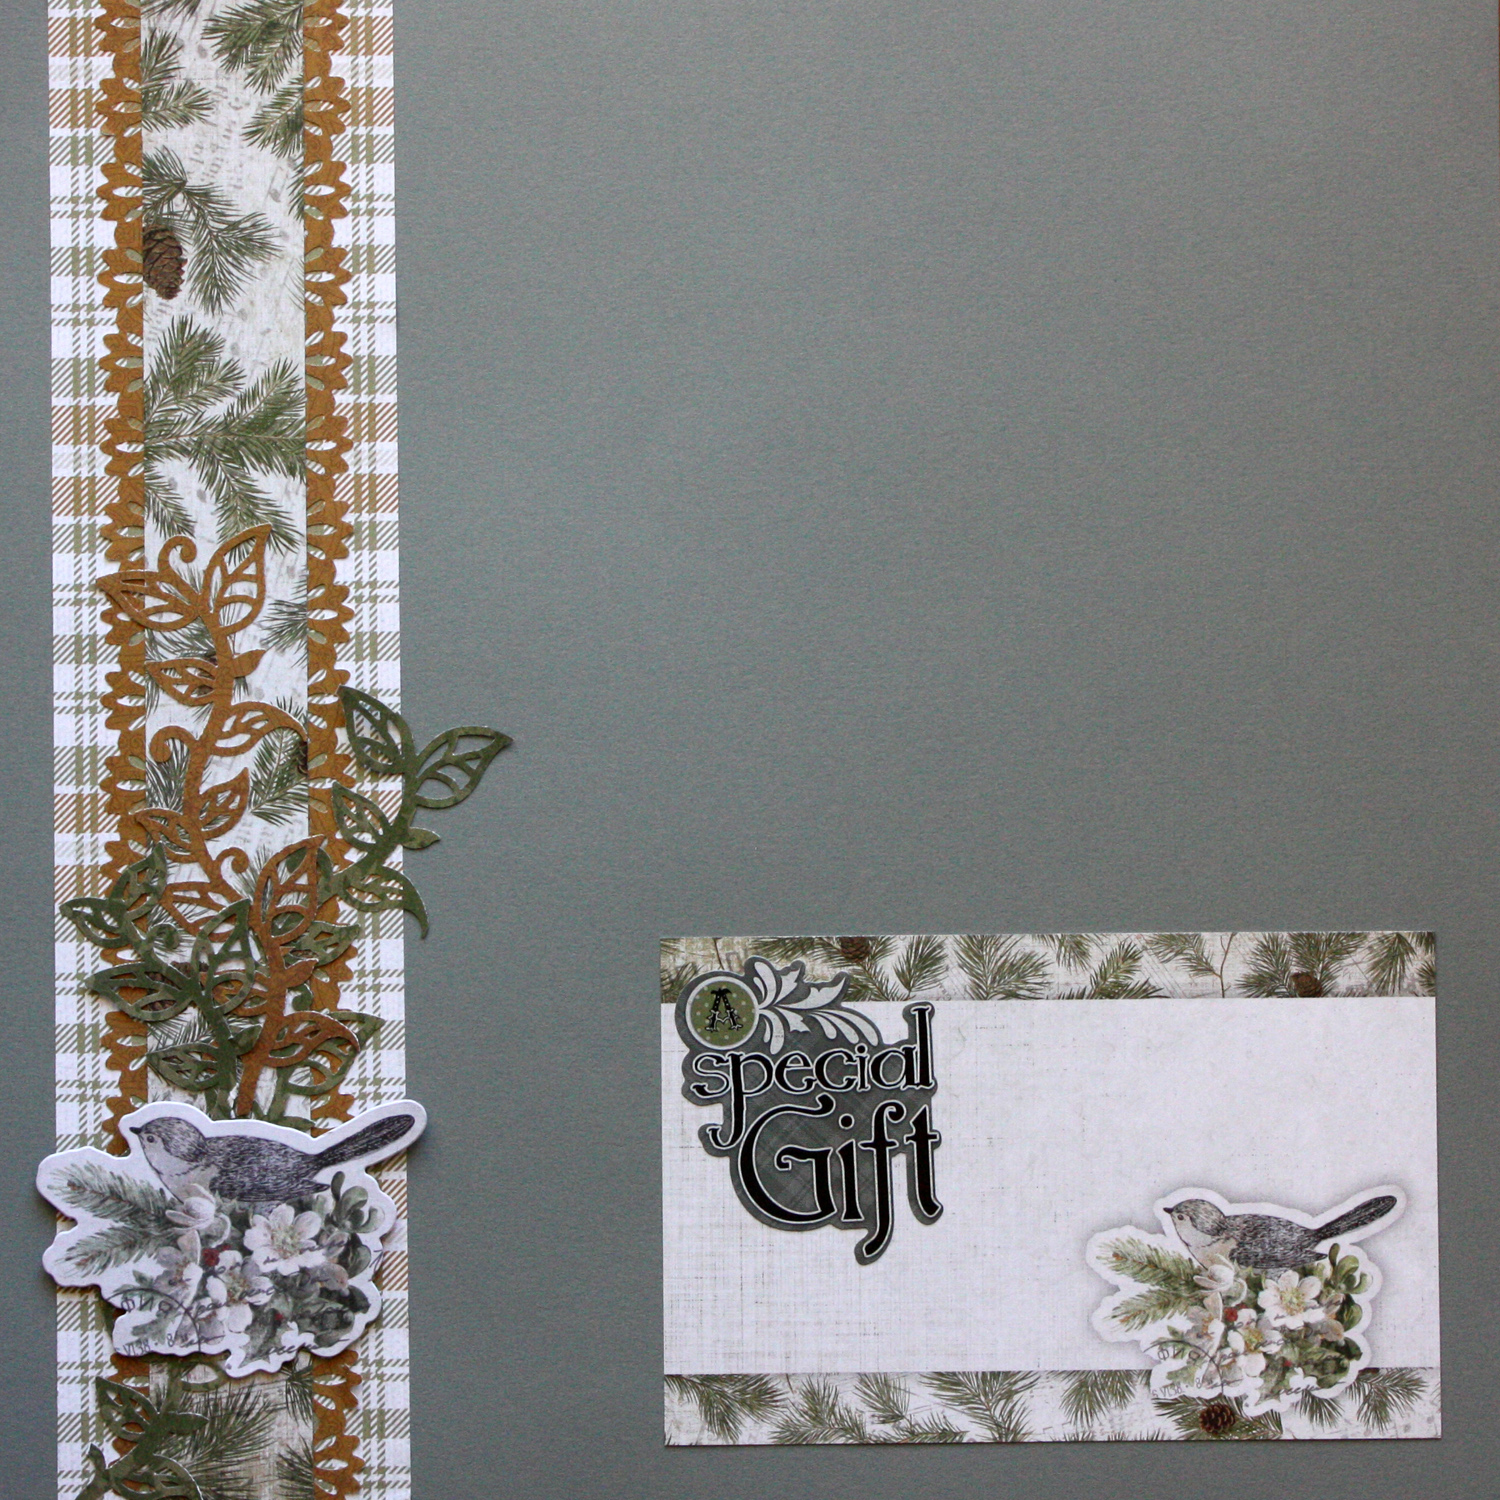
Bird and Boughs Border
Cut a 2-3/4″ x 12″ base with green/tan plaid paper. Cut a 1-1/4″ x 12″ strip with pine boughs paper.
Using lace scallop border, punch 2 borders with tan paper. Tuck behind pine boughs strip and add to base.
Using garden vine punch, punch a border with green and then tan papers. Trim and add to border as shown. Attach bird embellishment with foam squares.
Plaid Snowflake Border
Cut a 2-1/4″ x 12″ base with green dot paper. Cut a 1-1/2″ x 12″ strip with cream paper and adhere to base.
Using snowflake cartridge, punch a border with red/green plaid paper, omitting the punch on either end. Trim out to 1-1/4″ x 12″ and adhere to cream strip.
Add gems and snowflake stickers as shown.
Create a few ahead of time, adding your photos after the coming holiday.
Krislyn

Fabulous layering! They make your borders so beautiful!
body{font-family: Geneva,Arial,Helvetica,sans-serif;font-size:9pt;background-color: #ffffff;color: black;}Hi there, I love Creative Memories and I am so happy to see them back better then ever. I recently saw a post where someone was asking about being a consultant and the response was “they don’t have consultants anymore…” So, how does it work as far as purchasing products and having a consultant???Thanks,Gale Meyer
Hi Gale–We call them Advisors now. You can order via our main website http://www.creativememories.com. Let us know if you have any other questions!
Wow! I absolutely love these! Thanks so much!
These are soooooo cool and back to basic borders without clutter so you can add bling and still focus more on the pictures instead of the art work Thanks for the creativity!
These are Super Awesome, Krislyn!!! You are so creative. And, “What Fran said about no Clutter”.
Thank you!!
Love ALL of these! Thanx!
These ideas are great. Thank you.
Oh, these are just beautiful! I just got all caught up on my border maker punches this week! I took advantage of the free shipping for sure. I even had to buy another storage case for them. I’m just beyond thrilled that CM is back and better than ever!
You can make a lovely non-Christmas winter border using the directions for the Star-Topped Christmas Trees Border and substituting cloud cardstock for the red plaid paper and silver shimmer cardstock for the gold shimmer.