January 24, 2017
Mi Amor 2 for 1 Borders, Part 1


2 for 1 is always a great thing, right? How about this: Start by creating a dozen borders using the Mi Amor collection. Then cut them apart and use one set to decorate an 8×8 Album for your sweetheart and the other set to make a dozen Valentine greeting cards.
We’ll make the 12″ Borders and decorate the 8×8 Album in this post, and the greeting cards will be featured in an upcoming post.
For this project you’ll need:
- Mi Amor Paper (6 sheets, 1 of each design)
- Mi Amor Stickers
- Mi Amor Embellishments
- 2 Sheets each Cranberry, Black and White Cardstock
- 8×8 Black Refill Pages/Protectors
- 8×8 Album Cover in Ebony or Ruby (available January 16-31)
- Original Border Maker System with Heart Chain, Snowflake Chain, Scallop Dot, Zig Zag, Lace Flower Chain, Filmstrip, Circle Weave, Evergreen, Bubbles, Picket Fence and Button Chain Cartridges
- Embossed Button Trio Punch
- Custom Cutting System
- 12″ Straight Trimmer
- Tape Runner and Repositionable Tape Runner Refill
- Foam Squares
- Silver Metallic Pen
Step One – Cut Designer Papers
- Gingham/Red Hearts (hearts going lengthwise): Punch a border using picket fence cartridge, then trim border to 1-1/2″ x 12″; cut one 1-1/2″ x 12″ strip
- Red Dot/Eiffel Tower: Punch a border using scallop dot cartridge, then trim to 1-1/2″ x 12″; cut one 1-1/2″ x 12″ strip
- Hearts/Red Stripes (hearts going lengthwise): Cut two 1-1/2″ x 12″ borders
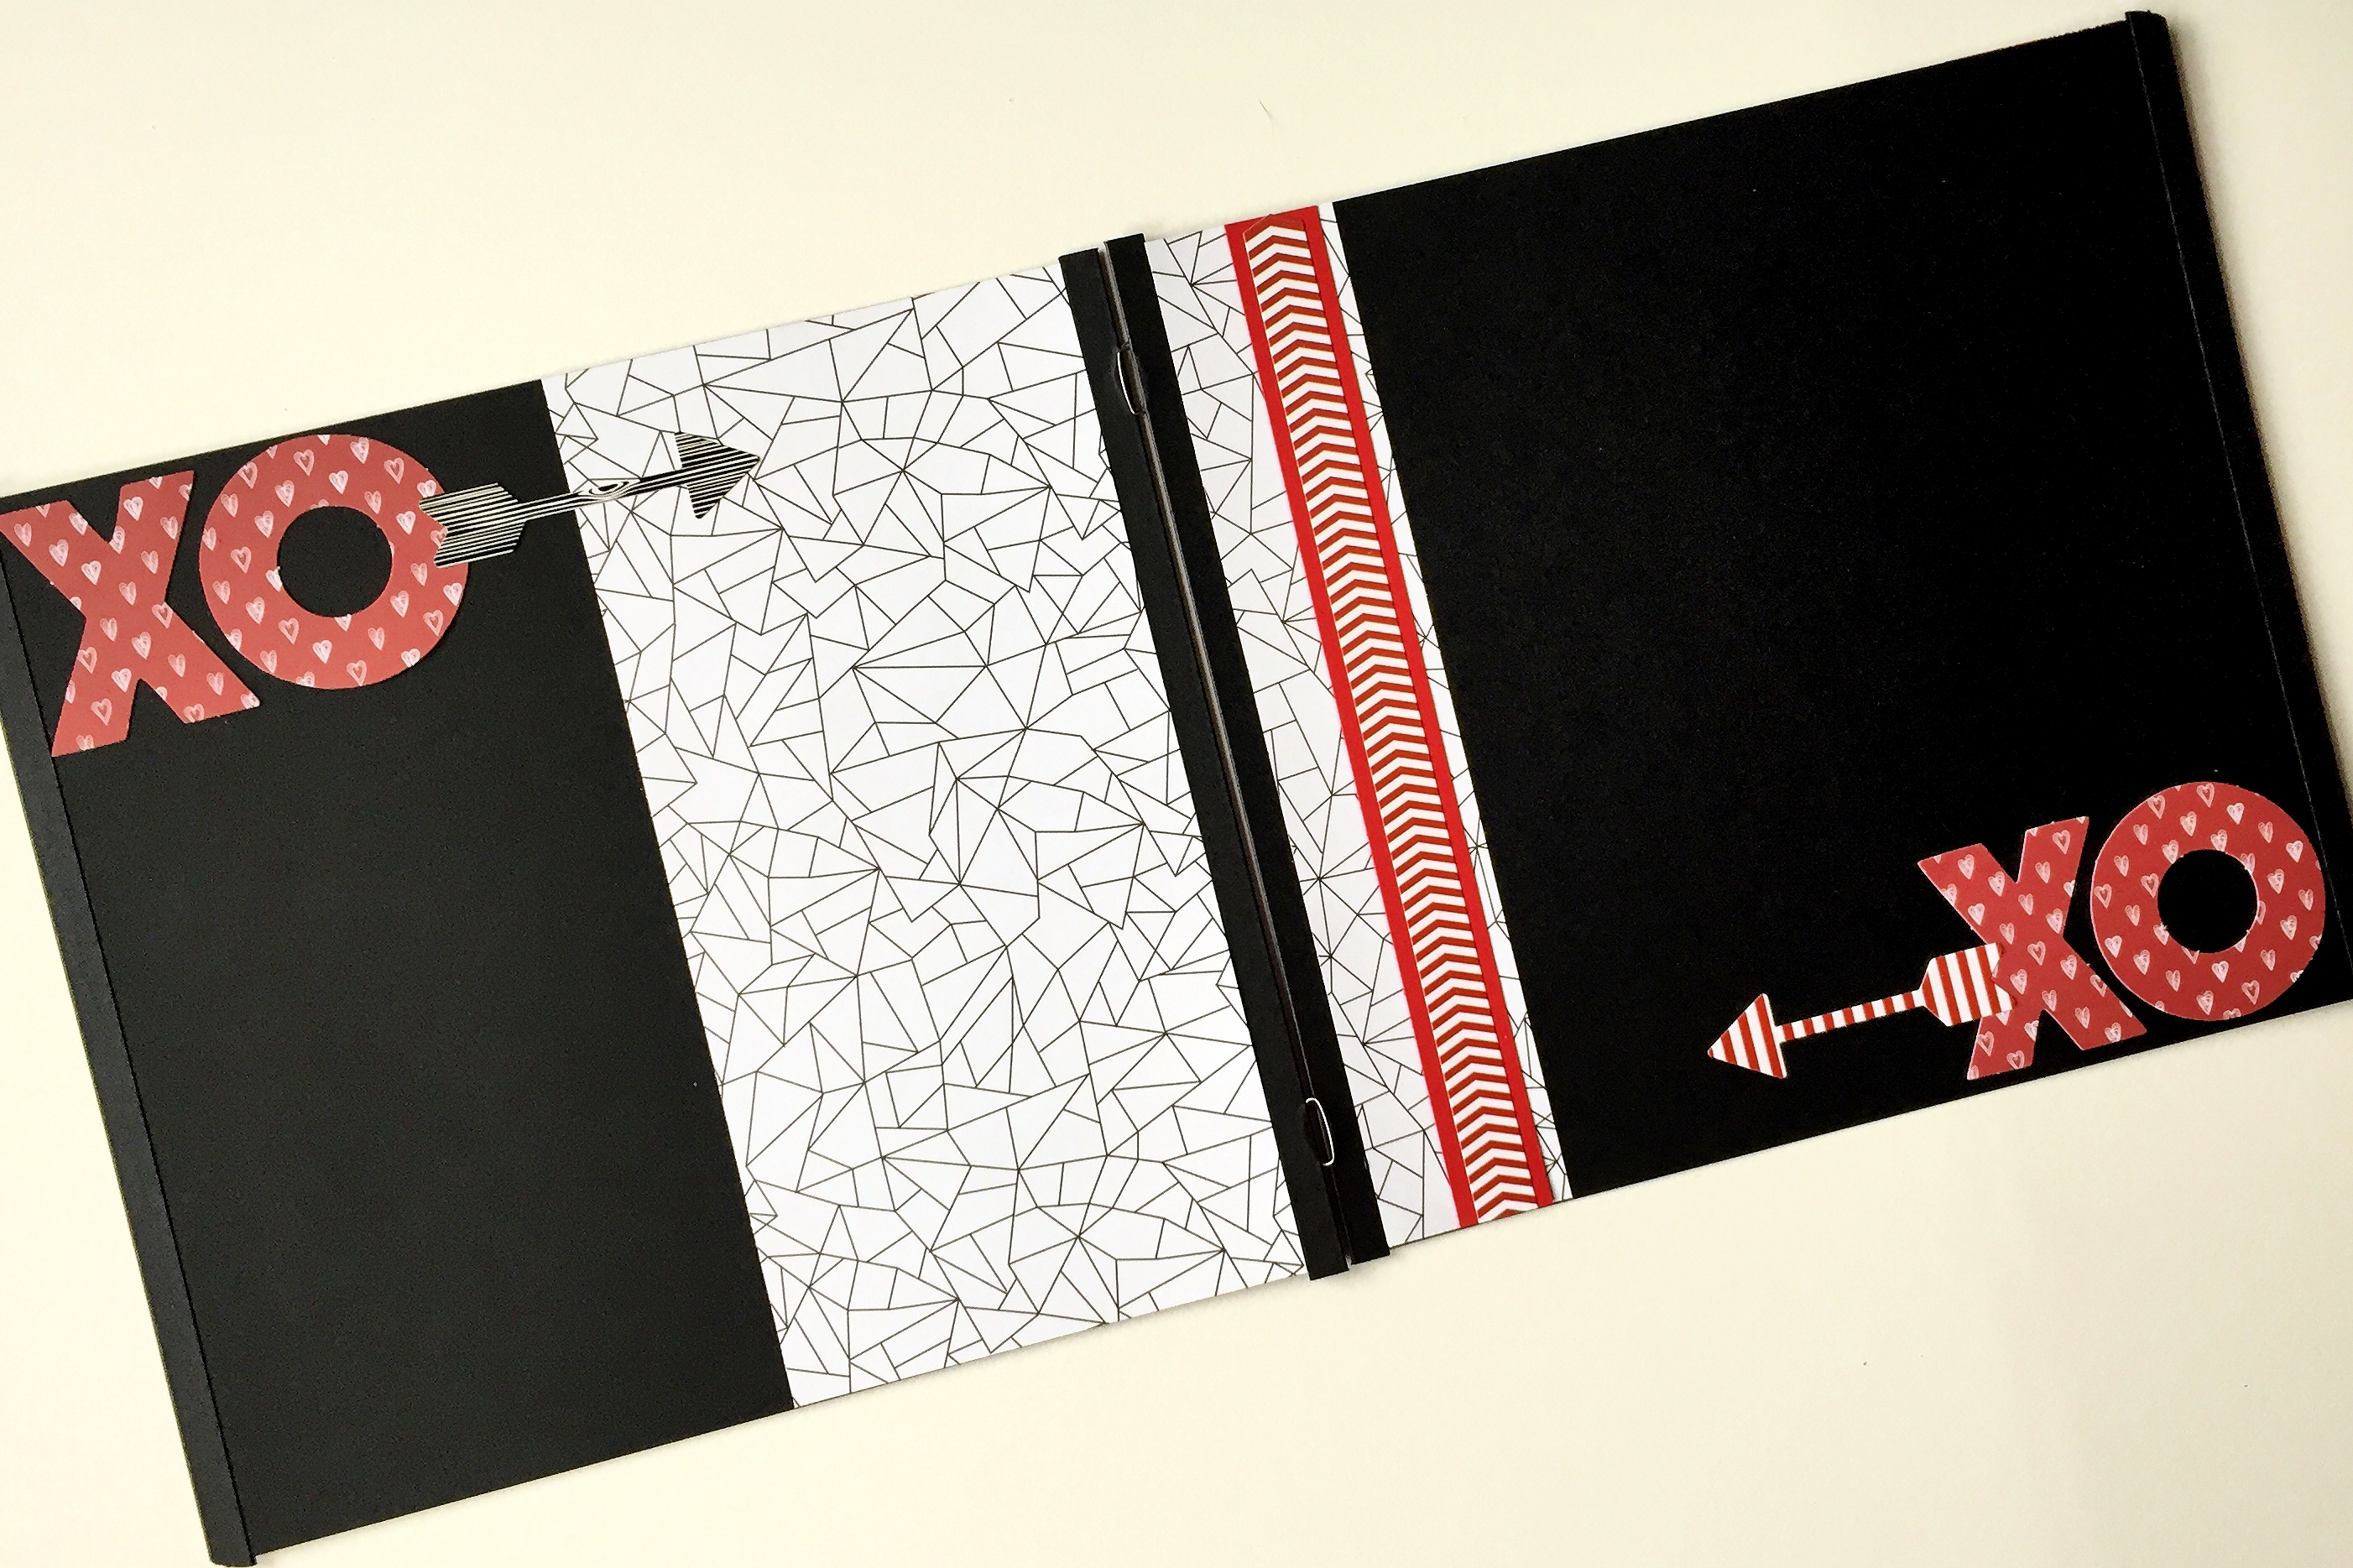
- Wood Grain/Broken Glass (wood grain going lengthwise): Cut two 1-1/2″ x 12″ borders
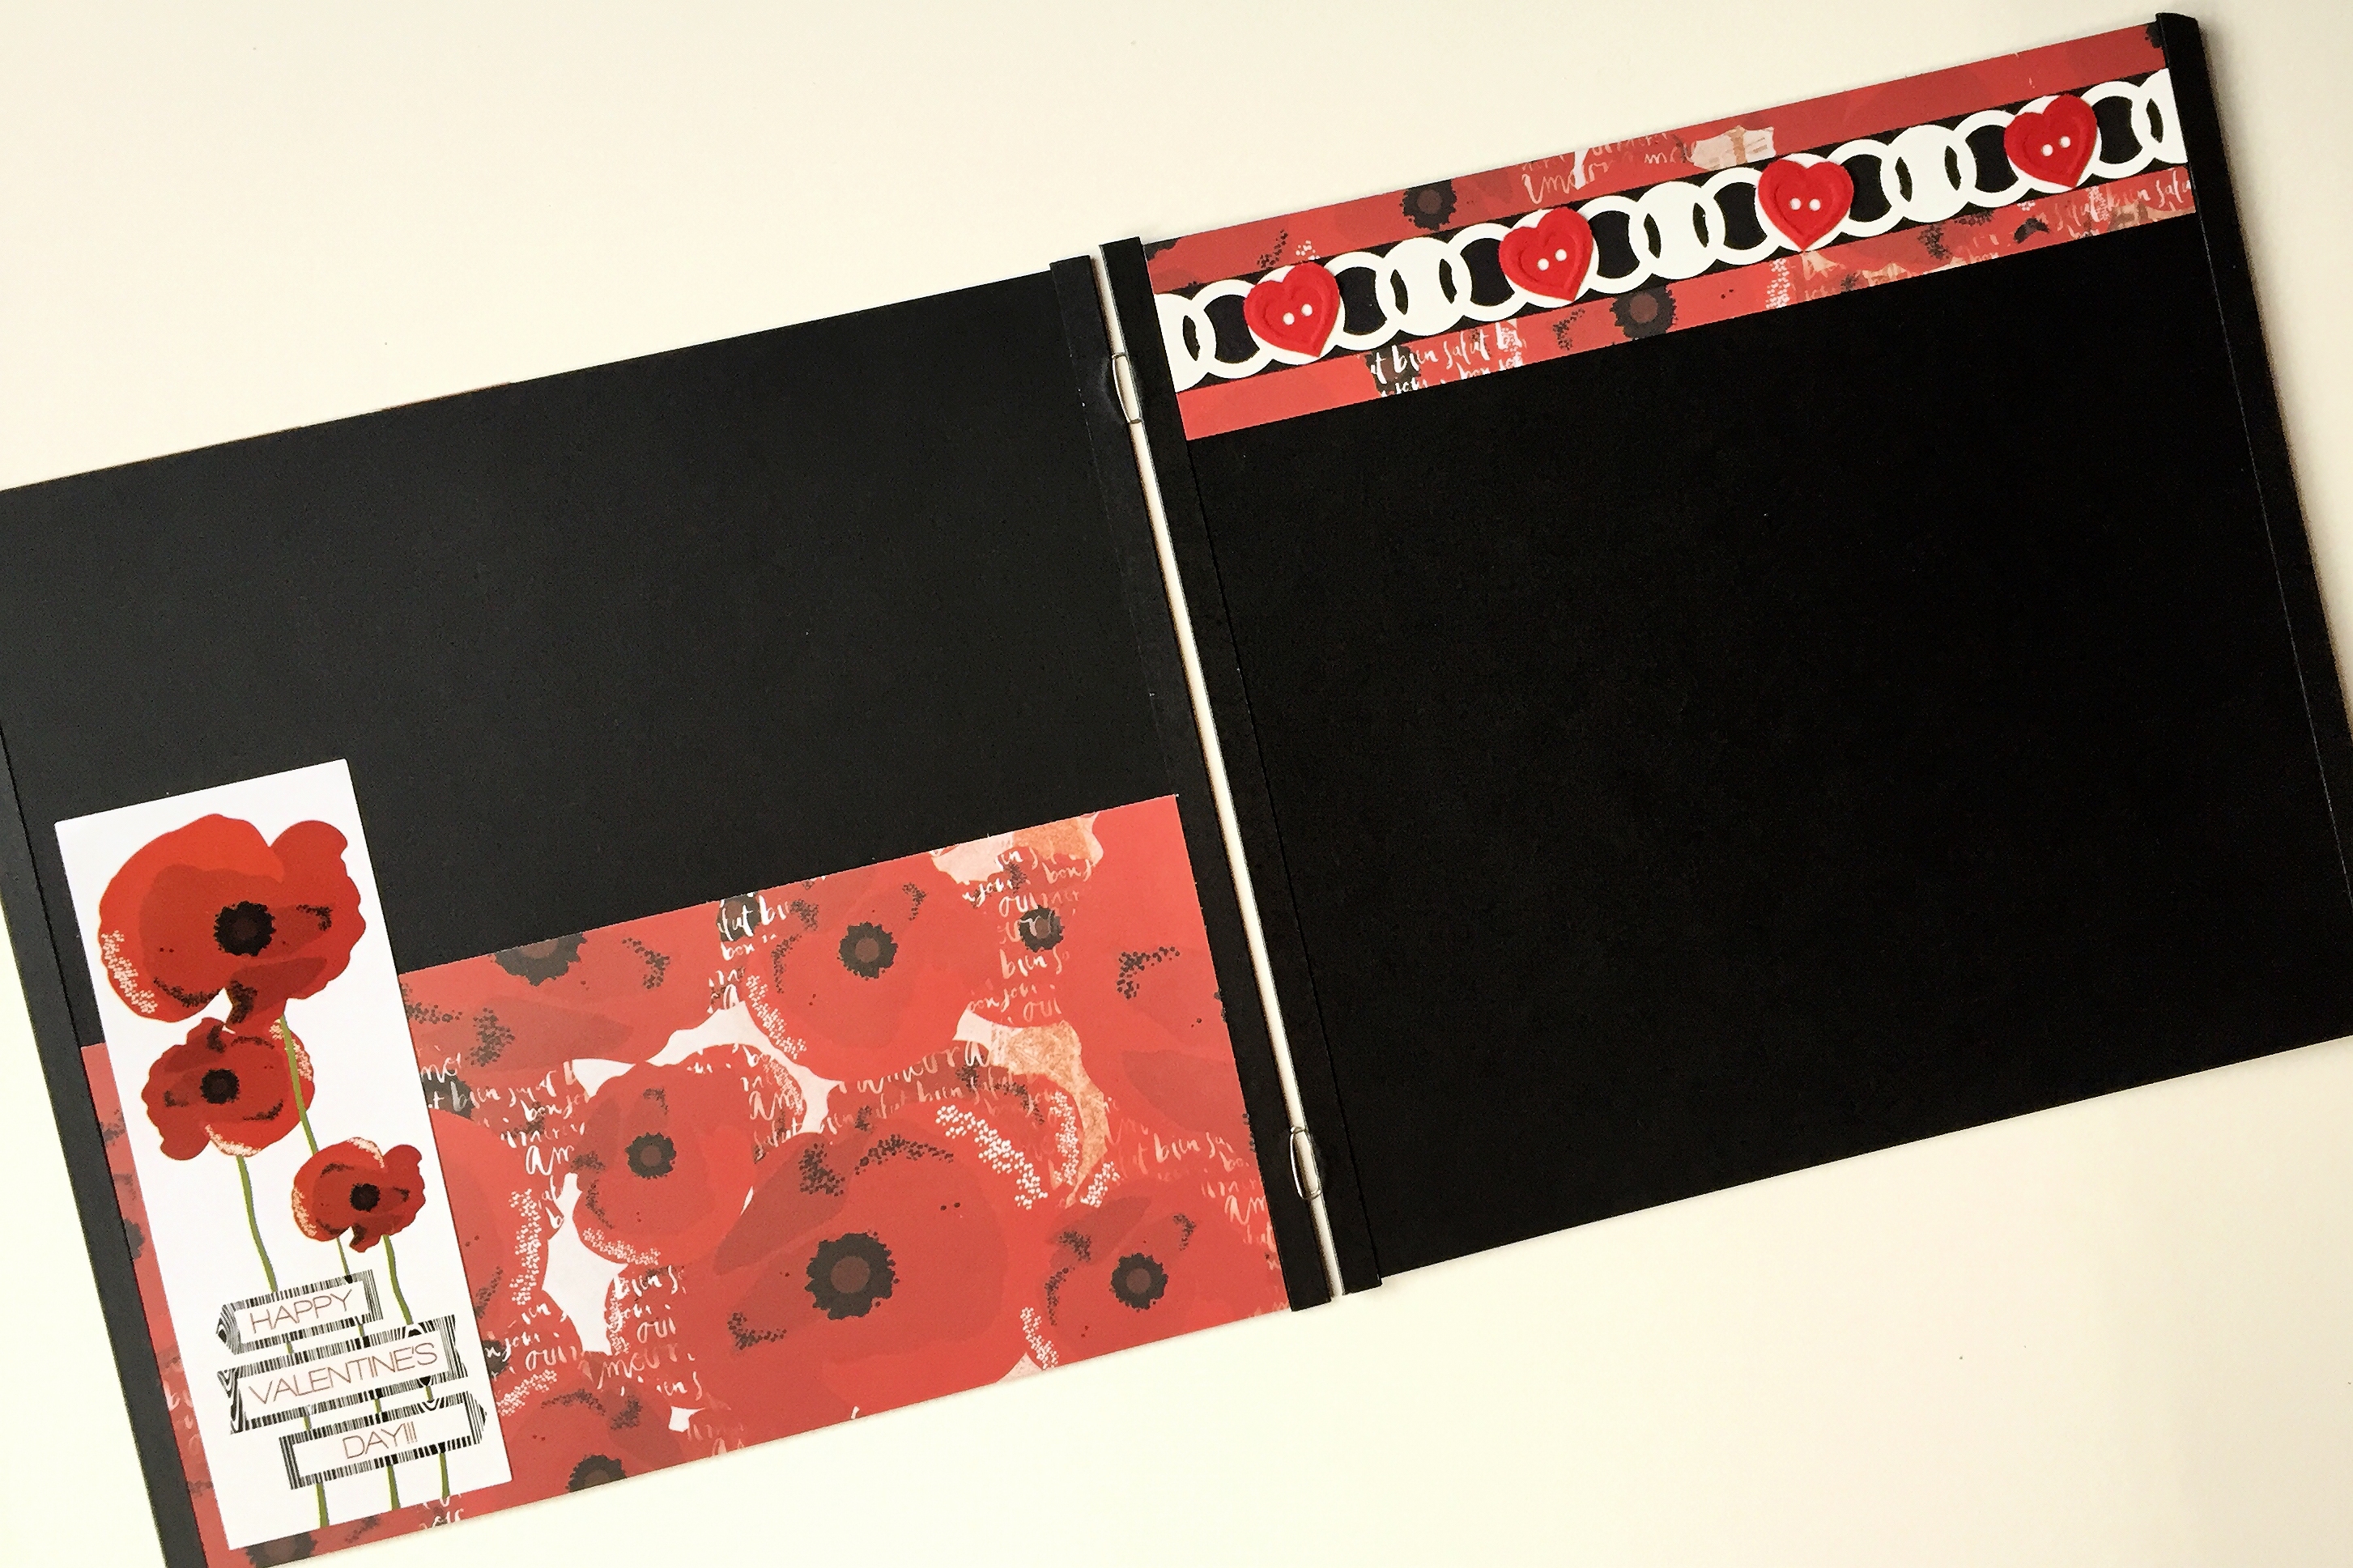
- B&W Dots/Poppies: Cut two 1-1/2″ x 12″ borders
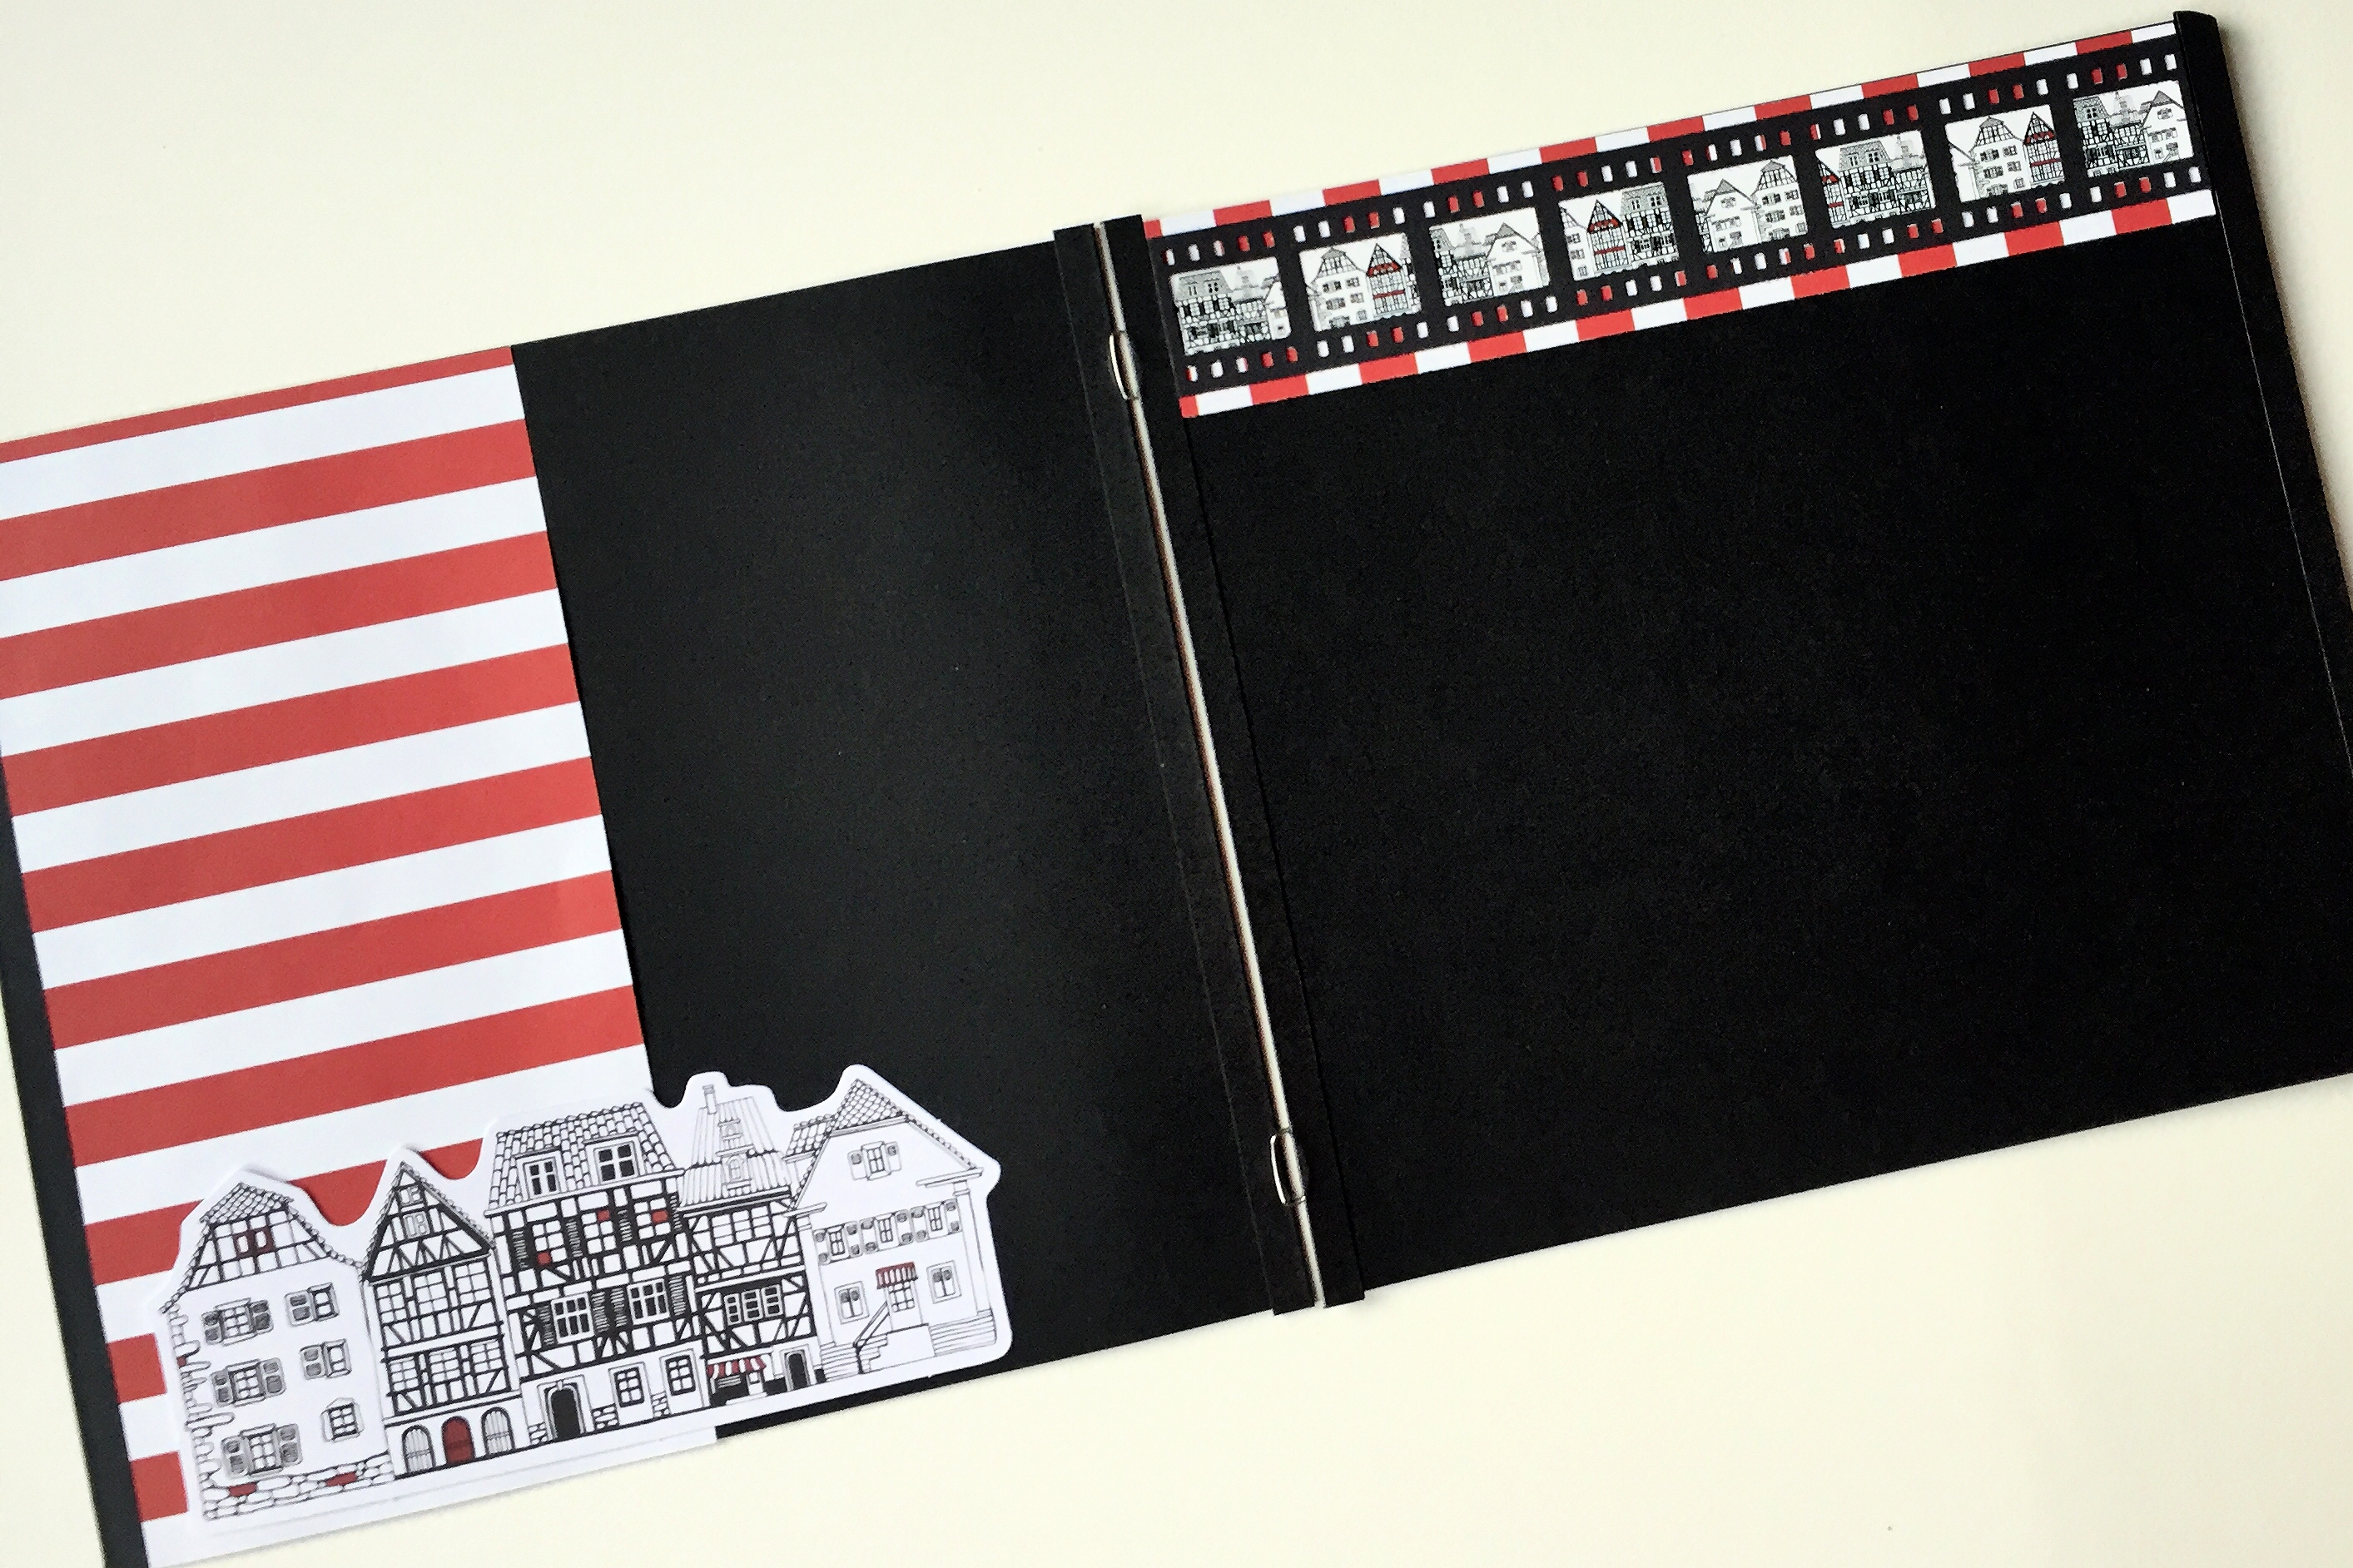
- Houses/Red (houses going lengthwise): Punch a border using bubbles cartridge, then trim border to 1-1/2″ x 12″; cut one 1-1/2″ x 12″ strip
- Cut remainder of each sheet to two 4″ x 12″ strips, then cut a 4″ square from each. You will now have two 4″ x 8″ rectangles (for 8×8 album) and two 4″ x 4″ squares (for cards) from each sheet of paper (12 total for each project). Set aside the 4″ x 4″ squares.
Step Two – Cut Cardstock
Note: For all six cardstock sheets, punch borders first as indicated. Then with the remainder of each sheet, cut to 8-1/2″ x 12″, then 4-1/4″ x 11″. Fold each in half. You will have 2 cards from each sheet for a total of 12. Set these aside.
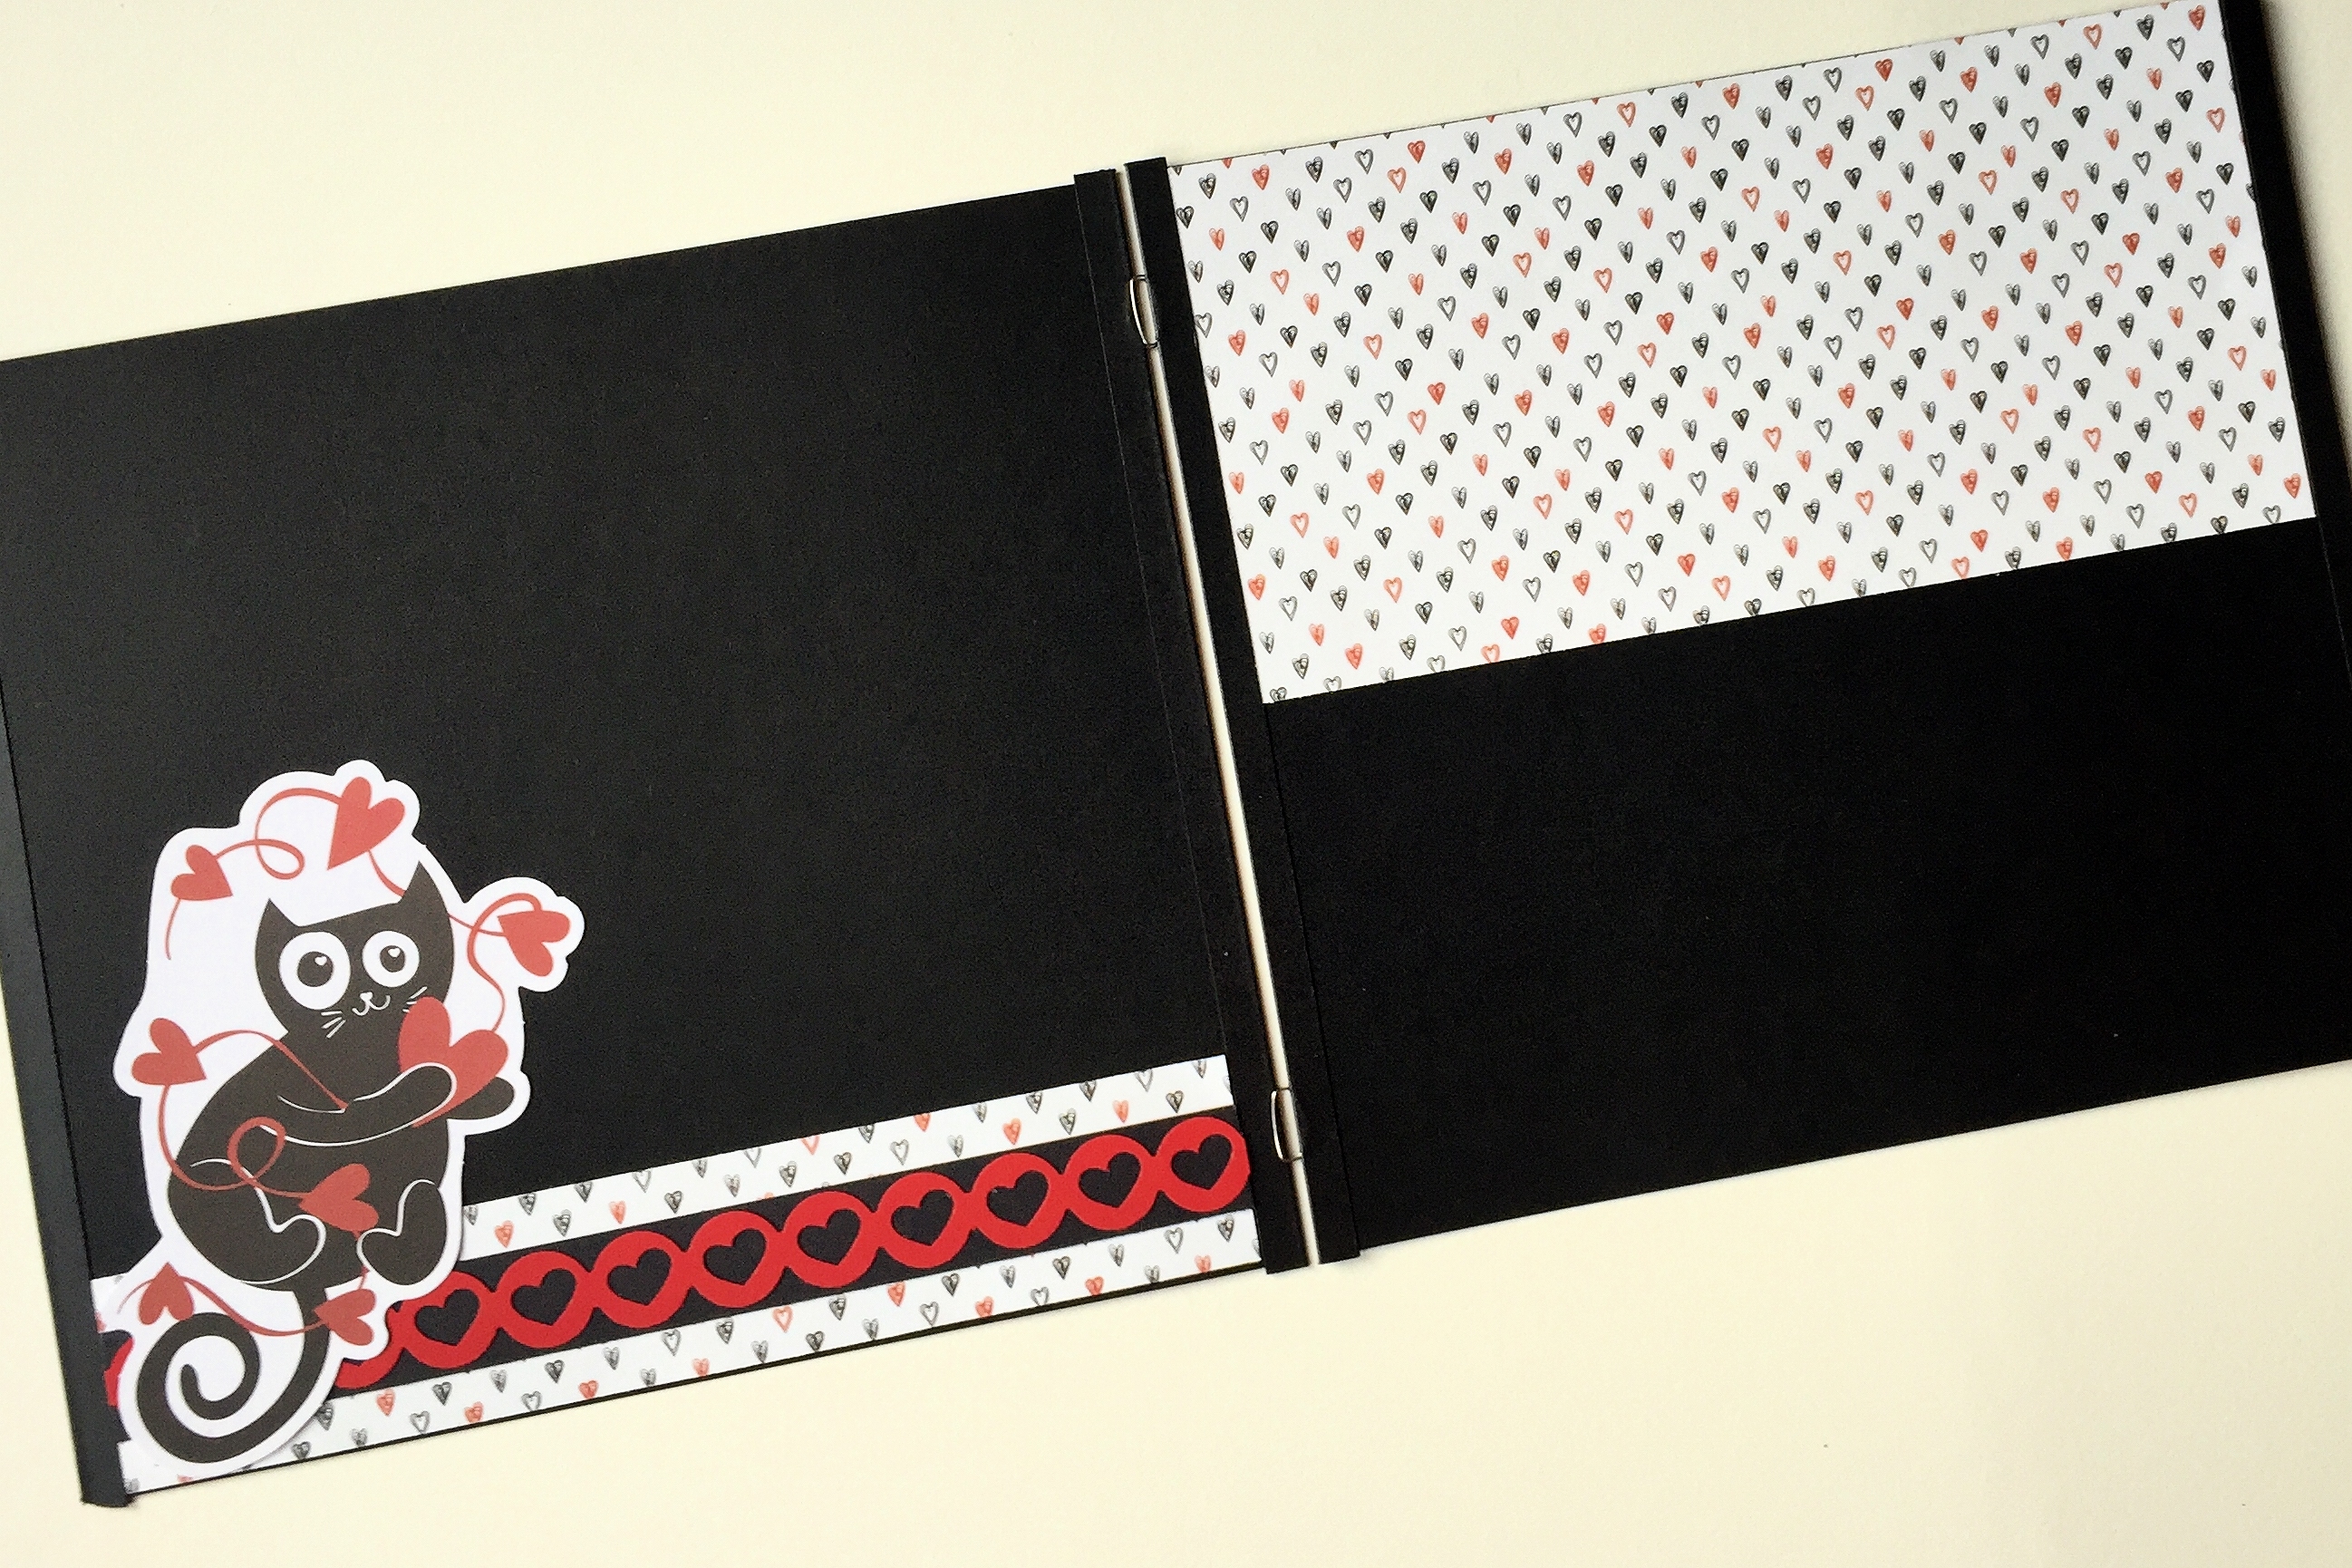
- Black 1: Punch one border each using film strip (trimmed out), and buttons cartridges. Punch one border using evergreens cartridge, alternating with heart chain cartridge for the second notch in from both ends; trim out trees.
- Black 2: Punch one border using zig zag cartridge; cut two 3/4″ x 12″ strips.
- Cranberry 1: Punch 6 sets of buttons from the embossed button trio punch; cut one 3/4″ x 12″ strip. From scraps, cut 6 small circles (smallest pattern, blue blade).
- Cranberry 2: Punch one border each using heart chain, lace flower chain and snowflake chain cartridges.
- White 1: Punch one border each using snowflake chain, circle weave and zig zag cartridges.
- White 2: Punch 6 sets of buttons from the embossed button trio punch; cut one 3/4″ x 12″ strip.
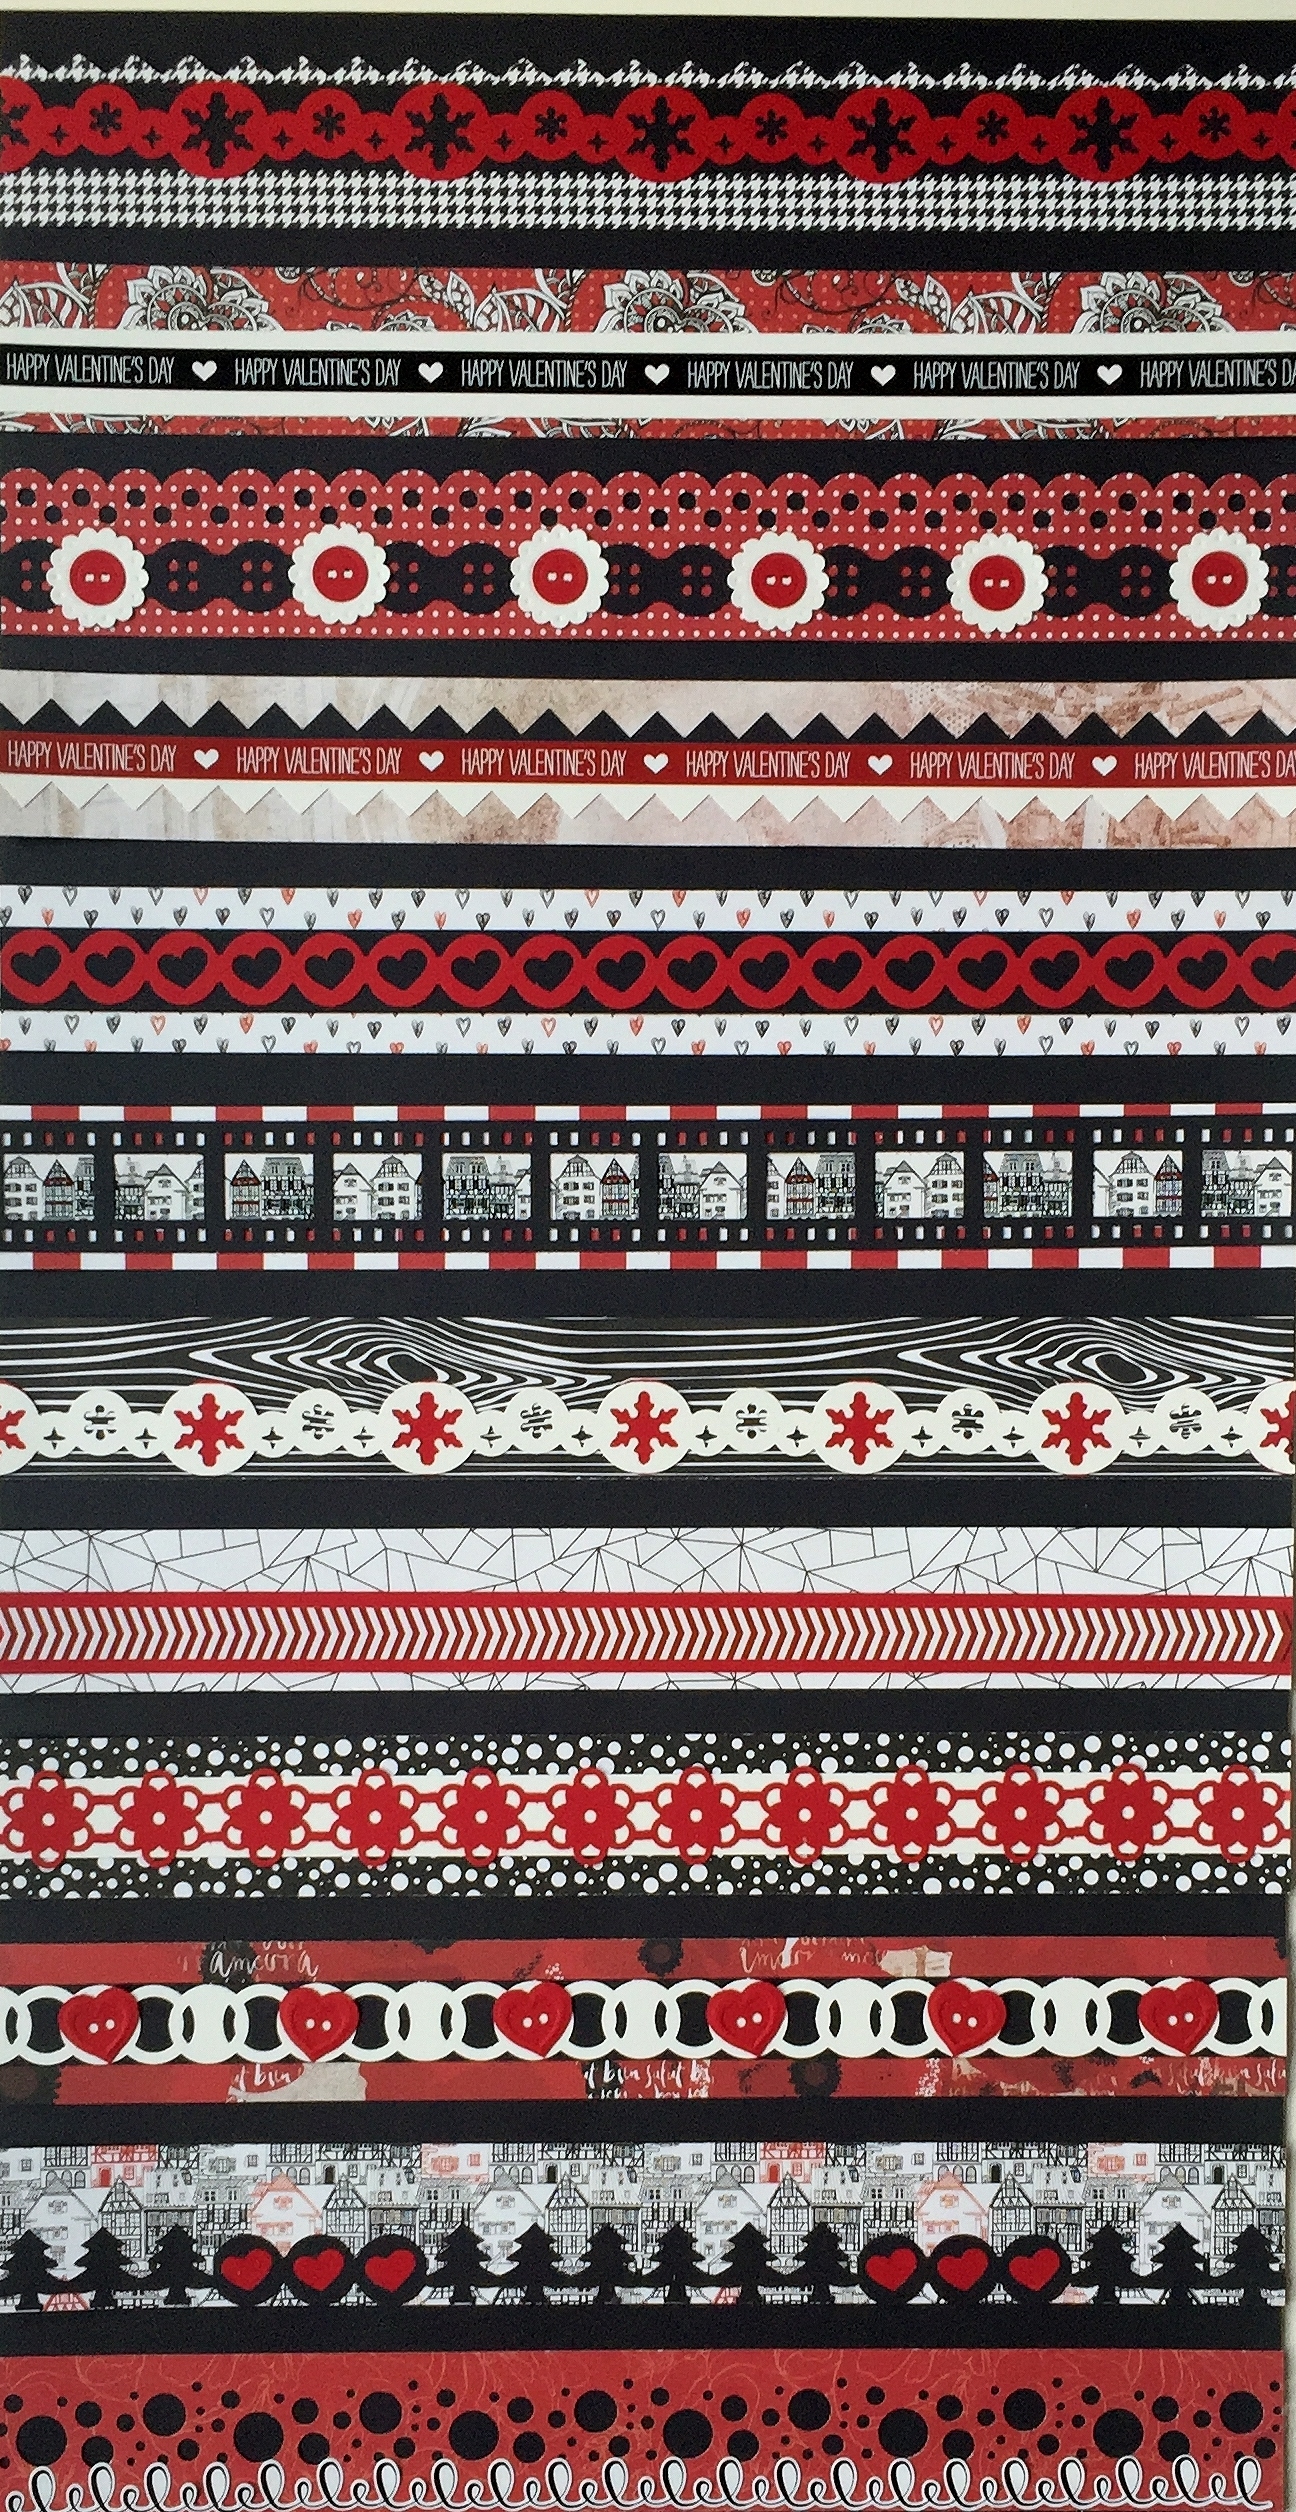

Step Three – Assemble Borders
- You now have all the ingredients to make your borders! Using the pictures as your guide, assemble the twelve 12″ borders.
- Cut each border to make one 8″ border and one 4″ border. Set the 4″ borders aside.

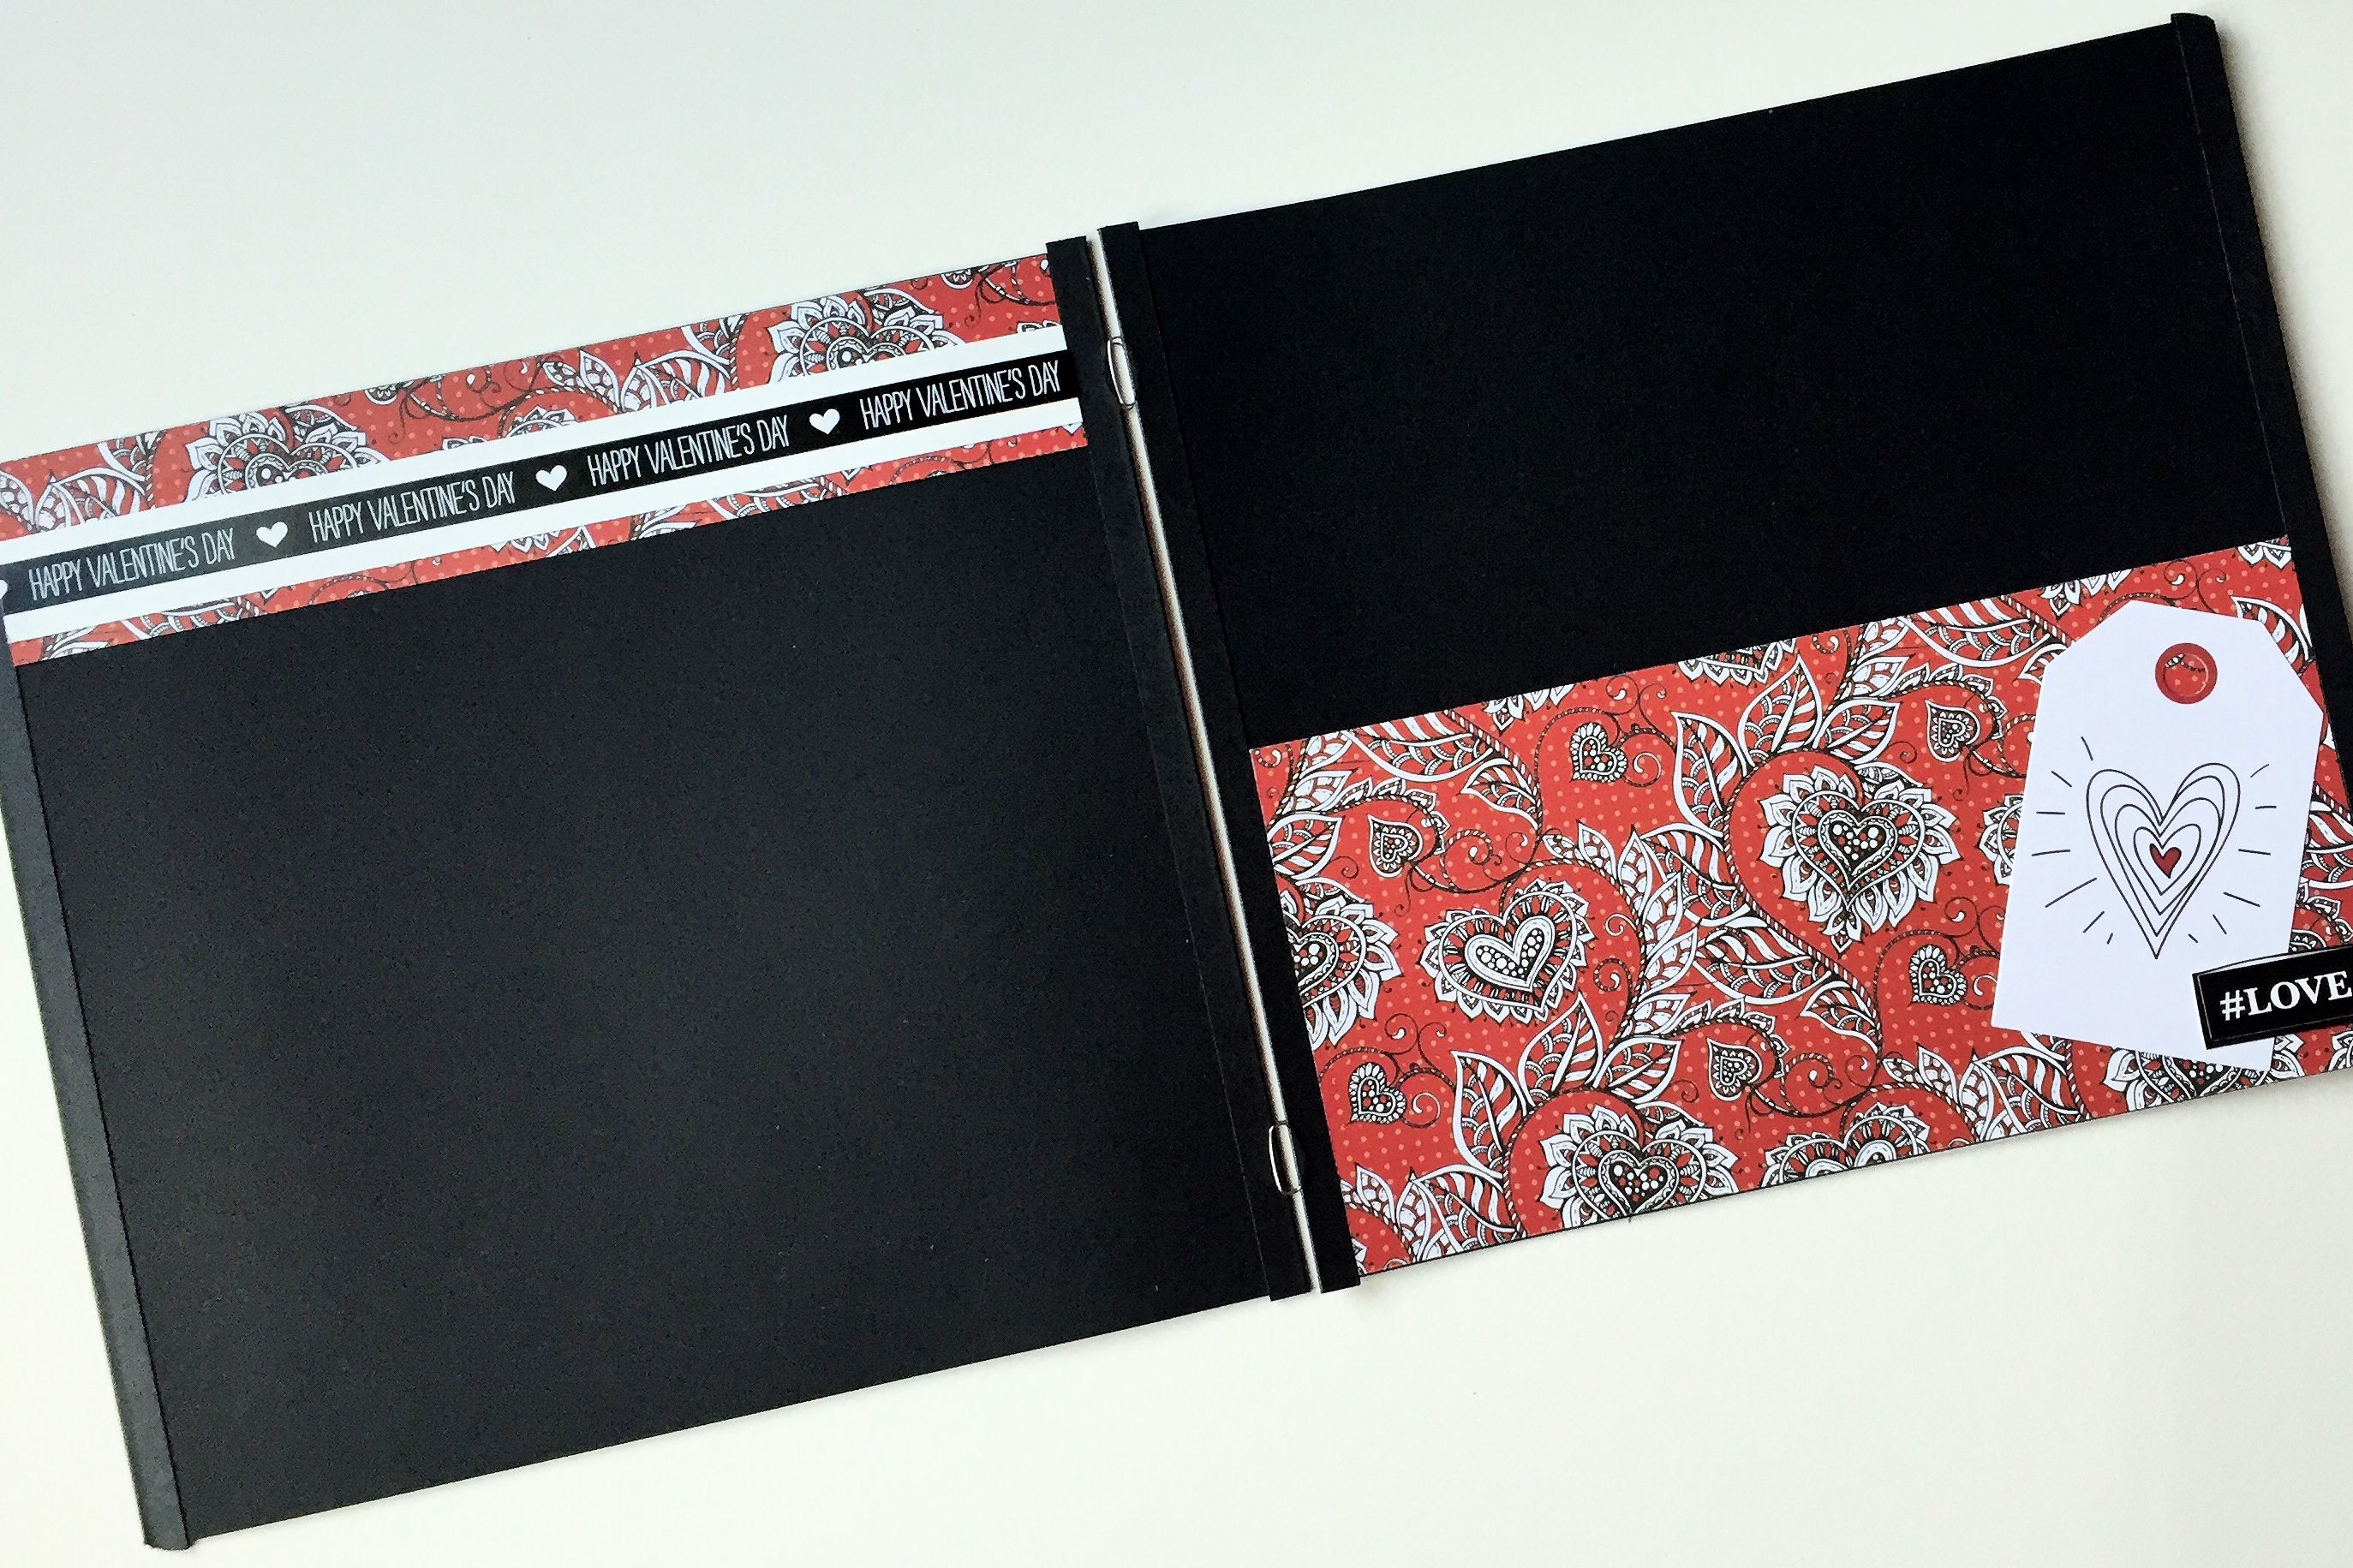
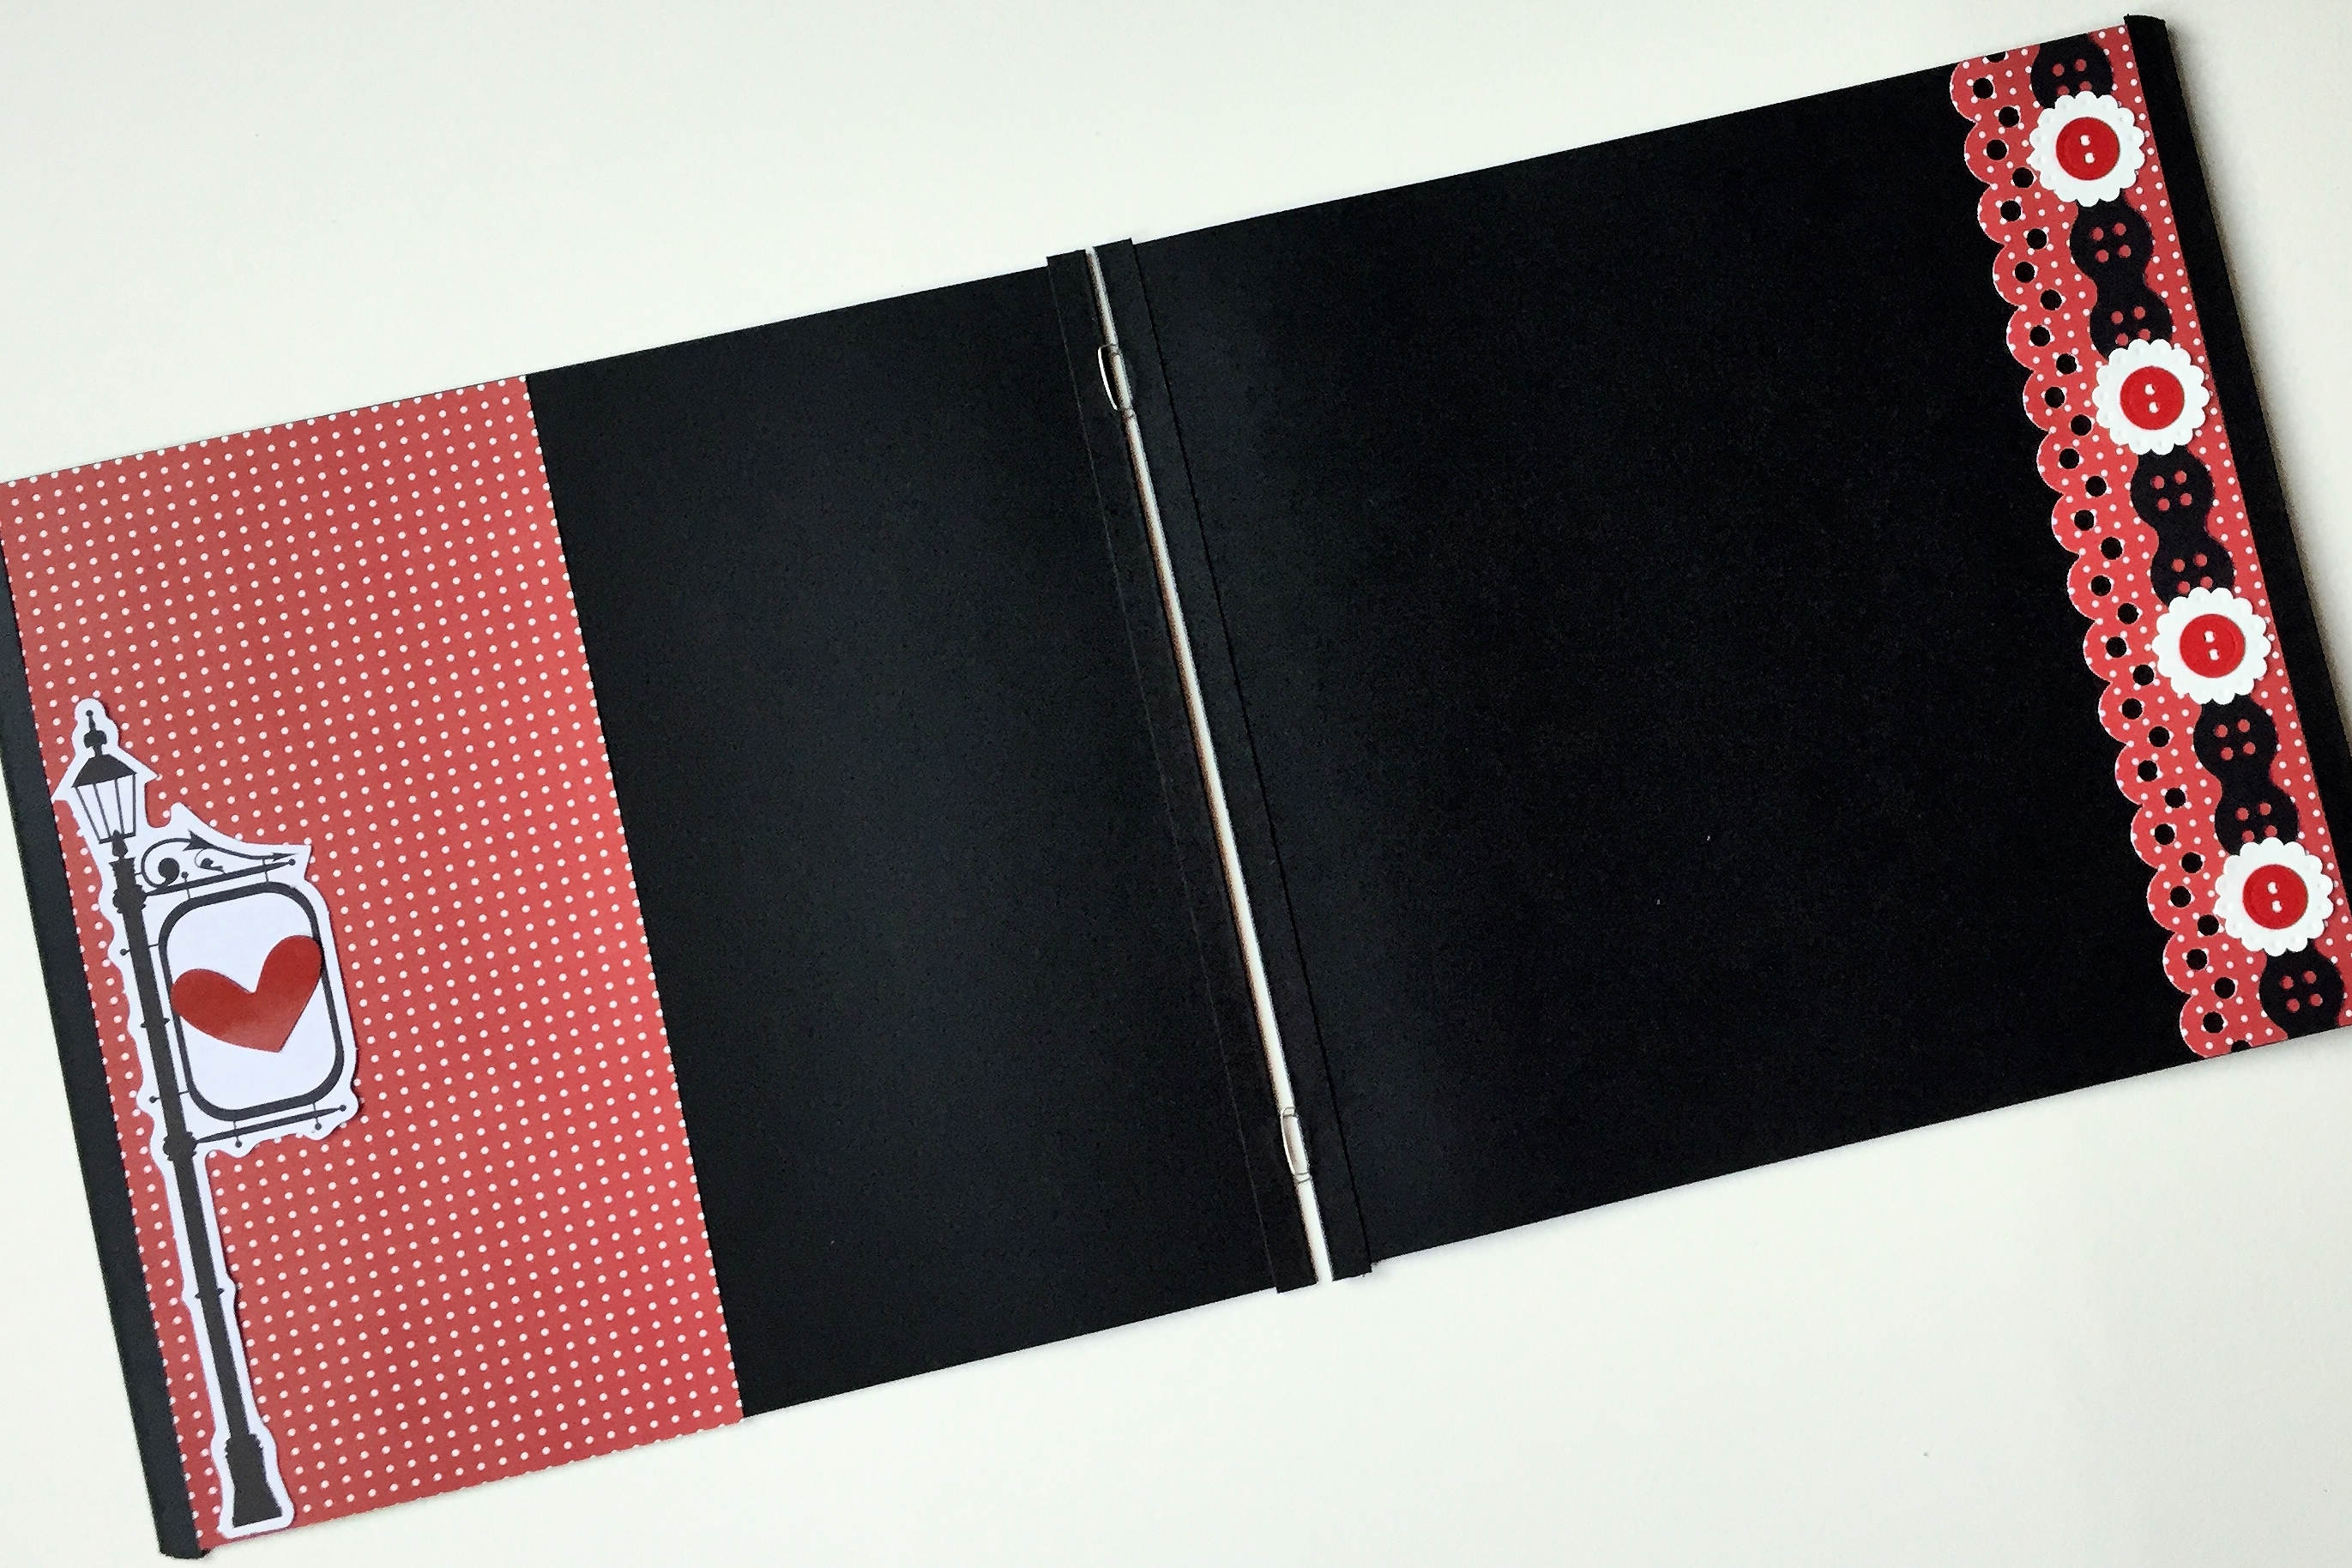
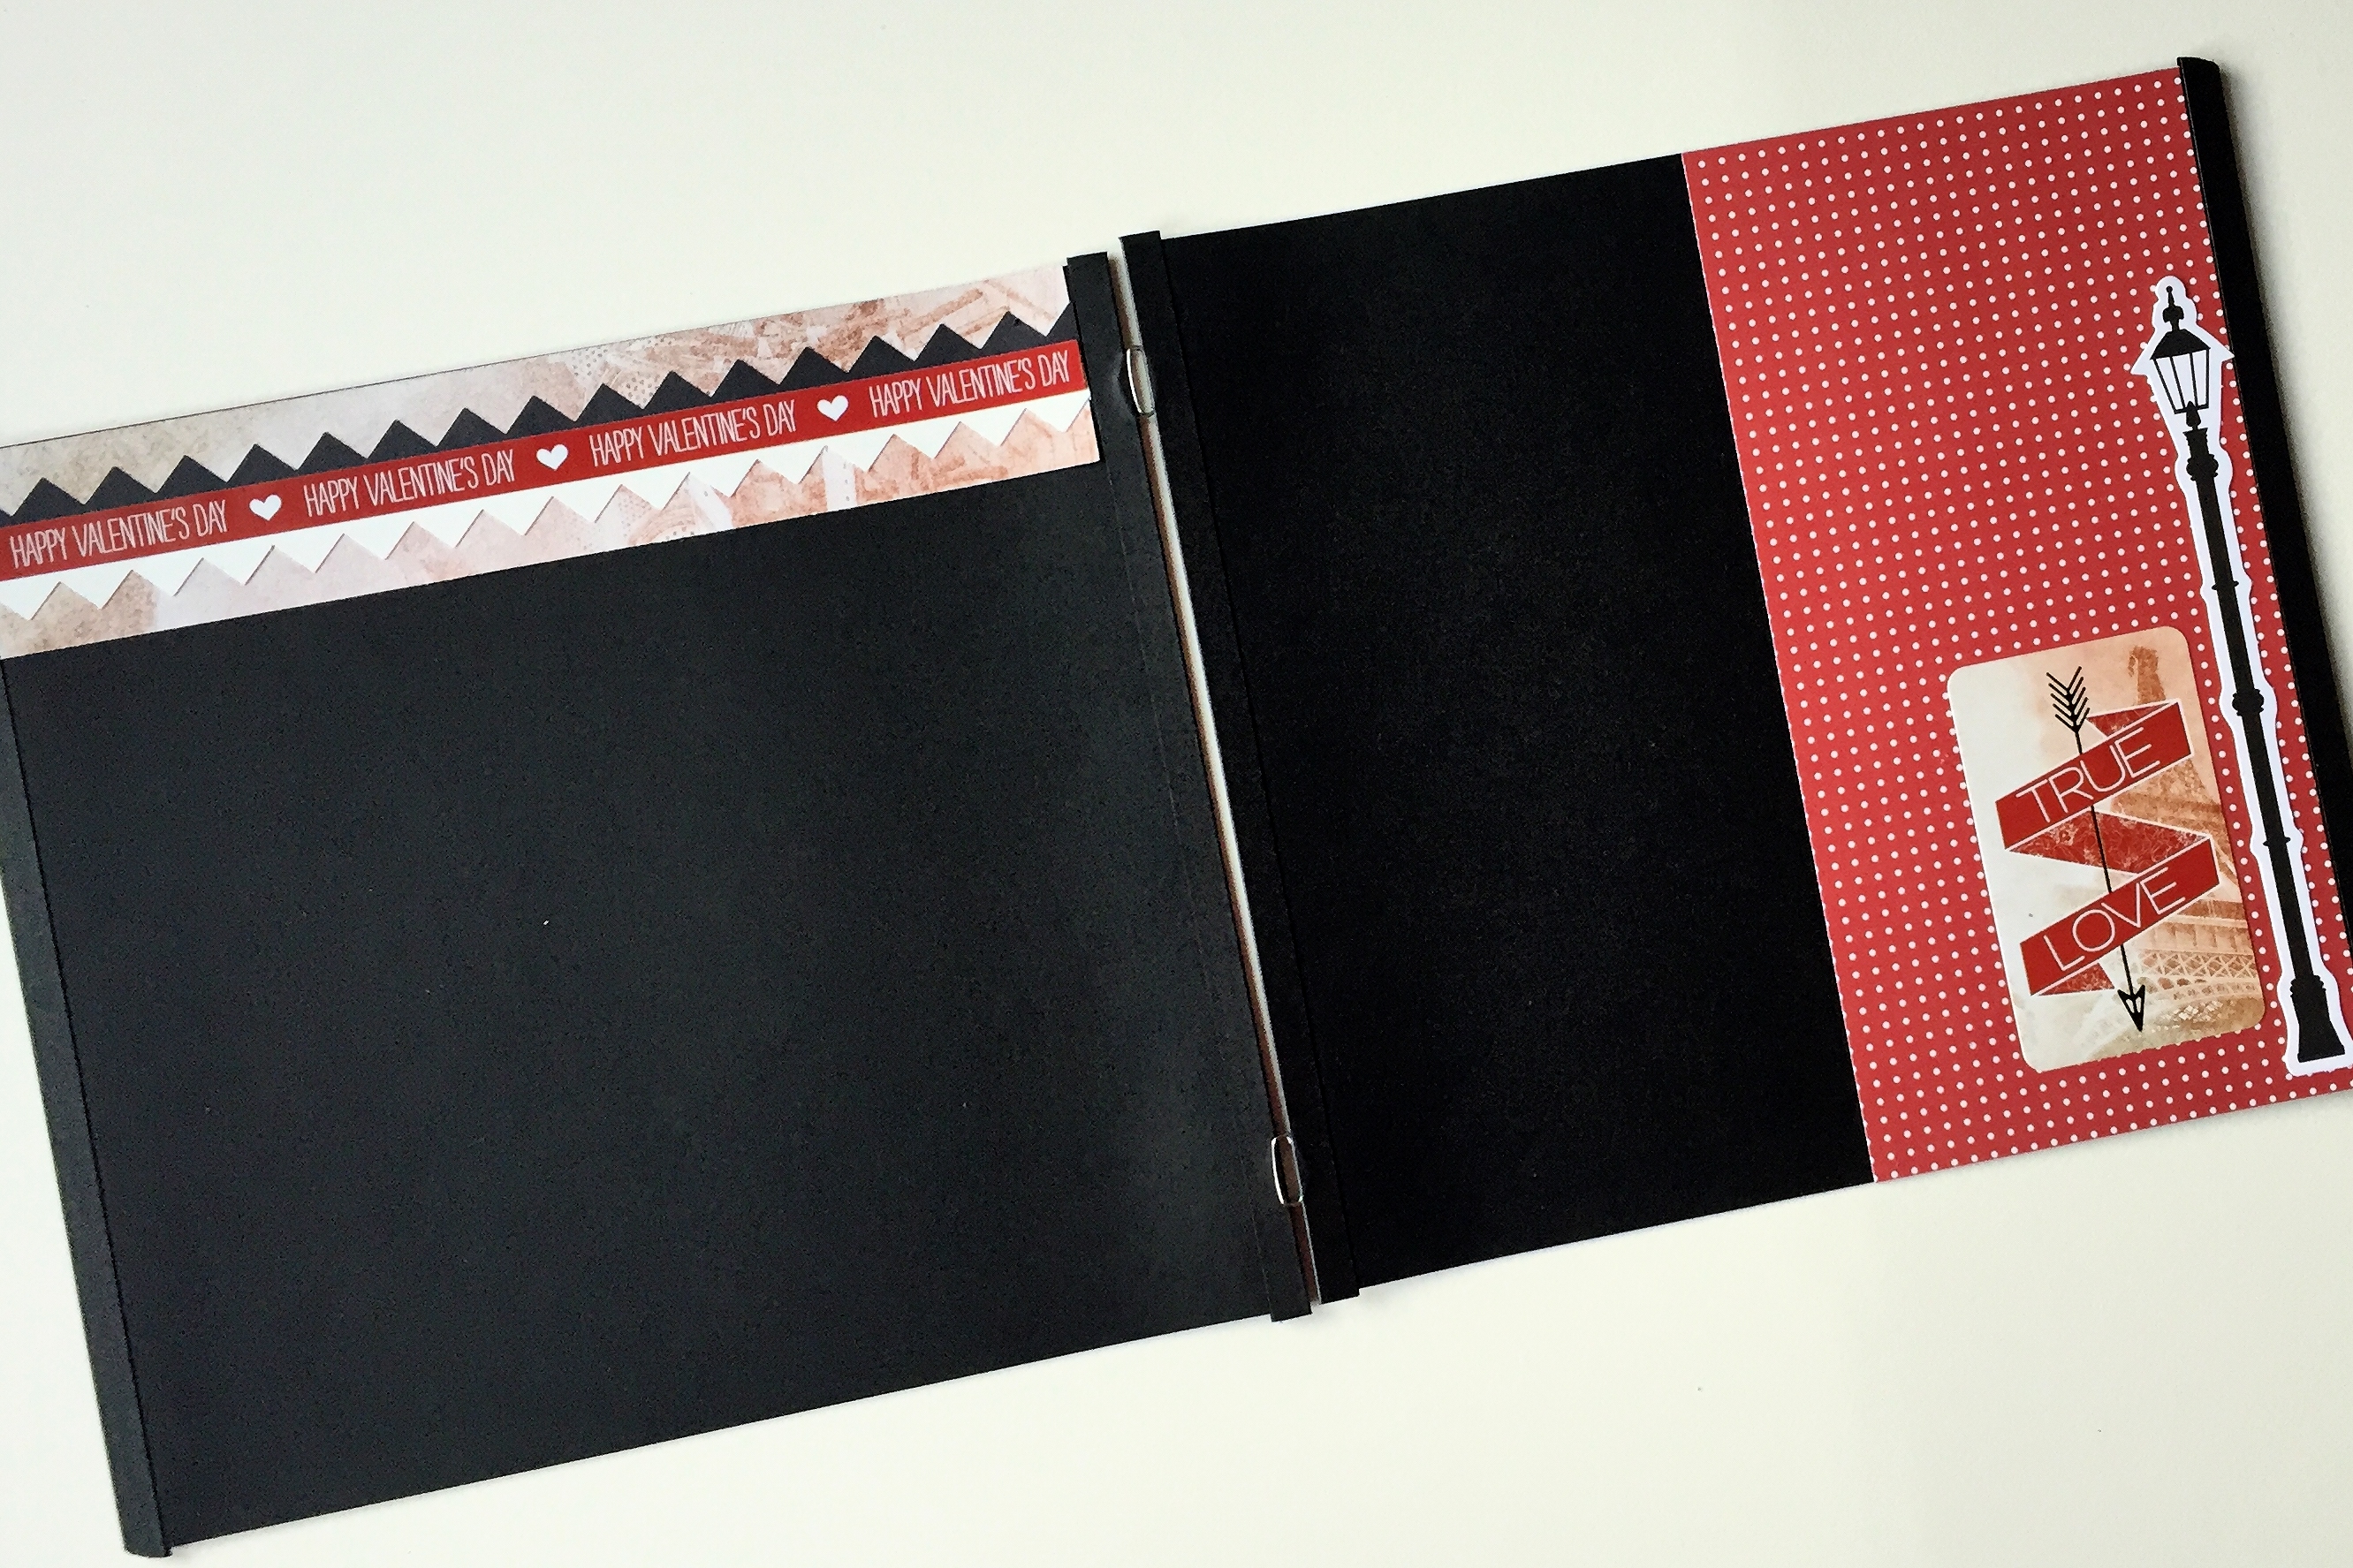


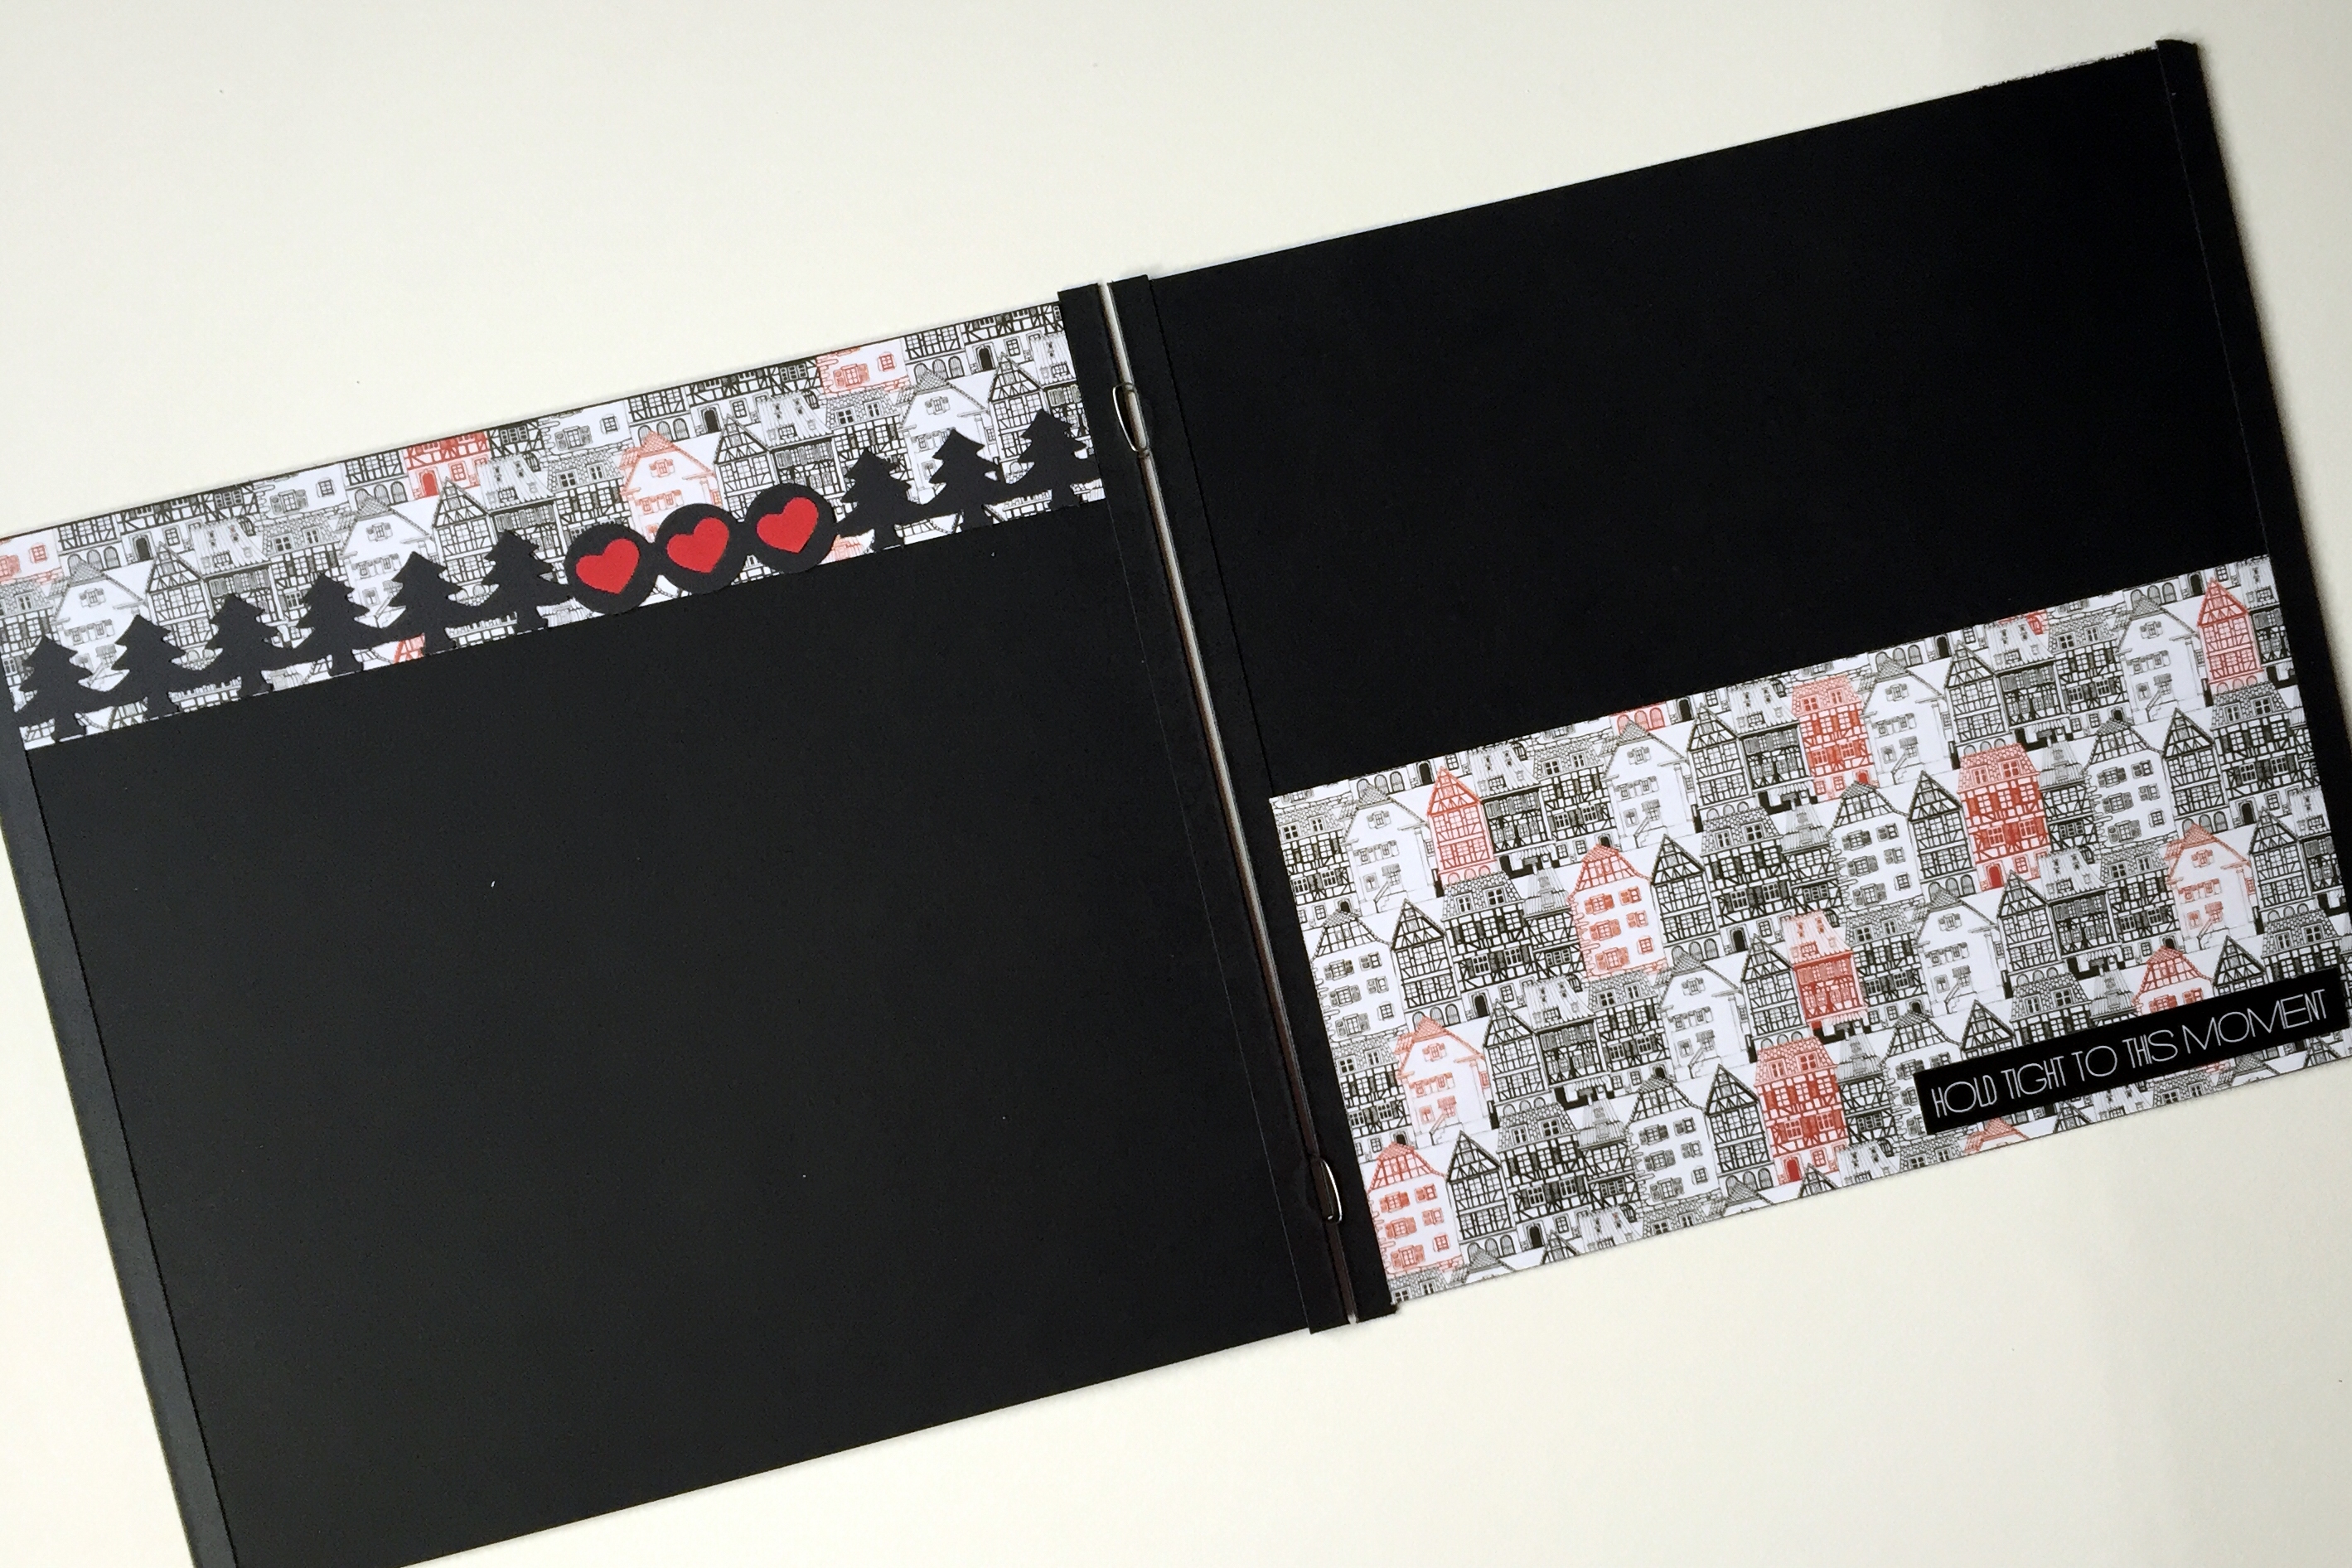
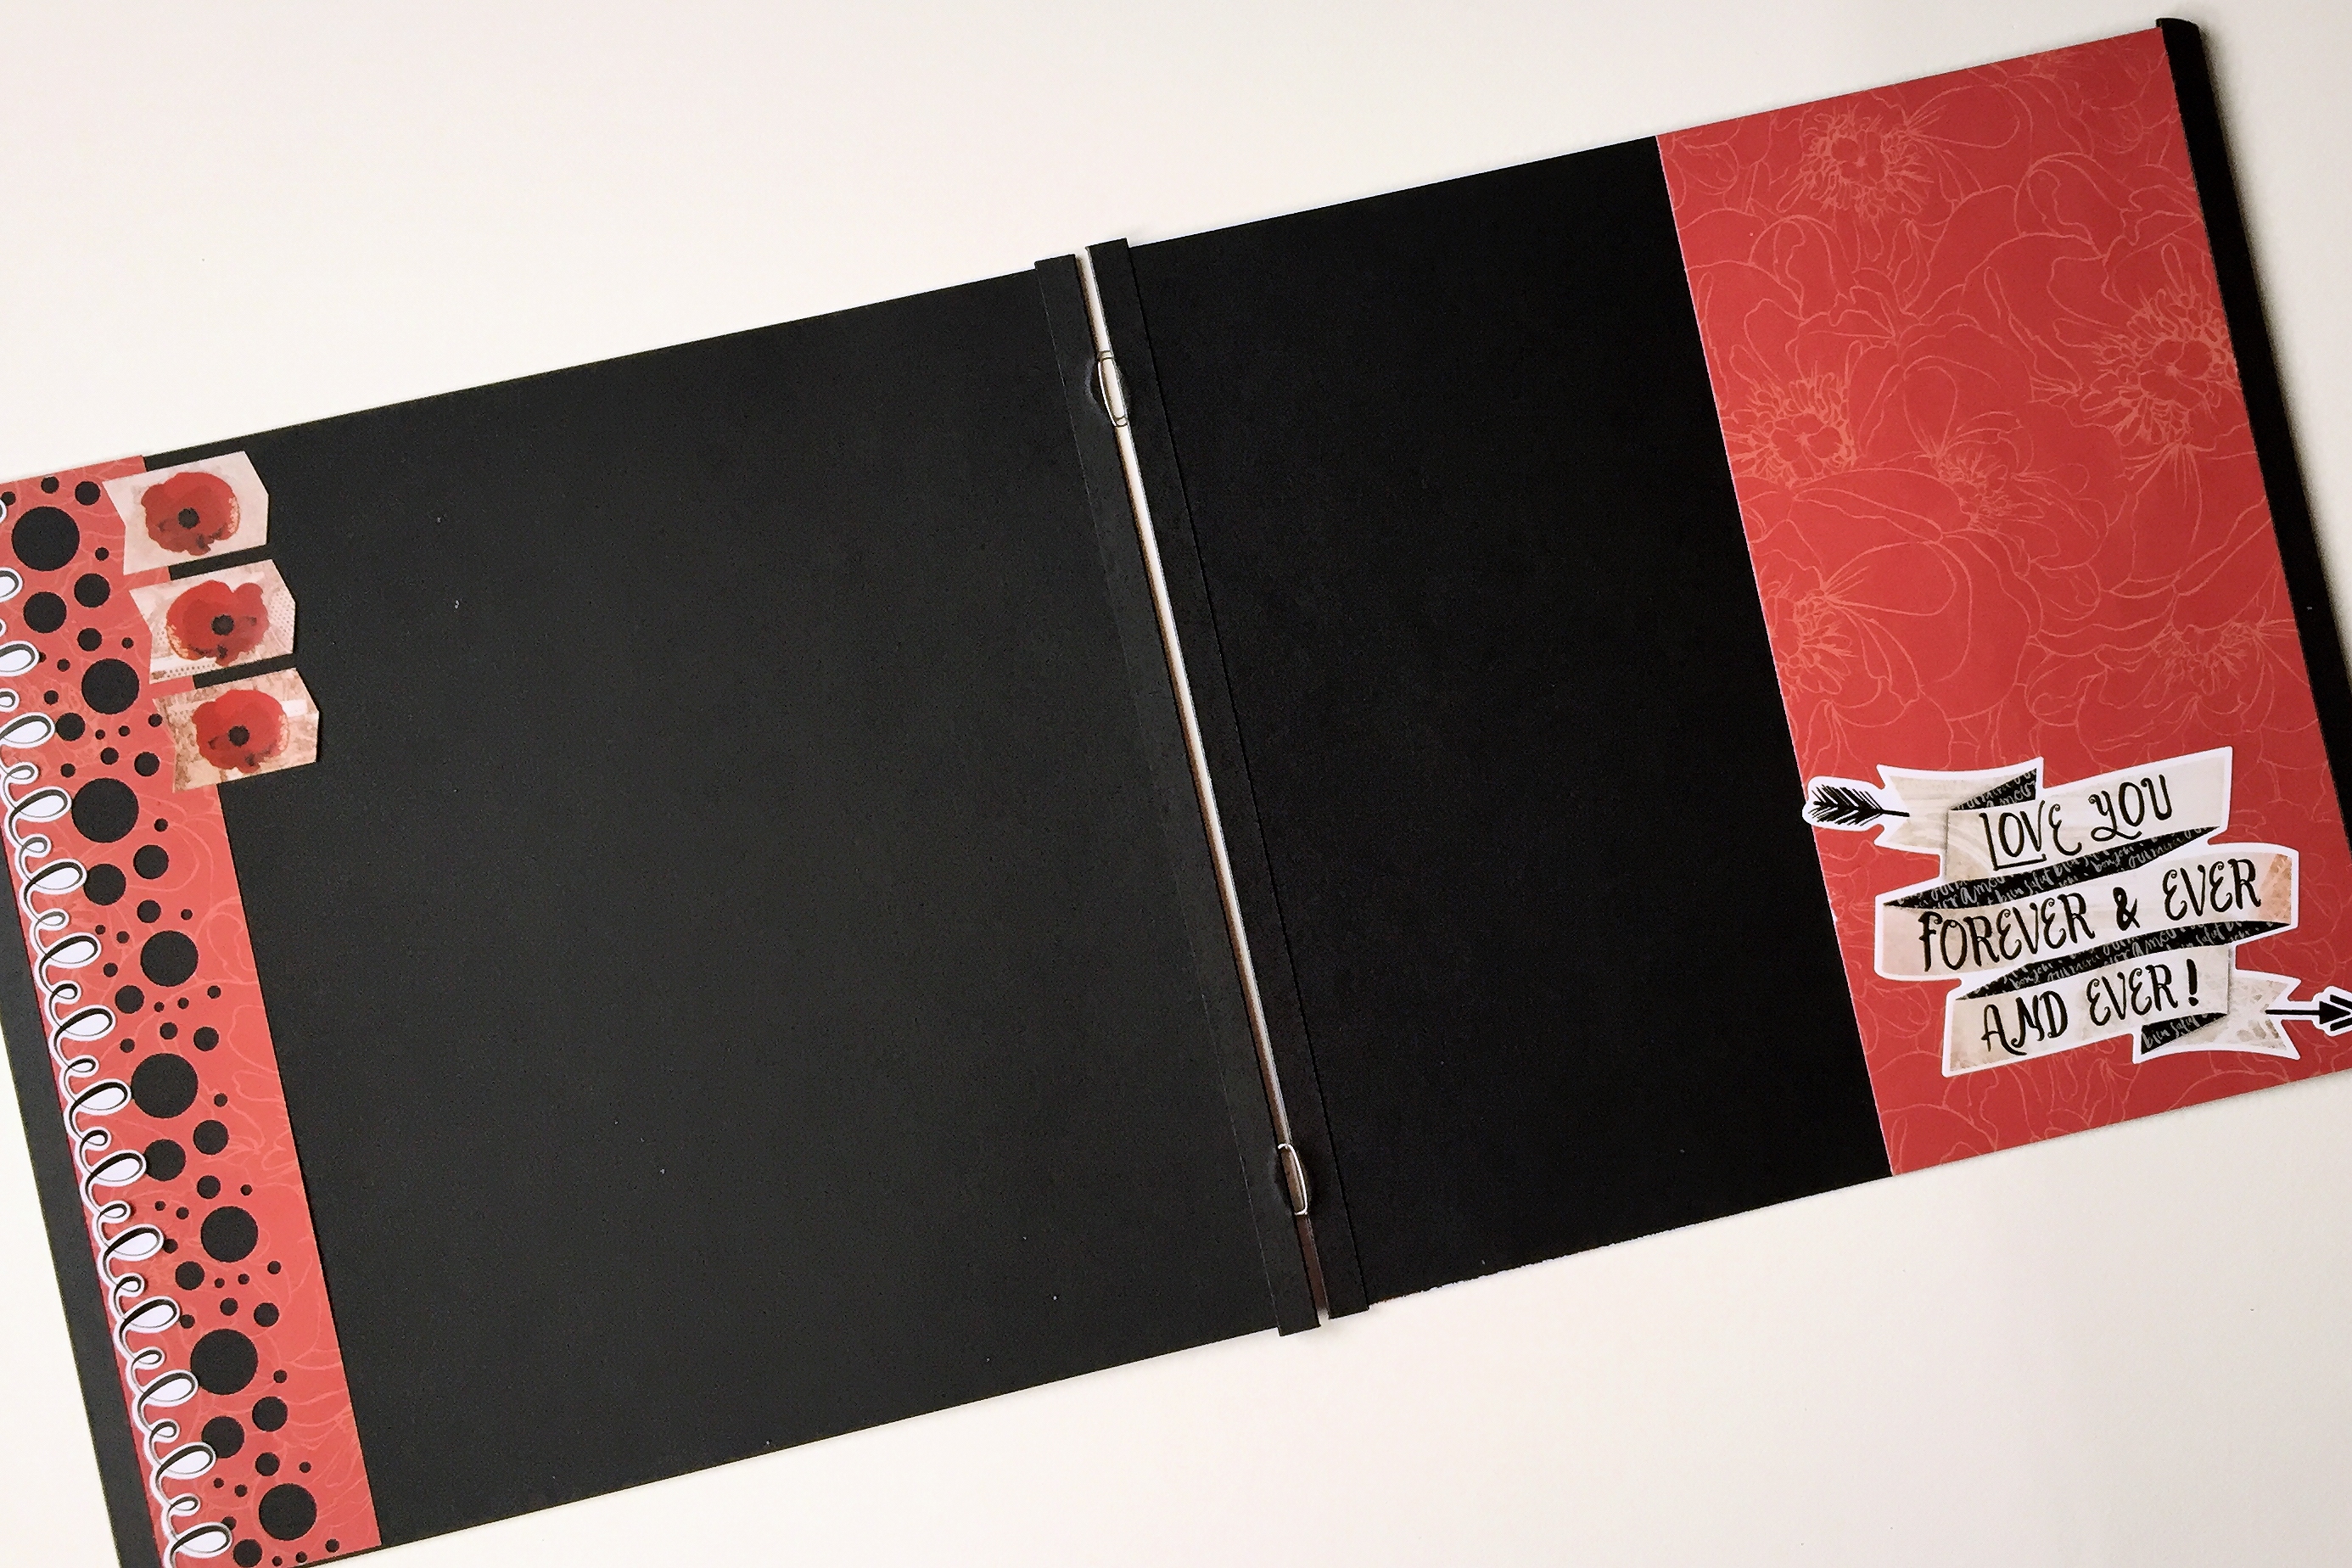
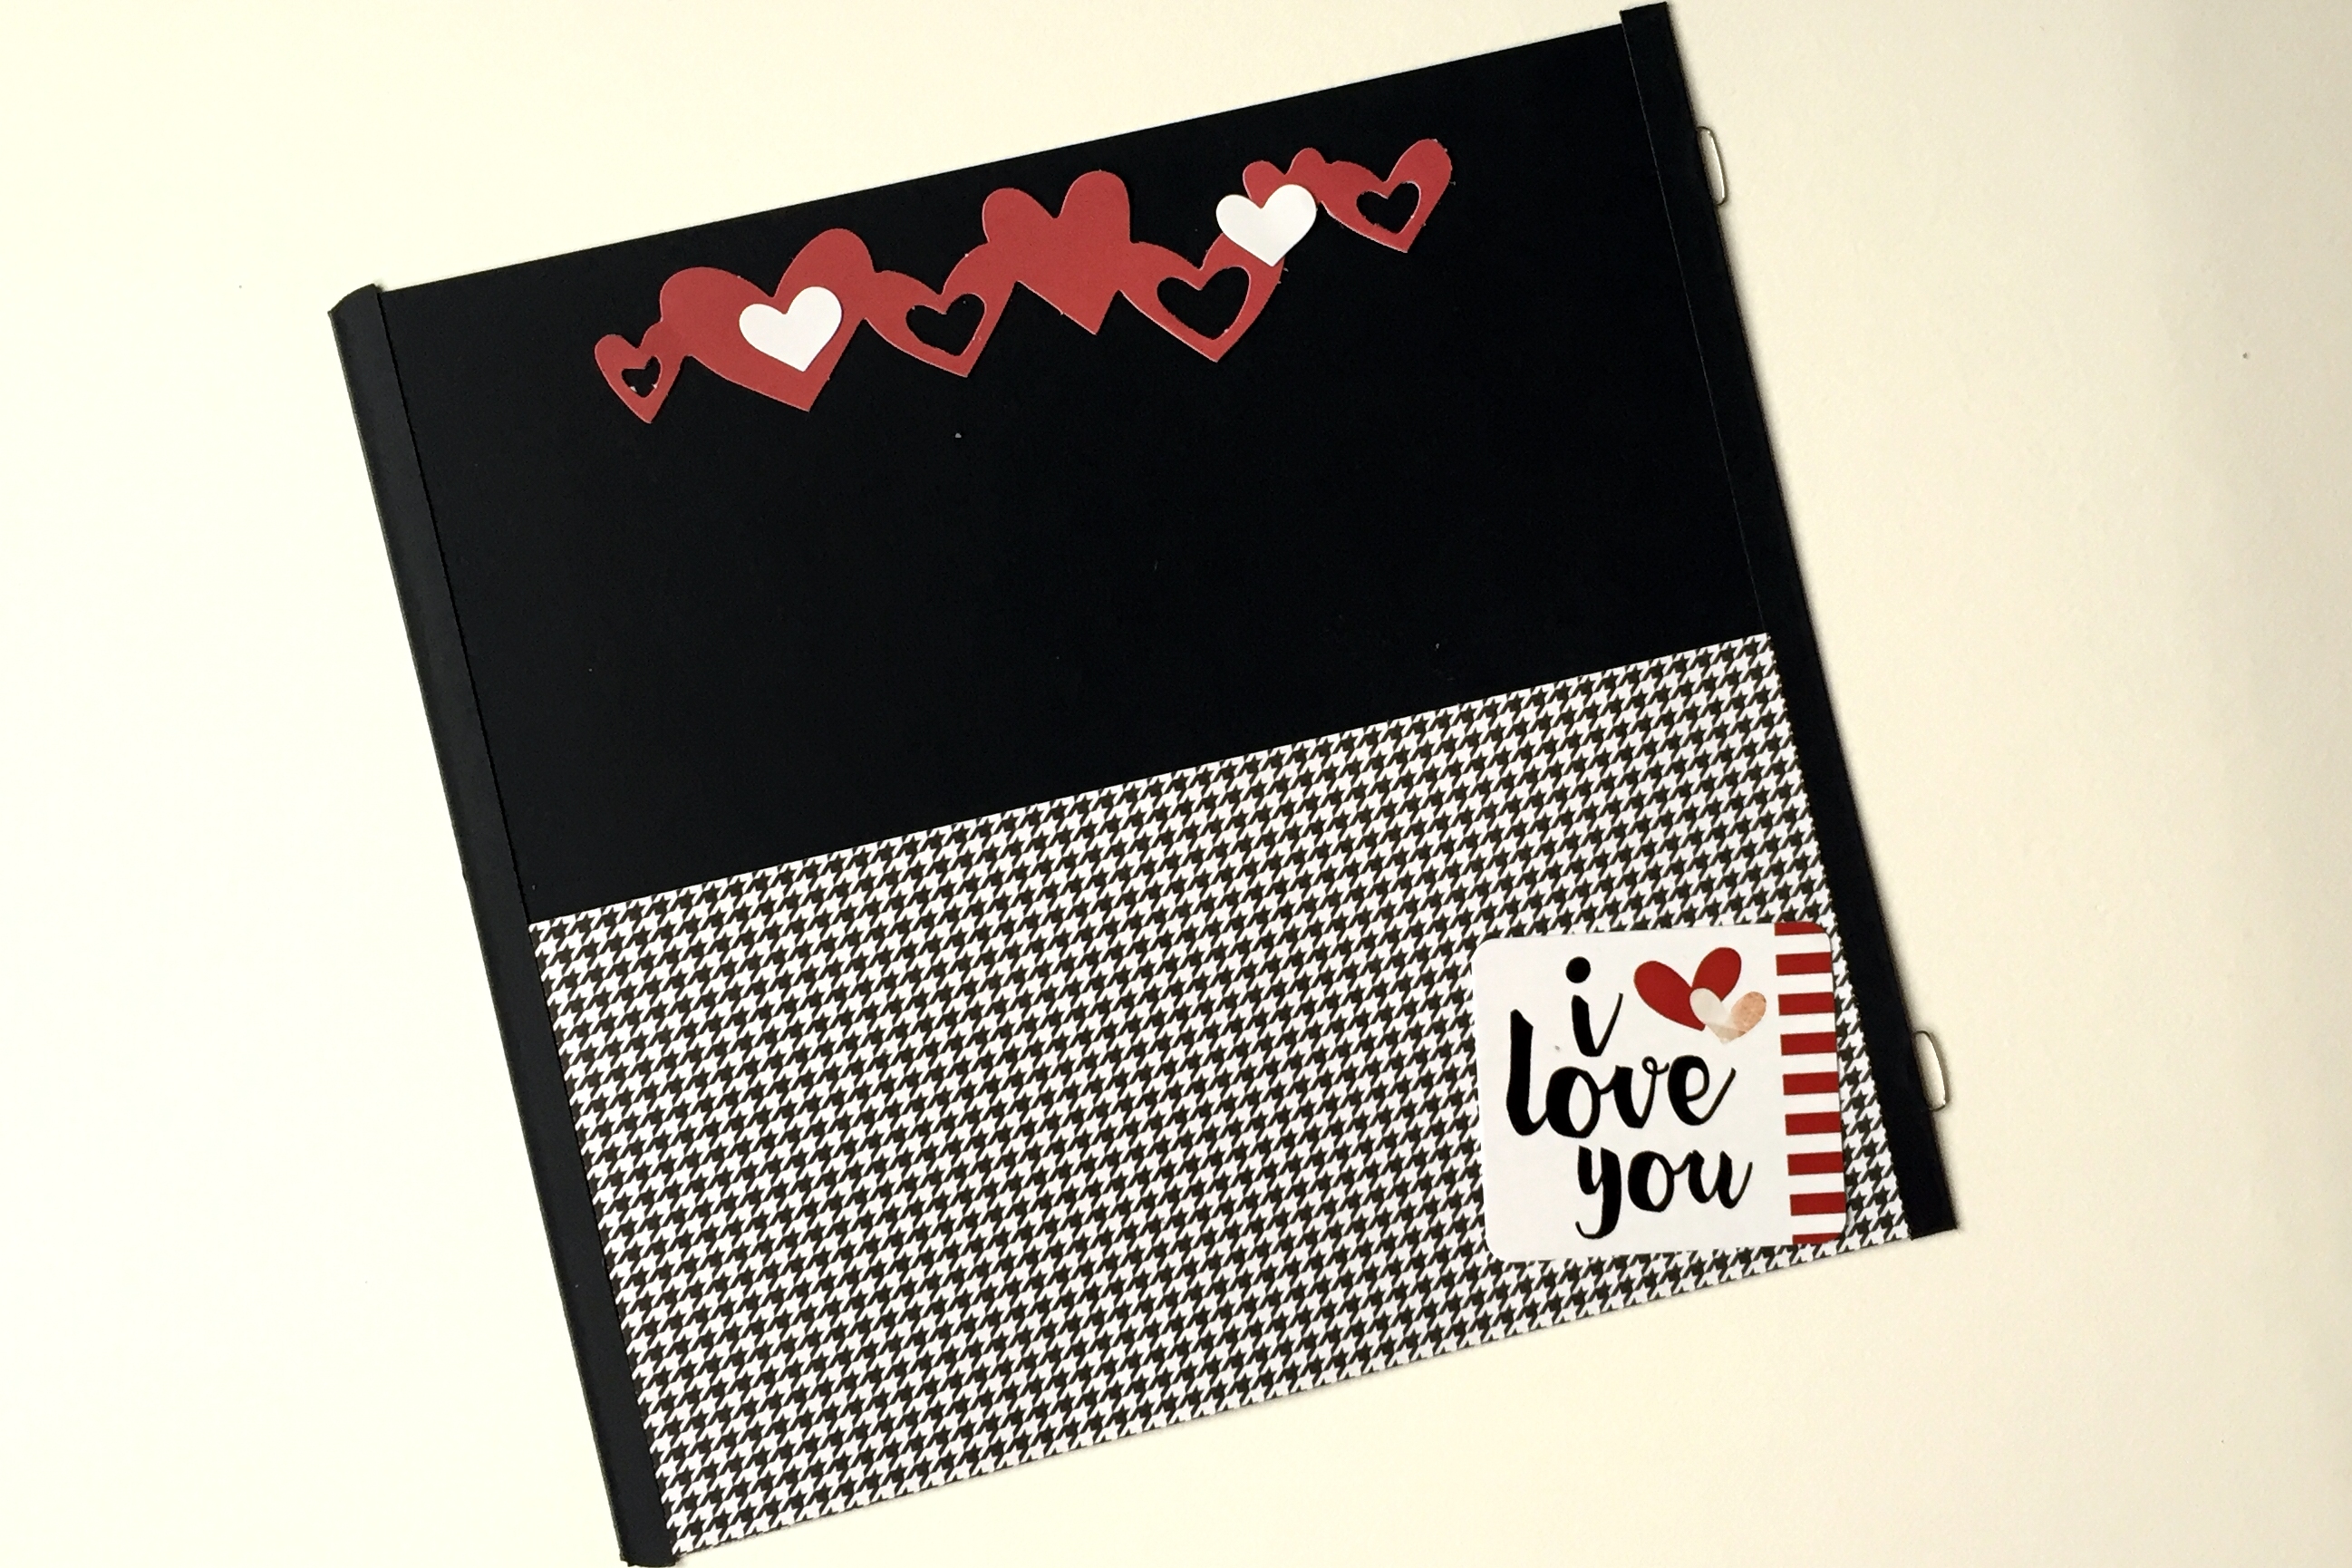
Step Four – Decorate Album
- Using the pictures as your guide, create the pages of your 8×8 album with the 8″ borders and the 4″ x 8″ designer paper pieces. Embellish as shown.
- Add photos and journal with love. (Black and white photos would look especially nice!)
Coming soon…Part 2: Valentines Cards using the borders and materials you’ve set aside!

These idea are simply wonderful but I cannot get my computer to copy them. Is there something I am not doing correctly when I hit the PRINT button?
Hi Virginia. Are you right clicking, and then hitting print? You should be able to print them.
I could only get the top part of the borders to print. Below the chevron border (on broken glass) will not print. What do I need to do to get the rest of them?
I just right click and copy, then paste into a word document then print. Hope that helps.
This would work for any set of paper pages and embellishments! Thanks so much for the great ideas!
[…] Using the pictures as your guide, make 12 Valentine cards with your remaining border pieces. (If you don’t know what I’m talking about, please refer back to Part 1.) […]