February 9, 2017
Cake My Day Scrapbooking Borders
PARTY TIME!
Birthday parties and celebrations of all kinds tend to be fun and lively, so why not make your pages lively too? The Cake My Day paper and stickers combined with favorite Creative Memories tools will do the job
.To make these borders you’ll need:
- Cake My Day Paper & Stickers
- Black, White, Raspberry and Peacock Blue Cardstock
- Original Border Maker System with Music Notes, Zig Zag, Bubbles, Scallop Dot, Button Chain and Star Cartridges
- Argyle Border Punch
- Custom Cutting System with Circle Patterns
- 12-inch Straight Trimmer
- All-Purpose Scissors
- Tape Runner and Repositionable Tape Runner Refill
- Foam Squares
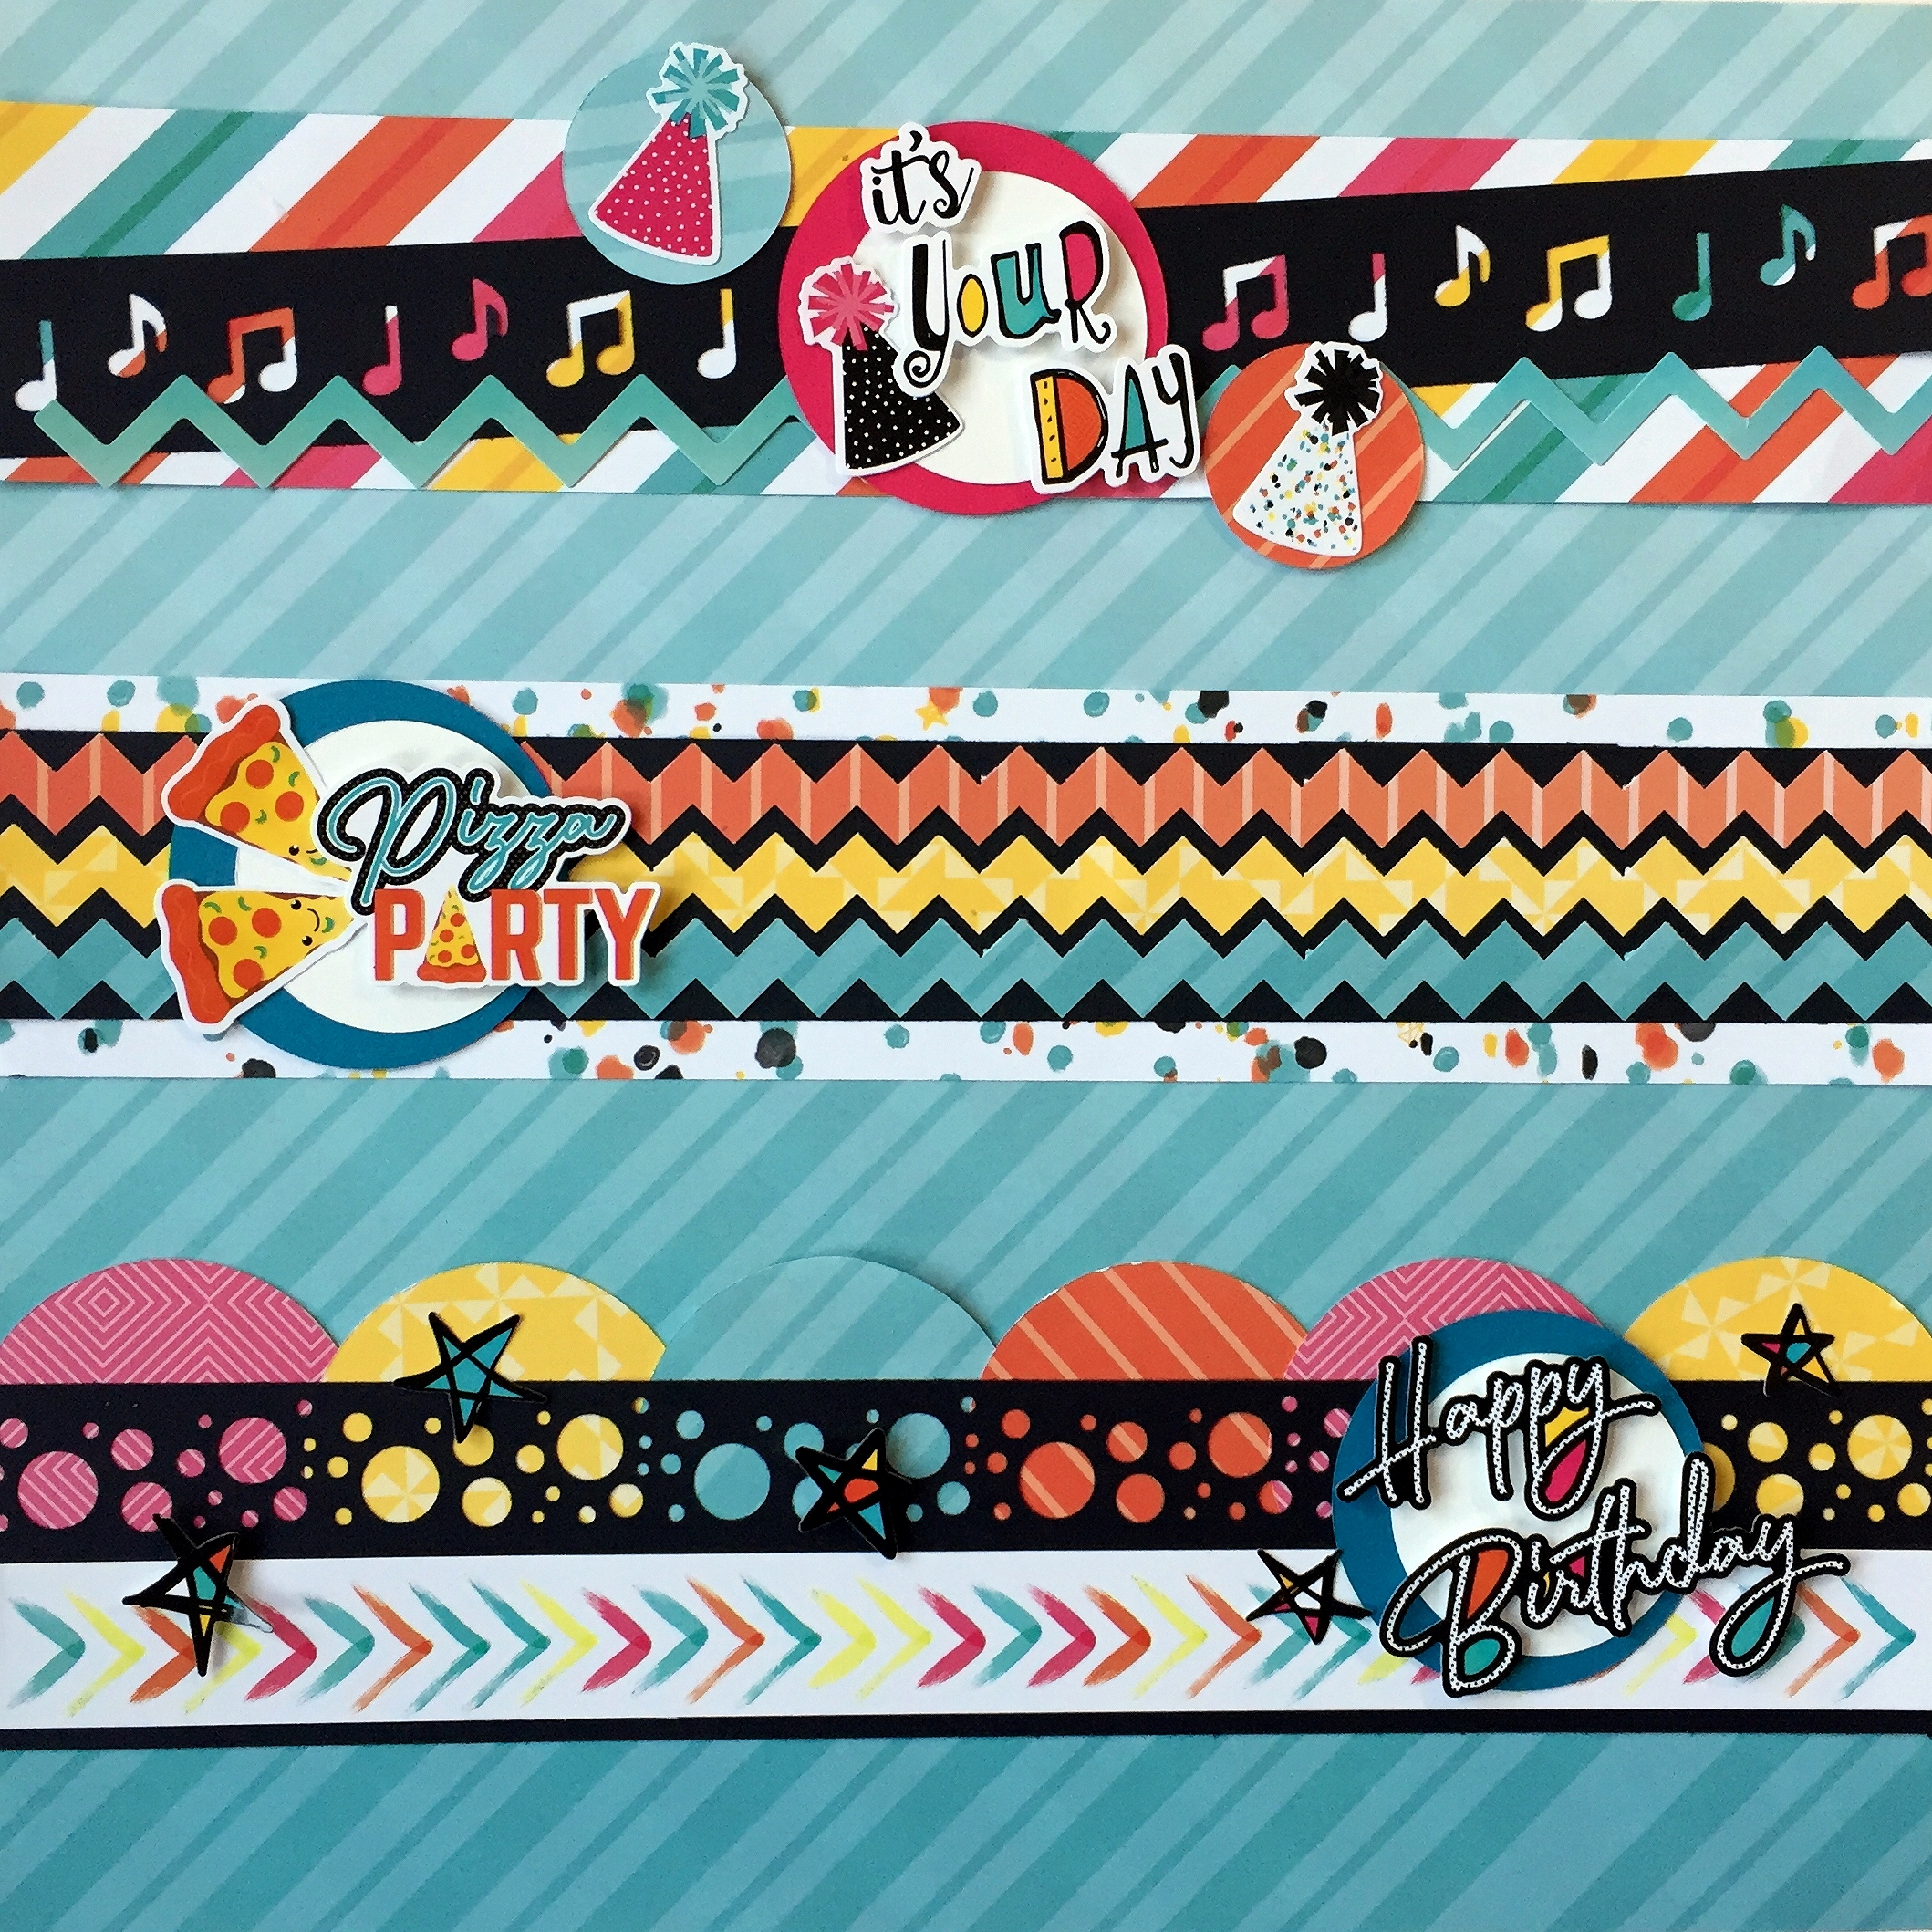
1.It’s Your Day Border
- Cut a 2-1/4″ x 12″ border with diagonal stripe paper.
- Using music notes cartridge, punch a border with black cardstock. Trim to 1-1/4″ x 12″ and mount diagonally to striped border. Add a zig zag sticker strip as shown.
- Using the custom cutting system with the inside of middle-size pattern, cut one white circle with blue blade and one raspberry circle with red blade. Mount as shown to middle of border. Cut two small circles using the inside of the smallest-size pattern with aqua and orange paper. Add to either side of border as shown.
- Add It’s Your Day and party hats stickers, using foam squares as desired.
2.Pizza Party Border
- Cut a 2-1/2″ x 12″ border with multi-dot paper. Cut a 1-3/4″ x 12″ strip of black cardstock and adhere to border.
- Using the zig zag cartridge, punch one border each with orange, yellow and aqua paper. Mount as shown on black strip.
- Using the custom cutting system with the inside of middle-size pattern, cut one white circle with blue blade and one peacock blue circle with red blade. Mount as shown to border.
- Add Pizza Party and pizza slice stickers, using foam squares as desired.
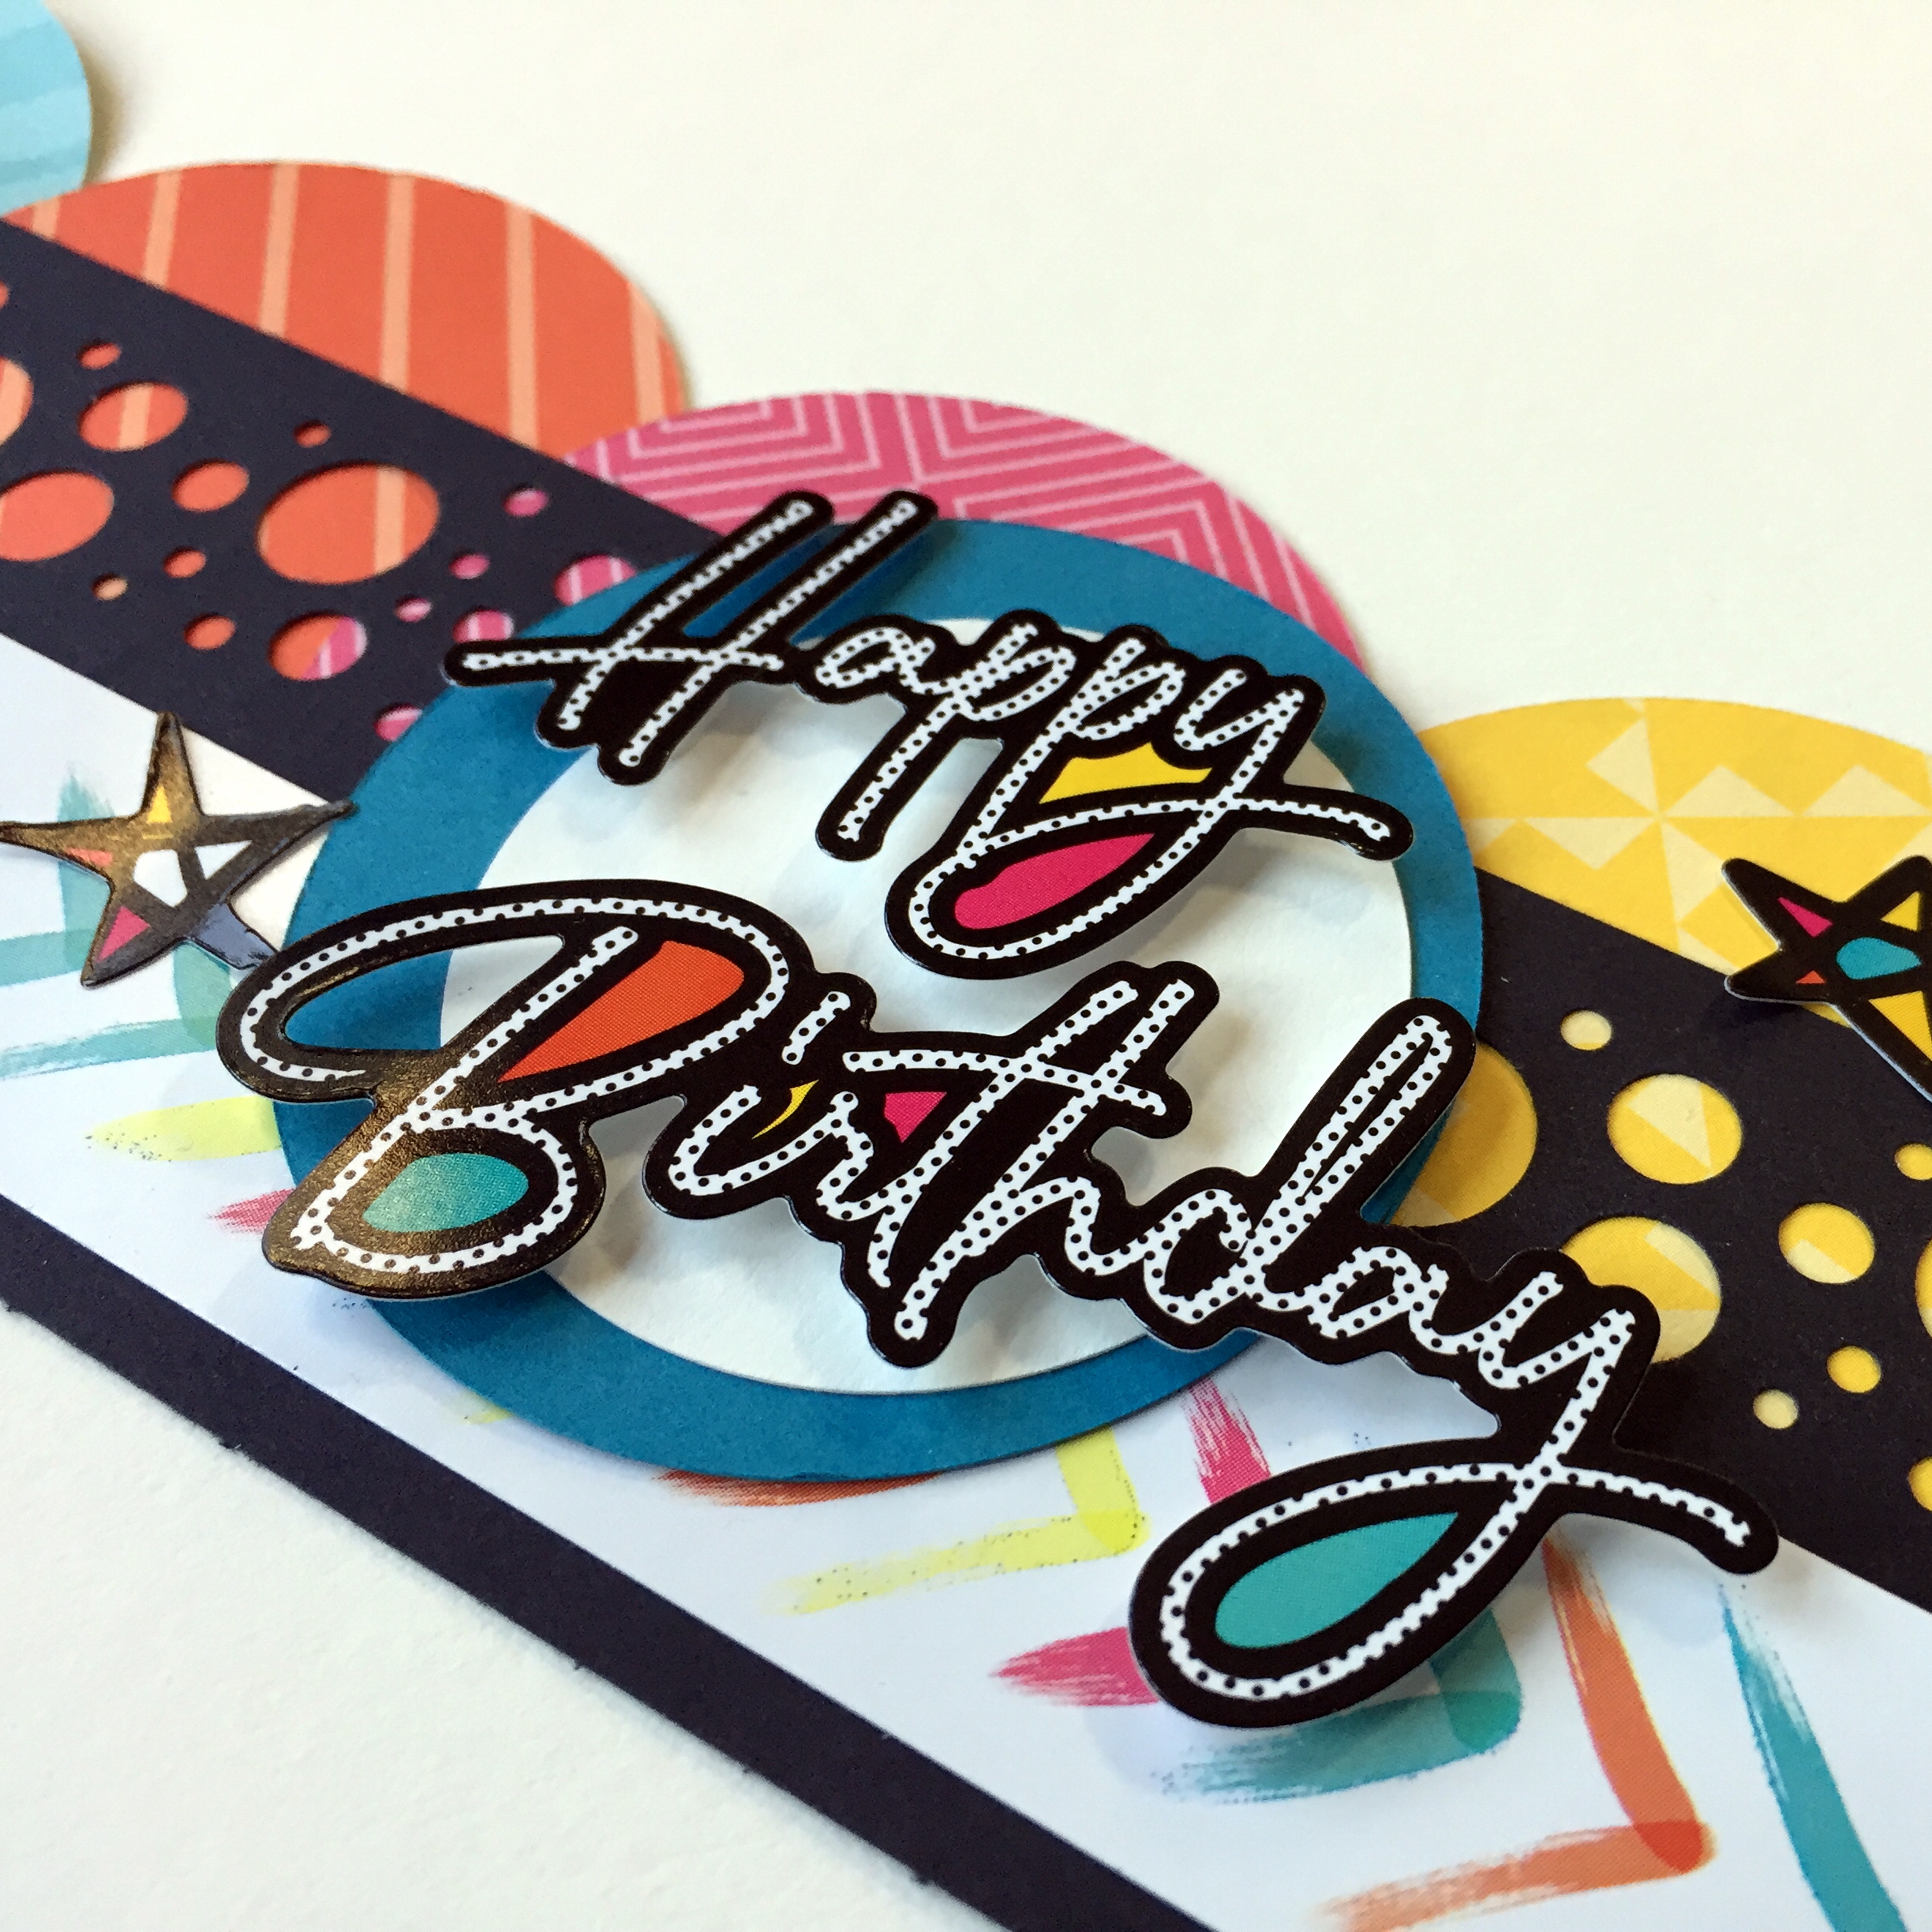
3.Happy Birthday Border
- Using the bubbles cartridge, punch a border with black cardstock. Trim to 2-1/4″ x 12″. Add multi-chevron sticker down length of one side as shown.
- Using the custom cutting system with the inside of middle-size pattern, cut six circles out of several scraps of solid designer paper with red blade. Mount behind bubbles border as shown, overlapping as needed.
- Using the custom cutting system with the inside of middle-size pattern, cut one white circle with blue blade and one peacock blue circle with red blade. Mount as shown to border.
- Add Happy Birthday and star stickers, using foam squares as desired.
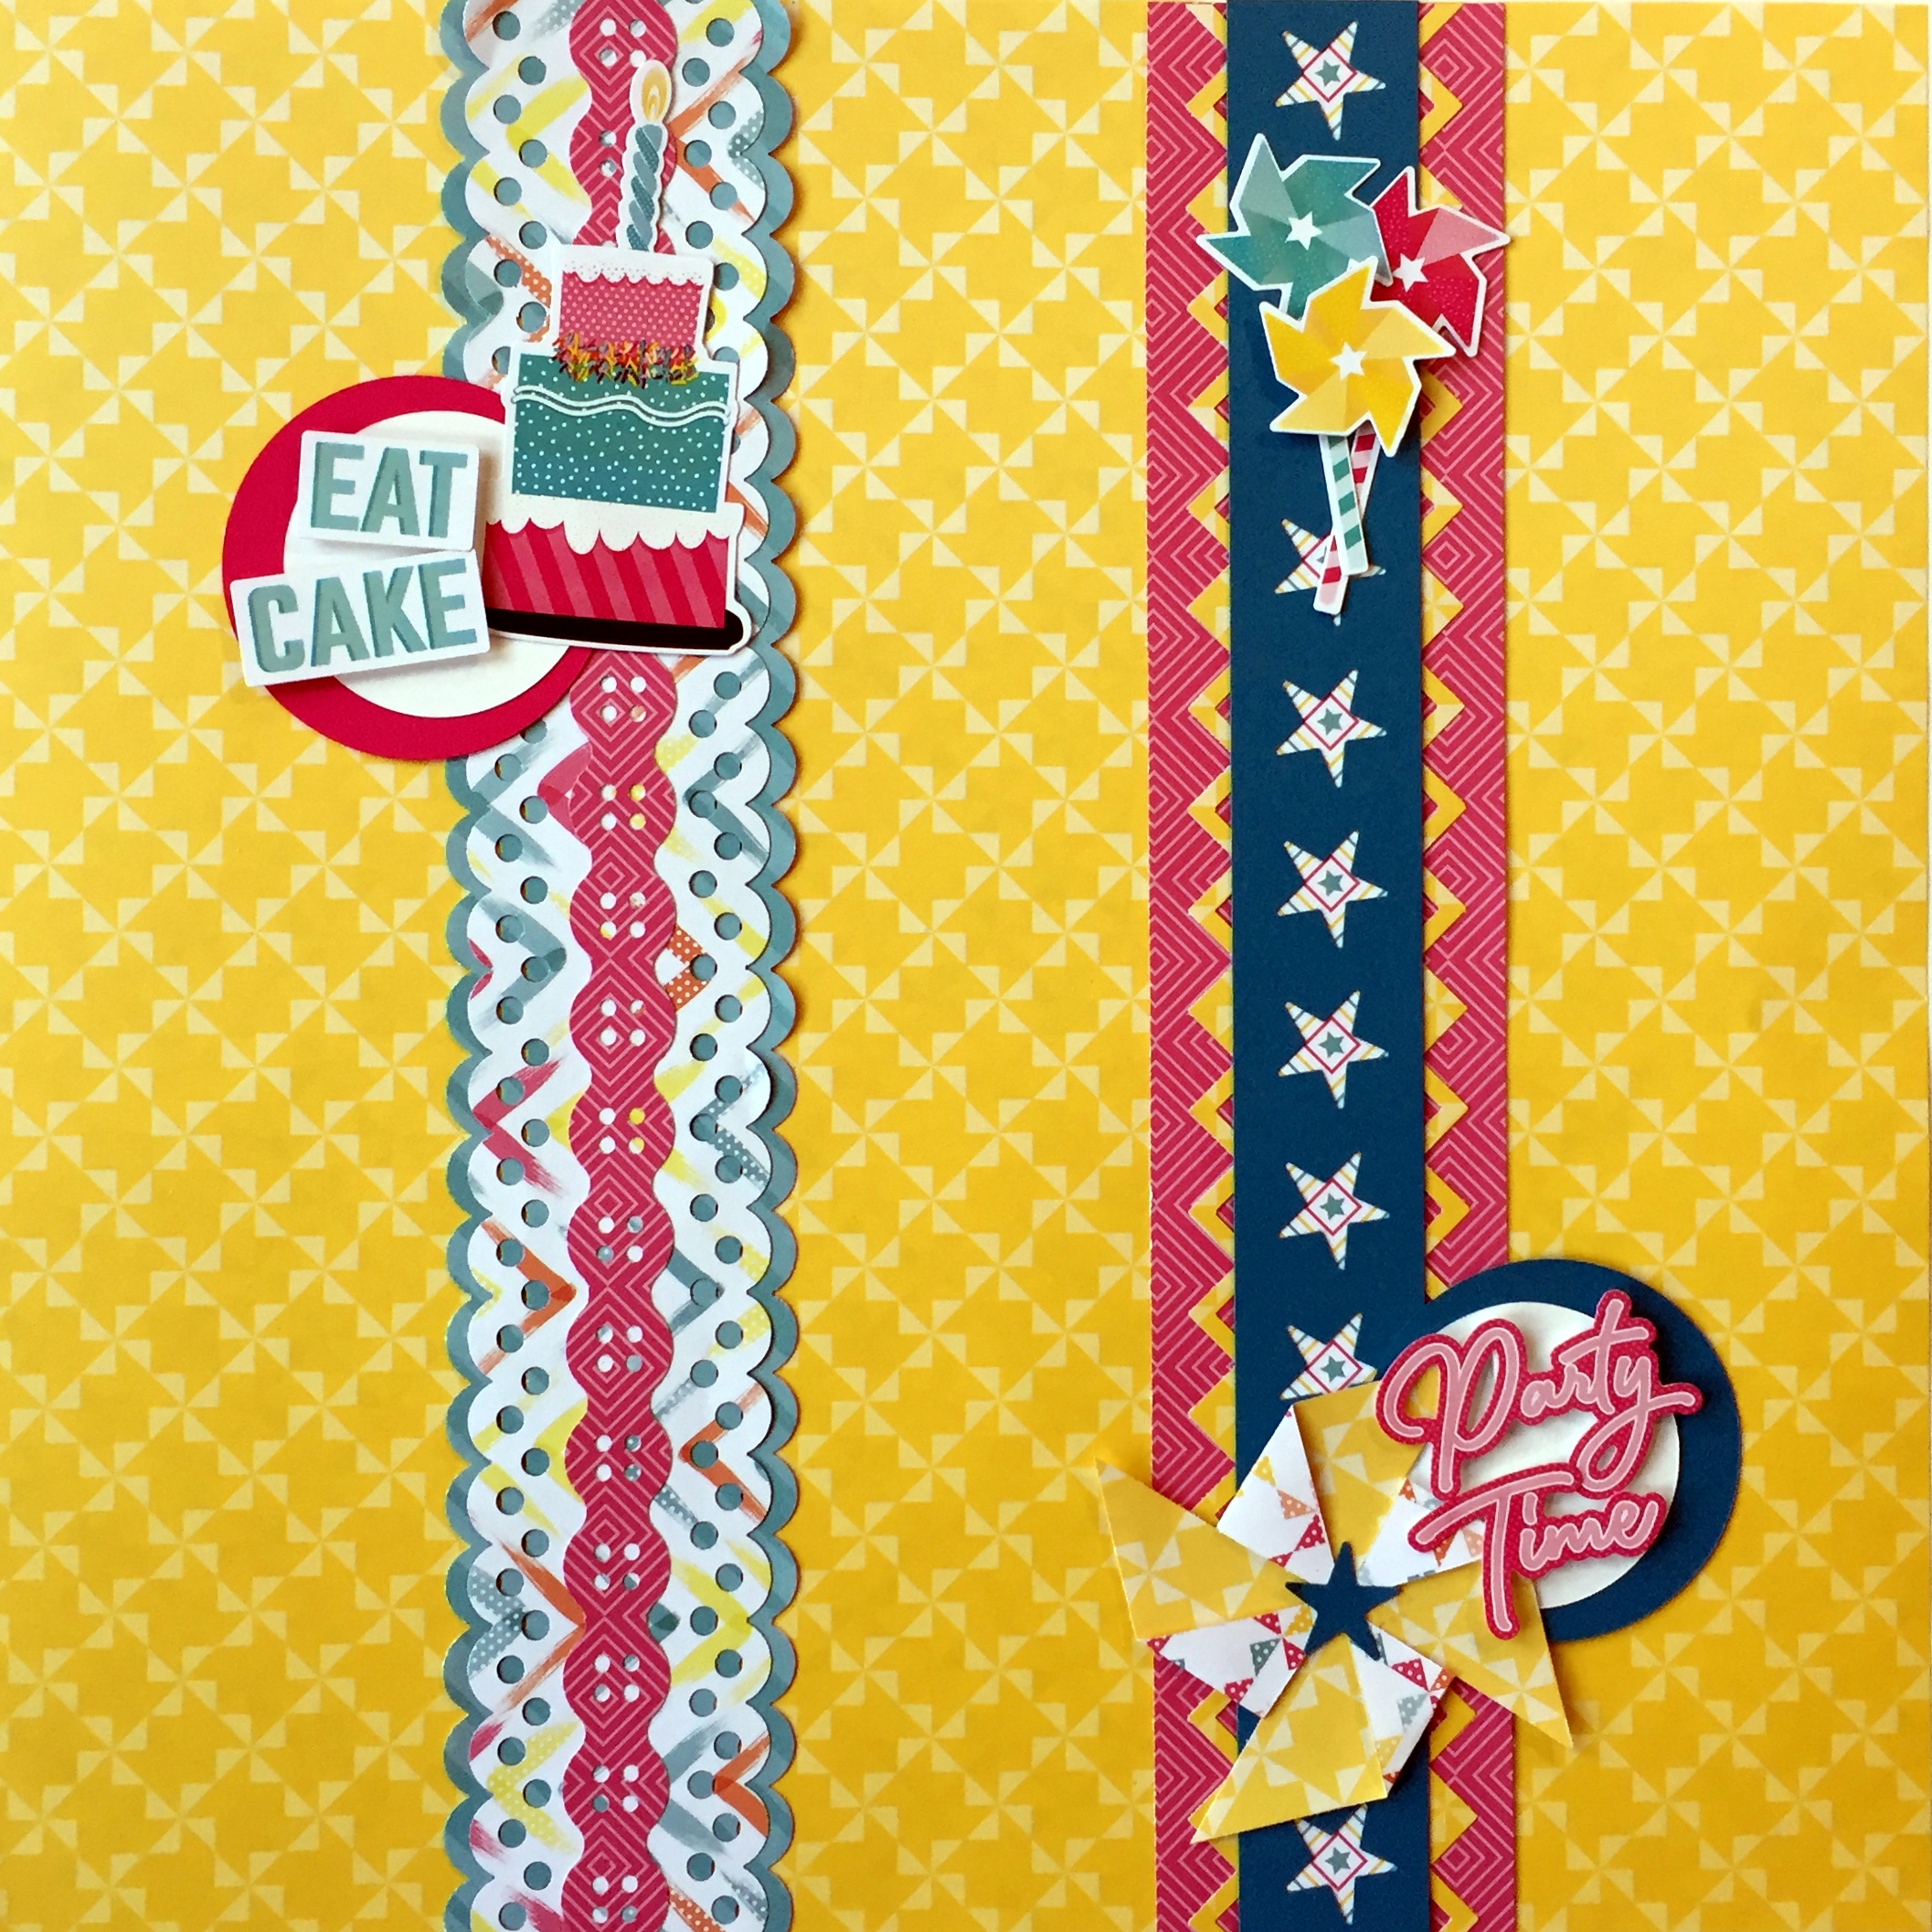
4.Eat Cake Border
- Using the scallop dot cartridge, punch a border with multi-chevron paper. Trim to 2″ x 12″. Punch the other side. (Tip: Use post-it notes along already-punched side to “lengthen” paper strip so it fits in the border maker guide.)
- Repeat with aqua paper, but trimming to 2-1/4 x 12″ instead. Mount multi-chevron border to aqua border.
- Using the button chain cartridge, punch a border with pink paper. Adhere down the length of scallop dot border.
- Using the custom cutting system with the inside of middle-size pattern, cut one white circle with blue blade and one raspberry circle with red blade. Mount as shown to border.
- Add Eat Cake, cake and candle stickers, using foam squares as desired.
5.Party Time Border
- Cut a 2-1/4″ x 12″ border with pink paper.
- Using the star cartridge, punch a border with peacock blue cardstock. Trim to 1-1/4″ x 12″. Cut a 1″ x 12″ strip of stars paper. Align behind stars border so that small stars on paper peek out from the punched stars.
- Using argyle border punch, punch a yellow border and cut in half lengthwise. Adhere each half as shown behind star border and then add to pink border.
- Using the custom cutting system with the inside of middle-size pattern, cut one white circle with blue blade and one peacock blue circle with red blade. Mount as shown to border.
- To make a pinwheel: cut a 2-1/4″ square of yellow paper. Starting at each corner, cut a 3/4″ snip towards the center of square. Fold every other corner in toward the center. Add a punched star on top.
- Add Party Time and pinwheel stickers, using foam squares as desired.
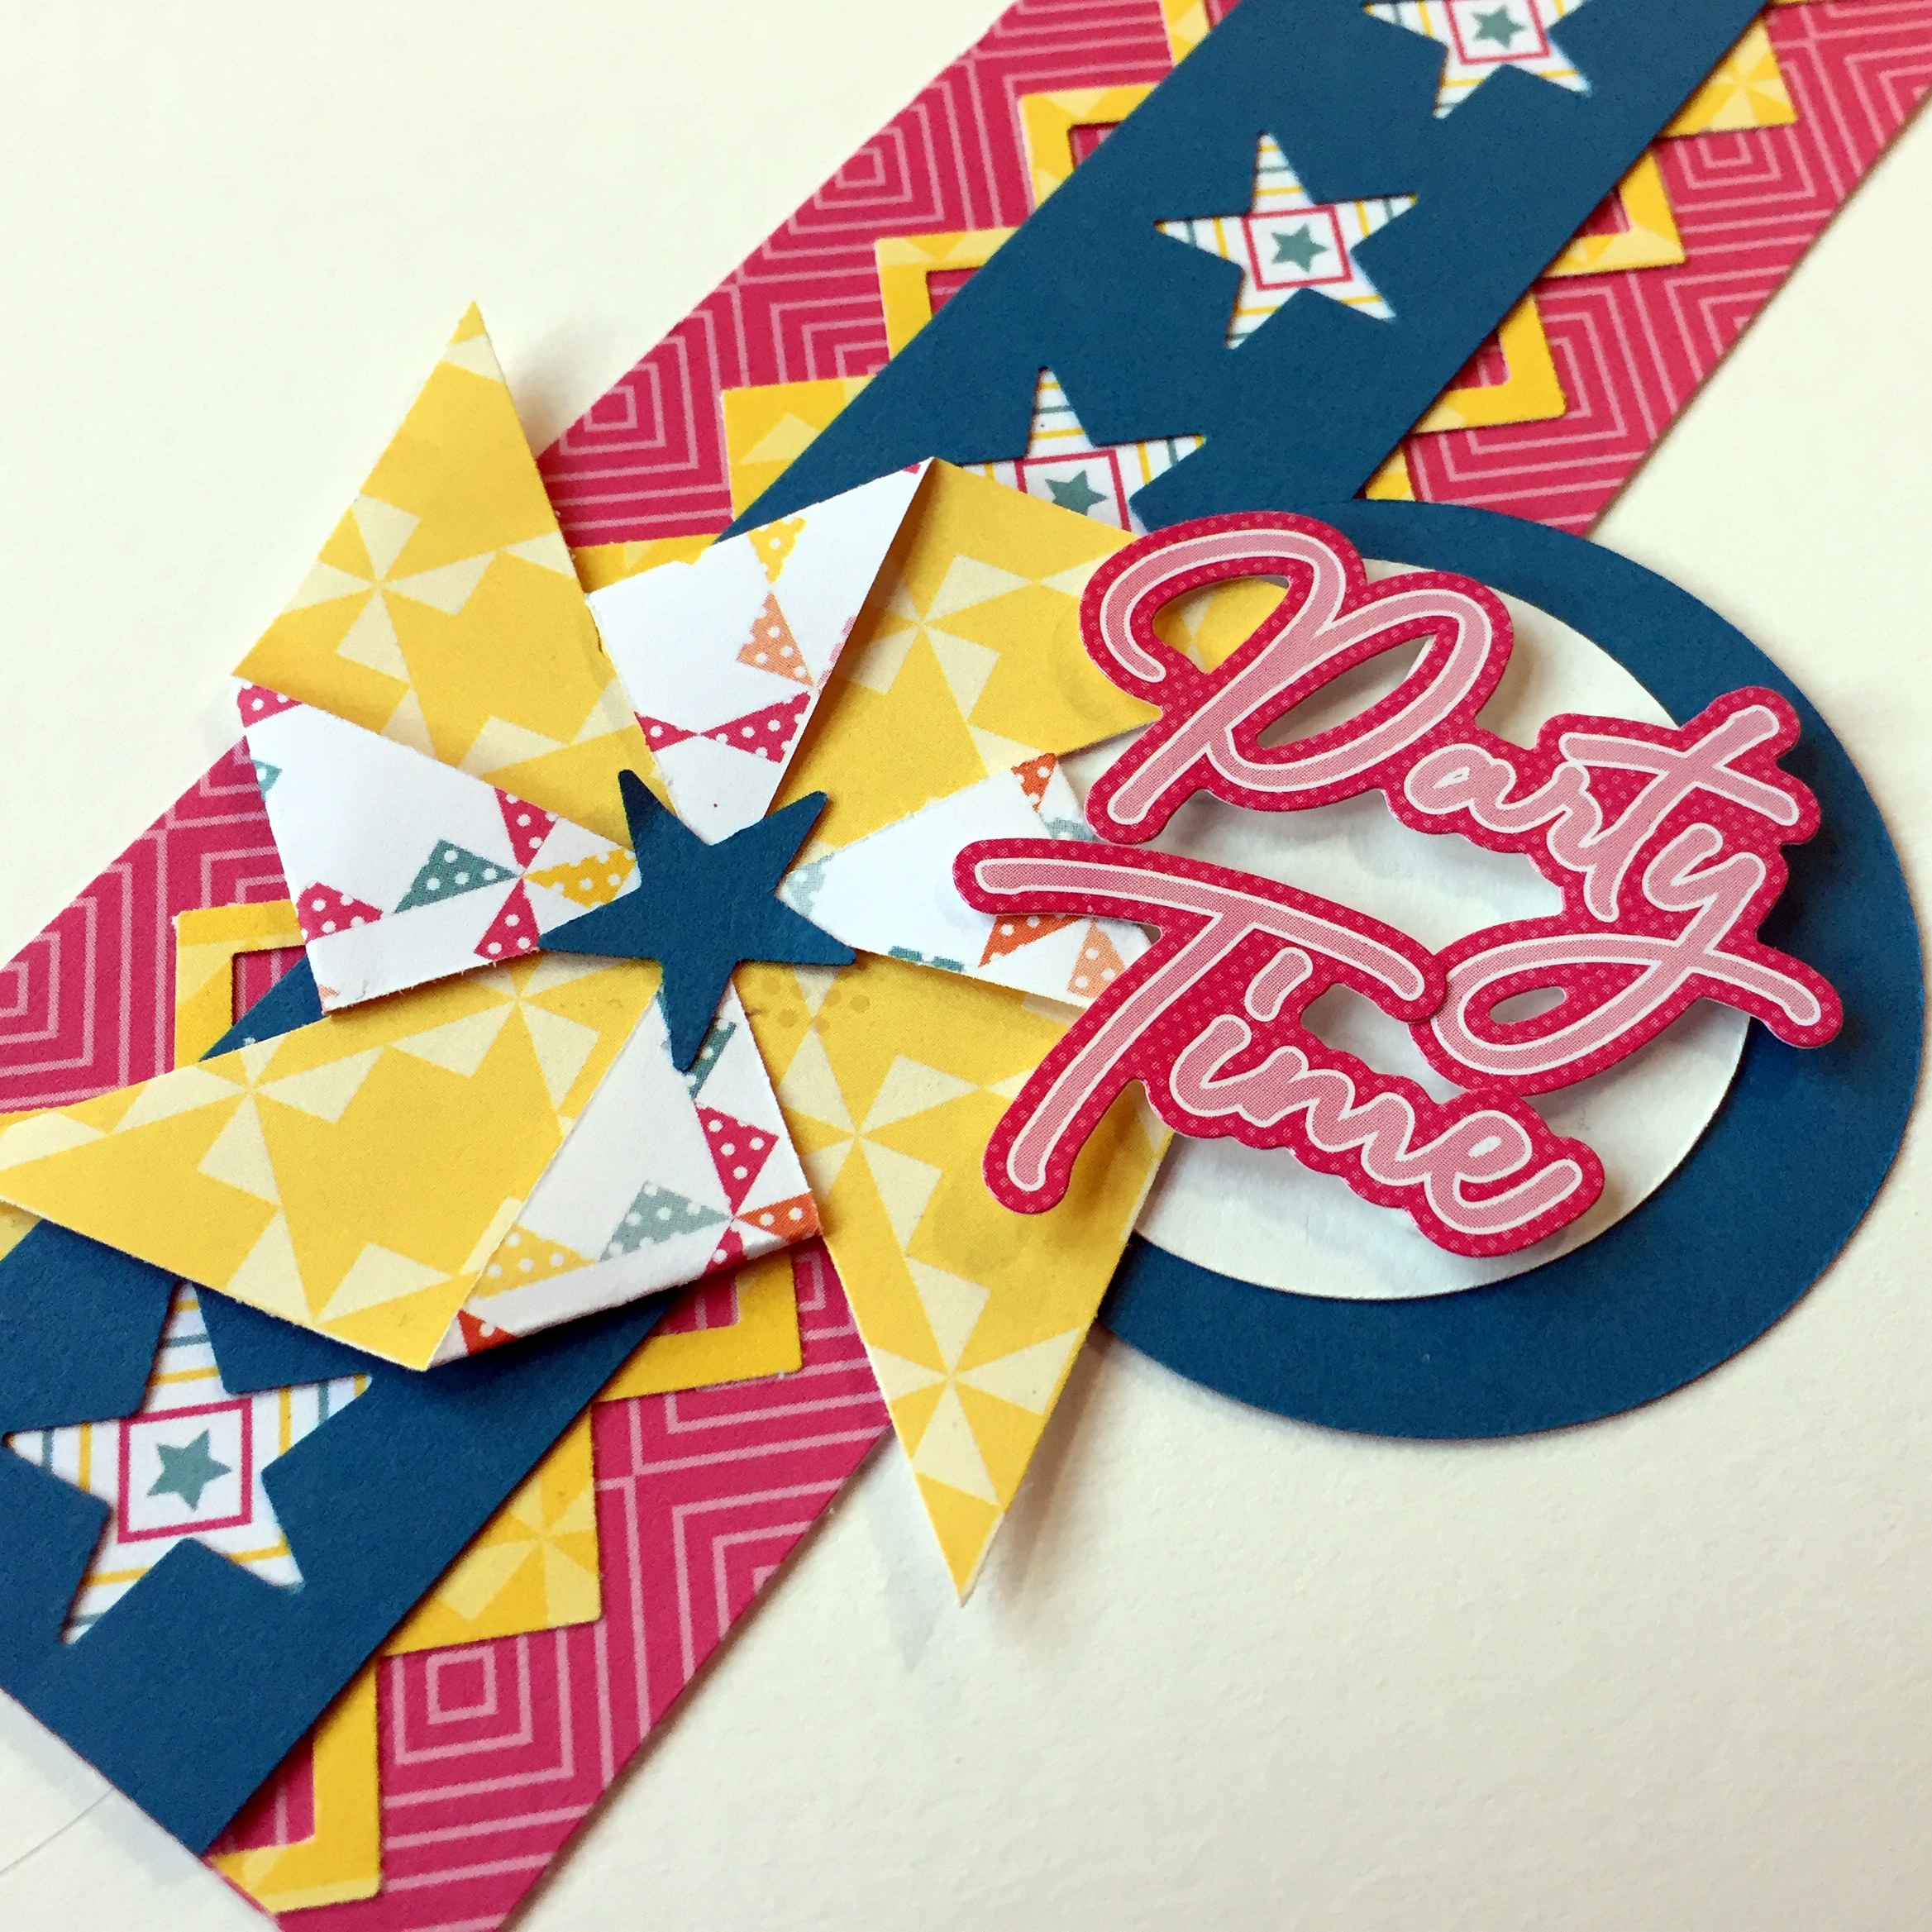

So, so cute! I really dig that little pinwheel. :-)
Love these! Wish I had more birthday pictures to use them with!
Dear Debbie,
These are really cute. I like them so much more than the borders I made. Do you have another pack of paper and 2 packs of stickers?…BArrie
So lively and colorful. So darling! Thanks for the ideas!
Love these borders! Just a tip . . . when you want to use a sticker with foam squares and raise it up, I like to get the sticky stuff off so I just dab the sticker (sticker side down) onto some baking soda on a dish and now the “sticker” is more like an embellishment!
I have so many photos I put on my pages, that borders are the best way to decorate! Thanks for sharing!