May 31, 2017
Scrapbooking Borders using the Doily Border Punch
Looking to add a fun, graphic “punch” to your pages? Try out the new Doily Border Punch! The doily shapes are nearly 1-1/4″ big and by themselves really accent a page. But add a few more of the fun papers and embellishments from several favorite Creative Memories collections, and they really pop!
To make these borders you’ll need:
- Doily Border Punch
- Original Border Maker System with Midnight Star Cartridge
- 12-inch Straight Trimmer
- 12-inch Decorative Trimmer
- Custom Cutting System with Circle Patterns
- Scissors
- 4-Way Corner and Hole Punch
- Tape Runner with Vellum and Repositionable Tape Runner Refill
- Foam Squares
- Made With Love Paper Pack
- Forever Yours Paper Pack, Vellum Paper Pack, Embellishments, Stickers and Laser Cut Embellishments
- Sorbet Paper Pack, Variety Mat Pack, Stickers and Embellishments
- Woodland Whimsy Baby Girl (or Boy) Paper Pack and Embellishments
- Black, Cranberry and Raspberry Cardstock

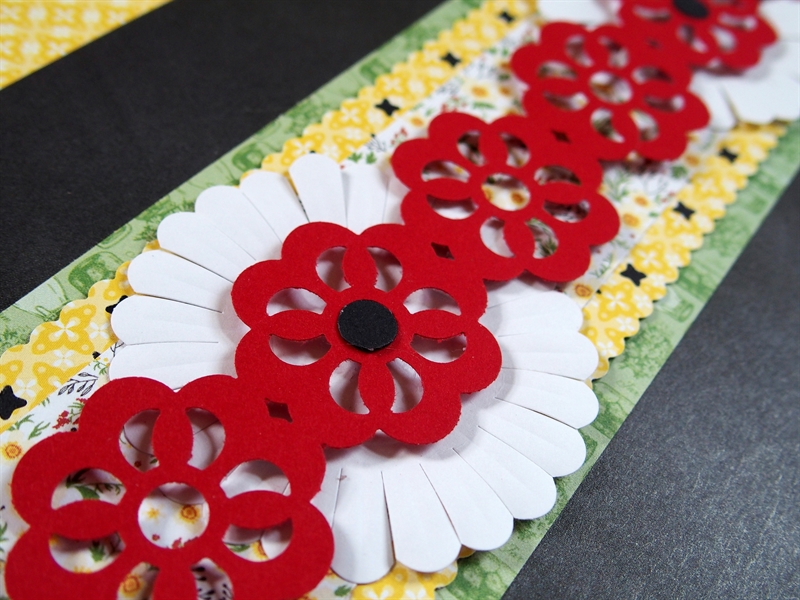
Made With Love Border
- Cut a 2-1/1″ x 12″ strip of green paper. Cut a 1-1/2″ x 12″ strip of daisies paper.
- Using the midnight star cartridge, punch two borders with yellow paper. Trim each and adhere a 1/4″ x 12″ strip of black cardstock to the back to show through “x” openings. Tuck between daisy and green strips as shown.
- Punch a doily border using cranberry cardstock, and again using black cardstock. (Save just three small center dots from the black border.) Trim off the last 1-1/2 doily shapes from cranberry border.
- Tuck three white daisy die cuts (from Forever Yours Embellishments) behind cranberry strip and attach to border. Attach cranberry border strip and black dots with small pieces of foam squares.
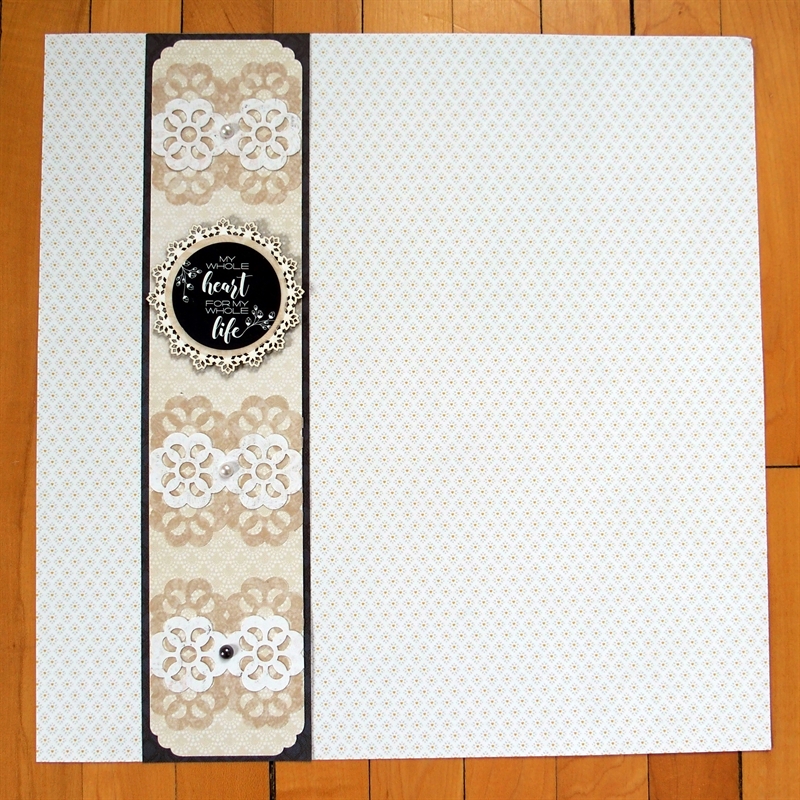

Forever Yours Border
- Cut a 2-3/4″ x 12″ strip of navy paper. Cut a 2-1/2″ x 11-3/4″ strip of beige scallops paper. Trim the corners with scalloped edge of 4-way corner & hole punch and adhere to navy border.
- Punch two doily borders with tan vellum paper and one with white newsprint paper. Cut apart every two shapes. Adhere two vellum pieces at the top, bottom and lower middle of border. Top each with one white newsprint piece, as shown. Add a pearl to each set.
- Cut a 2″ circle of tan vellum paper. Top with “My Whole Heart for my Whole Life” sticker” and add to laser cut circular shape. Add to border with foam squares.


Sorbet Border
- Line purple paper up at the 4″ mark on the decorative trimmer and cut a swell edge. Cut a 1-7/8″ x 11-3/4″ strip of yellow striped paper and add to border.
- Punch a doily border with both cranberry cardstock and light purple paper. Align purple on top of cranberry so that the little diamond cutouts from the cranberry show through the center dots of the purple doilies. Trim ends and add to border as shown.
- Punch doily shapes from scraps of cranberry cardstock and yellow and purple mats. Cut two 1″ circles of yellow and purple mat scraps to top the flowers. For the third flower, use the “Love it” sticker. Add to border, along with leaf embellishments.


Woodland Whimsy Borders
- Cut a 2-1/2″ x 12″ strip of plaid paper. Cut a 1-3/4″ x 12″ strip of white patterned paper and add to base.
- Punch a doily border with pink/orange paper. Trim off the last 1-1/2 doily shapes. Trim out the left and right edges of one to create bow/bow-tie. Add doily border to base.
- Adhere “darling”/”handsome” shape to arrow shape with foam squares. Attach bow/bow-tie to deer shape and add epoxy sticker to center. Add to border as shown.


Very nice!
These are great!!! Thanks for sharing.
Very nice! Love each of these – especially the little bows : )
Really like these!
Thank you! These are great!
thank for the great ideas. I am waiting for my doily punch maker to arrive. Should have it this weekend at our CM workshop weekend.
love these!!
Wow! I love them all! So much creativity in each and every one of the borders! Thanks, Krislyn!
I love these borders. I just need to order the supplies which I will probably due today
BEAUTIFUL IDEAS