August 30, 2017
Sun-Kissed Slice of Summer Layout
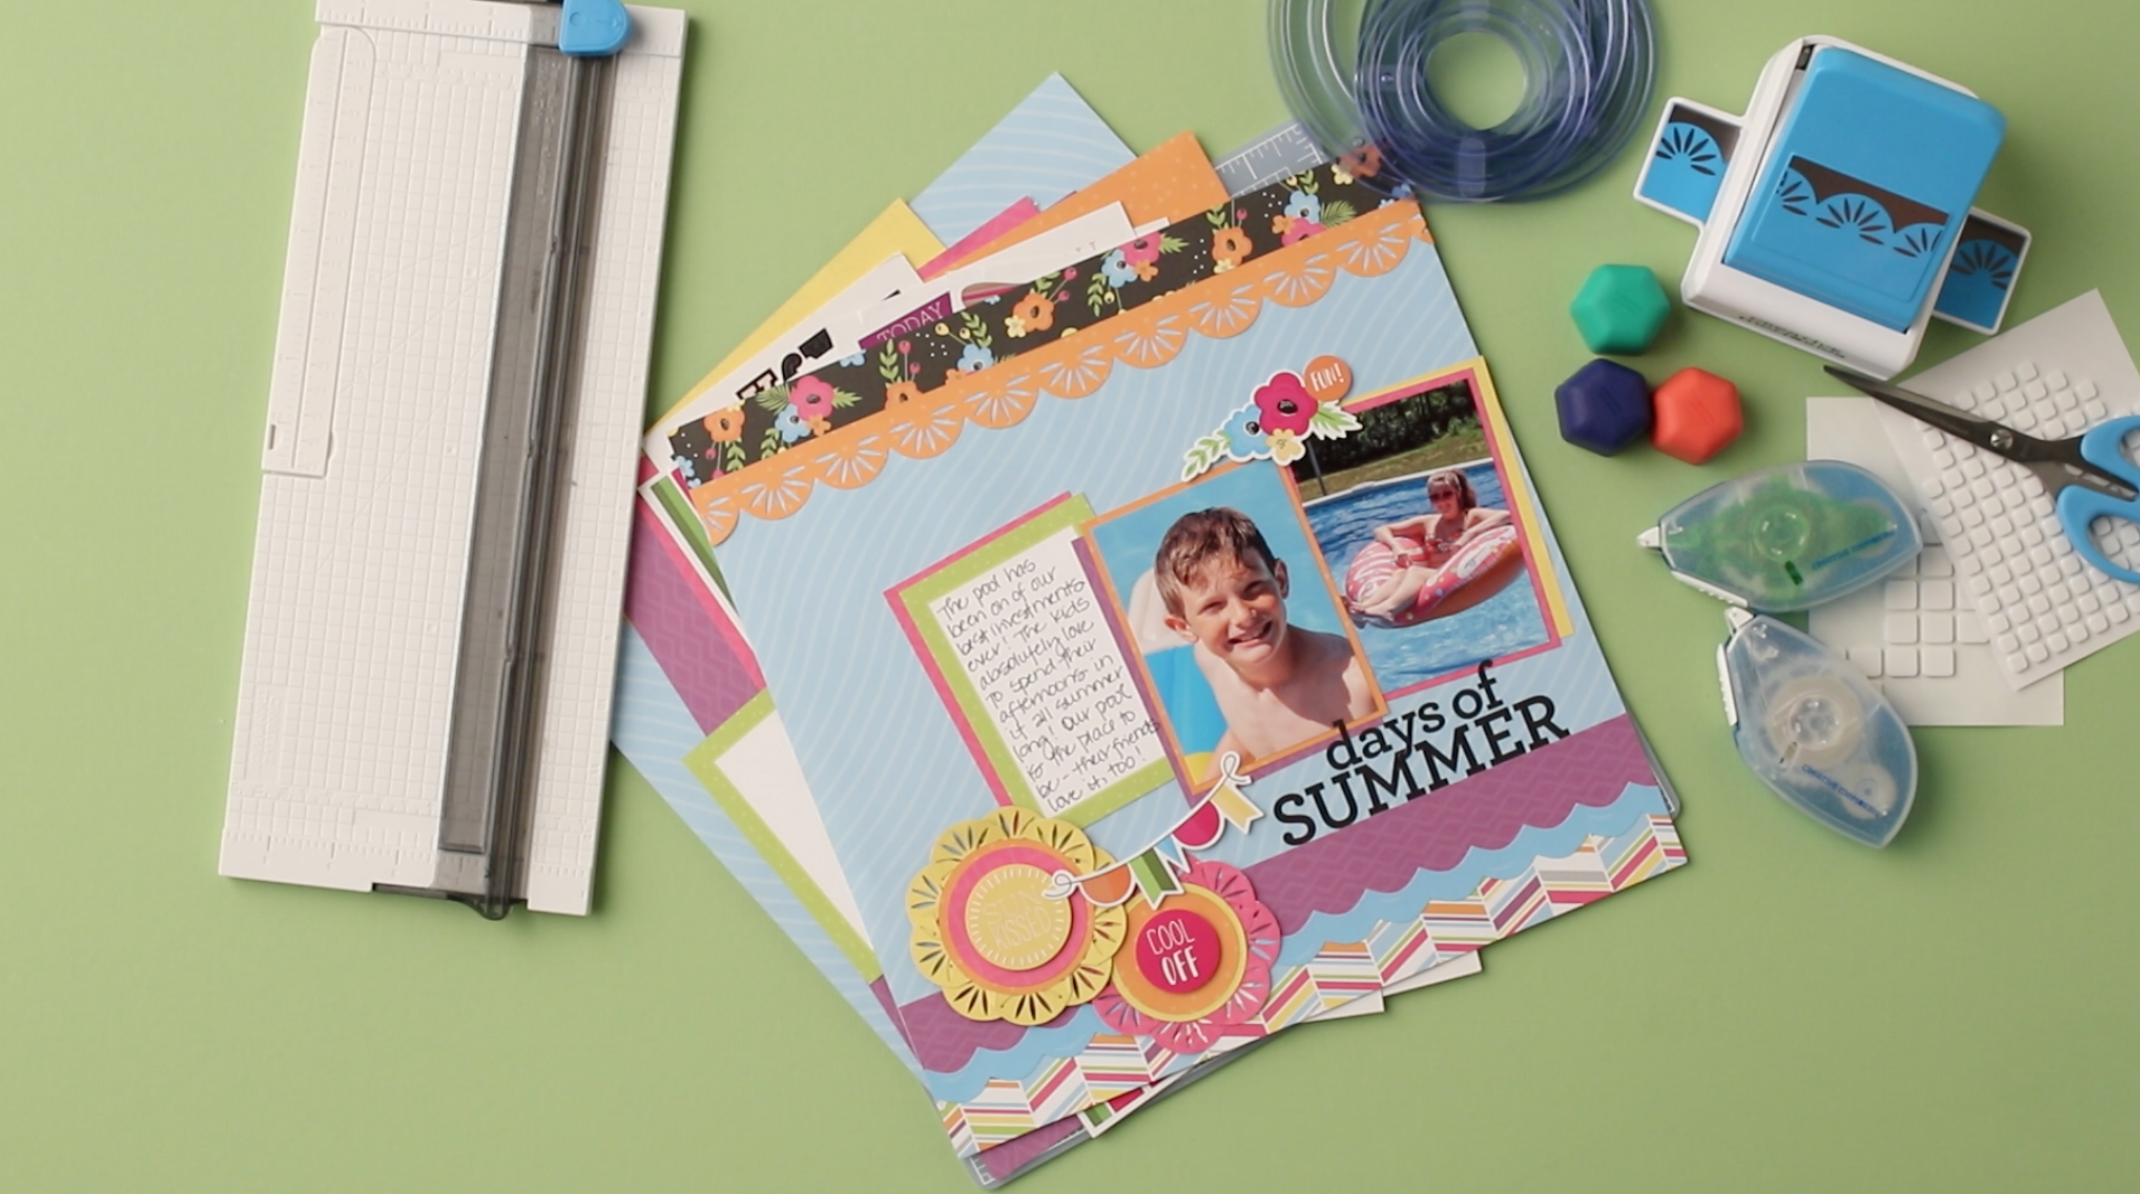
Typically the Labor Day weekend here in the states means that summer is coming to an abrupt end. It means floating in the pool one last time, or splashing in the lake. It means soaking up as much sun as you possibly can before the long winter hits.
Make sure that you remember to document all the summer’s memories–before it is gone. Did you take a vacation to the ocean? Or maybe just a weekend away to the cabin? Whatever it was, make sure you have it in your scrapbooks for years to come!
To create this layout, you will need:
- Slice of Summer Paper Pack
- Slice of Summer Stickers
- Slice of Summer Variety Mat Pack
- Scallop Burst Border Punch
- Custom Cutting System with Circle Patterns
- Scissors
- 12″ Straight Trimmer
- Black ABC/123 Stickers
- Repositionable Adhesive
- Tape Runner
- Foam Squares
Step 1: Use the blue patterned paper as the base of this layout.
Step 2: Cut a piece of the floral patterned paper to measure 12″ x 1″. Adhere to the top edge of the layout.
Step 3: Cut a piece of the striped pattern paper to measure 12″ x 1″. Adhere to the bottom edge of the layout.
Step 4: Cut a piece from the purple paper to measure 12″ x 1-1/2″. Adhere just above the striped paper.
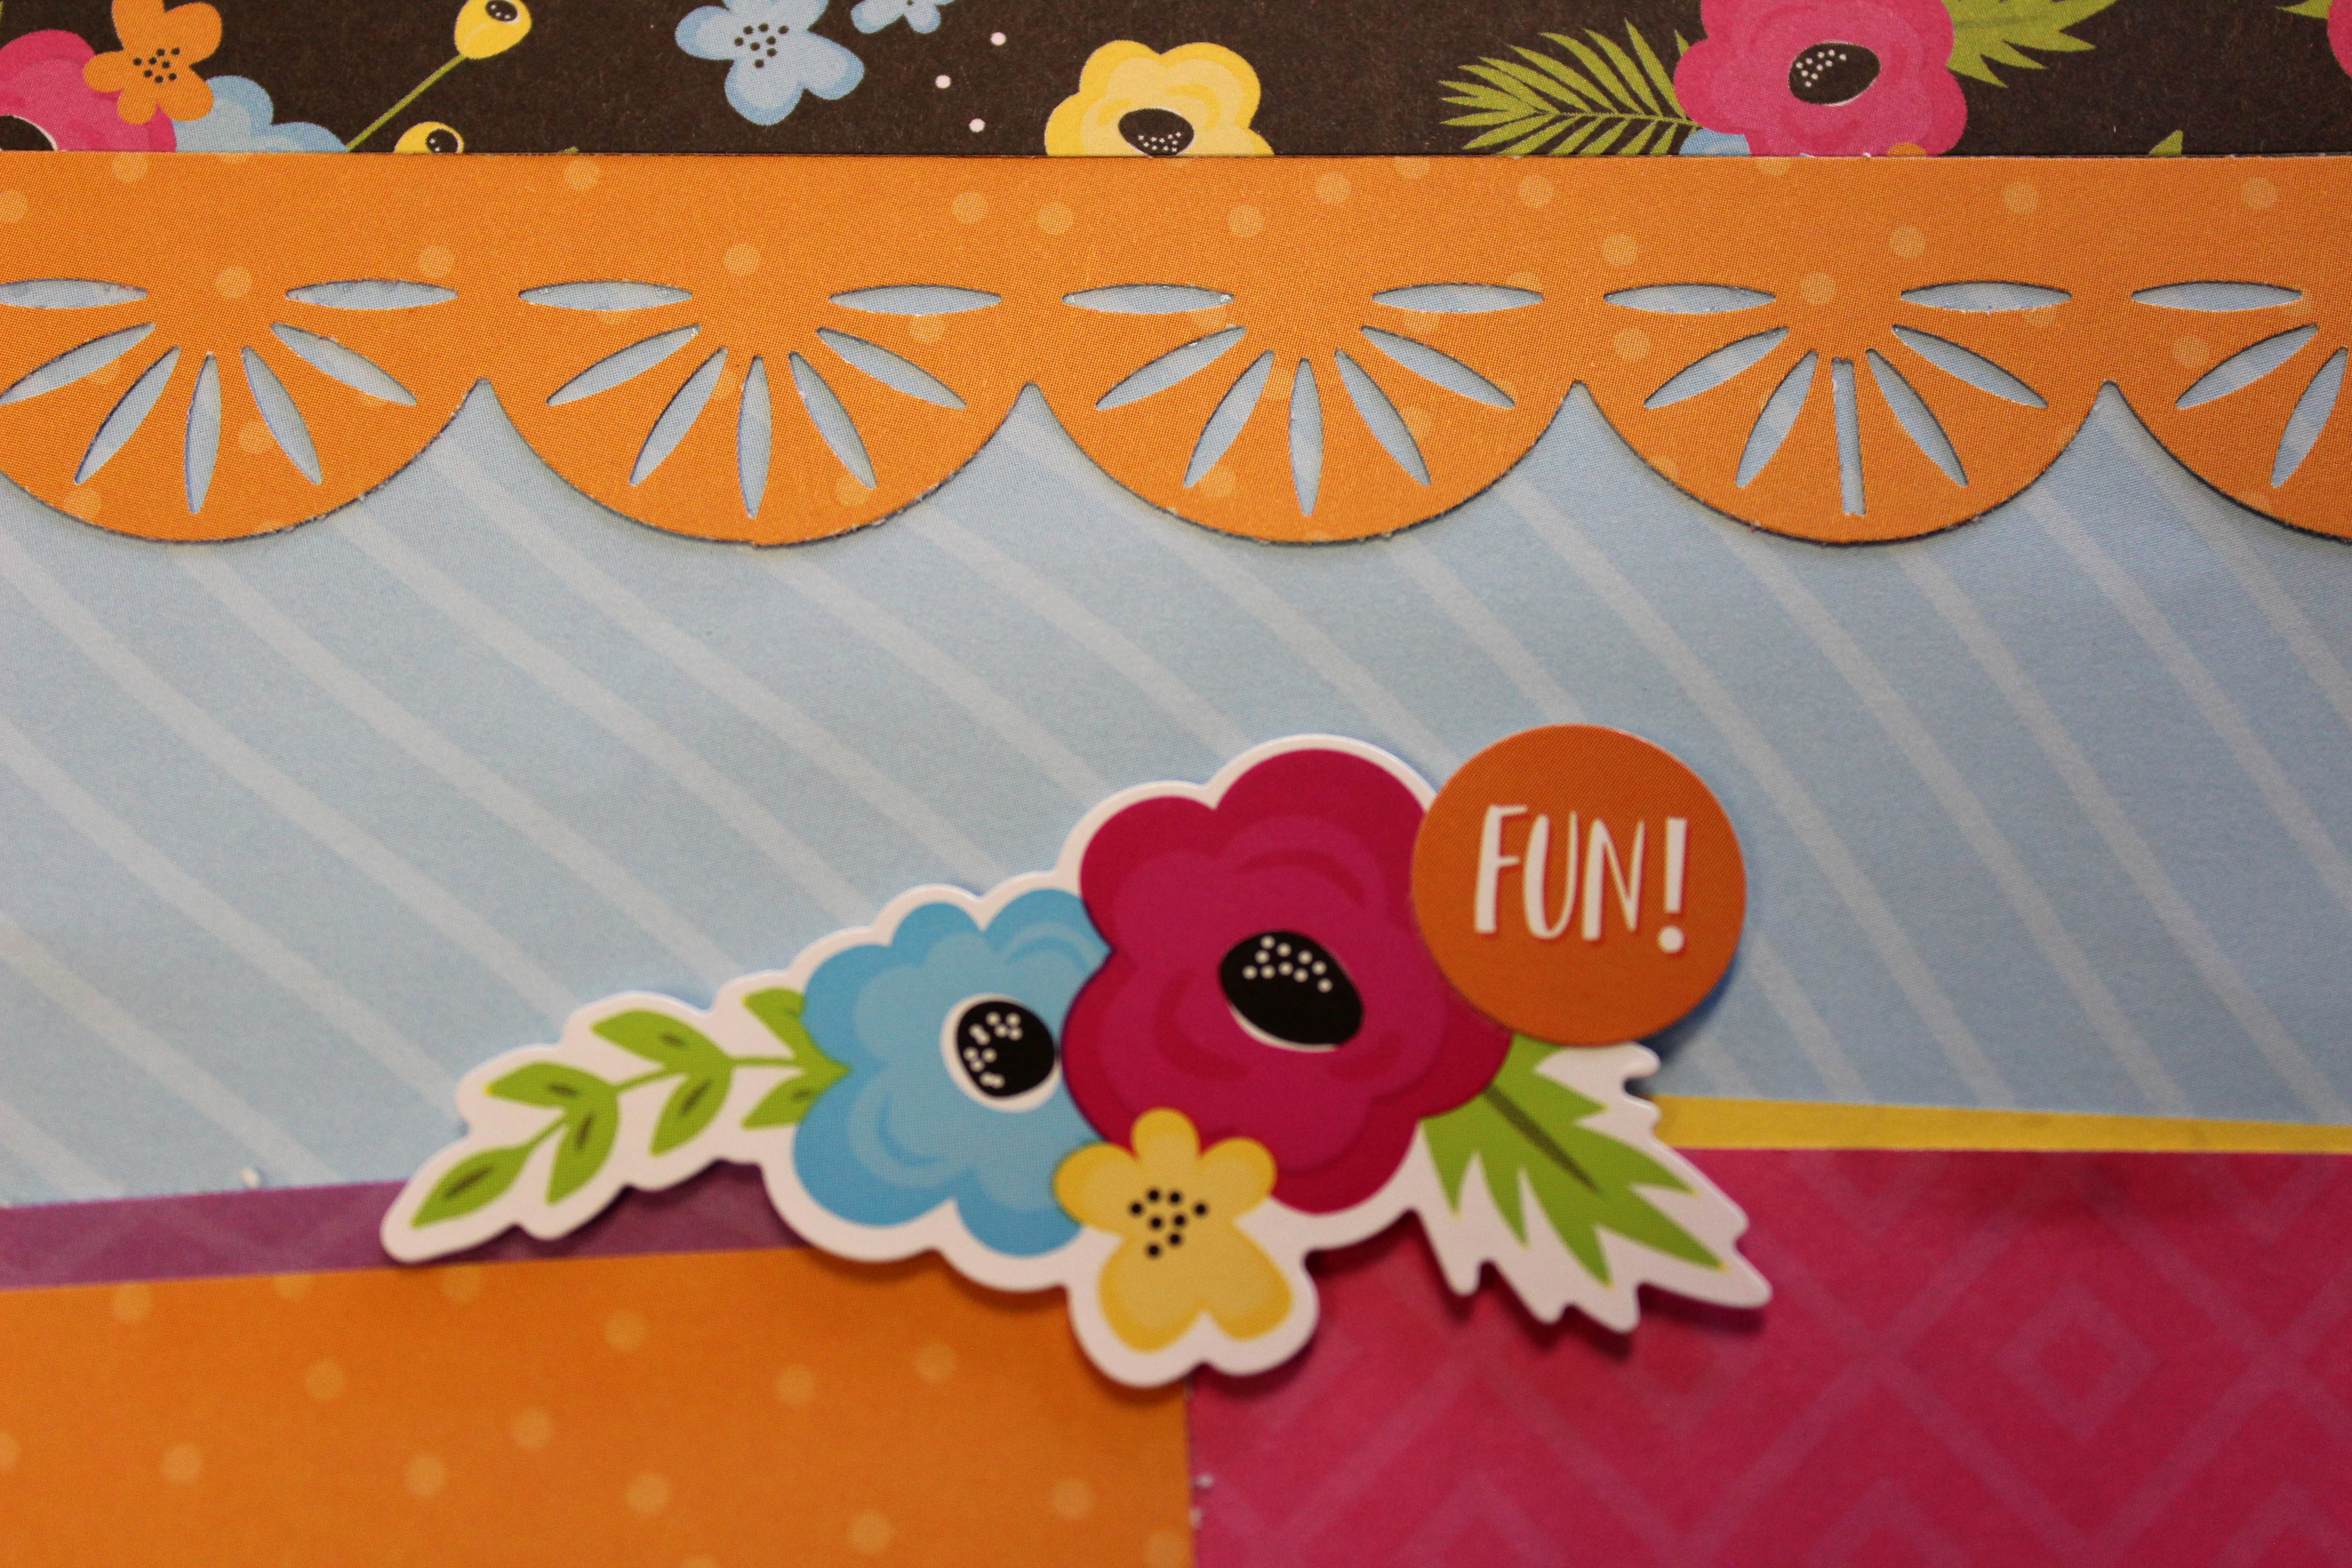
Step 5: Using the Scallop Burst Border Punch, punch along the edge of the orange paper. Cut this piece to measure 1″ wide. Adhere along the bottom edge of the floral paper using the Repositionable Adhesive.
Step 6: Cut the mat from the Variety Mat Pack in half to measure 3-1/4″ x 4-1/2″.
Step 7: Cut five pieces of patterned paper to measure 3-1/4″ x 4-1/2″.
Step 8: Using the Scallop Burst Border Punch, punch two borders along the pink patterned paper. Using your 12″ Trimmer, cut them to measure 1″ wide.
Step 9: Using the Scallop Burst Border Punch, punch two borders along the yellow patterned paper. Using your 12″ Trimmer, cut them to measure 1″ wide.
Step 10: Using the green blade cut a circle from the inside of the medium Custom Cutting Circle pattern, with the yellow paper.
Step 11: Using the red and blue blades cut a circle from each blade on the inside of the medium Custom Cutting Circle pattern, with the orange paper.
Step 12: Using the green blade cut a circle from the inside of the medium Custom Cutting Circle pattern, with the pink paper.
Using your scissors, you are going to snip in between each scallop on the borders. Adhere the scallop burst borders behind the two larger circles.
Layer your circles as shown. Adhere stickers to the center of the circles. Adhere to the layout.

Adhere wave border sticker to the layout.
Adhere the 3-1/4″ x 4-1/2″ papers to the layout.
Adhere ABC and icon stickers to the layout.
Adhere photos and journal as desired.
Happy Creating!


To whom it may concern, I’ve been looking for the border that was made by using the ocean wave cartridge and the scallop with holes cartridge. The wave formed a heart. I was sure I had saved it but now I can’t find it anywhere. Thank you in advance for your assistance.brenda_s_perkins@yahoo.com.
Love all the layers! Such a great layout!
[…] to re-create them! We’ve got one for you today that you’ll love… it’s a Slice of Summer layout that was featured on the blog last August, and this time we’ve created it using Sun-Kissed! So, as the sun continues to beat down and […]