July 19, 2018
#ThrowbackThursday – Sun-Kissed/Slice of Summer Scrapbook Layout

Have you had a great summer full of fun memories and want to make a summer scrapbook that does them justice? As we enter the end of July, now is the perfect time to look back at some of the past scrapbook layouts for summer that we’ve created and do a #ThrowbackThursday to re-create them! We’ve got one for you today that you’ll love… it’s a Slice of Summer layout that was featured on the blog last August, and this time we’ve created it using Sun-Kissed! So, as the sun continues to beat down and make the outdoors feel like the inside of an oven, now might be a great time to keep cool in your craft room and revisit the layout to make one (or a few!) for all of the summer memories you’ve made in 2018.
The Sketch:
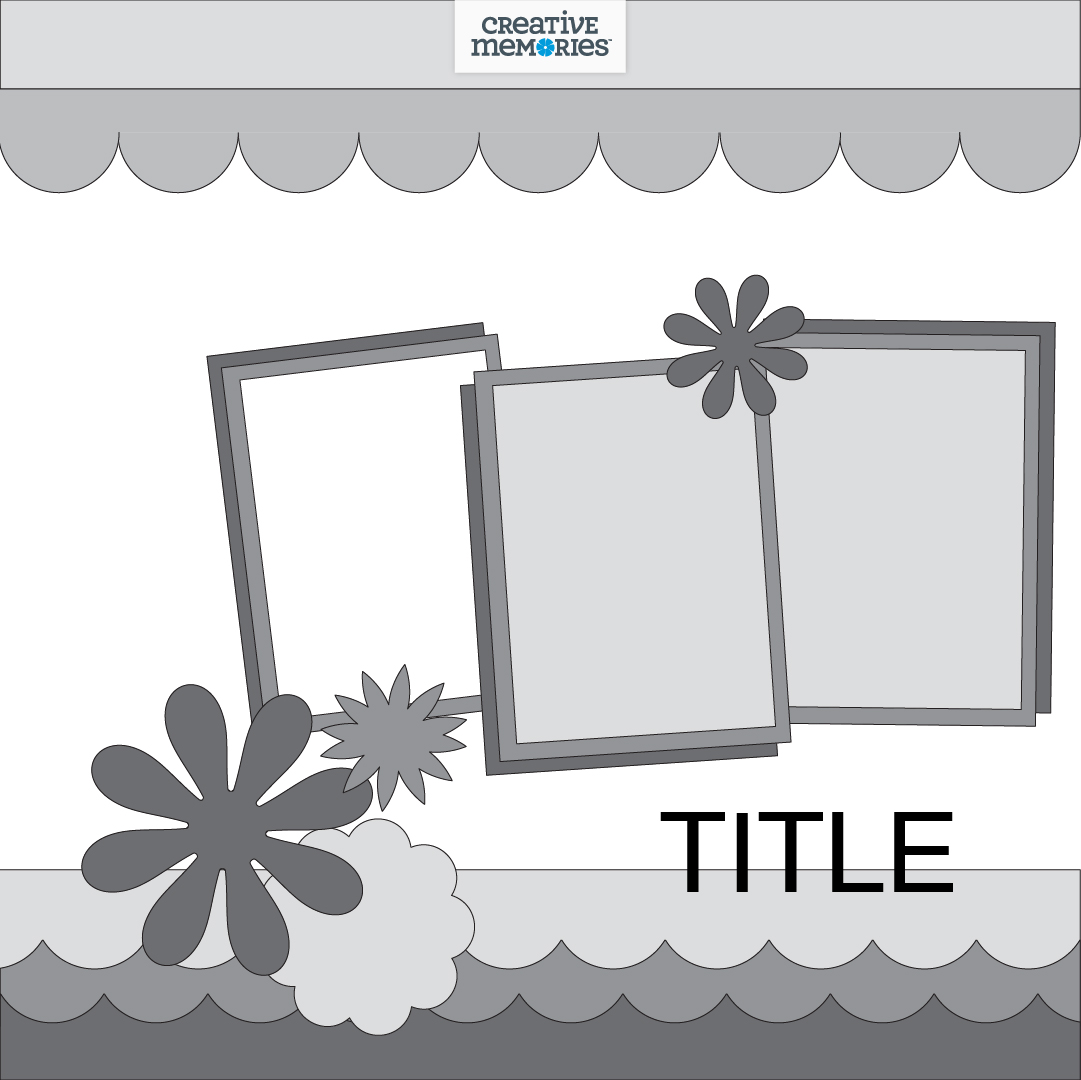
The Sketch as a Slice of Summer Layout:

Directions for this summer layout can be found here.
Blog Contributor Meggan’s Inspiration:
Sun-Kissed is a gorgeous collection – the Creative Memories designers really outdid themselves this time. I love the colors and the textures of the patterned paper and the stickers and embellishments are unbelievably cute. The new Rolling Waves Border Maker Cartridge? Absolute perfection!
One thing I love about scrapbooking is revisiting moments and memories from the past. My oldest son is rapidly approaching fifteen and is an often-surly teenager who is eager to express his independence. However, when I dove into these pictures of when he played in the ocean for the first time as a six-year-old, I was taken back to the days when he was still happy to hold my hand.
The Sketch as a Sun-Kissed Layout:
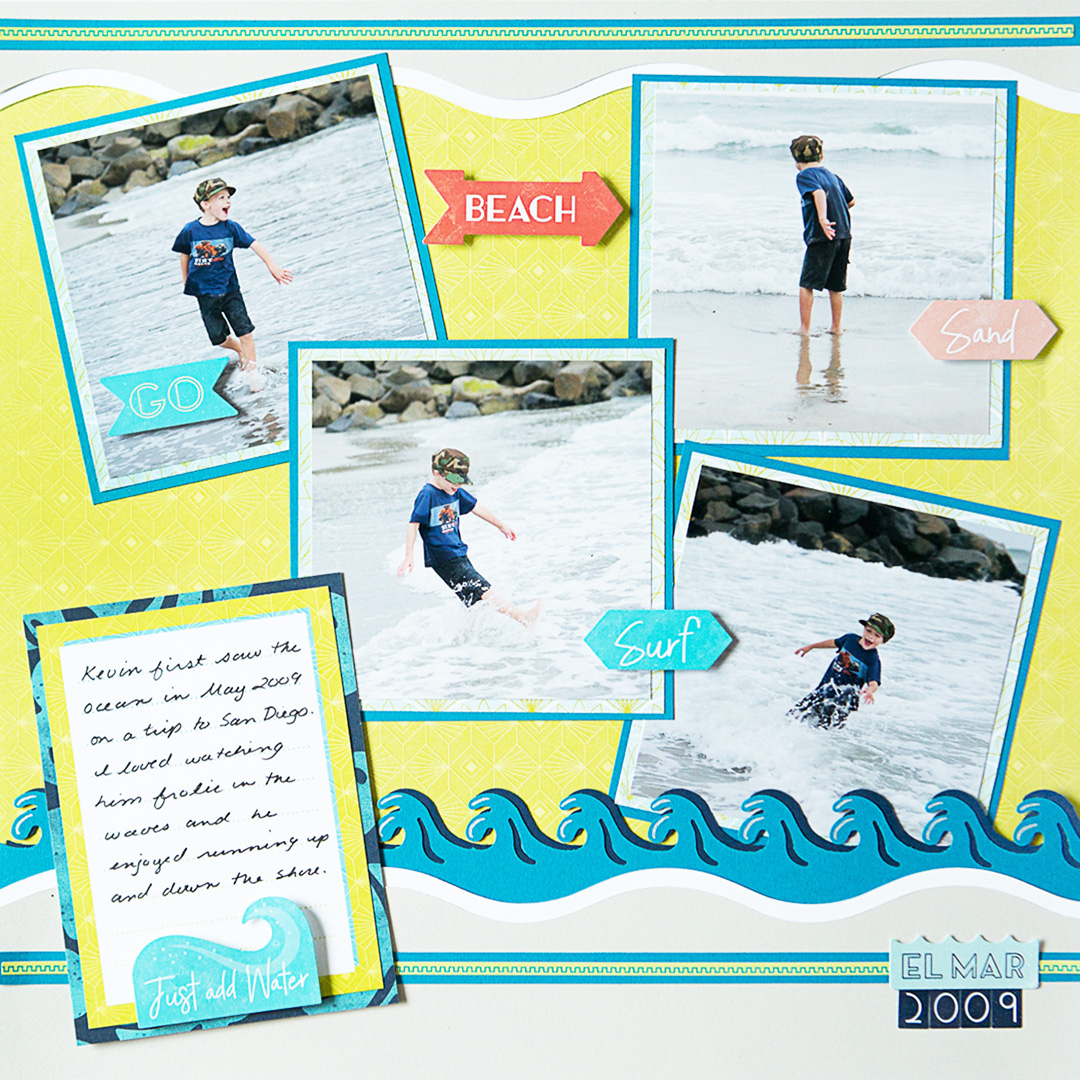
For this layout, the sketch featured two images and a journaling box, but I had WAY more pictures than just two of my boy frolicking in the waves, so I picked four of my favorites, trimmed them to squares and used the journal box to take the place of the title decoration of the sketch. Just like the sketch, however, I kept a top and bottom border, using the Rolling Waves Border Maker Cartridge and the Decorative Trimmer to give a hint of sand and sea. I finished off the page with some of the adorable stickers using Foam Squares to add dimension.
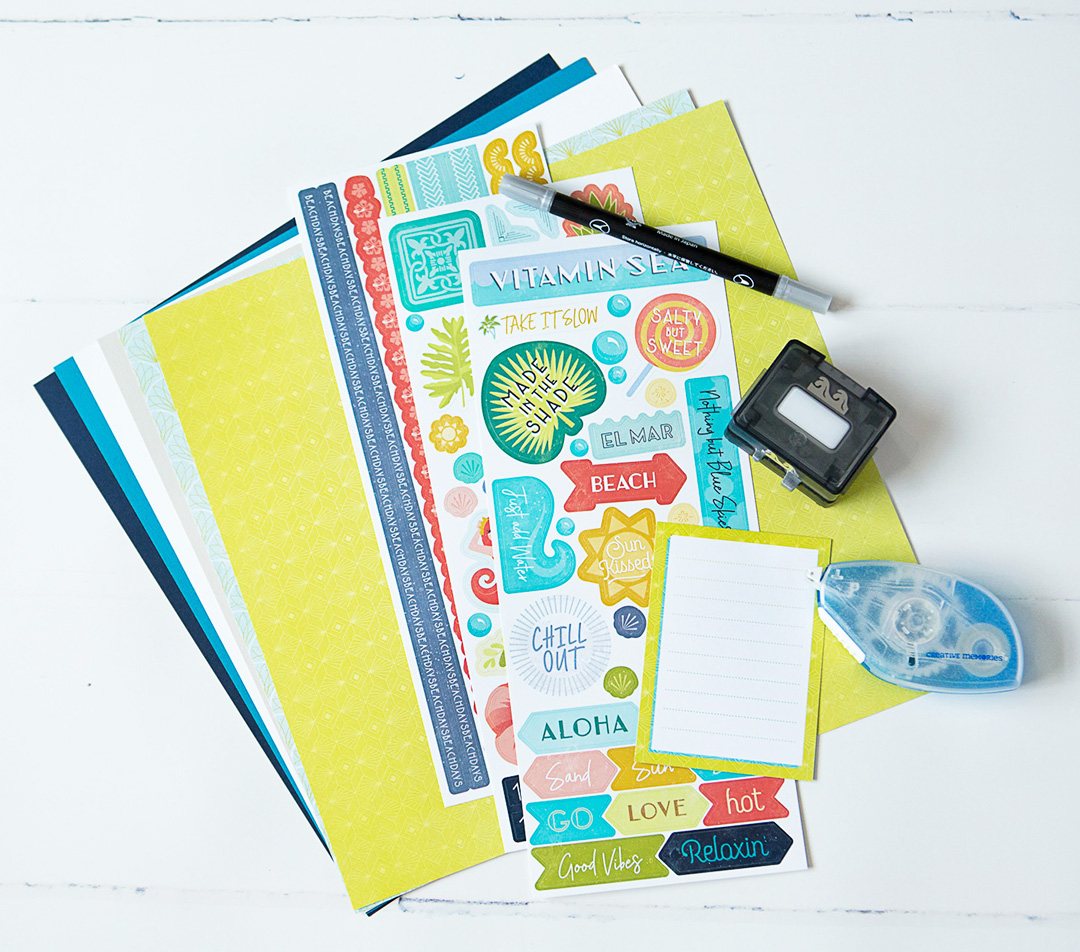
What You’ll Need to Create This Layout:
- Sun-Kissed Paper Pack
- Sun-Kissed Stickers
- Sun-Kissed Variety Mat Pack
- Cardstock: Beige, Navy, Peacock, White
- 12-inch Straight Trimmer
- 12-inch Decorative Trimmer
- Original Border Maker System with the Rolling Waves Border Cartridge
- Tape Runner
- Foam Squares
- Black Dual-Tip Pen
- Silver Metallic Dual-Tip Pen

Step 1: Use the lime green patterned paper for the base for this layout.
Step 2: Using the 12-inch Decorative Trimmer, cut a 1″ x 12″ wave and 2″ x 12″ wave from Beige Cardstock; using White Cardstock, cut a 1-1/4″ x 12″ and 2-1/4″ x 12″ wave. Adhere the beige wave on top of the white wave, allowing the white to show through by about 1/4 inch.
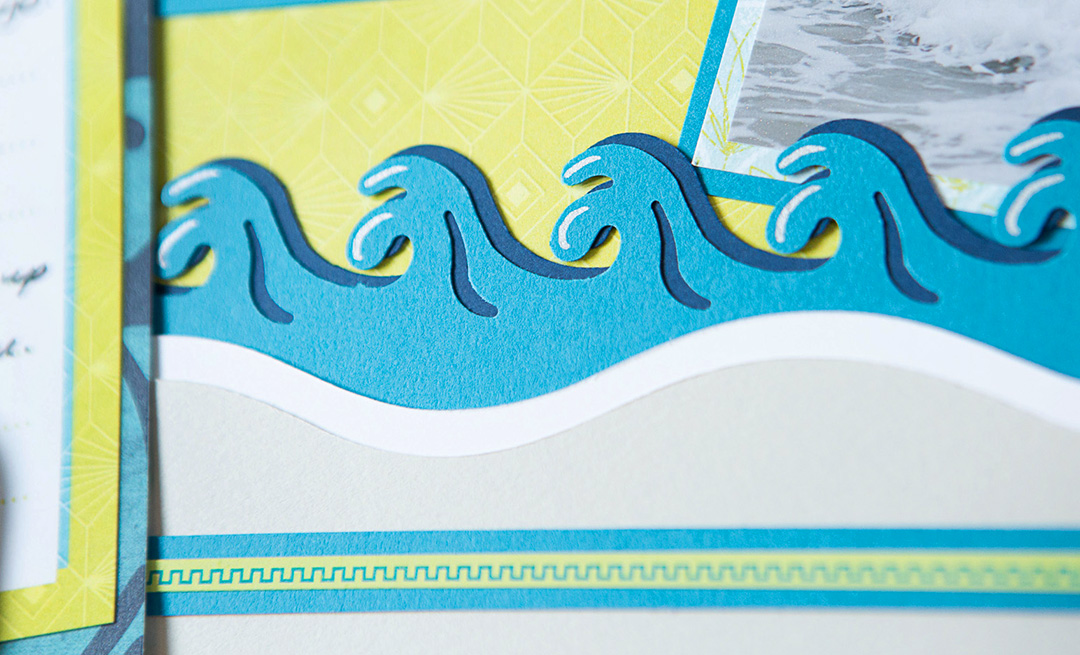
Step 3: Using the Border Maker System and the Rolling Waves Border Maker Cartridge, punch a border with Peacock and Navy Cardstock. Use the fine-tip end of the Silver Metallic Dual-Tip Pen to make highlights on the peacock wave border.
Step 4: Trim both wave borders to 1-1/2″ x 12″. Adhere the navy wave border to the back of the peacock border. Offset slightly (1/16″ or so) to give the effect of a shadow. Then, adhere the larger Beige/White Cardstock piece to the top of the rolling wave border.
Step 5: Use the 12-inch Straight Trimmer to cut two 3/8″ x 12″ strips of Peacock Cardstock. Use the green and blue border stickers and affix to the center of each strip. Adhere one to the smaller Beige/White Cardstock wave and one to the larger wave as shown in the final image.
Step 6: Use the 12-inch Straight Trimmer to cut out four 4-1/4″ x 4-1/4″ square photo mats from Peacock Cardstock. Then, cut another four mats to measure 4″ x 4″ from the blue patterned designer paper. Trim four photos to measure 3-3/4″ x 3-3/4″. Mount the photos to the light blue paper, then mount a second time to the Peacock Cardstock for a double mat.
Step 7: Select a mat with a journaling box from the Variety Mat Pack and trim in half. Then, trim the large tropical leaf mat to measure 3-5/8″ x 4-7/8″.
Step 8: Adhere the smaller beige/white wave border to the top of the base sheet and the larger border to the bottom of the base. Note: Keep adhesive away from the top of the wave border so that you can tuck a photo underneath.
Step 9: Arrange and adhere the photos on the page, overlapping and rotating images to achieve a pleasing arrangement.
Step 10: Adhere the journaling box to the lower left of the page and journal as desired.


Step 11: Add additional stickers and embellishments as desired, using Foam Squares on some for added dimension.
Summer memories are usually some of the happiest – make sure you’re doing all your summertime photos justice by putting them in a layout where they can shine like the sun! By using this scrapbook layout idea for summer, you can create pages so true to the season that you can practically feel the sand between your toes as you look at them.
What types of summertime memories do you fill up your scrapbooks with? Comment below!

Really cute layout for the challenge. But do we have to wait for Thursdays to see more great ideas? :-D
[…] Want to create the Sun-Kissed layout shown above? Get instructions now! […]