September 22, 2017
Countryside Comfort Scrapbooking Borders
Moving into a new home in a new city a few weeks ago, I was really excited, but I felt a bit out of my element, a little anxious. Stacks of boxes from floor to ceiling, furniture that didn’t fit the same way it did in our last home…it was overwhelming.
But little by little, one box at a time, one room at a time, our new house is taking shape. I’ve been appreciating the cozy nooks I’ve discovered, the way a framed picture looks in just the right spot…it feels like home. And my anxiousness is giving way to contentment.
Taking a break to work on these borders has been comfort and joy rolled into one! The colors, sentiments and designs of the Countryside Comfort Collection fit perfectly with my new sense of home and the changing seasons. Just like finding a new perfect spot for a favorite picture, discovering a new way to layer favorite punches with beautiful new papers is pure bliss…feels like home.
To make these borders you’ll need:
- Countryside Comfort Paper Pack, Variety Mat Pack, Vellum Paper & Stickers
- Everyday Sentiments Laser Cut Embellishments
- White Cardstock
- Original Border Maker System with Lac Flower Chain, Dancing Daisies & Scallop Dot Cartridges
- Scallop Burst Border Punch
- Victorian Fence Border Punch
- Leaf Trio Punch
- Maple Leaf Punch
- 12-inch Straight Trimmer
- 12-inch Decorative Trimmer
- Tape Runner with Repositionable and Vellum Refills
- Foam Squares
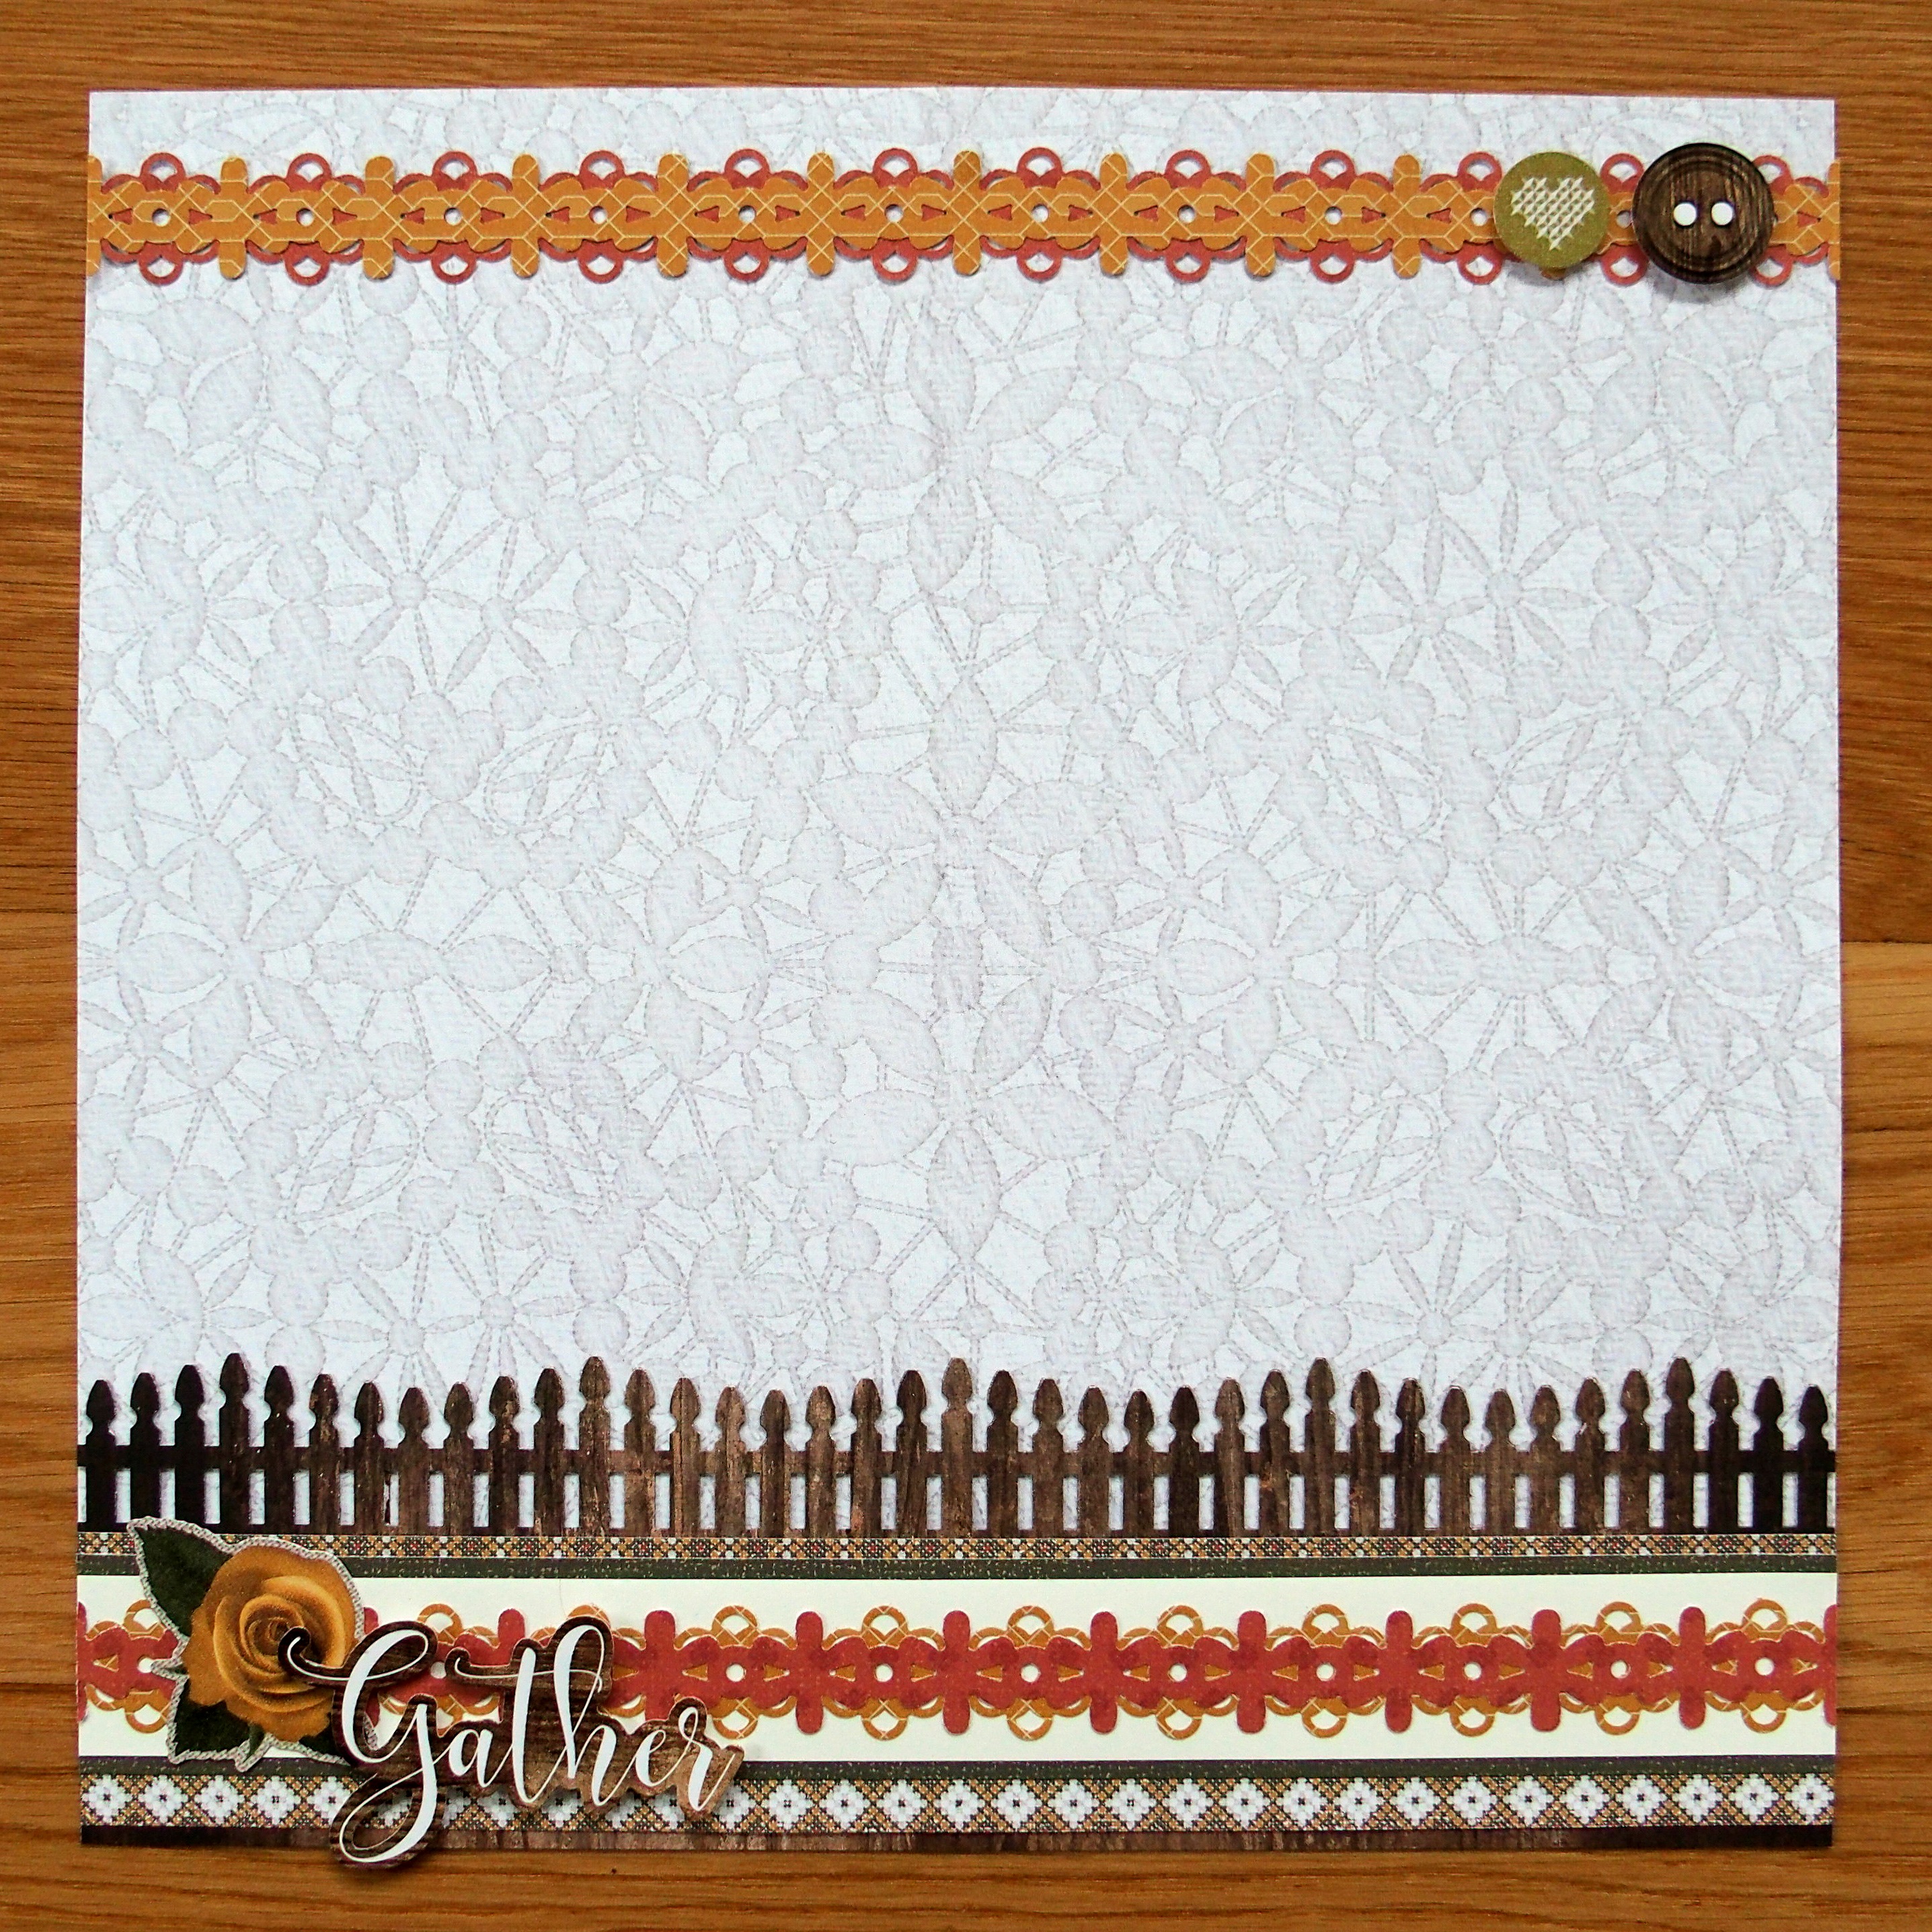
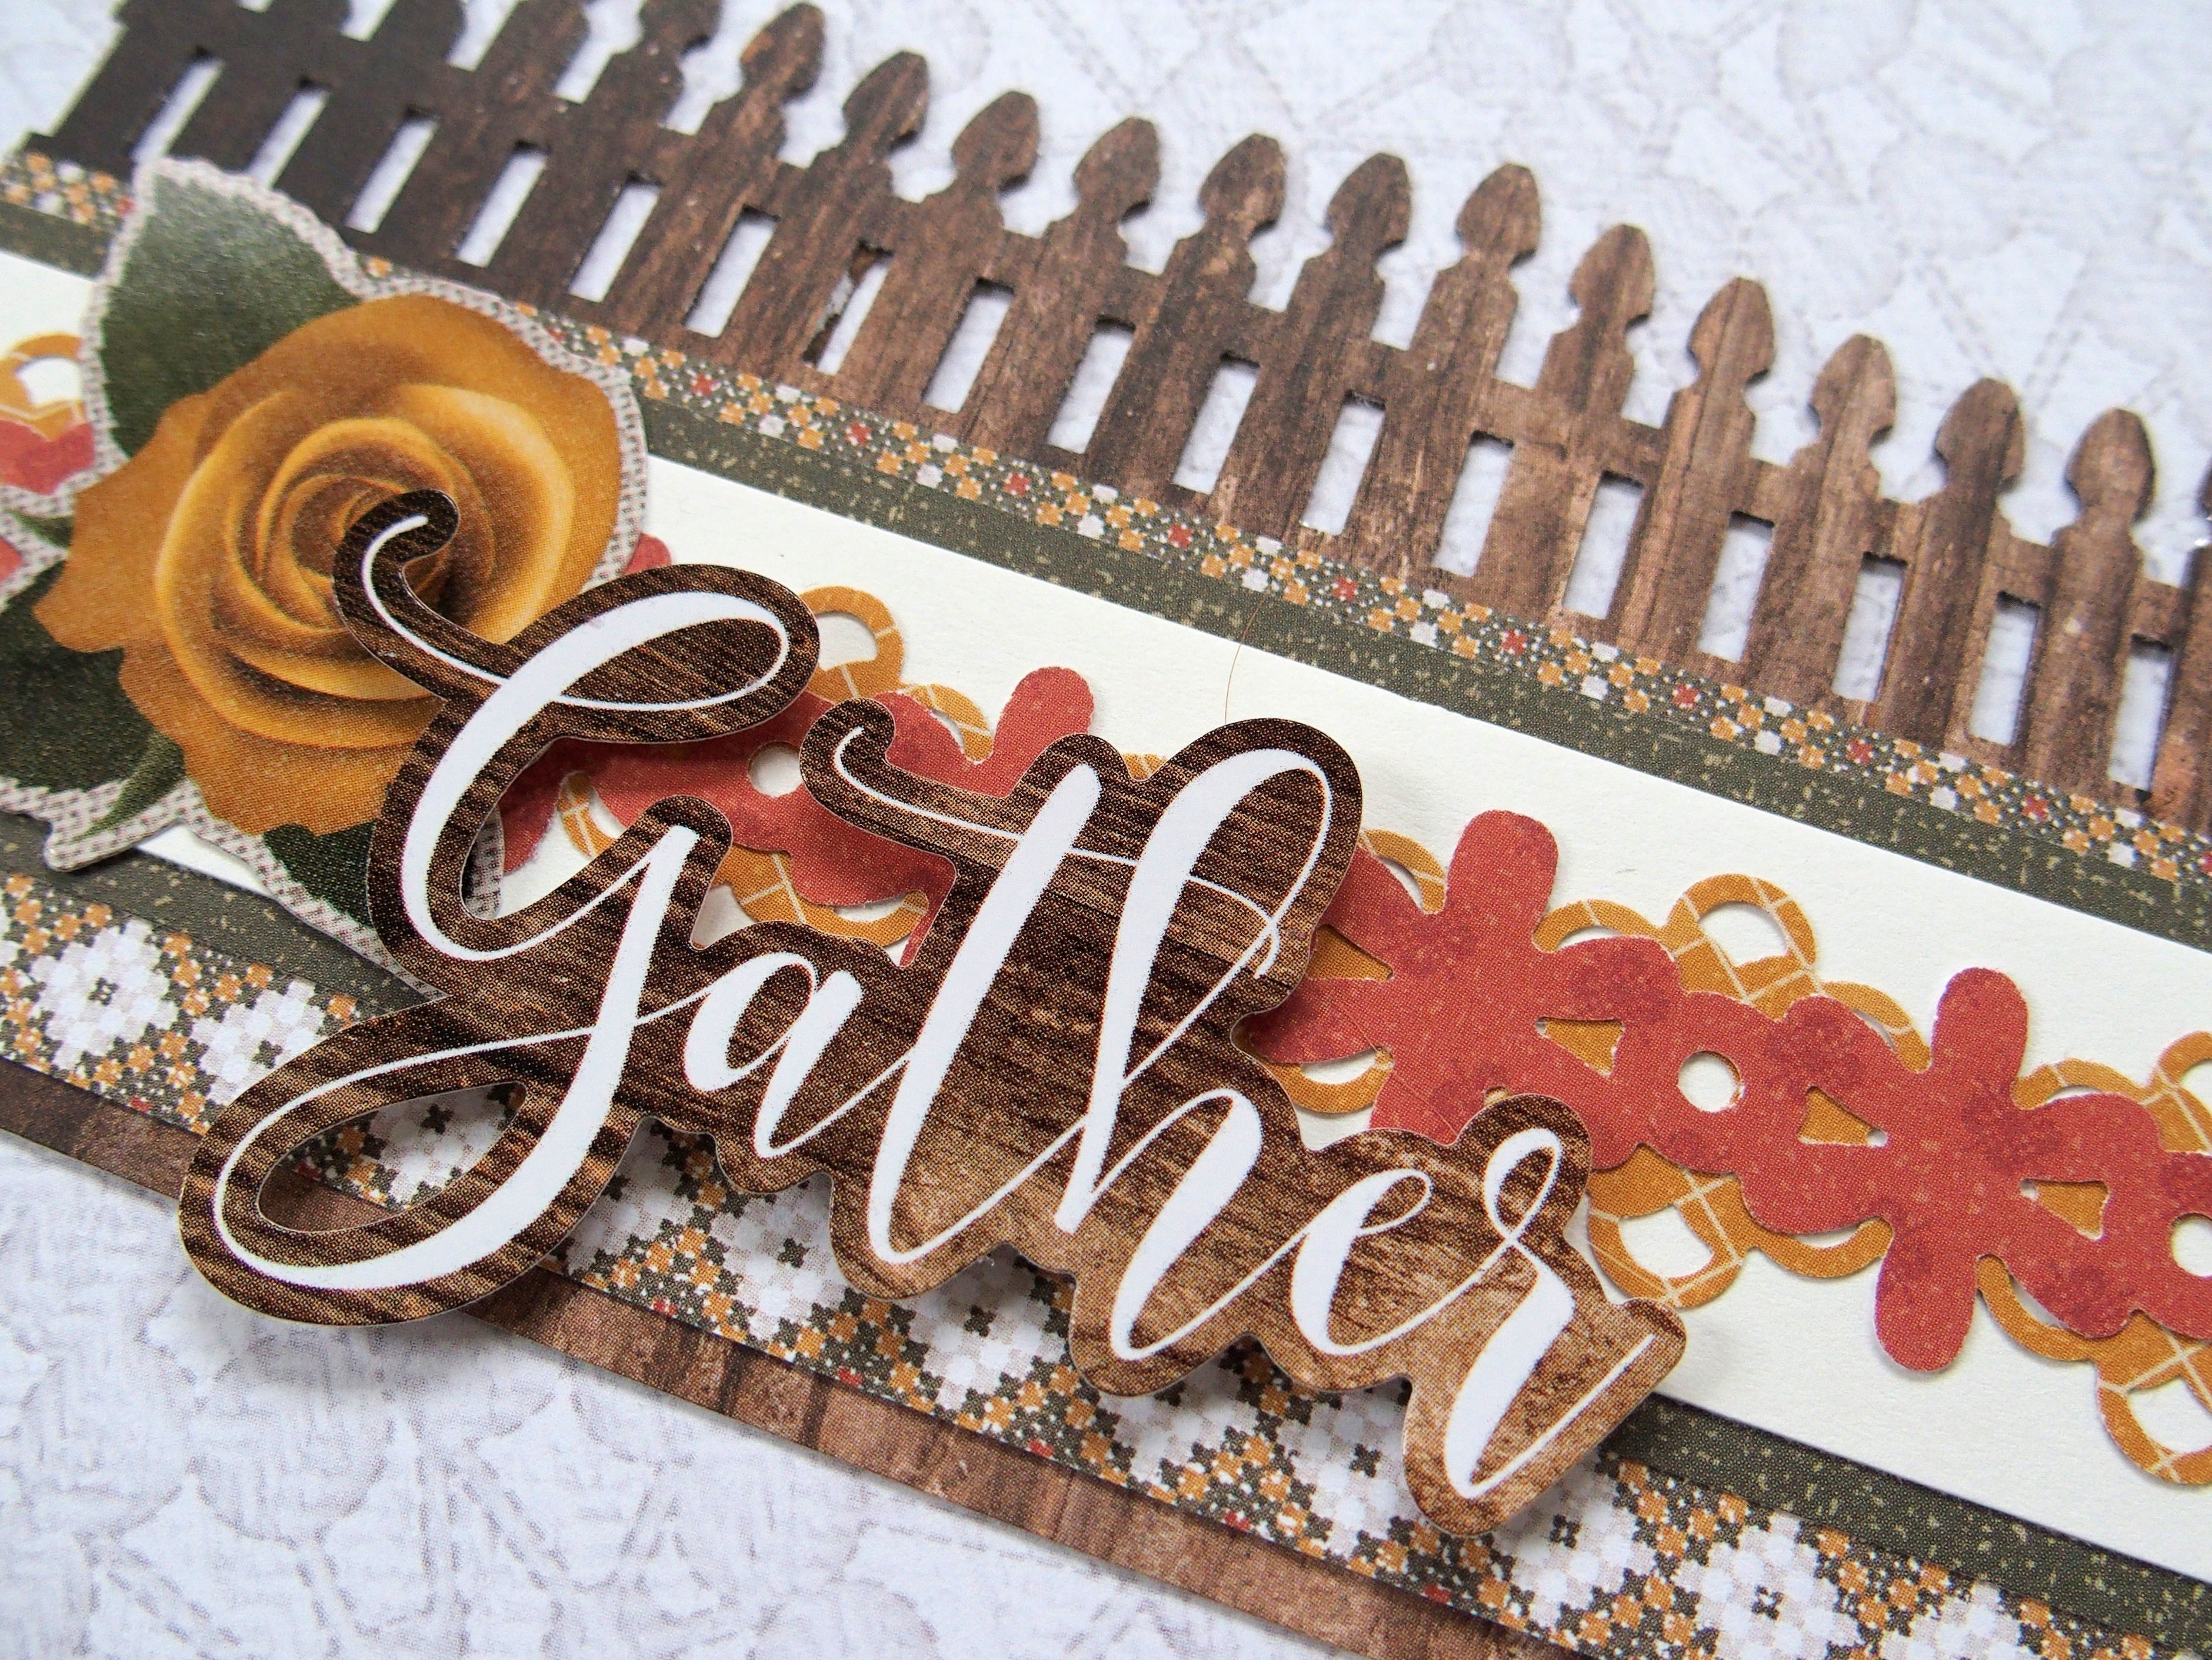
Gather Border
- Punch a victorian fence border with the wood grain paper. Trim to 3-3/8″ x 12″ to create the base.
- Cut a 2″ x 12″ strip of quilted paper, a 1-1/2″ x 12″ strip of green paper and a 1-1/4″ x 12″ strip of white cardstock. Layer on the border as shown.
- Using the lace flower chain and dancing daisies cartridges, punch one border each with red paper. Repeat using gold paper. Apply the red dancing daisies border on top of the gold lace flower chain border, lining up the holes. Add to the border as shown.
- Add yellow rose sticker and top with the “Gather” sticker using foam squares.
- To make the coordinating border, apply the gold dancing daisies border on top of the red lace flower chain border, lining up the holes. Add two button stickers with foam squares.

Remember Border
- Cut a 2-3/4″ x 12″ strip of red paper for the base. Cut a 2″ x 12″ strip of white patterned paper (aligning the cuts so rows of patterns are equal on the edges). Cut a 1-1/4″ x 12″ strip of green paper.
- Using the lace flower chain cartridge, punch two borders with gold paper. Tuck each behind the white patterned strip and layer the border as shown.
- Top the border with the long floral sticker using foam squares. Add the clock and “Remember” stickers, and punched leaves.
- To make the coordinating border, cut a 1-1/4″ x 12″ strip of gold sticker. Apply the other long floral sticker with foam squares and add a button and leaf.
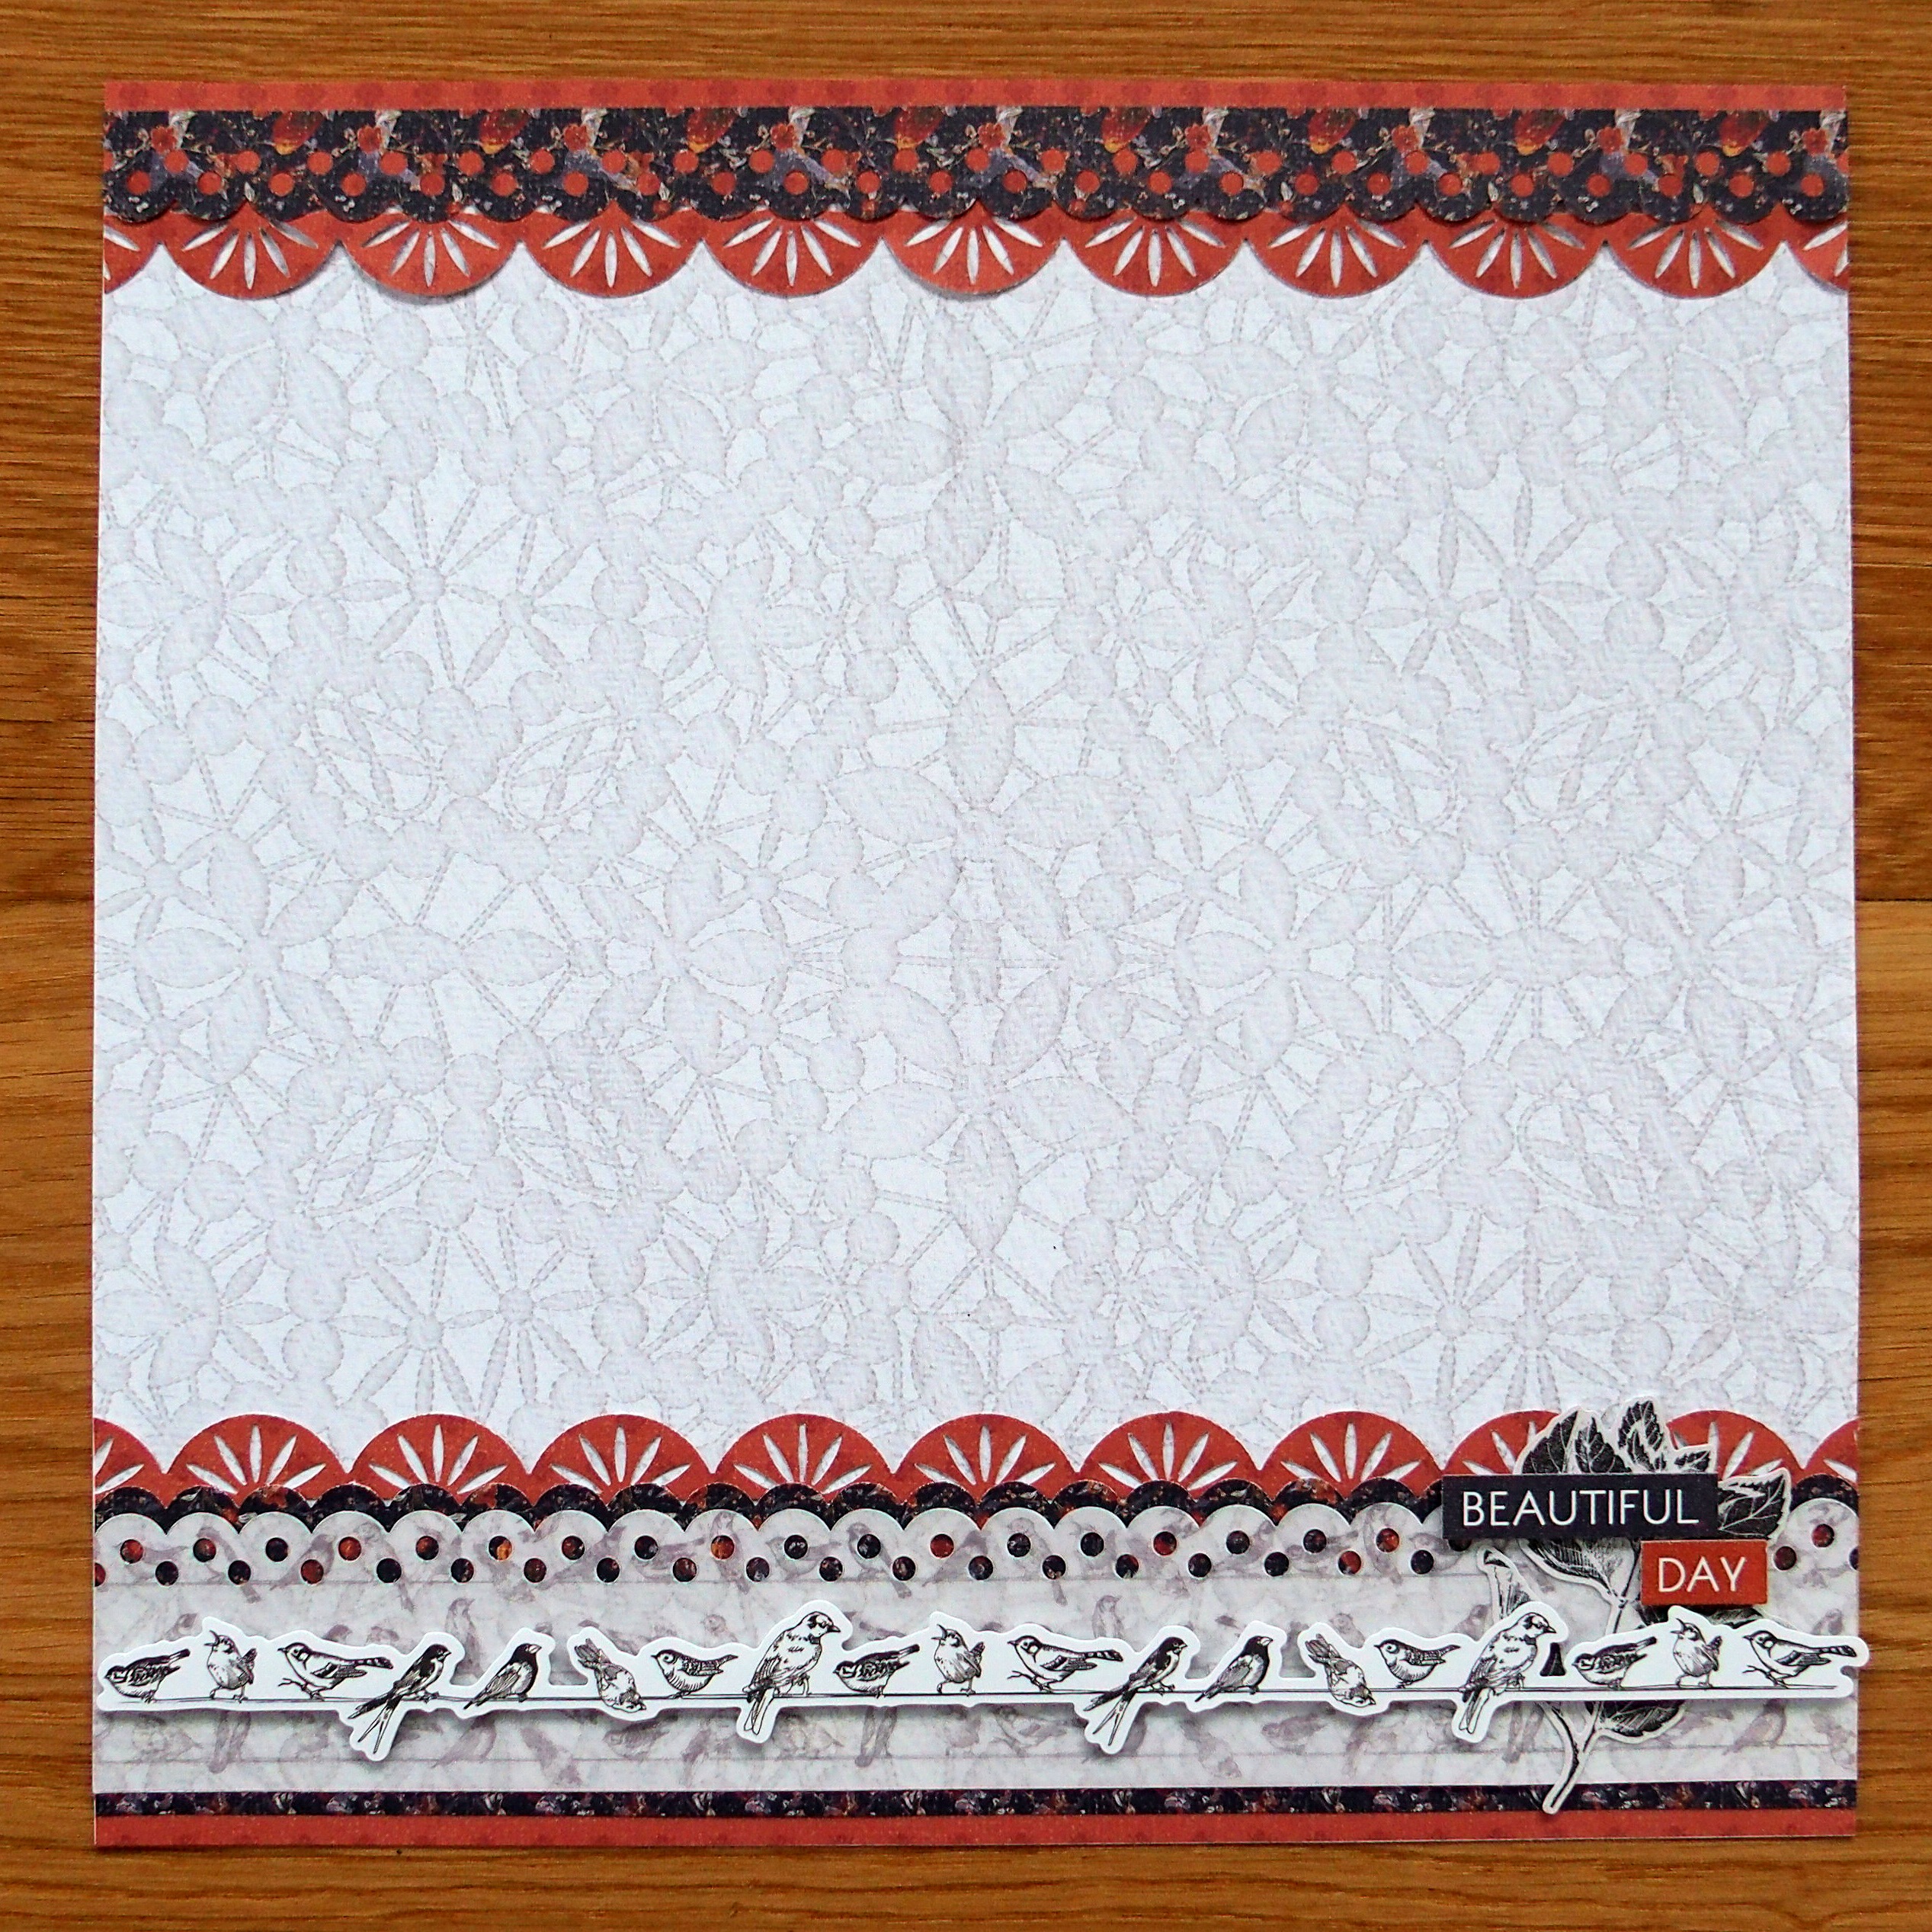
Beautiful Day Border
- Punch a scallop burst border with red paper. Trim to 3″ x 12″ for the base.
- Using the scallop dot cartridge, punch a border with navy patterned paper. Trim to 2-1/4″ x 12″. Stack the gray patterned paper and bird vellum paper together and punch a border. Trim to 2″ x 12″. Layer paper strips as shown on the base.
- Top with the bird sticker using foam squares. Tuck a leaf sprig sticker behind and add “Beautiful Day” stickers with foam squares.
- To make coordinating border, punch a scallop burst border with red paper for the base. Trim to 1-1/2″ x 12″. Using the scallop dot cartridge, punch a border and trim to 3/4″ x 12″. Apply on top of the base.
Enjoy the cozy comforts of the season!


Cute ideas!
LOVE!
So very pretty, thanks for sharing.
These are very pretty!!
Thankful for the simplicity of the Creative
Memories products and I love the Country
Side Comfort Borders!
Love it!
Congrats on your new home! Make it yours. Love your borders, especially the bird border! Thanks for the great ideas.
Thanks, Pam! I appreciate it!
GREAT ideas – thanks for sharing. I understand the “moving” thing! My father was in the oil field and we moved a LOT! I always chose to treat it as an adventure so I enjoyed the “gypsy life”.
At age 36, I made my 37th move! Now married and settled in one house for last 22 years and I still think I should be ready to pack and go! Beautiful ideas…even more impressive that you got them done during the move!!
37 moves??? Suzanne, that’s amazing. Glad you’ve been able to stay put for 22. Thanks for your comments!
Beautiful!
Gorgeous use of layering different borders! I love the Dancing Daisies over the Lace Flower Chain, and love the Scallop Dots paired with the Scallop Burst. I’m not good at thinking up what will look great together, so I truly appreciate you sharing your creativity!
They are all beautiful! Love them all. :-)
Oh, my! These are absolutely gorgeous. I can’t wait to make some. Thank you so much.
[…] via Countryside Comfort Scrapbooking Borders — CREATIVE MEMORIES BLOG […]
Beautiful!!!! Thank you!!!