February 14, 2018
How to Create a Valentine Grid-Style Layout with Bee Mine

Happy Valentine’s Day! Whether you receive chocolates, flowers or a thoughtful card from a special someone today, given how much we know you LOVE scrapbooking, we’ve got the perfect Valentine’s Day gift for you!


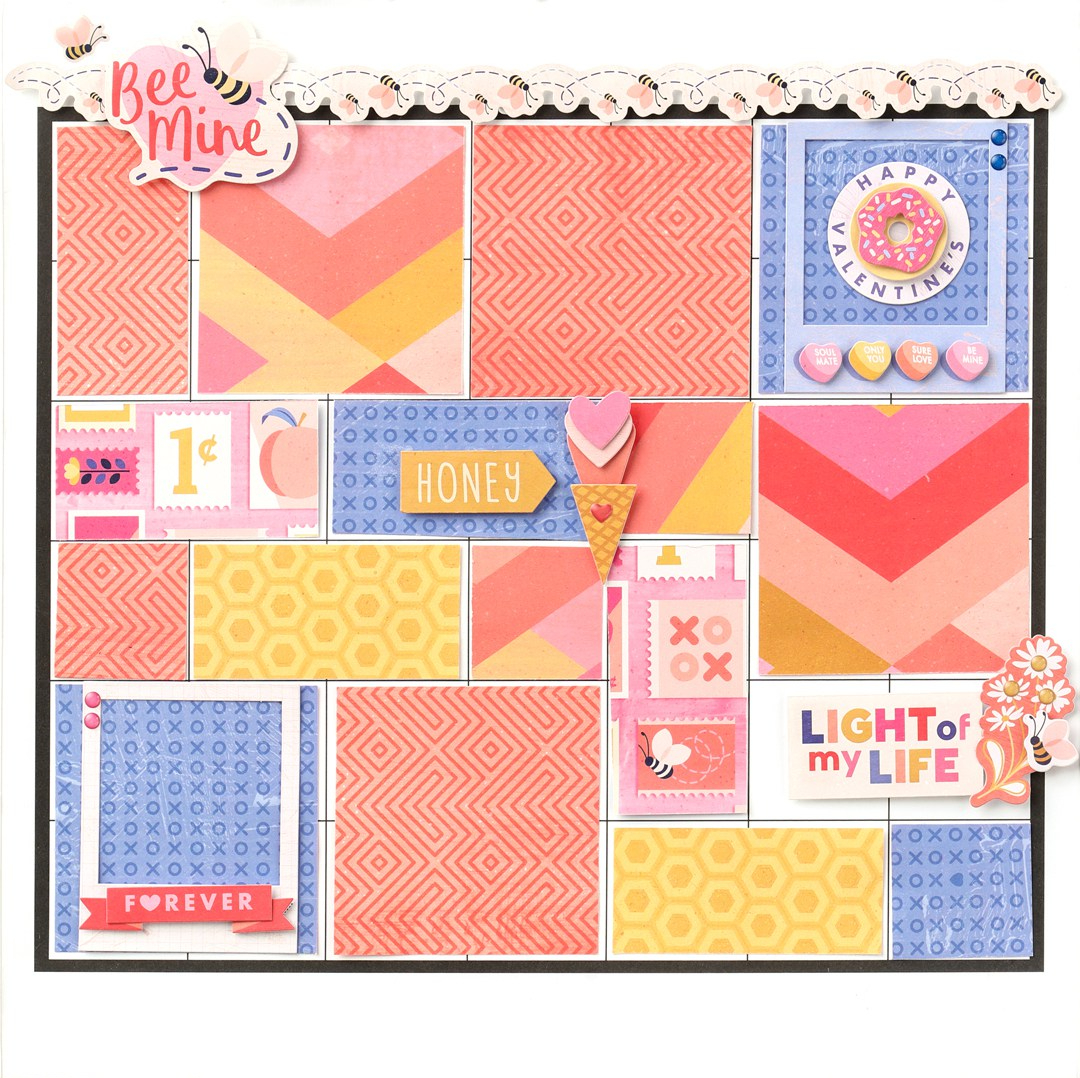
Our treat to you is how to create this fun grid-style scrapbook layout using a Calendar Page. The Calendar Pages are pre-printed sheets with a perfect grid for creating layouts and title pages. It is easy to use extra designer papers and Cardstock from other layouts to create these pages. You’ll find you have plenty of extra paper pieces to create a masterpiece.
This layout makes it so easy to write notes on the page to remember the important milestones and memories you cherish (and sometimes you don’t have a photo to document a celebration). Let’s get started!
What You’ll Need to Create This Layout:
- 12×12 Calendar Pages
- 12×12 Bee Mine Paper Pack
- Bee Mine Stickers
- Bee Mine Layered Embellishments
- 12-inch Straight Trimmer
- Foam Squares
- Tape Runner
- Repositionable Tape Runner Refill
Start with three sheets of designer paper that coordinate. This Calendar Grid page uses three sheets from the Bee Mine collection. It is easy to take coordinating sheets from different Creative Memories designer paper packs and mix and match if you choose.
Step 1: Cut three sheets of a variety of paper into a 12″ x 3″ strips. Then take those 12″ x 3″ strips and cut into 3″ x 3″ squares. You’ll use 9 of the 3″ squares and place those first as shown: three on the top section, one on the middle section and two on the bottom section. Tip: Use the Repositionable Tape Runner Refill for placement so it is easy to make changes if you wish.
Remember you can use both sides of Creative Memories’ Designer Papers for a fun and unique layout. There is one side of Creative Memories’ Designer Paper that is more tonal and one side that is more decorative – It is fun to choose which side you like best!
Step 2: With the last 3 of the 3″ squares you will cut those into 1-1/2″ x 3″ strips and 1-1/2″ x 1-1/2″ squares. Look at the sample and decide where you want to fill-in with a strip or square or even a decoration. Mix and match with the sides and the patterns that you like the best!
Step 3: Decorate! Fill in any open squares, layer and create borders. Stickers and layered embellishments work perfectly to create clusters with fun sentiments and happy icons (like ice-cream, donuts, flowers and Bee Mine borders).
Create a new calendar grid layout each month and then add photos as the month progresses. Have fun and please share your Calendar Grid page ideas with us!

Very pretty. Thank you! Happy Valentine’s Day. <3
Happy Valentine’s Day! ?
I think I will use this as a demo or mini class at my NSD.
Great idea! We can’t wait to see what you come up with :)
Love it! Thanks for sharing.