March 13, 2018
Use the Black & White Mat Pack to Create a Stunning Scrapbook Layout

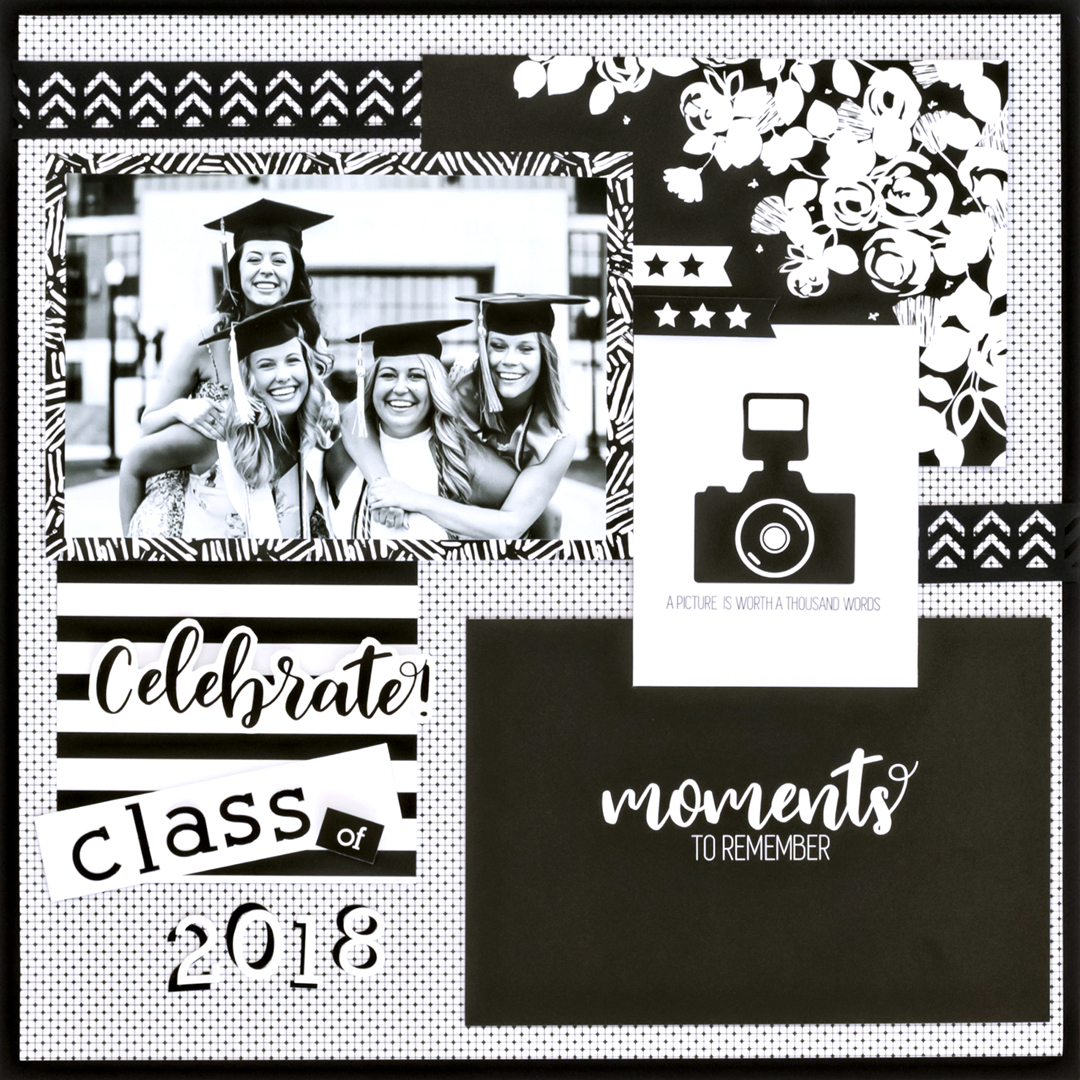
Looking for an easy scrapbook layout to make in just a few steps? You have come to the right place! You can use the Black & White Collection for everything from graduation and birthday celebrations to weddings, anniversaries, babies, the artist or photographer in the family and more! Ready to get started?
The Black & White mat pack offers several mats to choose from so you can make it customized to your special occasion. Tip: Use the decorative side of a mat to help complement your focus photo.
To create this scrapbook layout, you will need:
- Black & White Paper Pack
- Black & White Variety Mat Pack
- Black & White Stickers
- ABC/123 Serif Stickers
- Solid Black 12 x 12 Cardstock
- Original Border Maker System with Double Chevron Border Maker Cartridge
- 12-inch Straight Trimmer
- Tape Runner
- Repositionable Tape Runner Refill
- Foam Squares
Step 1: Lay down the Solid Black 12×12 Cardstock for your base.
Step 2: Trim one sheet of white designer paper by one-inch on each side, making the paper 11″ x 11″. Adhere to the Cardstock.


Step 3: Take the black patterned designer paper and punch out the Double Chevron design using the Border Maker System.

Step 4: Lay out all of the mats on your layout, you can even trim down the camera icon out to fit it into your layout.
Step 5: Before adhering the mats, use your Repositionable Tape for your Double Chevron Punch.


Step 6: Using your Foam Squares and Stickers, dazzle up your design
Step 7: Adhere your photo and you are all done.
Life is a celebration, so tell your stories with the Black & White Mat Pack! Comment below to tell us what you think of this mat pack layout.

What a waste of a page! Only one photo.
I agree!
Hi there! You could easily add many photos to this layout, even on top of all the mats! We just showed more mats to inspire some ideas. :)
These are just suggestions. You don’t have to follow them.
Some pages look great with only one photo!
Beautiful
Fun black and white! It’s perfect for a title page or a lead page for the upcoming photos of the same subject.
That is a fantastic idea!
I keep seeing the same comments on all the sample layouts. The sample layouts are to showcase the paper not the pictures. I still use this as a guide and add all the pictures I want. I love the ideas presented for the new paper packs/tools.
Hi Julie- You are exactly right! We like to show several ideas to inspire you all :)
Beautiful layout for a special picture. Thanks for sharing.