April 9, 2018
9 Easy-to-Follow Steps to Create a Baby Boy Scrapbook Layout

Oh, BOY have we got an awesome baby boy scrapbook layout for you today! If you are thinking something that includes plaid, tractors, fresh produce, hearts and adorable animals – you have come to the right place! This scrapbook layout combines the Little Lamb Baby Boy collection and several scrapbooking tools. Grab your supplies and get started!
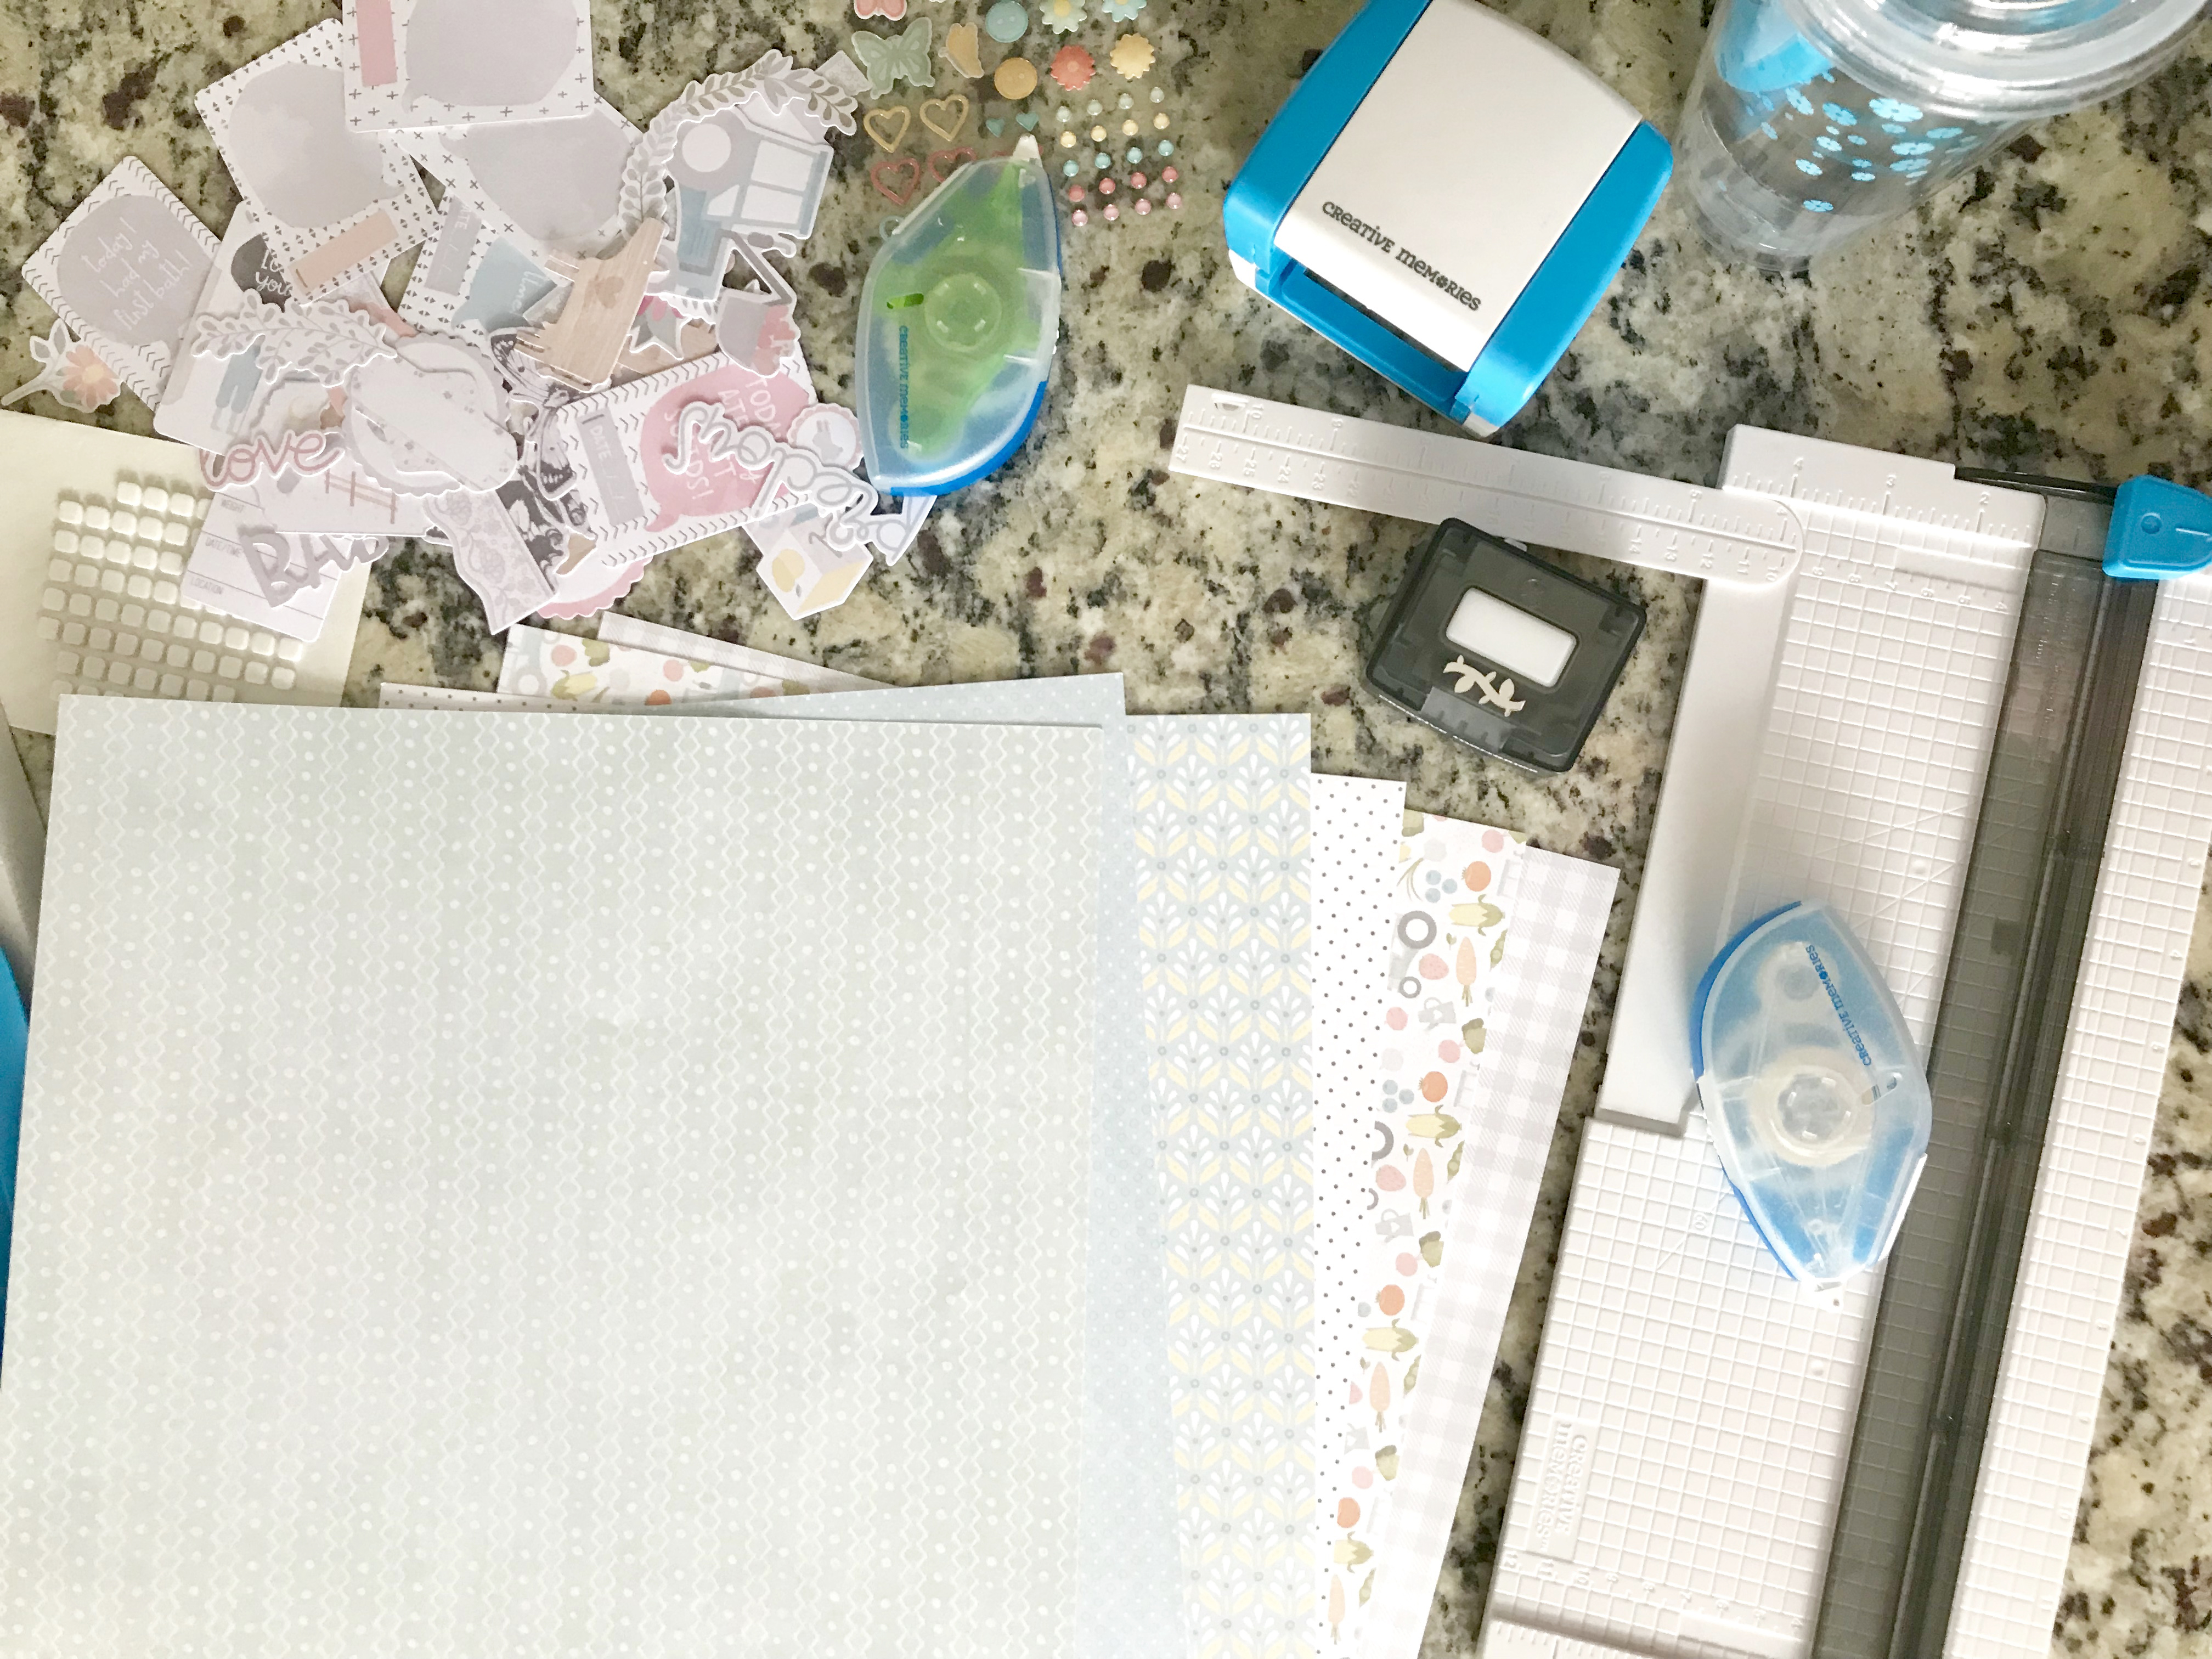
What You’ll Need to Create This Layout:
- Little Lamb Baby Boy Paper Pack
- Little Lamb Baby Boy Stickers
- 12×12 White Cardstock (1 Sheet)
- Original Border Maker System with the Sprout Border Maker Cartridge
- 4-Way Hearts and Stars Corner and Hole Punch
- 12-inch Straight Trimmer
- Tape Runner
- Repositionable Tape Runner
- Foam Squares


Step 1: Use a sheet of 12×12 White Cardstock for your base. (It doesn’t matter what color you use, you won’t see it at all once you’re done.)


Step 2: Take your 6 sheets of Designer Paper and cut each of them into 3″ x 3/4″ strips with your Trimmer. You will have six strips, one for each design.


Step 3: Select a piece of Designer Paper (I chose mini polka dots) and trim it down to 8″ x 12″. Take another piece of Designer Paper, (I chose the chevron wood design) and trim it down to measure 4″ x 12″.

Step 4: Using the Sprout Border Maker Cartridge with the Border Maker System, punch out the sprout design for your layout with another piece of Designer Paper (I chose the green patterned paper).


Step 5: Now, you will need to make the mats for your photograph(s). Using a piece of patterned paper (I chose the green patterned paper), trim down a rectangle to measure 5″ x 7″. Then, cut two pieces of Designer Paper (I used a blue Designer Paper) to measure 4″ x 4″ and 4-1/2″ x 6-1/2″.
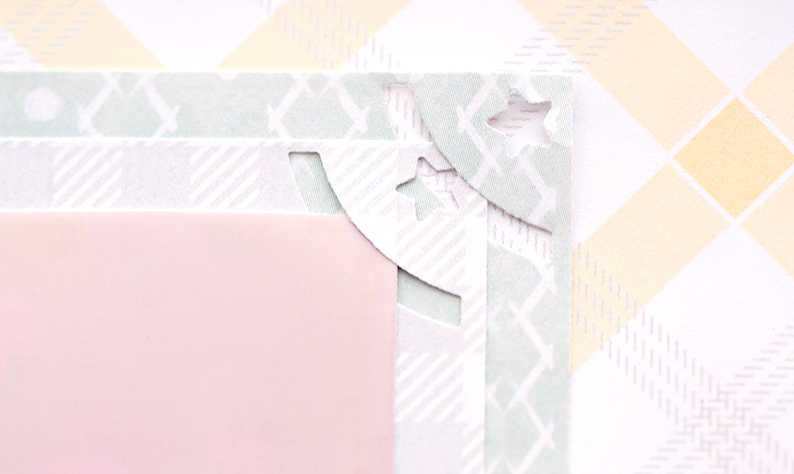
Step 6: Decorate the corners of your mats as desired using the 4-Way Hearts and Stars Corner and Hole Punch.

Step 7: You will start to adhere your elements following the layout. Using the Tape Runner, adhere your mini strips at the top of the layout. You will need about 13 strips. Then, using the Repositionable Tape Runner, adhere the Sprout punch across these strips.
Step 8: Adhere your layered photo mats using the Tape Runner as they are shown. Gather your photo(s) and adhere them to the page. To create this layout, you will need one 4″ x 6″ photograph.

Step 9: Use your Foam Squares to adhere some of the stickers for added dimension.
You’ll love this scrapbook layout for photos of your little man. Comment below and tell us if you are going to be making this layout!

Just darling!
What did you use to get the scallop piece below the 3 x 3/4 ” strips?
Hi Ellen – That is a border sticker in the Little Lamb Baby Boy Sticker Pack!
Thank you!
absolutely love this paper pack and the layout ideas but am I the only one who finds the colors extremely pale in the images? I ordered the paper and hope it is not so faint – fingers crossed. The photos are bright but everything else is dimly lit – any ideas? I tried both Chrome and Explorer as browsers.
Thanks!!!
Hi Victoria – It is hard to showcase how beautiful this collection is! Pastel colors are very hard to photograph. Maybe try brightening your screen when looking at the images. Thanks!
thanks!!! will do.
I have had a hard time following it because I don’t have all of the things from Creative Memories . I would like a simpler one which doesn’t use as much.
[…] Get instructions for this layout here! […]
But it appears the neighbours will have to move fast if they are to land the highly-rated youngster.
But Antoine is a great player and I think he can go even higher and I hope for him that hell do it.