April 20, 2018
Worldwide Virtual Crop Challenge 7

Alright, scrappers… it’s the magical time again – time for another challenge! This one is a card sketch, BUT if you don’t feel like making a card you can always find a way to make it into a layout and sketch.
On your mark, get set… GO!
To see all posting times for the Worldwide Virtual Crop by country, click here.
For a refresher on VC instructions, get the 411 on Virtual Crops here.
 Worldwide Virtual Crop Challenge 7:
- Create a layout following the sketch below.
- Take a photo of your completed project.
- Post the photo of your completed page, spread or card to the Worldwide Virtual Crop Facebook Event Page AND add #CM1, #CM2, #CM3, etc. to the caption/comments. You will add the hashtag that matches the challenge that you are submitting. No words needed, just stick to the hashtag CM with numbers as this is a bilingual event! Feel free to use other hashtags as well, such as #WWVC2018 or #CreativeMemories, but BE SURE to include #CM1, #CM2, etc. so we can find your post.
- You have the entire event to submit all 12 challenges (some will post while you are sleeping). To see your final deadline date and time, check when your Facebook event ends; this will show you the date and time in your time zone. View challenge times in your time zone here. Keep refreshing the Facebook Event Page to see others’ masterpieces!
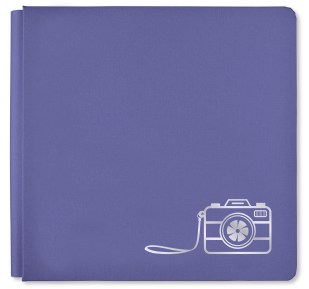
NOTE: For the Worldwide Virtual Crop, the prize will be the 12×12 Periwinkle Camera Album Cover. Prizes will be awarded to two participants in each challenge. We will award the prizes randomly, but to win, it must be evident that you have used the sketch we provided as inspiration to create a project using your Creative Memories products. Prizes will be announced on Friday, April 27, at 9am CT.

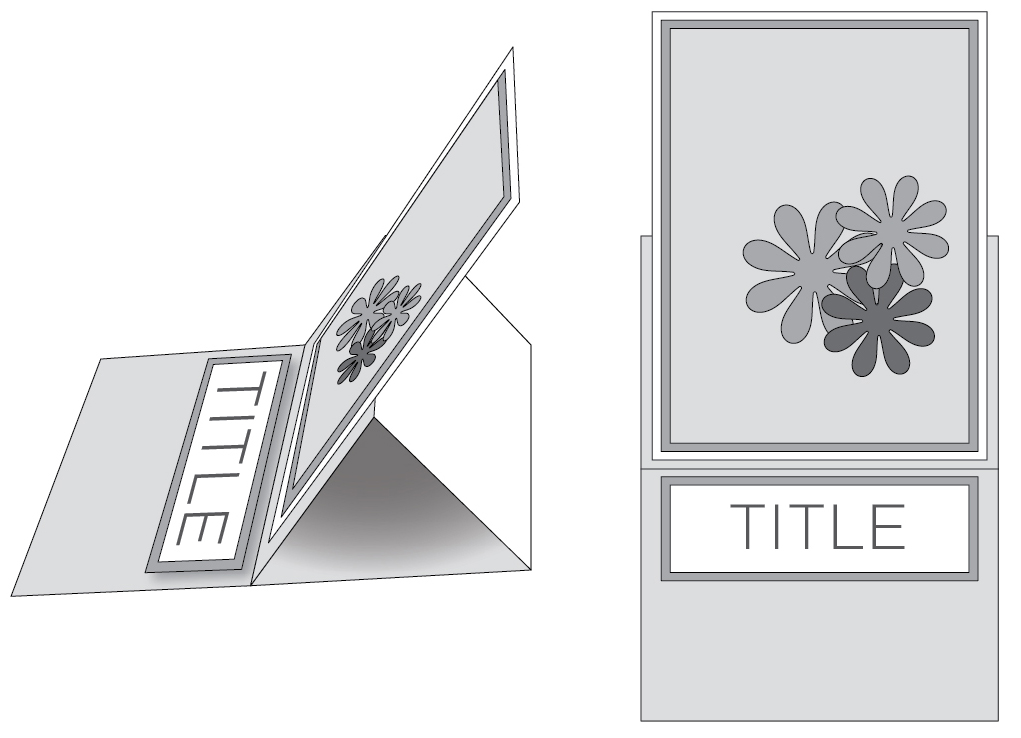
![]() This sketch was created for you by Australia Advisor Kathy Armstrong.
This sketch was created for you by Australia Advisor Kathy Armstrong.

From: Brisbane, Queensland Australia
Kathy has been a Creative Memories Advisor for over 15 years.
She loves being creative and likes to put lots of photos of her two grandchildren (boys) on a page. She loves creating family history albums, which cover a lot of past memories for her children and their children.

Instructions:
- Cut card 11 inches x 5 ½ inches.
- Score this piece at 5 ½ inches and 8 ¼ inches. (See first image of white folded card above.)
- Add decorative paper to the bottom section of the folded card. (See second image above showing green paper on the card.)
- Cut a second piece of card 5 ¼ inches x 4 inches, adhere to the front folded face of the card. (See forth image above showing completed card.)
- Add papers, stickers or embellishments to the card as desired.
- Using the left over 1 inch piece, trim this to 5 1/2 inches long and attach this to the card at 2 inches from the front edge of the bottom section with Foam squares. (See second image above showing 1 inch piece adhered on the card.)
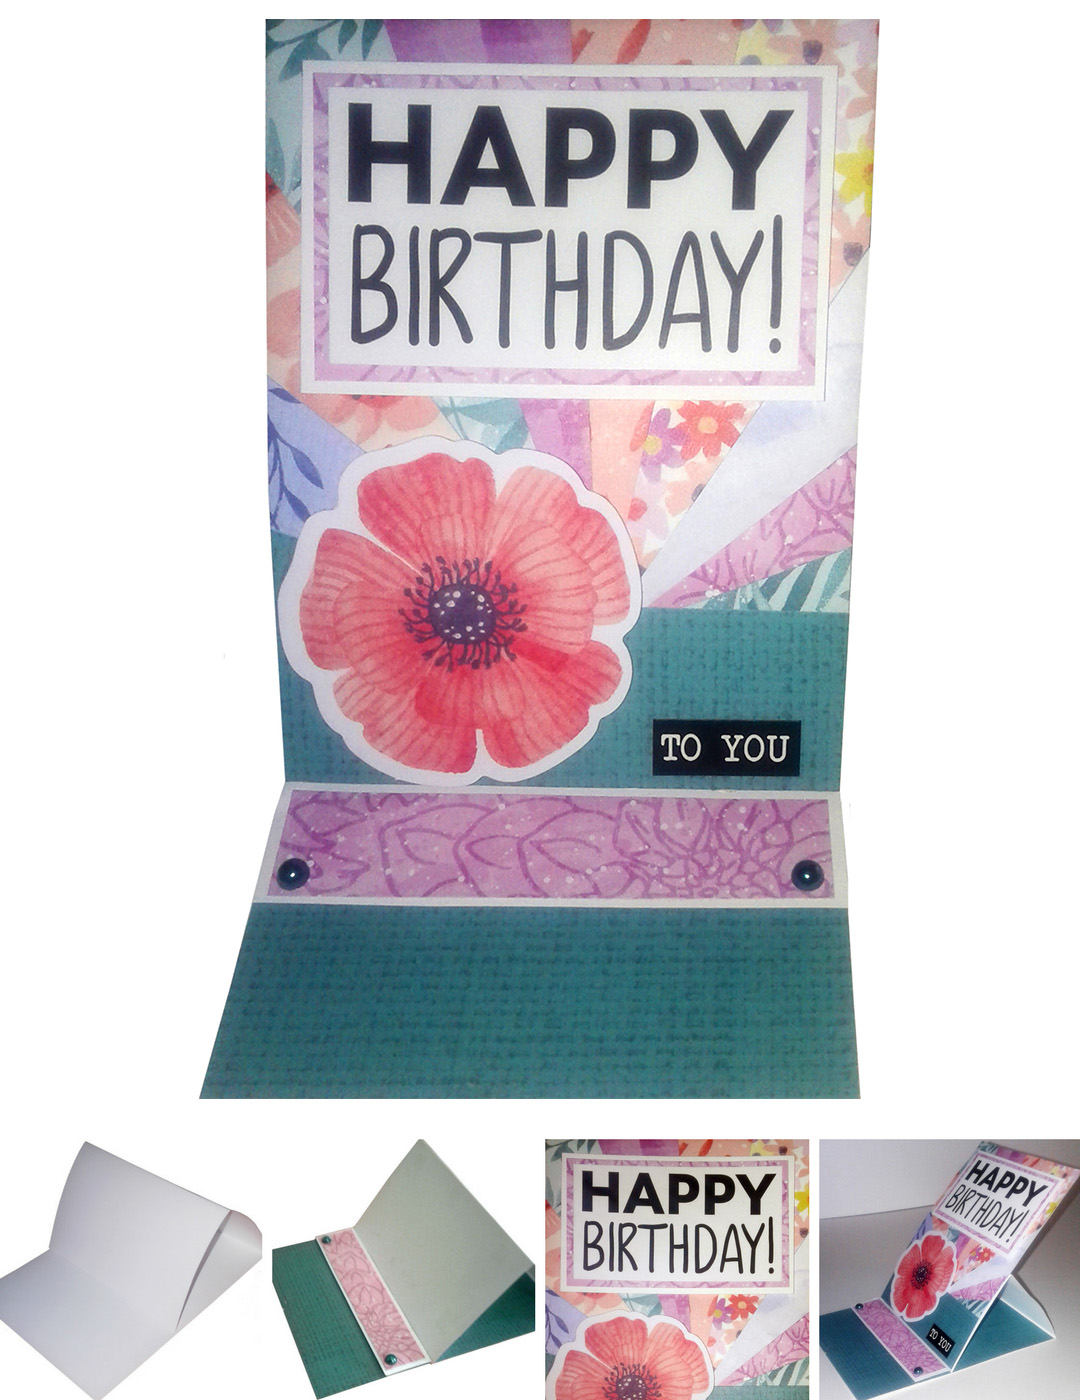
To create this card, you will need:
- Full Bloom Paper Pack
- Full Bloom Embellishments
- How-Do-You-Do Stickers
- White Cardstock
- 12-inch Straight Trimmer
- Tape Runner
- Foam Squares

To create this card, you will need:
- Little Lamb Baby Girl Paper Pack
- Little Lamb Embellishments
- White Sans Serif ABC/123 Stickers
- Blank Card Kit
- Gray Cardstock
- Border Maker System with the Scallop Dot and Sprout Border Maker Cartridges
- 12-inch Straight Trimmer
- Multi-Purpose Tool
- Tape Runner
- Repositionable Tape Runner Refill
- Foam Squares
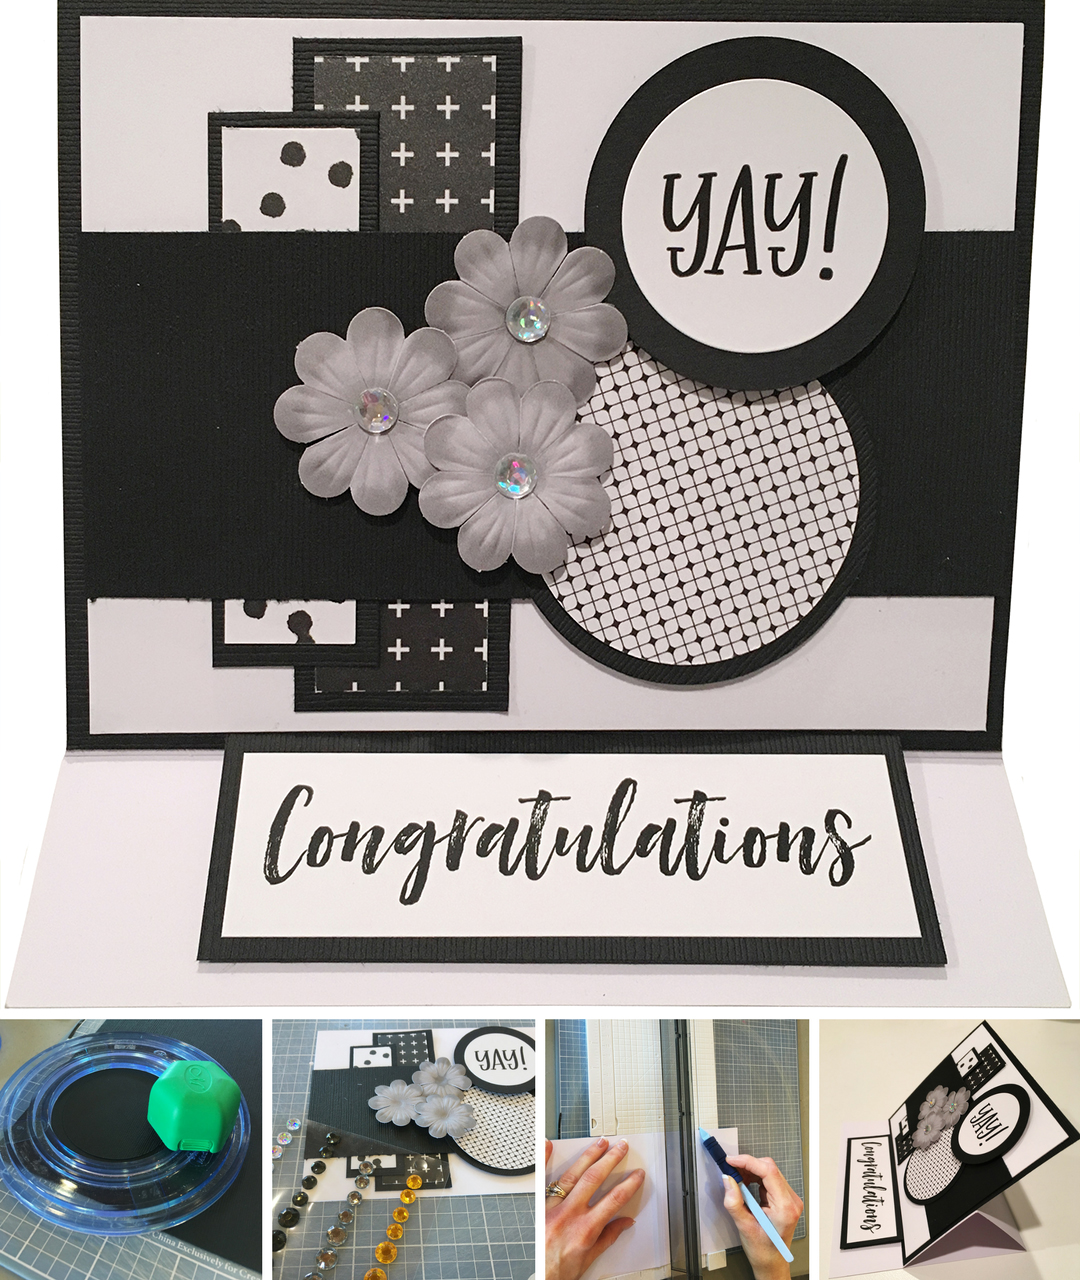
To create this card, you will need:
- Black & White Paper Pack
- Black & White Embellishments
- How-Do-You-Do Stickers
- Blank Card Kit
- Black Cardstock
- Custom Cutting System with Circle Patterns
- 12-inch Straight Trimmer
- Multi-Purpose Tool
- Tape Runner
- Foam Squares

To create this card, you will need:
- Full Bloom Paper Pack
- Full Bloom Embellishments
- Full Bloom Stickers
- ABC/123 Stickers
- 2-Way Corner Rounder
- 12-inch Straight Trimmer
- Tape Runner
Thanks for joining us! When posting your projects on social media, use #WWVC2018 #CreativeMemories to share your excitement!


Love this! Such a fun card, and I love the idea of creating a photo frame — what a great gift!