July 12, 2018
Celebrate Time Spent Up North — O Canada Scrapbook Layouts
Canada is full of breathtaking beauty and natural wonder that cannot be done justice with just plain photographs. But, by dedicating pages in a scrapbook to your adventures in the Great White North, you can truly capture the Canadian essence and commemorate the country properly. Read on for our guide to creating the best O Canada scrapbook layout this side of the border!
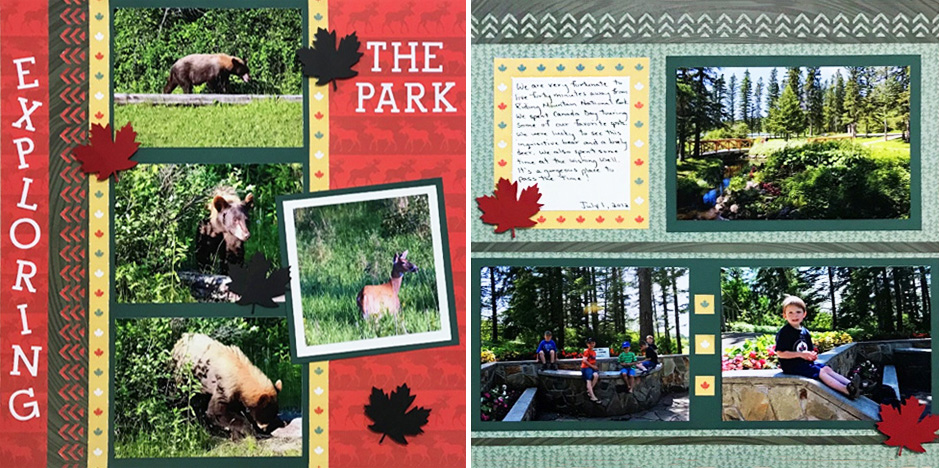
Lynne’s Inspiration: I was really excited to be asked to create a layout using the O Canada Paper Pack. We live really close to Riding Mountain National Park and always spend some of our summer days exploring what the park has to offer. These photos are from Canada Day. My sister was visiting from Alberta and we decided that there was no better place to spend Canada Day than at the park. It was such a memorable day!
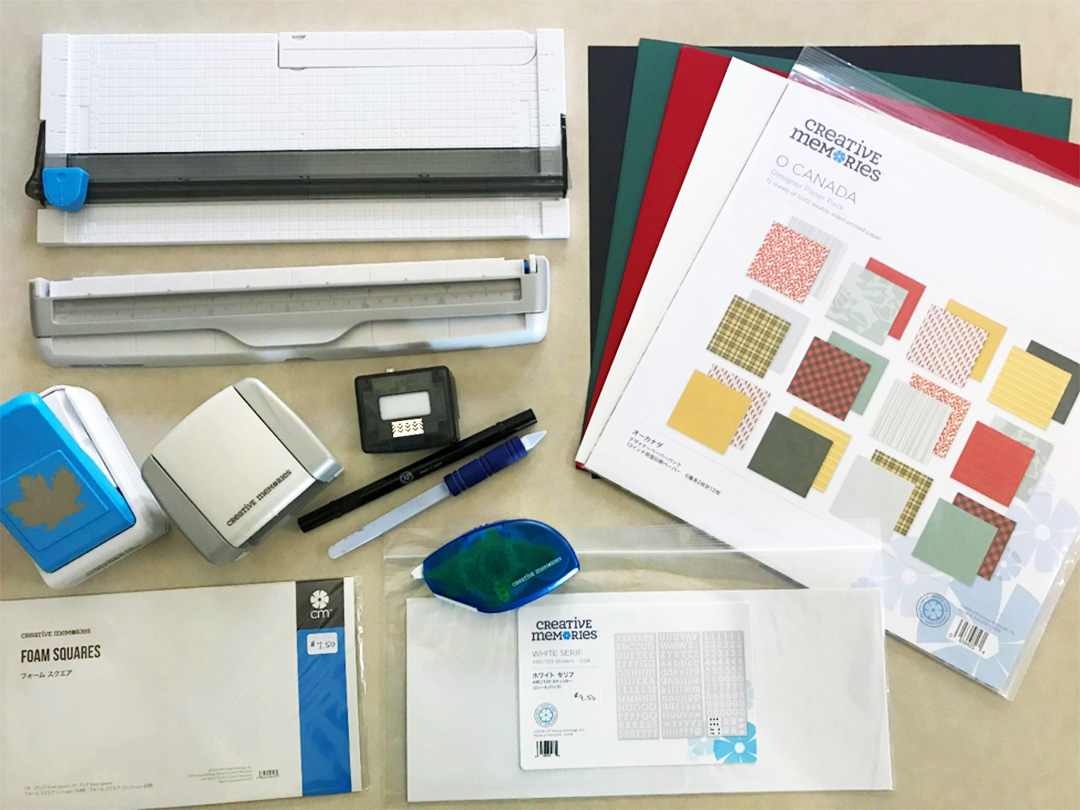
To create this two-page layout you’ll need:
- O Canada Paper Pack
- Cardstock: Evergreen, Black, White and Cranberry
- White Serif ABC/123 Stickers
- Original Border Maker System with Double Chevron Border Maker Cartridge
- 12-inch Straight Trimmer
- Maple Leaf Punch
- Multi-Purpose Tool
- Tape Runner with Repositionable Tape Runner Refill
- Foam Squares
- Black Dual-Tip Pen
Step 1: Choose four papers from the O Canada Paper Pack. Two will be used for the background and the other two will be used for embellishments.
Step 2: From the Evergreen Cardstock, use the 12-inch Straight Trimmer to cut one 12″ x 5-1/2″ strip and one 12″ x 4-1/2″ strip. Adhere the 12″ x 5-1/2″ strip vertically on page one and the 12″ x 4-1/2″ strip horizontally on page two. Still using the Evergreen Cardstock, cut a 4-1/2″ x 6-1/2″ mat. Adhere this mat above and to the right of the horizontal strip on page two.
Step 3: Using the Border Maker System with the Double Chevron Border Maker Cartridge, punch the full length of a 12″ sheet of paper from the O Canada Paper Pack. Use the 12-inch Straight Trimmer to trim to 1-1/4″. Repeat this process so you have two Double Chevron borders punched and trimmed. Adhere one border vertically on the left side of the evergreen strip on page one, making sure to leave a 1/4″ space between the border and the evergreen strip. Adhere the second border horizontally to the top of page two.
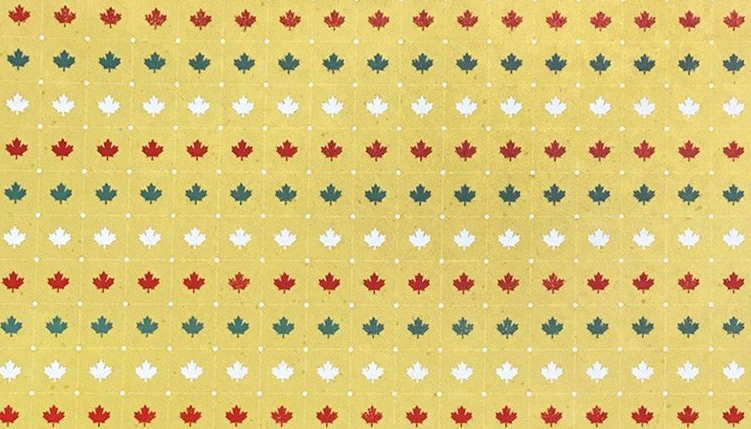
Step 4: I loved that this paper I chose to work with is like a grid. It made for easy cutting! I needed two vertical grid strips, but first there was a 1/4″ strip on each side of the paper that I needed to trim off. I did this using the 12-inch Straight Trimmer, and then flipped them over and used the other side as it matched the paper I had used to make the Double Chevron borders. Adhere one of these 1/4″ strips above and one below of the horizontal evergreen strip on page two.
Step 5: Going back to the grid maple leaf paper, follow the grid line to vertically cut a strip of maple leaves using the 12-inch Straight Trimmer. Adhere these strips to each side of the vertical evergreen strip on page one. The maple leaf strip on the left side of the evergreen strip should fill the gap that was left between the evergreen strip and the Double Chevron border.

Step 6: Create a journaling box by cutting a 4″ x 4-1/2″ mat, following the grid lines of the maple leaf paper. Using White Cardstock, cut a 3″ x 3-1/2″ mat to fit inside and adhere to the maple leaf paper. Place this beside the evergreen mat on page two.
Step 7: Add your photos to the two-page layout as shown. Bonus: Add a double photo mat to page one by cutting a piece of Evergreen Cardstock to 4-1/2″ x 4-1/2″ square and a piece of White Cardstock to 4″ x 4″ square. Adhere the white square to the green square. Place on page one.
Step 9: Embellish with leaves from Cranberry and Black Cardstock using the Maple Leaf Punch. Adhere with Foam Squares for extra dimension. Finish by adding a title to your page with ABC/123 Stickers and journal as desired.

But wait… there’s more! Here is another idea Lynne came up with for you by using this sketch as inspiration! Do you recognize it from the Virtual Crop last year?!
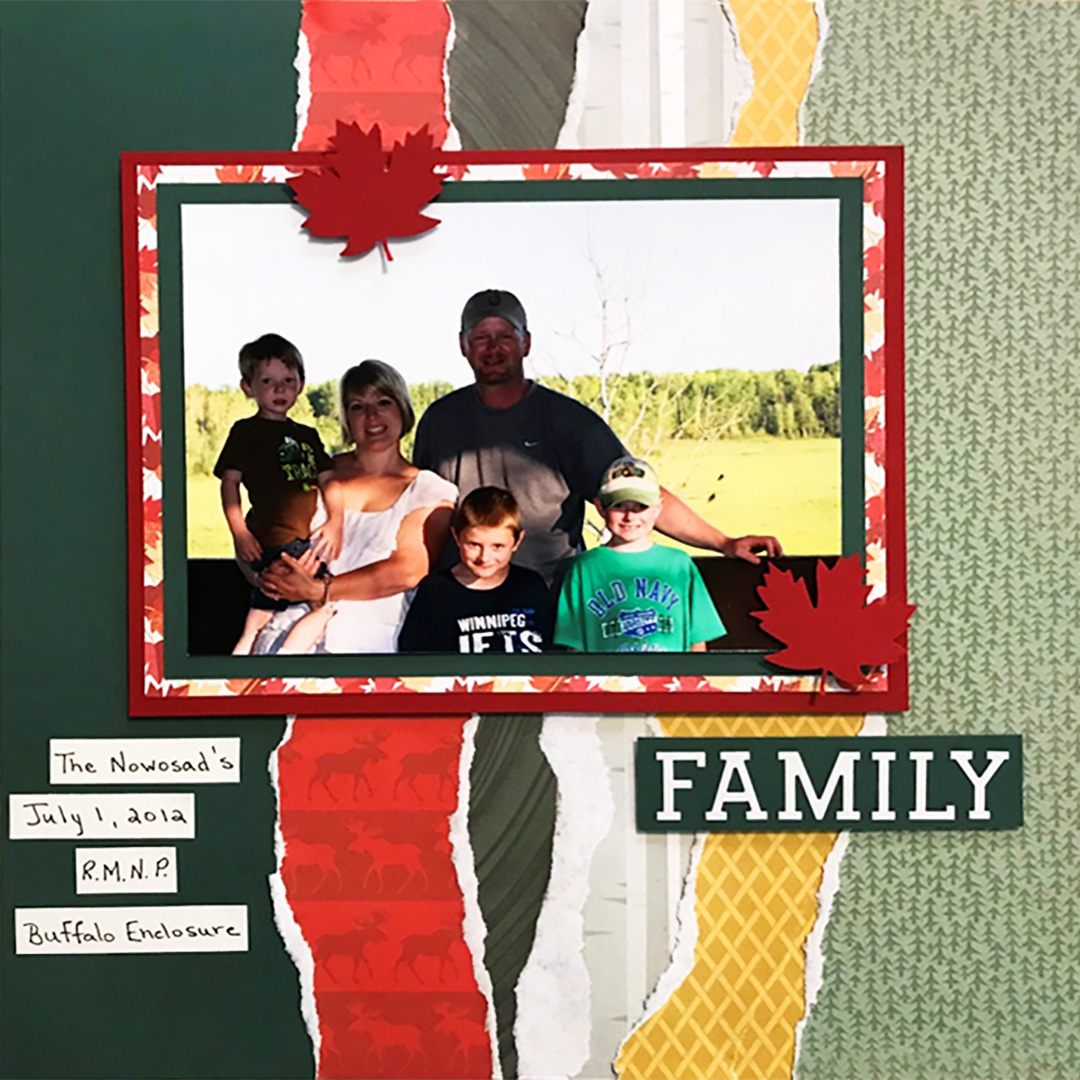
Step 1: Use one piece of Evergreen Cardstock for the background.
Step 2: Choose five pieces of Designer Paper from the O Canada Paper Pack. Tear one 12″ piece in varying widths from each paper. Arrange the pieces to your liking and adhere using the Repositionable Tape Runner to the Evergreen Cardstock. Tip: You can also use a Tearing Tool for a more accurate tear.
Step 3: Mat your photo with Evergreen Cardstock. Then, mat that with a designer print paper from the O Canada Paper Pack and then again with Cranberry Cardstock. Adhere to the page using Foam Squares for added dimension.
Step 4: Add a title using ABC/123 Stickers and journal as desired using strips made from White Cardstock.
Step 5: Add maple leaves punched from Cranberry Cardstock using the Maple Leaf Punch and adhere with Foam Squares.
Whether you’re visiting Canada on vacation or you’ve spent your entire life up north, there is no denying the natural beauty of the country. By using this plan for an O Canada scrapbook layout, you can capture that beauty and preserve them for generations to come. What’s your favorite part of this O Canada scrapbook layout? Comment below!

This is my style…would like to see more of it. Thank you!
Love it!!! I always scrapbook my camping weekend.. Thank you..
BEAUTIFUL