December 17, 2018
Bring Your Adventures to Life with Theme Park Scrapbook Layouts
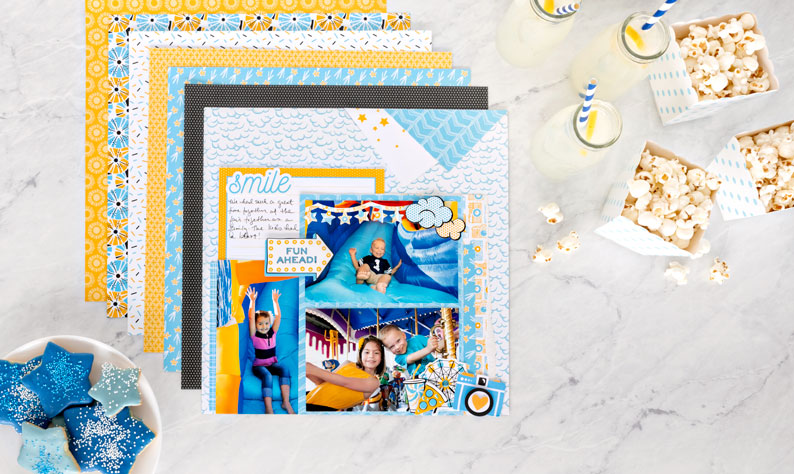
Is there any place on earth more fun for kids than a theme park? Although they can be a little intense for the adults that bring them there, the endless wonder and amazement on a child’s face when they go to these theme parks makes it all worth it. The rides are fun and the food is great — it’s a dream come true! It’s a day full of photo opportunities, meaning you’ll have tons of pictures of smiling kids that need a layout to call home. Luckily, the Imagine That! collection is full of fun themes and elements that make creating amusement park scrapbook layouts a breeze. Check it out!

To create this layout, you will need:
- Imagine That! Paper Pack
- Imagine That! Stickers
- Imagine That! Layered Embellishments
- Imagine That! Variety Mat Pack
- Original Border Maker System with the Star Banner Chain Border Maker Cartridge
- 12-inch Straight Trimmer
- Personal Trimmer
- All-Purpose Scissors
- Tape Runner
- Precision Point Adhesive Pen
- Foam Squares
- Black Dual-Tip Pen

Step 1: Use the cloud patterned paper for your base.


Step 2: Using your Personal Trimmer, rotate the star patterned mat on the trimmer to create a triangle. Then, insert a corner of the blue chevron patterned paper into the Personal Trimmer and cut a small triangle by rotating the paper slightly. Using your Taper Runner, mount both triangles at the top right side of the layout as shown.
Step 3: Using your 12-inch Straight Trimmer, cut the blue chevron patterned paper to measure 6-1/2″ x 8-1/2″, then adhere two photos, one below each other onto the rectangle as shown. Cut a 1″ x 4″ strip from the blue grid patterned paper and adhere the strip vertically to the bottom left side of the layout, approximately 1/4″ from the bottom of the layout. Adhere a 4″ x 6″ photo slightly over this strip. Then, mount the two matted photos over the right side of the vertical photo (covering approximately 3/4″).
Step 4: Select an Imagine That! mat and adhere it approximately 2-1/2″ from the top of the base, leaving 3/4″ space between the left side of the base and the mat, tucking it behind the photos as shown.
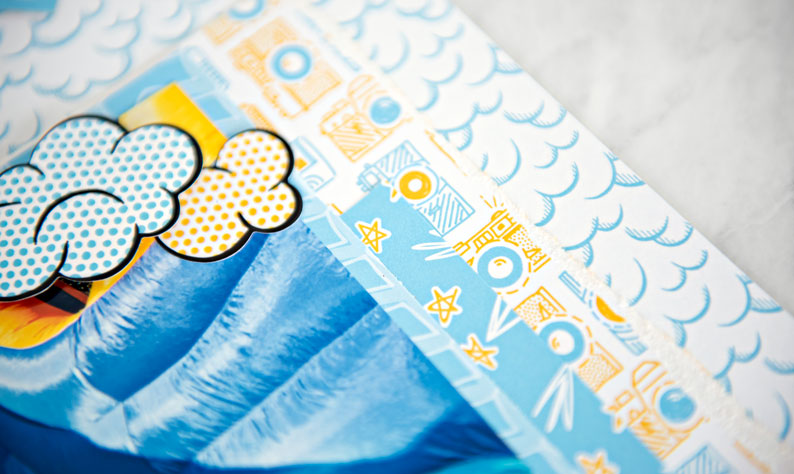
Step 5: Cut a strip from the camera patterned paper to measure 1″ x 8″, then tear the edge slightly. Adhere the strip along the side of the matted photos on the right side of the layout. Cut another strip from the shooting stars patterned paper to measure 1″ x 6-1/2″ and tuck it slightly behind the photos as shown.
Step 6: Using a piece of the camera patterned paper, the Original Border Maker System and the Star Banner Chain, punch a border and trim it down to 4-1/2″. Adhere it to the top photo as shown using your Precision Point Adhesive Pen.
Step 7: Using a Black Dual-Tip Pen, journal your story on the journaling mat.
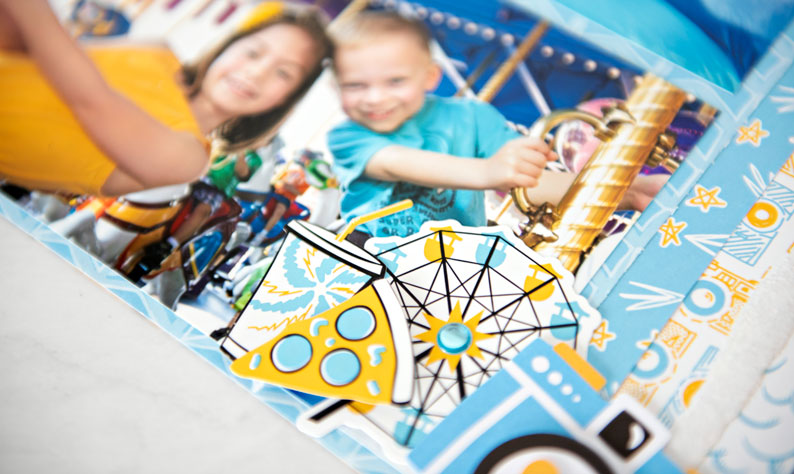
Step 8: Embellish your layout by adding stickers, embellishments and gems. Make sure to use Foam Squares on some of the die cuts for added dimension.
Trips to theme parks are always a fun affair, and you’re sure to have photos aplenty from your day(s) of adventure. You can decorate these photos and make them pop with the Imagine That! collection and its assortment of fun icons, themes and elements. What types of photos will you be putting in this theme park scrapbook layout? Let us know in the comments below!

I’m really focused on those trimmed triangles at the top of the page. I don’t think I’ve ever seen a page embellished in that way, and I LIKE IT!! Thanks for the inspiration :-)
Glad you like it! It’s a great idea :)
agree with Barb on the triangle edges – will try it on some vacation photos —and to be honest — if she had not brought attention to them I would have skipped my attention right past them!!!!
[…] Want to create the Imagine That! layout shown above? Get instructions now! […]