February 26, 2019
Put the PETAL to the Metal Creating Floral Scrapbook Borders with the Tulips Border Punch
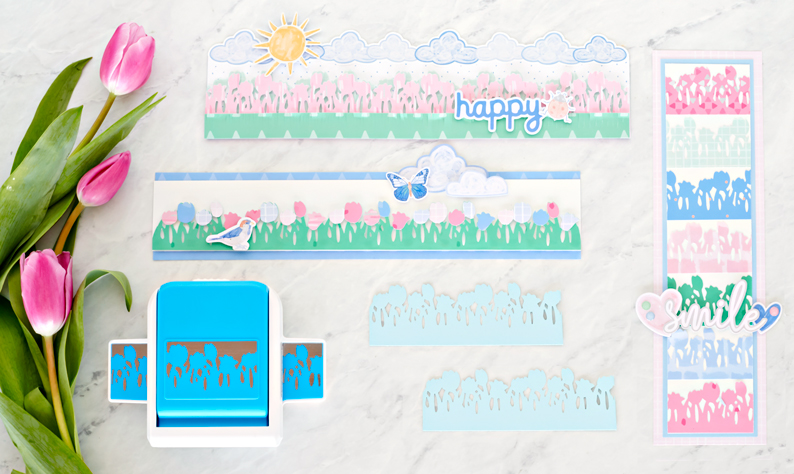
There have never been more awesome Creative Memories tools and supplies that you can use to create gorgeous spring scrapbook layouts, and the new Tulips Border Punch is one you’re definitely going to love – it creates stunning floral scrapbook borders that give your page the look of a warm and sunny day. While it makes beautiful borders on its own, you can add extra decorations to really spice it up! Take a look at this example of how you can add some flair to the flower scrapbook borders that you make with the Tulips Border Punch!
To create these borders, you will need:
- Blend & Bloom Blue, Green and Pink Paper Packs
- Blend & Bloom Stickers
- Blend & Bloom Embellishments
- 12-inch Trimmer
- Cloud & White Cardstock
- Tulips Border Punch
- Tape Runner with Repositionable Adhesive
- Foam Squares
- All-Purpose Scissors
Shop products by clicking your country’s icon below:


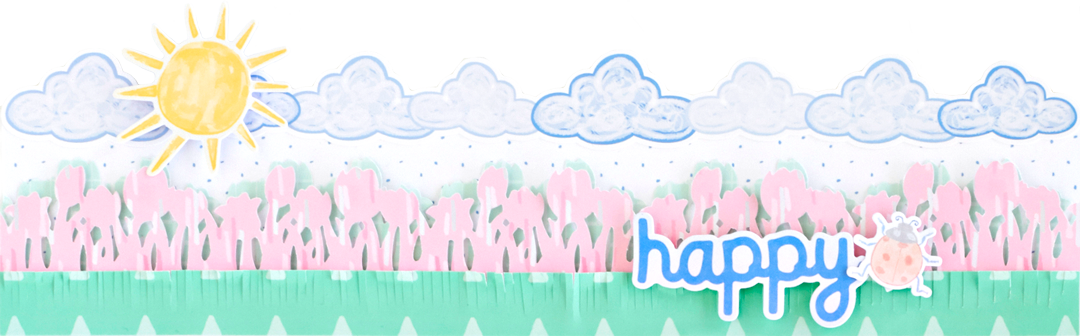
Step 1: Cut a piece of the blue dot patterned paper to measure 12″ x 2-1/2″. This is the base for the border.
Step 2: Using the Tulips Border Punch, punch along the edge of the light green patterned paper. Using the trimmer, cut to measure 2″ wide. Adhere along the bottom edge of the border.
Step 3: Using the Tulips Border Punch, punch along the edge of the pink patterned paper. Using the trimmer, cut to measure 2″ wide. Flip this piece over, so that the tulips are alternating on the border. Adhere this piece with Foam Squares.
Step 4: Cut a strip of green patterned paper to measure 12″ x 3/4″. Use scissors to cut small cut marks along one edge to create “grass.” Adhere to the bottom edge of the border. Use your fingers to curl back some of the “grass.”
Step 5: Adhere the clouds border sticker along the top edge of the border. Finish by adding other embellishments using Foam Squares.
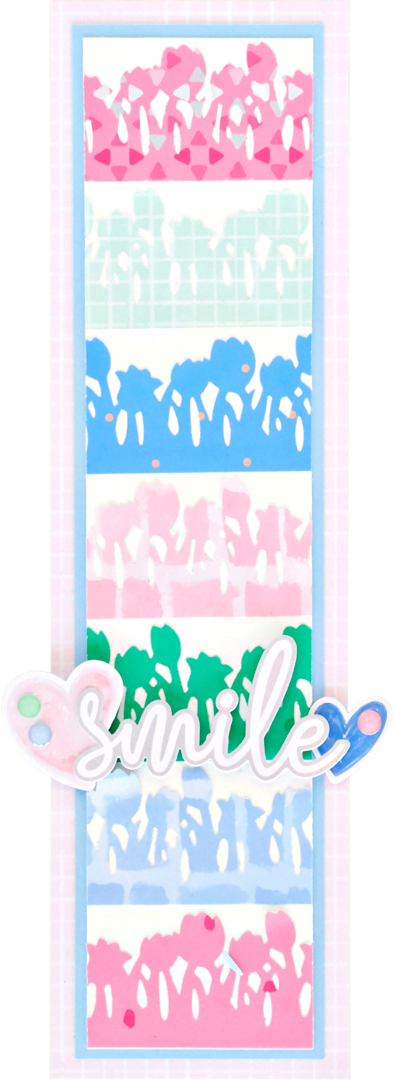
Step 1: Cut a piece from the light pink grid patterned paper to measure 3-1/4″ x 11″. This is the base for the border.
Step 2: Cut a piece of Cloud Cardstock to measure 2-3/4″ x 11″. Adhere to the border.
Step 3: Cut a piece of White Cardstock to measure 2-1/2″ x 10-3/4″.
Step 4: Using the Tulips Border Punch, punch six borders from different shades/patterns of paper. Adhere to the top of the White Cardstock using Repositionable Adhesive. Use a trimmer or scissors to trim any excess along the edge of the cardstock. Adhere to the border.
Step 4: Adhere hearts, the “smile” embellishment and enamel stickers to the border using Foam Squares on the embellishments.

Step 1: Cut a piece of the blue patterned paper to measure 12″ x 2-1/2″. This is the base for the border.
Step 2: Cut a piece of White Cardstock to measure 12″ x 2″. Adhere to the border.
Step 3: Using the Tulips Border Punch, punch a border from the green patterned paper.
Step 4: Using scraps of blue and pink papers, punch using the Tulips Border Punch. Using scissors, cut off the tops of the tulips. Adhere to the top of the green tulips border using Repositionable Adhesive.
Step 5: Adhere the border of tulips to the border using Foam Squares.
Step 6: Decorate your border by adding embellishments. Use Foam Squares on some to add dimension.
The Tulips Border Punch is the ultimate tool for adding a sprinkle of spring to your layouts with floral scrapbook borders. What types of layouts will you decorate by using this border? Let us know in the comments below!

Could someone please clarify on border #1, what do you mean by ‘light green patterned paper’? Light green splotches or light green gingham? And the ‘pink patterned’ as well. Totally cute ideas. Thanks!
Glad you like the ideas! We put that because it really doesn’t matter what papers you use, but here are the specific ones we used! The green patterned paper is the light green grid paper and the pink patterned paper is the painted line paper. Happy creating :)
Thank you! I always make the original border as it was designed and then I introduce alternatives.
The new Tulips Border Punch is a GREAT way to use up those colored scraps of paper that seem a shame to toss but who wants to keep piles of little scraps? While watching TV, you can fill up a little snack baggie full of tulip tops to make gorgeous borders for all those spring, garden tour, and Easter photos!
When I use this border punch (and others with detailed cuts), my paper often gets stuck in the punch. Is there something I can do to keep the paper from sticking in the punch?
Becky, there is a recommended weight of paper that works best in the punch. I know I’ve heard it, but right now, I can’t remember what it is. Perhaps if you call CM Customer Support, they can tell you.
Try using wax paper with your scrapping paper when you use the punch. People say the paper comes out easier.