April 18, 2019
Make an Egg-cellent Easter Scrapbook Layout!
We’re so egg-cited, we just can’t hide it – Easter is right around the corner! The pretty pastel shades, the bright and vivid dyed eggs, the joy in the air and the (sometimes) sunny weather makes this a great weekend for everyone who enjoys snapping pictures. You’ll likely be taking plenty of photos during Easter weekend, but what will you do with said photos? Don’t worry, be HOPPY because Kelly from Creative Memories Australia has come up with a fun Easter scrapbook layout that somebunny will love to look at in their album for years to come! Check it out in today’s post! (Oh, and if you’re thinking “For peeps’ sake – enough with the Easter puns already!” don’t worry, that’s all yolks. Seriously, that’s the last one!)
Kelly’s Inspiration
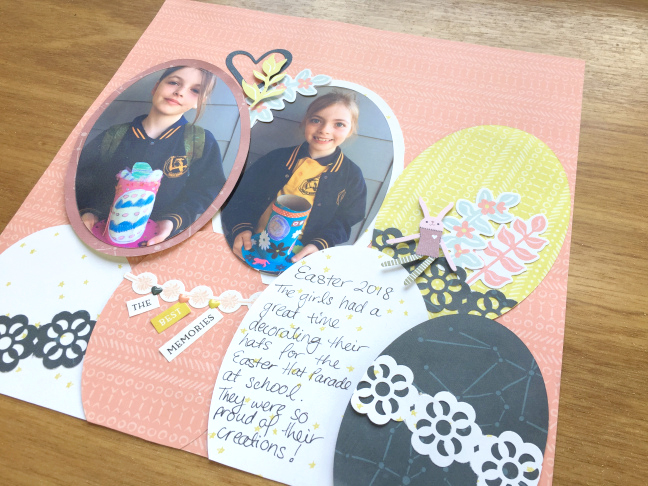
In my house, Easter is one of those times of year I find myself snapping plenty of photos of my girls, whether it be their Easter hat parade creations for school or the action (and aftermath) of the Easter egg hunt! It’s a joyful time of year that I want to capture in my scrapbooks, and this playful layout featuring fun egg shapes is one you can create to populate with up to five of your special Easter photos.

To create this scrapbook layout you’ll need:
- Storytime Tone-on-Tone Paper Pack or (Shop Canada | Shop Australia)
- Storytime Embellishments or (Shop Canada | Shop Australia)
- Simply Sunshine Stickers or (Shop Canada | Shop Australia)
- Doily Border Punch or (Shop Canada | Shop Australia)
- Custom Cutting System Oval Patterns with Red and Blue Blades or (Shop Canada | Shop Australia)
- All-Purpose Scissors or (Shop Canada | Shop Australia)
- Tape Runner with Repositionable Adhesive or (Shop Canada | Shop Australia)
- Foam Squares or (Shop Canada | Shop Australia)
- Black Dual-Tip Pen or (Shop Canada | Shop Australia)

Step 1: Select the background paper for your layout and crop an oval from the middle of the sheet using the smallest Oval Custom Cutting System Pattern and the Red Blade. It’s a paper-saving tactic, but don’t worry, we’ll be covering up this hole! (Note: All cuts for this layout are on the outside edge of the patterns.)
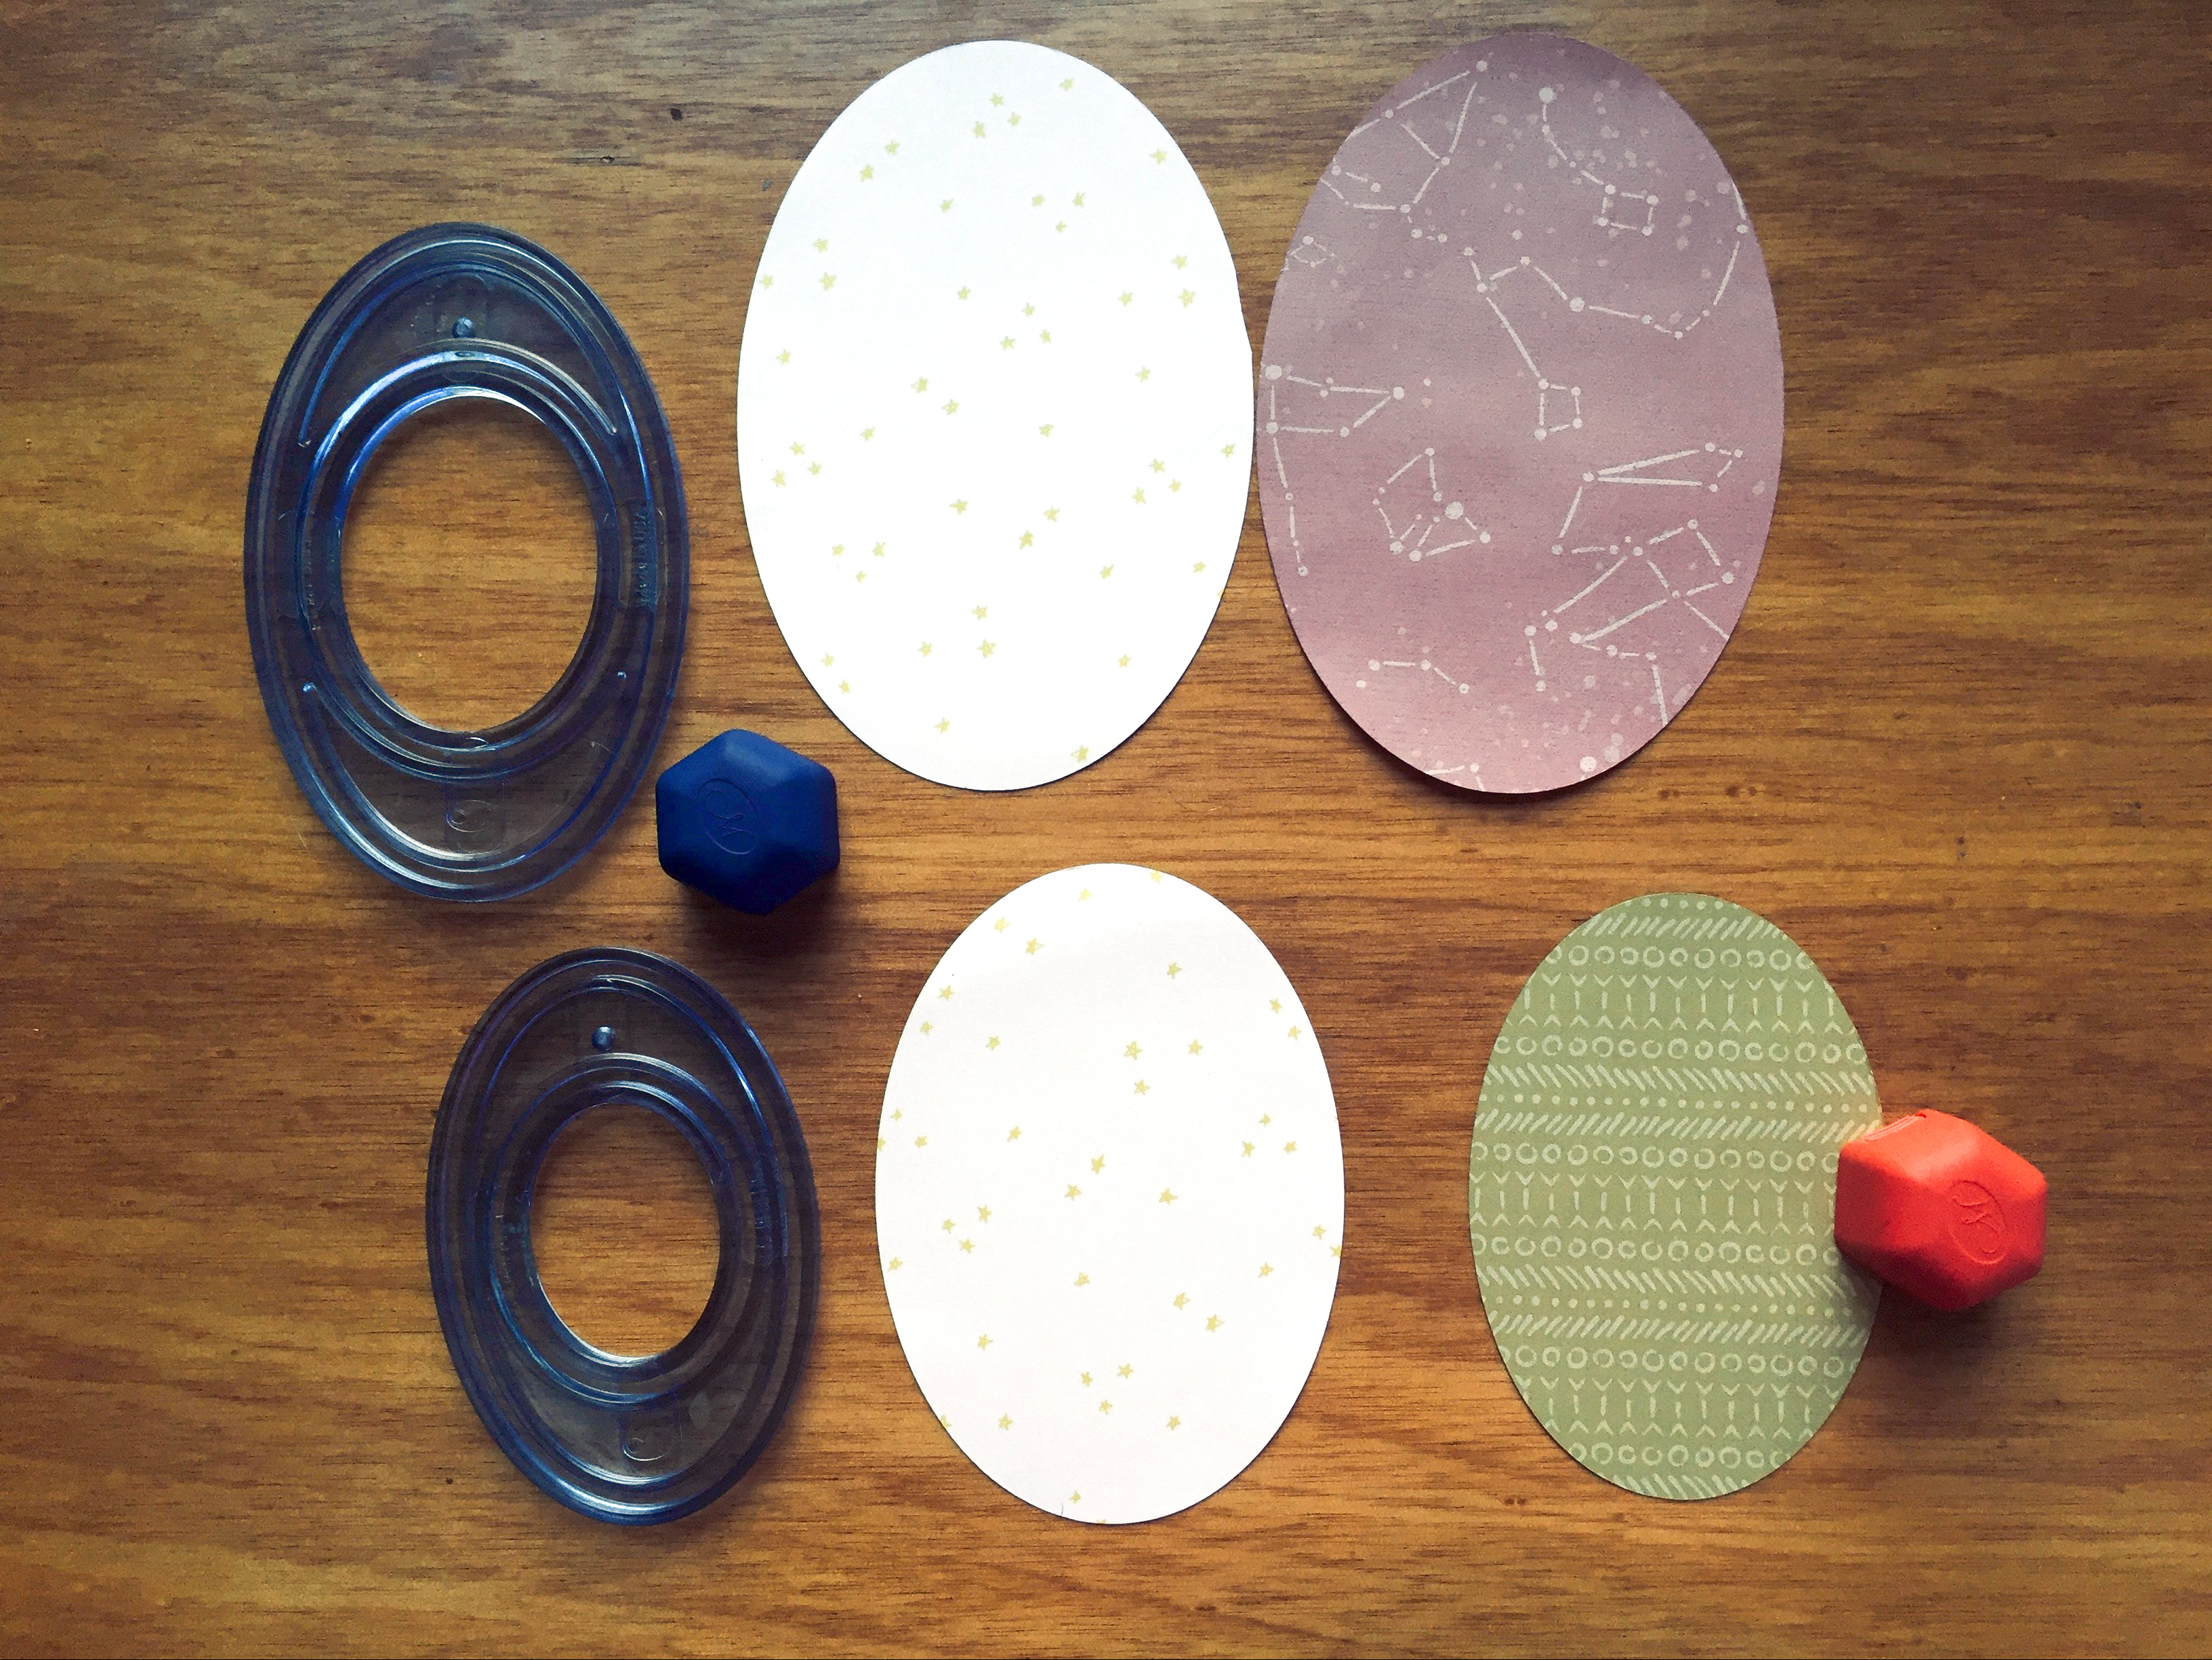
Step 2: From your other two sheets of paper, crop two ovals using the second largest pattern and one with the smallest pattern using the Blue Blade. Crop a fourth oval with the smallest template and the Red Blade (Optional: Crop a photo instead of paper). Flip the ovals over for additional patterns.

Step 3: Crop two photos into ovals with the second smallest pattern and the Red Blade. Crop two more paper ovals with the second smallest template and the Red Blade. (Optional: Crop photos in place of paper for any of these ovals.) Punch some border pieces using the Doily Border Punch from the white and navy patterned papers.

Step 4: Roughly assemble the position of elements for your layout, overlapping ovals and matting the photos on top of larger ovals. Choose the bunny embellishment, along with your choice of floral embellishments, to group together. (Note: If you have more photos and fewer paper ovals, position your embellishments to avoid covering photos.)
Step 5: Begin adhering the elements into place. First, use the Repositionable Tape Runner to adhere the doily borders on the ovals of your choice and trim the excess with scissors. Mat two photos with the larger paper ovals. Adhere and overlap the ovals in order to create a layered effect. Adhere the top left oval and the bottom right oval to the layout last using Foam Squares for dimension. Adhere the embellishments in position using a mixture of Repositionable Tape Runner for the finely cut pieces and Foam Squares for a few to add height.


Step 6: Add stickers to one of the paper “eggs” to create a title and finally journal your Easter memories!

Wishing you a happy Easter! Tell us below — what are your most special Easter memories that you want to capture in your scrapbook albums?


Cute!! A great reminder about our great Custom Cutting system!! With the Border maker, we forget the other great system we have sometimes!!
Love it . Very Eggy!!
[…] […]
[…] Get Instructions! […]