May 1, 2019
Create Beautiful DIY Paper Rosettes with the Flourish Collection

Have some leftover scrapbook papers that you don’t have a use for? Do you have scraps of paper lying around that aren’t large enough to use in an album? You’re in luck, because with a little bit of inventiveness and imagination from CM Advisor Tina (and the help of the Custom Cutting System Circle Patterns) you can create your very own DIY paper rosettes! These rosettes work great as decorations for events or parties (plus, they just look cool). Check out how they look when done with the Flourish papers!
To create this project, you will need:
- Decorative Paper Pack or (Shop Canada | Shop Australia)
- Decorative Stickers or (Shop Canada | Shop Australia)
- Decorative Variety Mat Pack or (Shop Canada | Shop Australia)
- 12-inch Trimmer with the Scoring Blade or (Shop Canada | Shop Australia)
- All-Purpose Scissors or (Shop Canada | Shop Australia)
- Custom Cutting System with the Circle Patterns or (Shop Canada | Shop Australia)
- Tape Runner with Repositionable Adhesive or (Shop Canada | Shop Australia)
- Multi-Purpose Tool or (Shop Canada | Shop Australia)
- Hot Glue Gun

Step 1: For each rosette, cut two strips of patterned paper that measure 1-1/2″ x 12″ and 1-1/2″ x 6″.
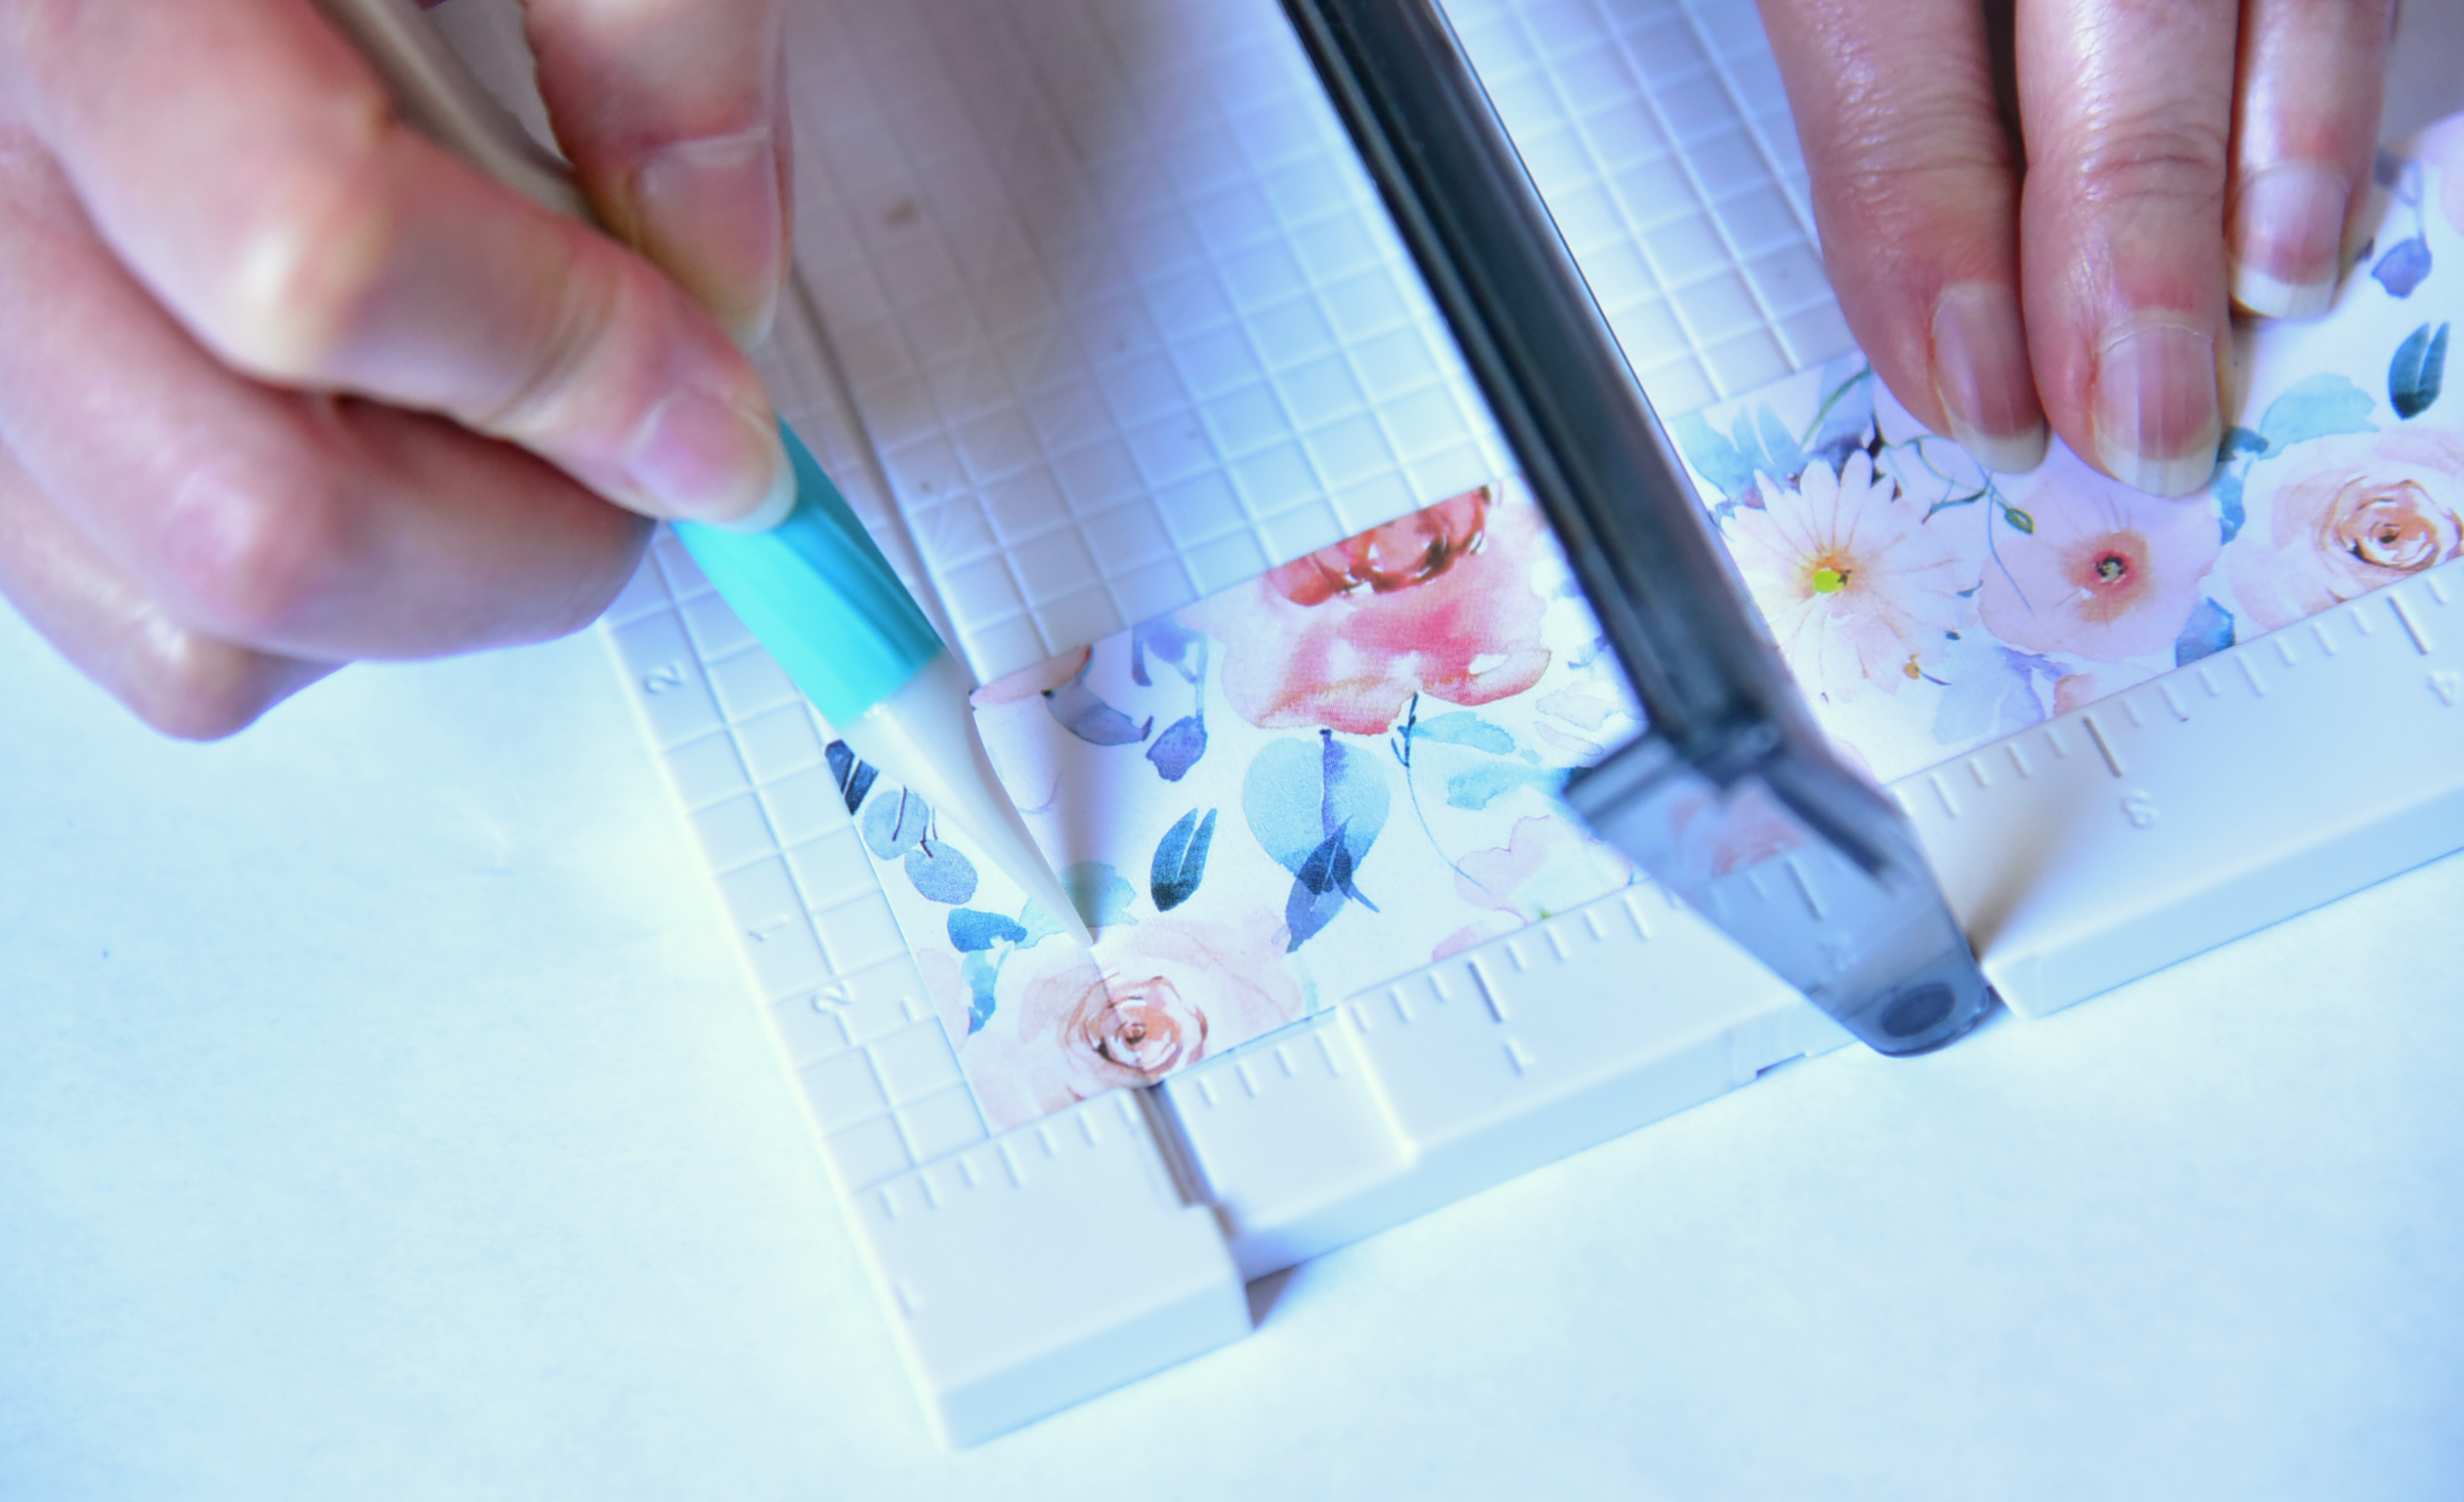
Step 2: Score each strip at 1/2″ intervals using the Multi-Purpose Tool and 12-inch Trimmer, or the new 12-inch Trimmer and the Scoring Blade. Accordion fold the two strips.
Step 3: Using Repositionable Adhesive, adhere the 6″ strip to the 12″ strip and then adhere the ends to make a loop.
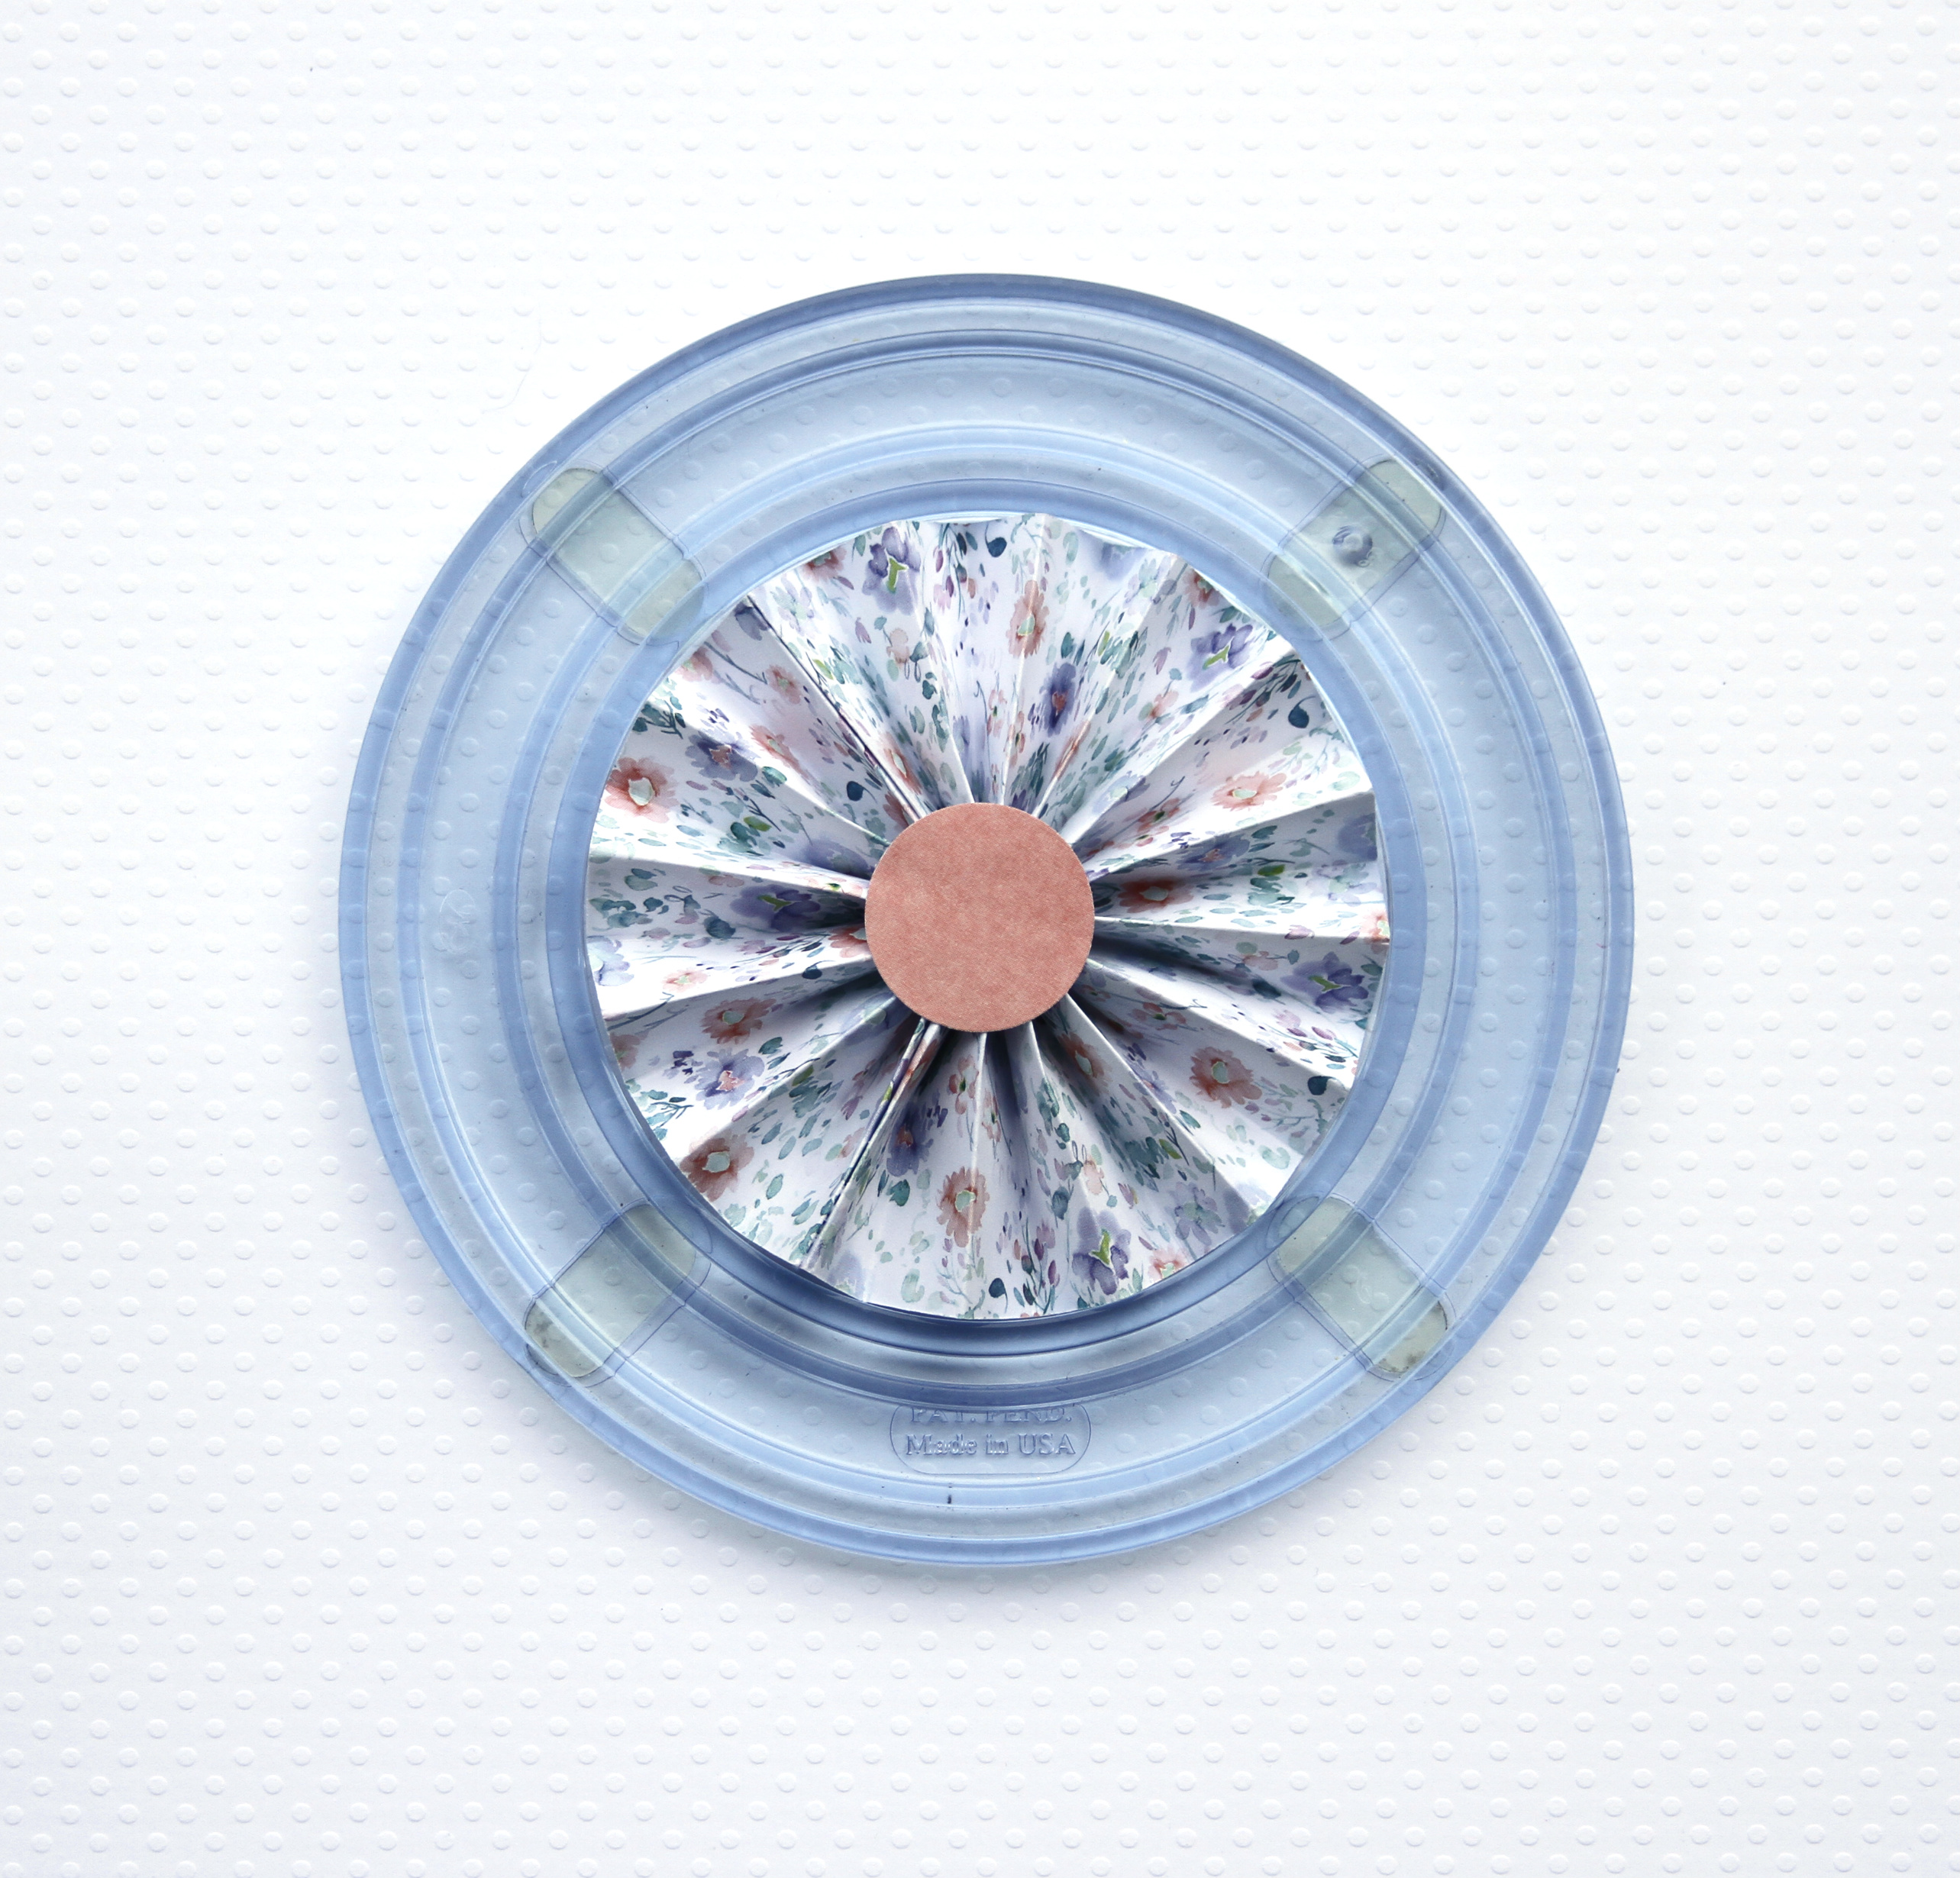
Step 4: Using the smallest Circle Custom Cutting System Pattern and cut onto the cardstock along the inside of the ring with the Green Blade. Then, using the largest Circle Custom Cutting System Pattern, gently press the pleated loop until it nestles inside. Even out the pleats. Put a glop of hot glue along the top of the pleats and press one of the punched circles into the glue and hold until it hardens. Flip the rosette over and repeat this same process on the other side.
Step 5: Using the inside ring of the smallest Circle Custom Cutting System Pattern, cut a circle from cardstock or a Variety Mat Pack and adhere to the middle of the rosette.
Step 6: Adhere a heart sticker from the Flourish Stickers to a matching mat. Fussy cut out the heart and adhere to the middle with Foam Squares.

Step 7: Adhere the straw to the back of the rosette with hot glue.
If you love a fun DIY paper craft project, these paper rosettes are perfect for you! No matter what you use them for, they’re guaranteed to add a little bit of fun and whimsy to your day. What could you envision yourself using these DIY paper rosettes for? Let us know in the comments below!

These are really cute – smaller would be wonderful cupcake toppers. Another great use for your leftover paper stash is to start making cards using the beautiful white card and envelope boxed set
. You can also line the envelopes using coordinating paper. Place a piece in the envelope holding back from the bottom by 1/2″ then cut the end nearest the point of the envelope to match the shape of the flap. Once cut push the paper in to the bottom of the envelope. Voila! it now misses the glue. add a little tape runner adhesive to hold the liner in place – done!!!
I’m going to make Paper Rosettes using this method and use them on my scrapbook pages as embellishments! CM has put four rosettes into the Happy Birth-YAY Embellishment Pack, and I don’t see any reason you couldn’t make your own with other decorative papers to match your theme! The only possible objection might be using hot glue in your scrapbook, but since the pages are buffered, and the hot glue will be contained to one area and covered with the cardstock circle, I feel sure it’s a go! Thanks for the idea!