May 28, 2019
Create a Simple Scrapbook Layout with the Fold-Over Page Recipe
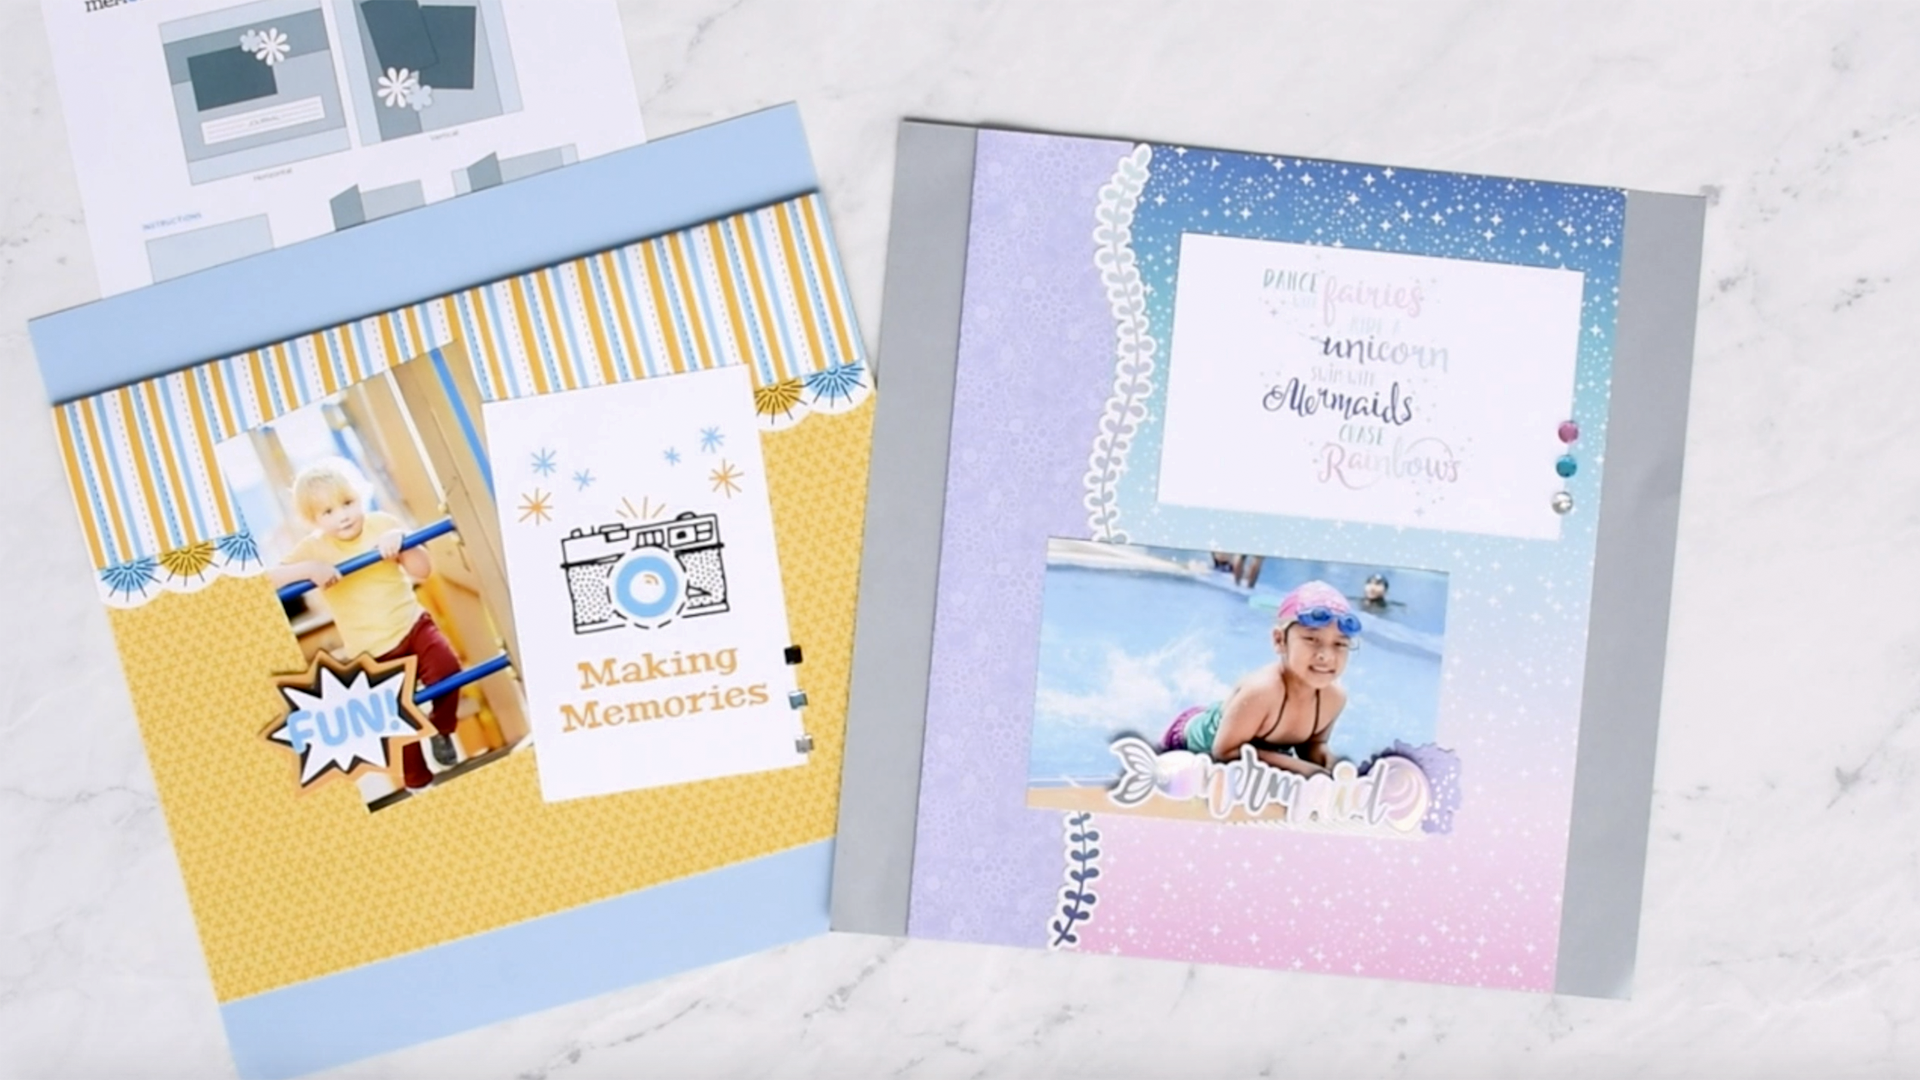
Sometimes less is more. Sure, everyone loves to see intricate scrapbook layouts with lots of layers, countless cuts and a deluge of decorations. But sometimes your photos are best served when placed on a simple scrapbook layout. By using the Fold-Over Page Recipe, you can create a clean, uncluttered layout within minutes – you don’t even need a trimmer to make it work! Just grab papers, stickers and adhesive and follow the instructions below — you’ll be on your way to creating a modern, minimal masterpiece in no time!
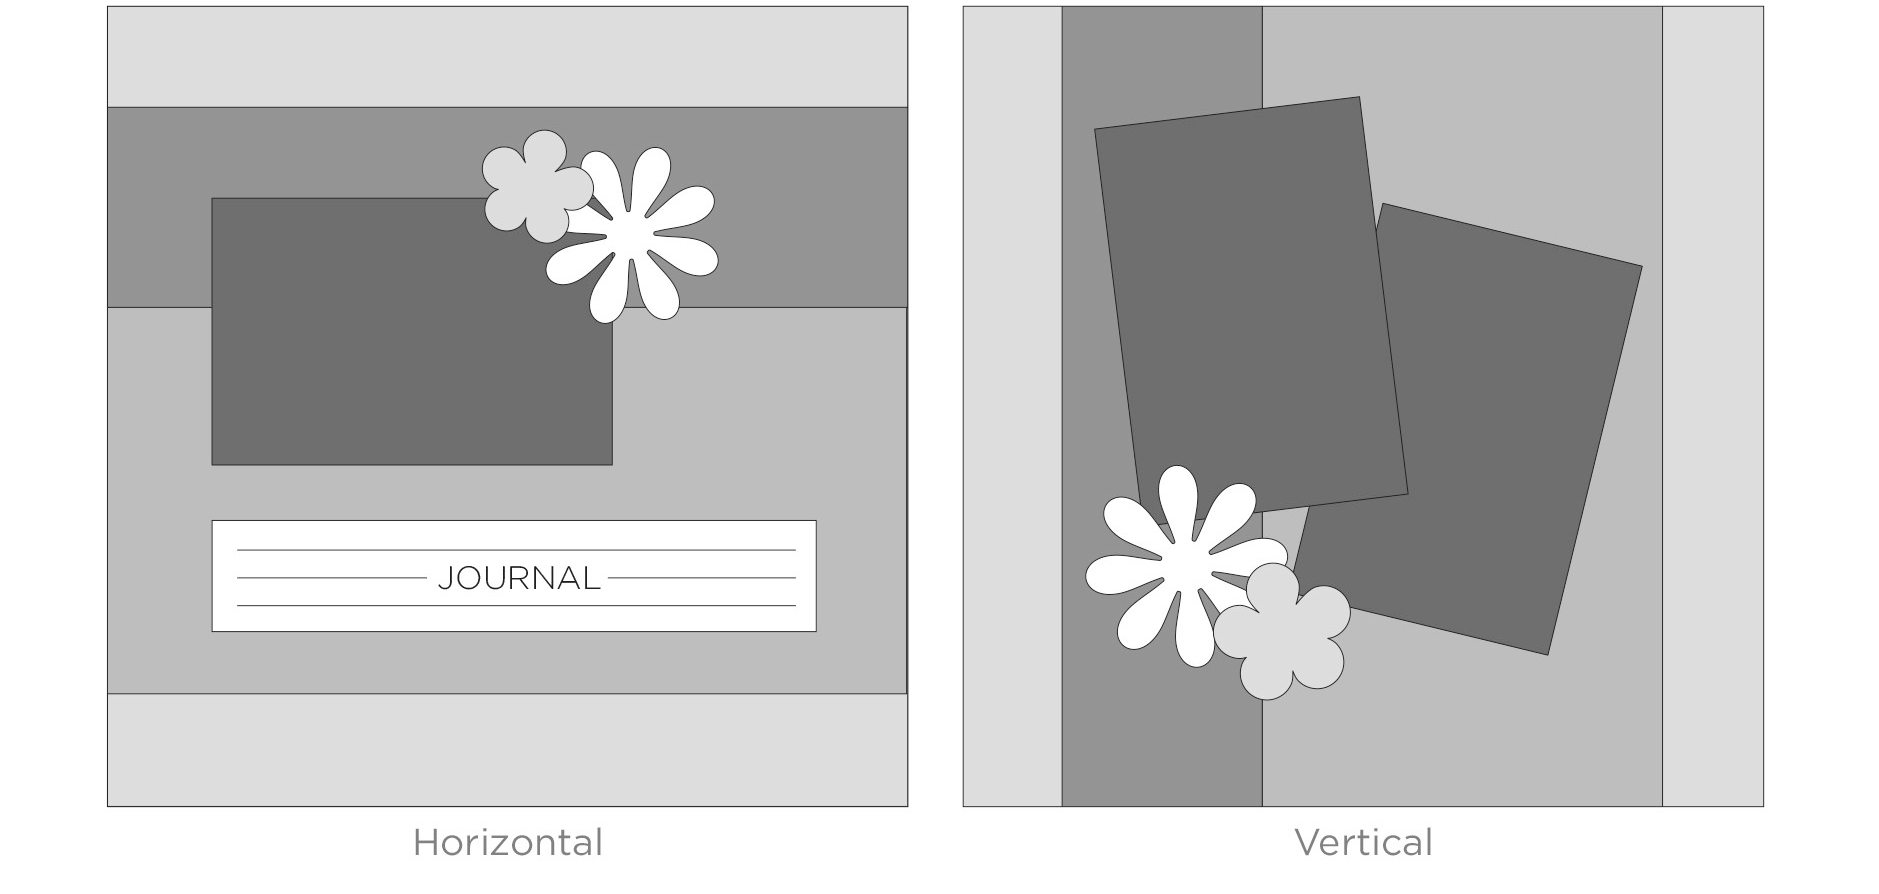
This layout can be made horizontal or vertical – it’s up to you!
To create this layout, you will need:
- 1 sheet of cardstock or (Shop Canada | Shop Australia)
- 1 sheet of designer paper or (Shop Canada | Shop Australia)
- Tape Runner or (Shop Canada | Shop Australia)
- Stickers/Embellishments or (Shop Canada | Shop Australia)
- Foam Squares or (Shop Canada | Shop Australia)
- Black Dual-Tip Pen or (Shop Canada | Shop Australia)
Step 1: Use one sheet of cardstock as the base for the layout.
Step 2: Fold the designer paper at roughly 3″.
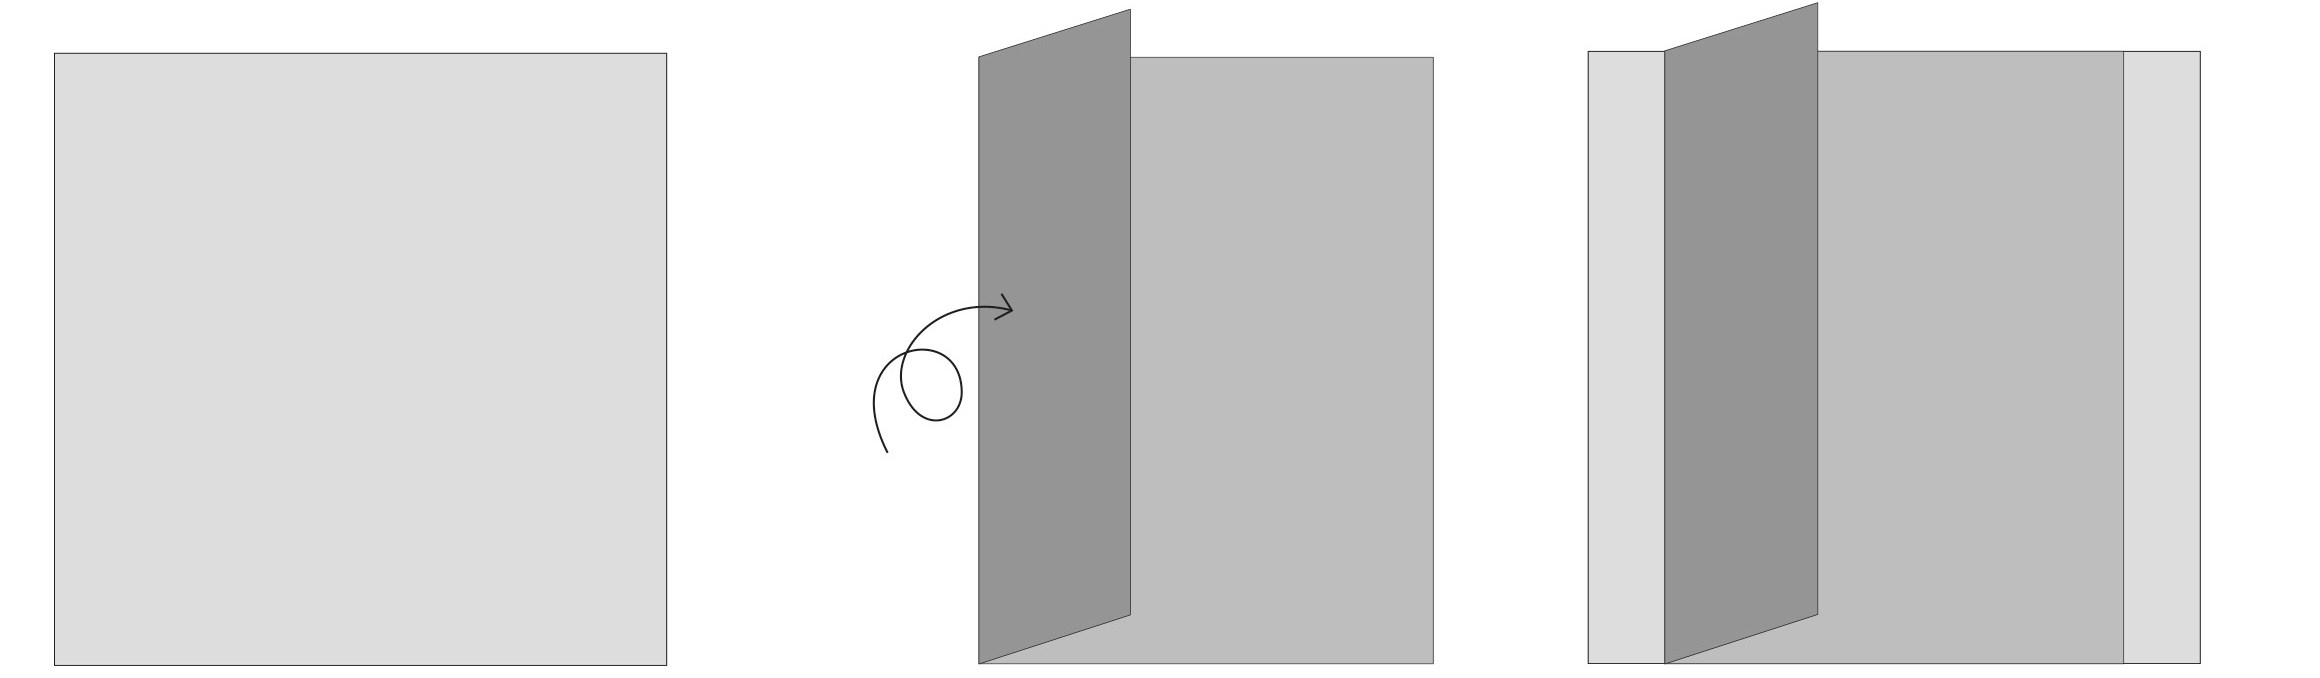
Step 3: Adhere the 9″ portion of the designer paper to the cardstock using the Tape Runner, leaving the 3″ section folded back.
Step 4: Adhere the folded piece in place with the Tape Runner.
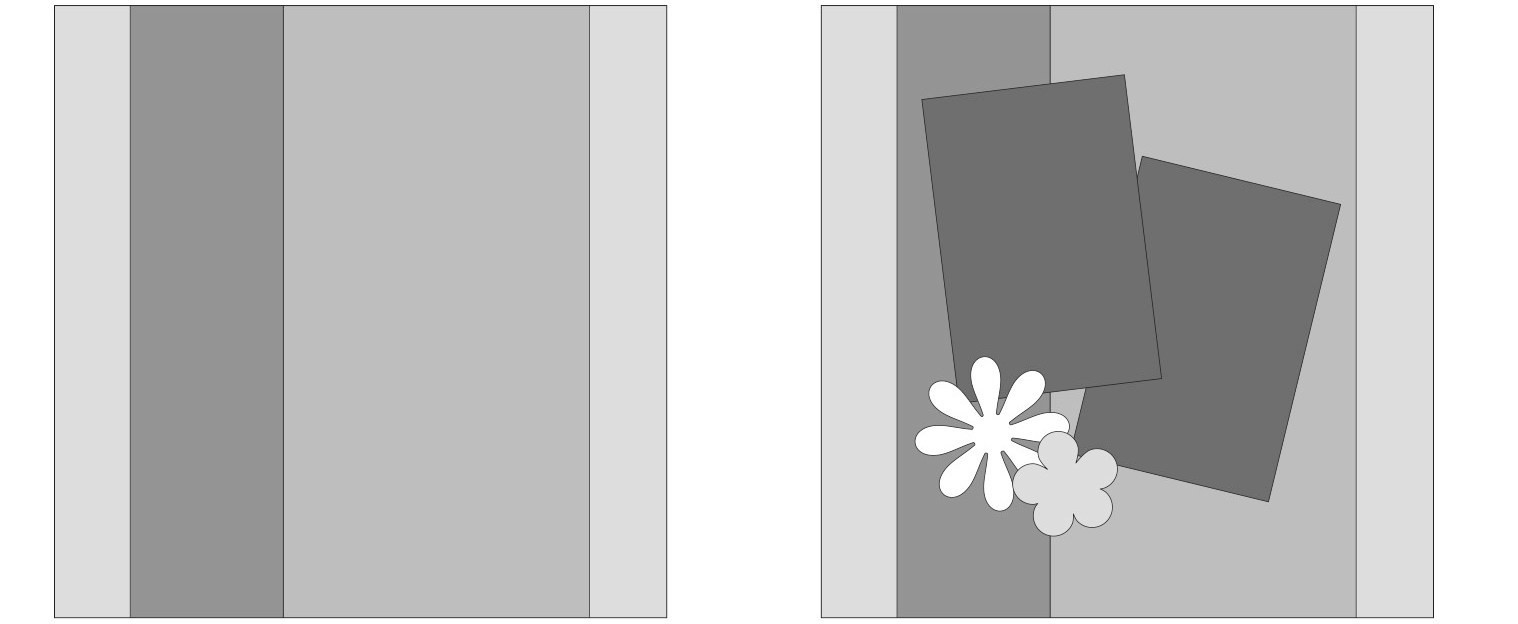
Step 5: Adhere one or two photos and embellish however you wish.
Creating stunning scrapbook layouts doesn’t have to be complicated at all! With a little bit of creativity, there’s no limit to what you can create. What do you like most about this fold-over scrapbook layout? Let us know in the comments below!

Love this idea!!!!
I would like to know the papers used in this video please
The papers are from the Imagine That! and Mermaid Cove collections.
I love this idea of the fold over layout. I tried it with the folded paper folded on an angle as well with 2 folds so that there is no over hanging paper. It works great and gives a different look to my page
Tried a few of these at our NSD. Great looking and SO easy!
Please identify the papers used! Thanks.
Hi Christy – The papers are from the Imagine That! and Mermaid Cove collections that launched back in December.
Great idea! So easy and looks like it it took a long time to make!!
Love the video included with the instructions.
I also love the paper!
bonus, you could also use the ‘folded-over’ area as a pocket, if you had something you wanted to tuck into that space!! I will definitely be making a couple layouts using this technique, for sure.
Great idea! Glad you like this technique :)