June 14, 2019
Create DIY Father’s Day Cards that Dad Will Love
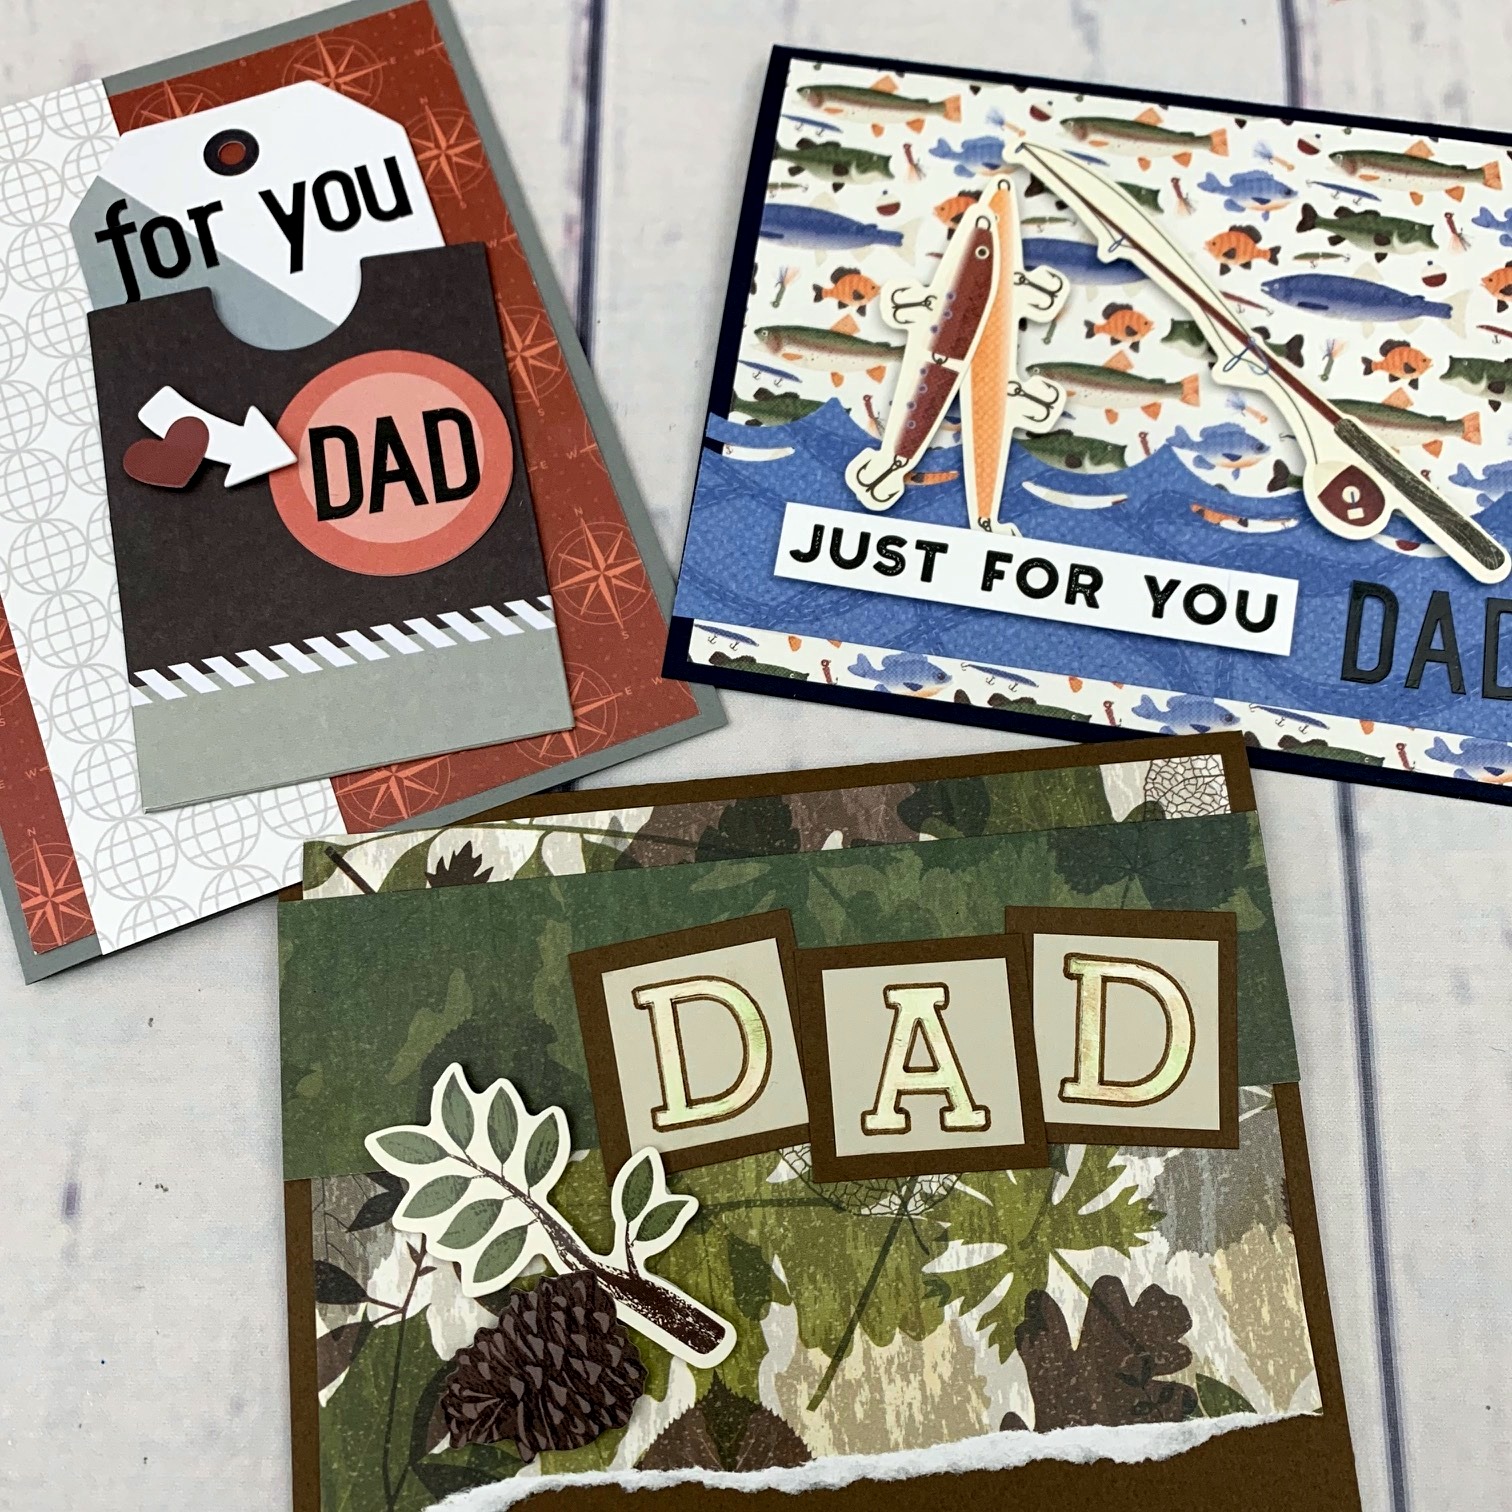
Father’s Day is just around the corner in North America — do you have your card picked out? If not, don’t panic – you can make a custom Father’s Day card for your dad that reflects his personality and passions! These three cards all use simple paper shapes cut to the same size, but with a few small changes, they turn into completely different cards tailored just to Dad! Learn more about how to create these DIY Father’s Day cards below and show some love to the main man in your life.
For the Fisherman:

To create this card you’ll need:
- Explorer Paper Pack or (Shop Canada | Shop Australia)
- Explorer Stickers or (Shop Canada | Shop Australia)
- How-Do-You-Do Stickers or (Shop Canada | Shop Australia)
- Black Sans Serif ABC/123 Stickers or (Shop Canada | Shop Australia)
- Navy Cardstock or (Shop Canada | Shop Australia)
- 12-inch Trimmer with the Straight Blade and Scoring Blade or (Shop Canada | Shop Australia)
- Original Border Maker System with Scallop Wave Border Maker Cartridge or (Shop Canada | Shop Australia)
- Tape Runner or (Shop Canada | Shop Australia)
- Foam Squares or (Shop Canada | Shop Australia)
- Silver Metallic Dual-Tip Pen (Optional) or (Shop Canada | Shop Australia)

Step 1: Cut the Navy Cardstock into a 5-1/2″ x 8-1/2″ rectangle using the 12-inch Trimmer outfitted with the Straight Blade. Open the blade housing, remove the Straight Blade and insert the Scoring Blade. Place the cardstock rectangle in the Trimmer with the long edge at the top. Score it at 4-1/4″ and remove it from trimmer. Fold it in half to create a standard card. Turn the card so the fold is at the top.
Step 2: Trim the fish patterned paper into a 5-1/4″ x 4″ rectangle (Tip: Make sure your fish are “swimming” in the right direction when you make your cut!) Adhere the paper to the base of the card as shown.
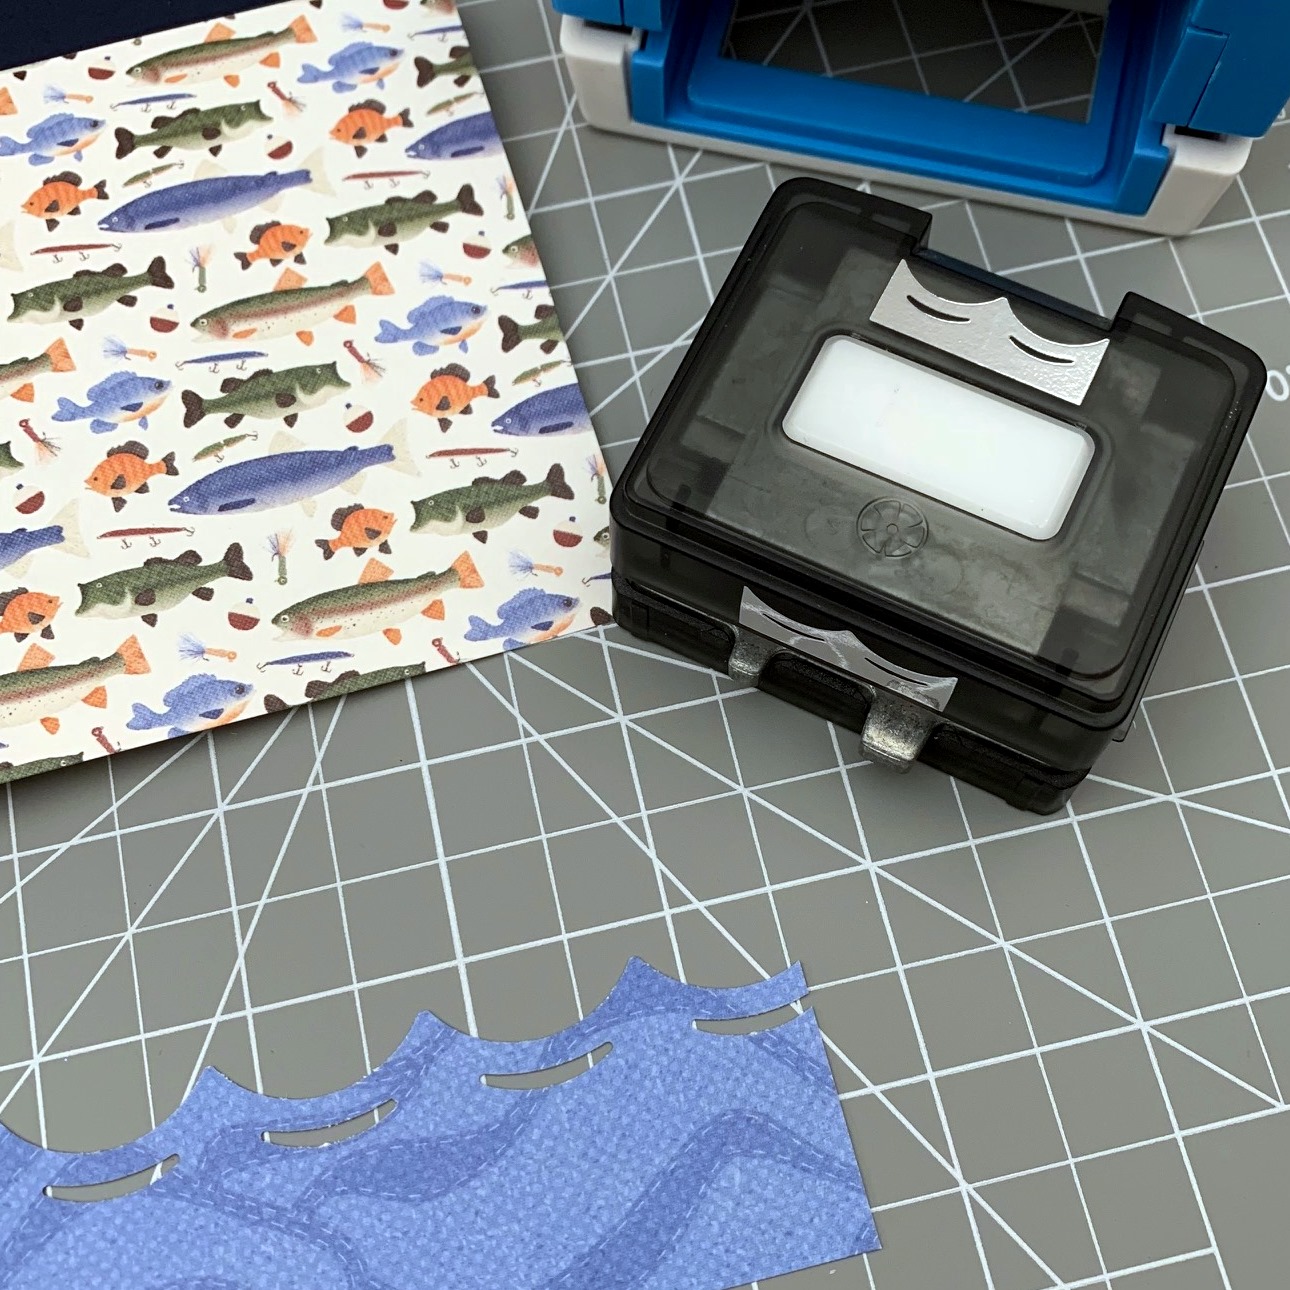
Step 3: Using the Original Border Maker System and the Scallop Wave Border Maker Cartridge, punch a border from the blue wave patterned paper. Trim the border to measure 5-1/2″ x 1-1/2″. Adhere it on top of the fish patterned paper as shown.
Step 4: Add the fishing pole and the fish stickers from the Explorer Sticker Pack using Foam Squares.
Step 5: Adhere the “Just for you” sticker from the How-Do-You-Do Sticker Pack on top of the wave border using Foam Squares. Add the word “DAD” using the Black San Serif ABC/123 Stickers beside it.
Step 6: Write your message inside. (Tip: Try using the Silver Metallic Dual-Tip Pen to write on dark cardstock!)
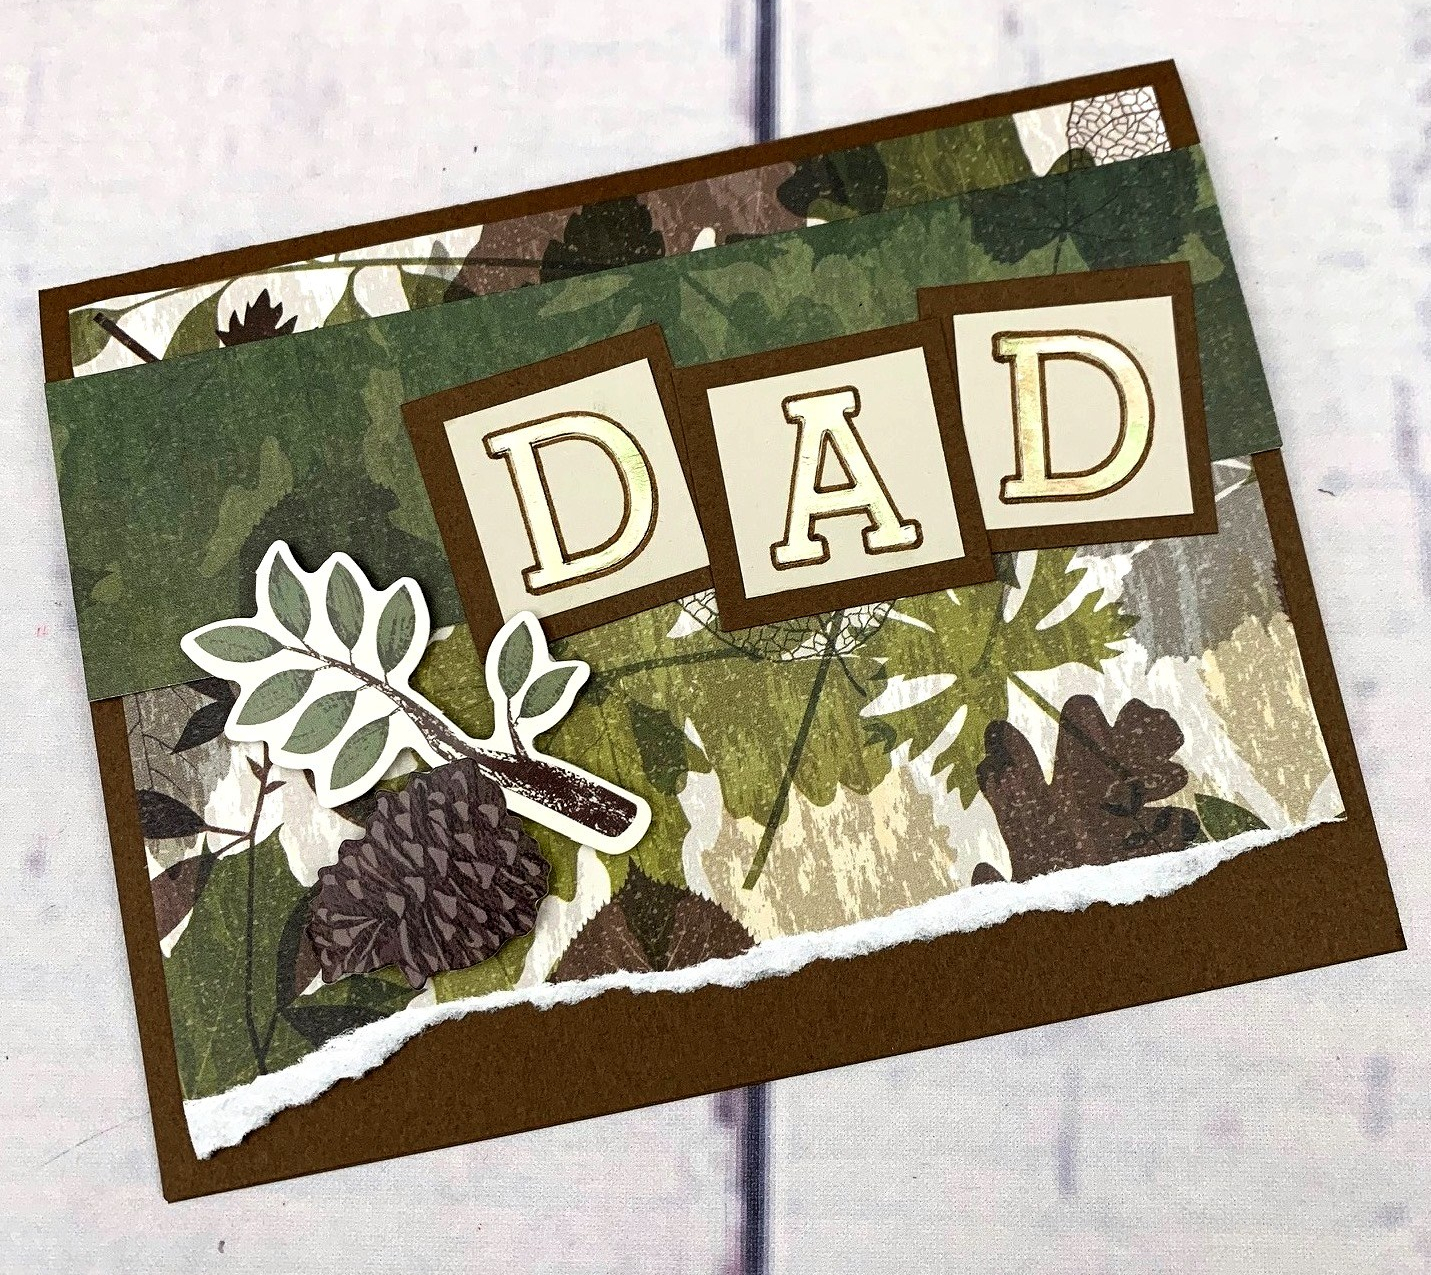
For the Nature Lover:
To create this card you’ll need:
- Camouflage Paper Pack or (Shop Canada | Shop Australia)
- Explorer Stickers or (Shop Canada | Shop Australia)
- White Serif ABC/123 Stickers or (Shop Canada | Shop Australia)
- Beige & Brown Cardstock or (Shop Canada | Shop Australia)
- 12-inch Trimmer with the Straight Blade and Scoring Blade or (Shop Canada | Shop Australia)
- Tape Runner or (Shop Canada | Shop Australia)
- Foam Squares or (Shop Canada | Shop Australia)
- Brown Dual-Tip Pen or (Shop Canada | Shop Australia)
- Green Dual-Tip Pen from the Pens & Pouch or (Shop Canada | Shop Australia)
- Gold Metallic Dual-Tip Pen (Optional) or (Shop Canada | Shop Australia)
Step 1: Cut the Brown Cardstock into a 5-1/2″ x 8-1/2″ rectangle using the 12-inch Trimmer outfitted with the Straight Blade. Open the blade housing, remove the Straight Blade and insert the Scoring Blade. Place the cardstock rectangle in the trimmer with the long edge at the top. Score it at 4-1/4″ and remove it from the Trimmer. Fold it in half to create a standard card and turn it so the fold is at the top.

Step 2: Trim the green and brown leaf patterned paper into a 5-1/4″ x 4″ rectangle. Tear or rip one edge to create a distressed finish. Adhere it on the card with the ripped edge toward the bottom of the card.
Step 3: Trim the green leaf patterned paper to measure 5-1/2″ x 1-1/2″ and adhere it to the upper part of the card as shown.
Step 4: Cut three 1-1/4″ x 1-1/4″ squares of Brown Cardstock and three 1″ x 1″ squares of Beige Cardstock. Mount the smaller beige squares on top of the brown squares and set aside.
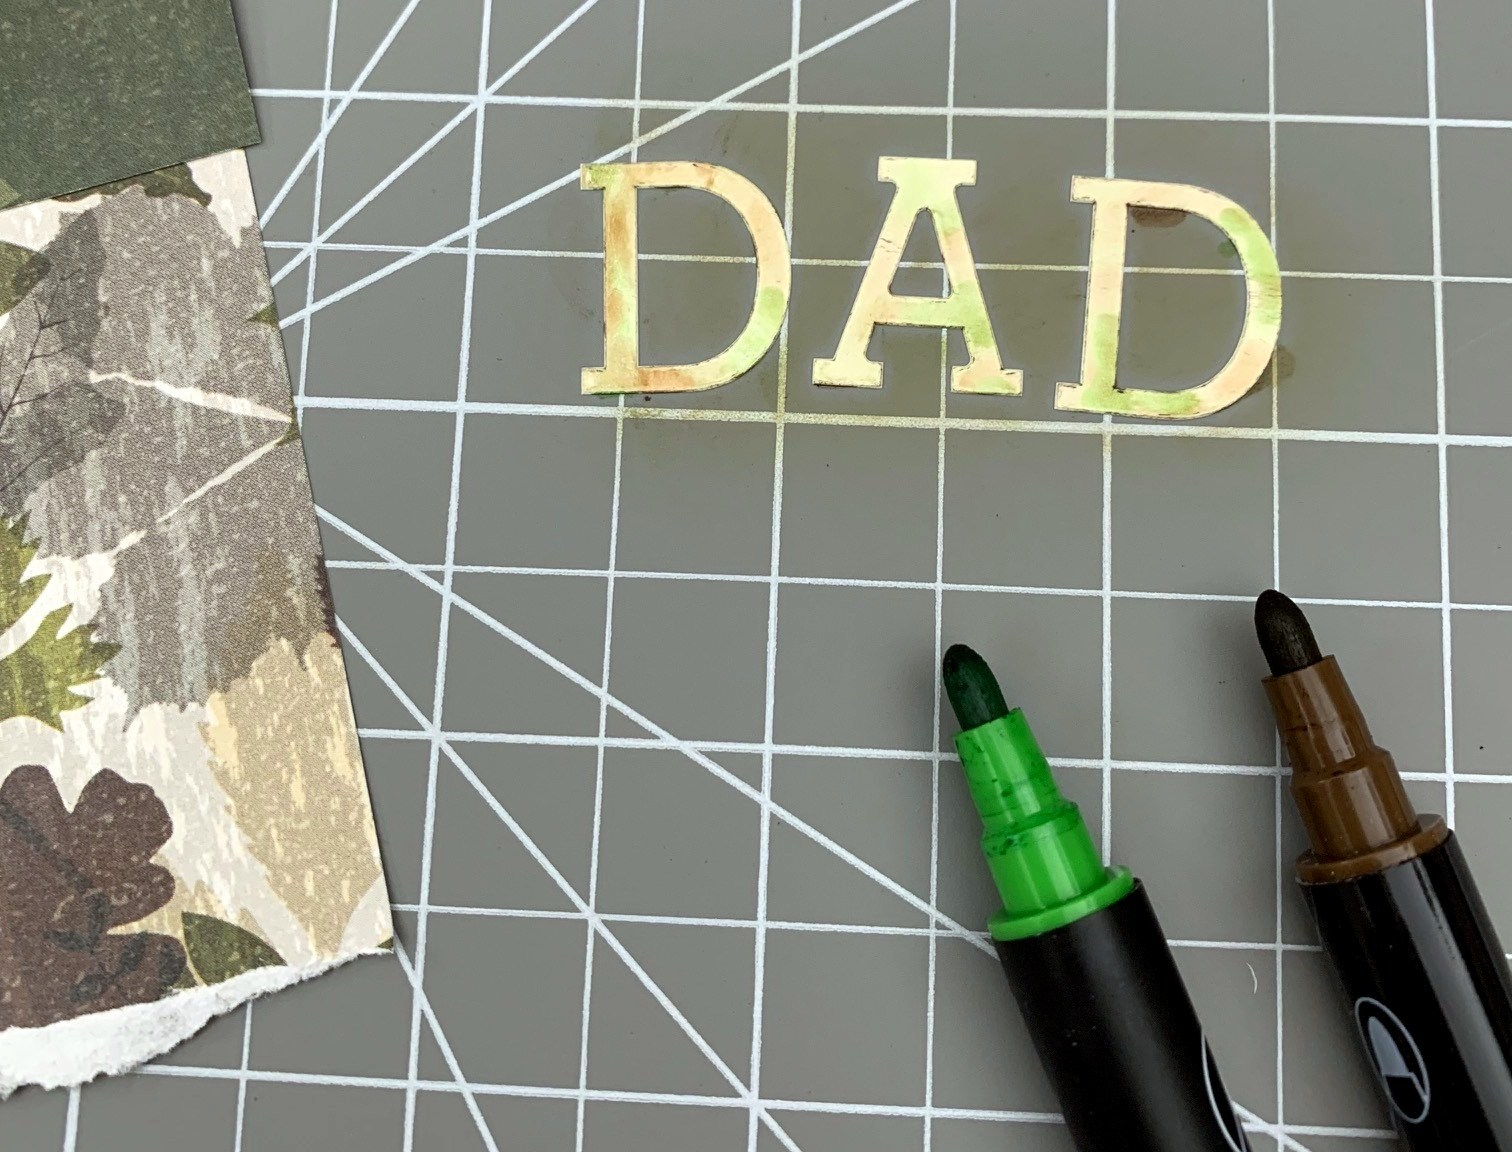
Step 5: Gently place uppercase “D-A-D” letters onto a non-porous surface like your work mat or a small plastic bag. Use the Green and Brown Dual-Tip Pens to fill each letter, adding dots and dabs of each pen and blending them with a tissue to create a camouflage effect. Let them dry briefly. Adhere the letters on top of the Beige and Brown Cardstock squares. Outline each letter with the Brown Dual-Tip Pen. Mount each letter square onto the card overlapping the green leaf patterned paper.
Step 6: Adhere the small tree branch and pine cone stickers from the Explorer Sticker Pack with Foam Squares as shown.
Step 7: Write your message inside (Tip: Try using the Gold Metallic Dual-Tip Pen to write on the Brown Cardstock or add a small rectangle cut from the Beige Cardstock.)
For the Traveler:

To create this card you’ll need:
- Travel Log Paper Pack or (Shop Canada | Shop Australia)
- Travel Log Banner & Tag Embellishments or (Shop Canada | Shop Australia)
- Travel Log Pocket Embellishments or (Shop Canada | Shop Australia)
- Black Sans Serif ABC/123 Stickers or (Shop Canada | Shop Australia)
- Gray Cardstock or (Shop Canada | Shop Australia)
- 12-inch Trimmer with the Straight Blade and Scoring Blade or (Shop Canada | Shop Australia)
- All-Purpose Scissors or (Shop Canada | Shop Australia)
- Tape Runner or (Shop Canada | Shop Australia)
- Foam Squares or (Shop Canada | Shop Australia)
- Black Dual-Tip Pen or (Shop Canada | Shop Australia)
Step 1: Cut the Gray Cardstock into a 5-1/2″ x 8-1/2″ rectangle using the 12-inch Trimmer outfitted with the Straight Blade. Open the blade housing, remove the Straight Blade and insert the Scoring Blade. Place the cardstock rectangle in the Trimmer with the long edge at the top. Score it at 4-1/4″ and remove it from the Trimmer. Fold it in half to create a standard card and turn it so the fold is at the left side.
Step 2: Trim the red compass patterned paper into a 4″ x 5-1/4″ rectangle and adhere it onto the base of the card as shown.
Step 3: Trim the gray globe patterned paper to measure 1-1/2″ x 5-1/2″ and adhere it toward the left side of the card as shown.

Step 4: Trim the point off the red location tag with the All-Purpose Scissors.
Step 5: Use uppercase stickers from the Black Sans Serif ABC/123 Sticker Pack to create the word “DAD” in the middle of the tag. Turn the “Vacay” pocket from the Travel Log Pocket Embellishments around and adhere it to the card as shown. Mount the red location tag on top of the pocket as shown.
Step 6: Use lowercase stickers from the Black Sans Serif ABC/123 Sticker pack to create the words “for you” on the blue and white tag. Place the tag into the pocket and adhere it at an angle.
Step 7: Mount a small white arrow die-cut and a red heart sticker with Foam Squares to finish the card.
Step 8: Write your message inside with a Black Dual-Tip Pen.
Have fun creating a custom card just for Dad this Father’s Day! Which Creative Memories® product collection most reflects your dad’s personality and passions? Let us know in the comments below!

These are great, would be even greater if they were posted a couple of weeks ahead of the date rather than 2 days. Can’t make them if you don’t have the paper and supplies.
I agree with Bonnie. I would have preferred to see these two weeks ago in order to purchase the supplies.
Love these ideas, thank you!
True – that’s what I was thinking – explorer pack? Got it! Stickers, no! Would have ordered had I known.