July 1, 2019
Show Pride in Your Country with these Fun Scrapbook Layout Ideas
The first week of July means two things for the majority of North Americans — Canada Day (July 1) and U.S. Independence Day (July 4). People love to take the time to express gratitude and pride while celebrating the country they call home, and these celebrations come jam-packed with fun memories that will last a lifetime. Need some ideas for a Canada Day scrapbook layout or a 4th of July scrapbook layout that can house these photos and memories! You’re in luck — blog contributors Mati and Marja took some time to explain how and why they created these original scrapbook layout ideas. Check them out below!
Mati’s Inspiration
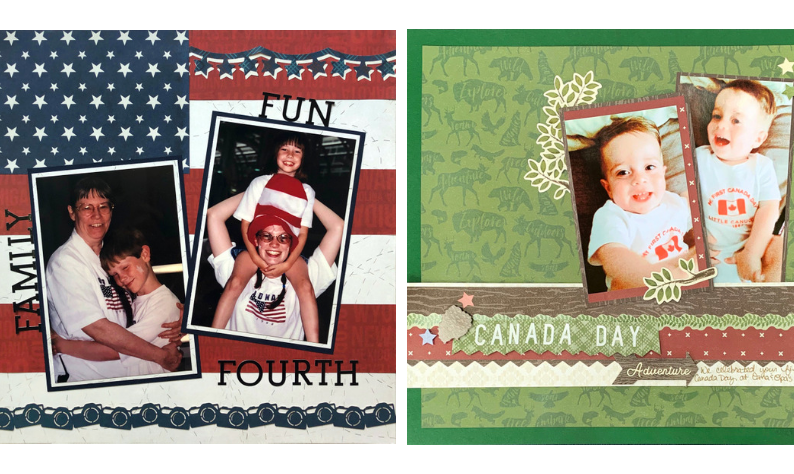
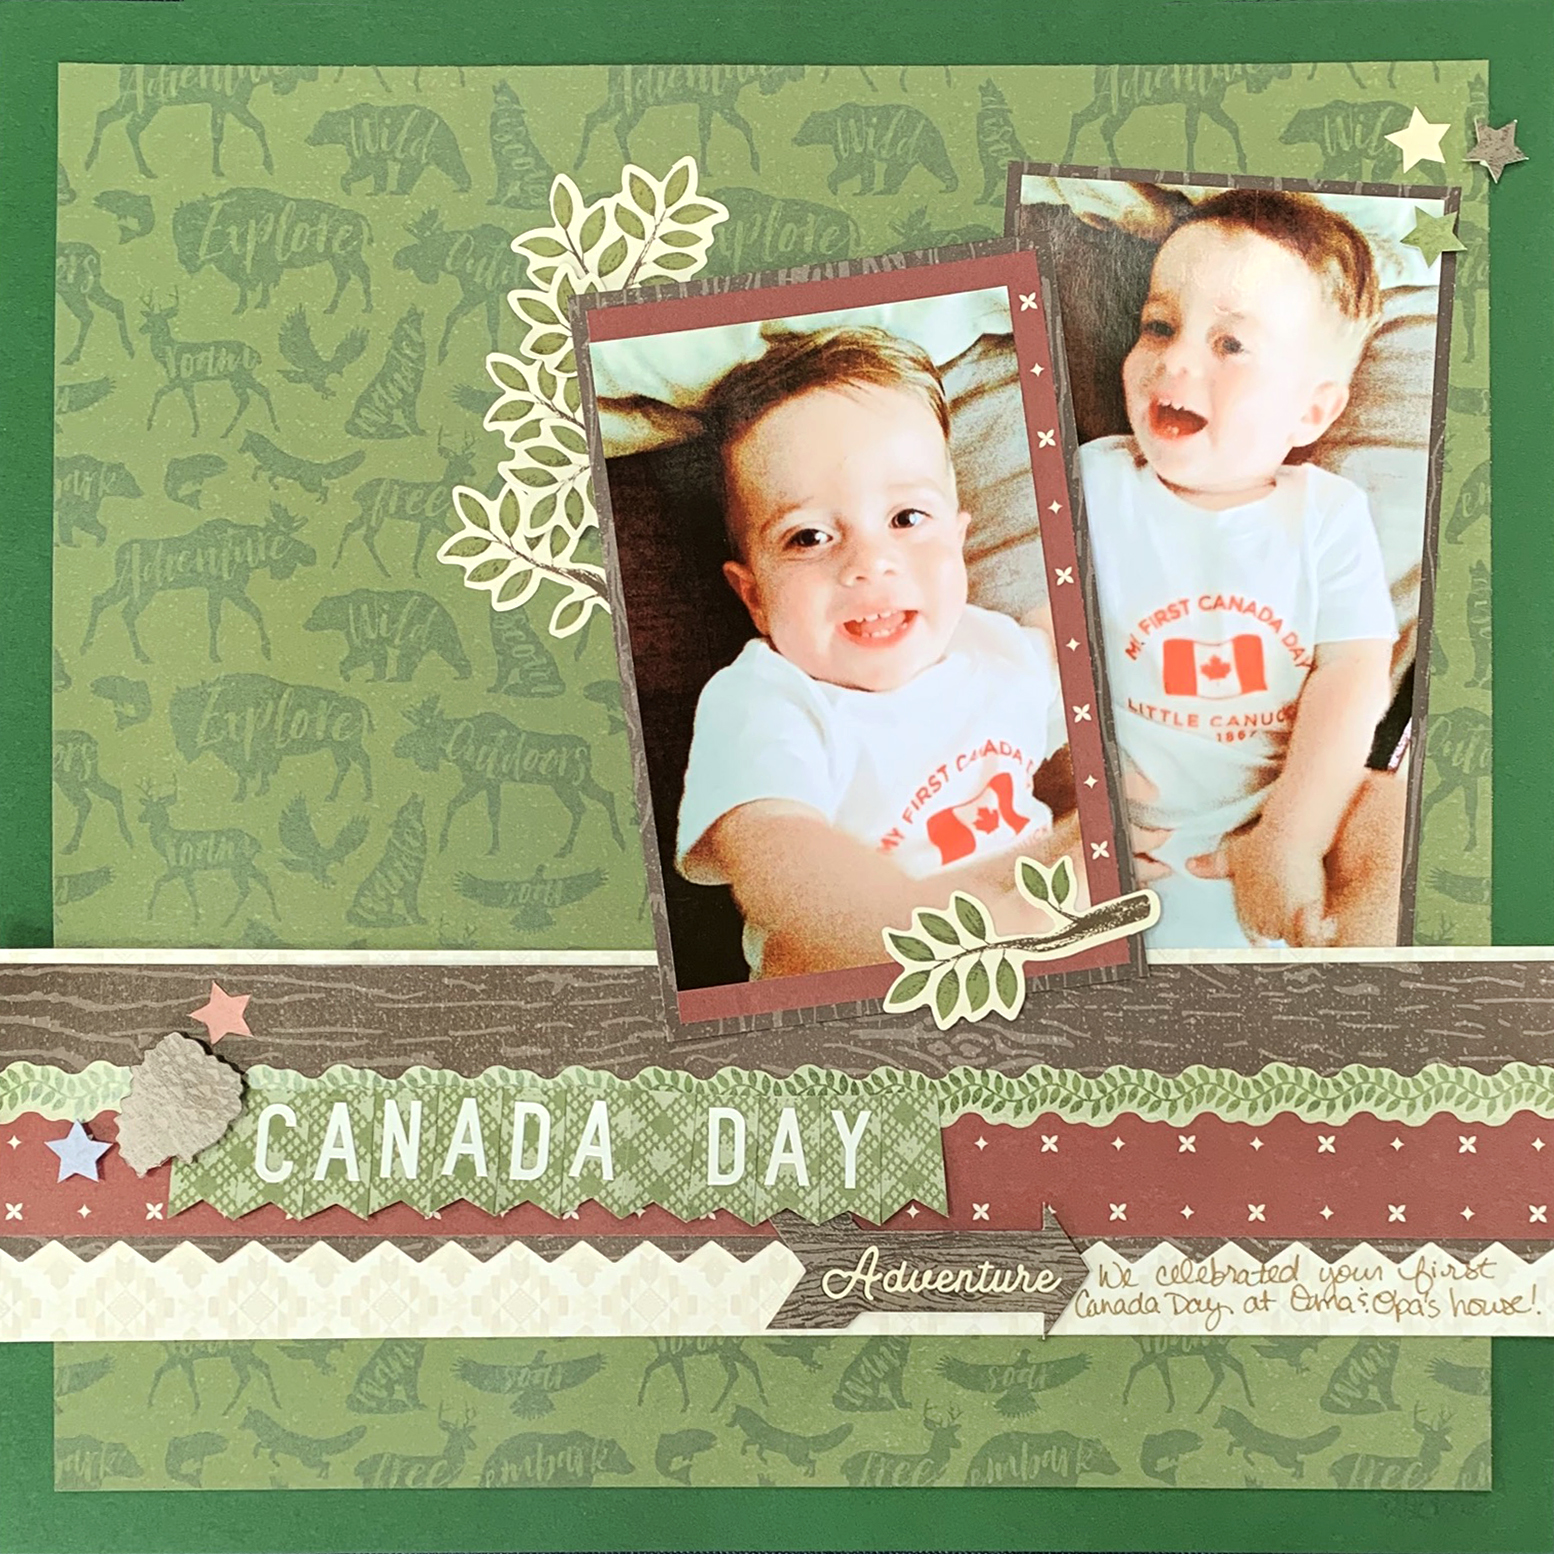
The Scenic Route Paper Pack is fantastic for capturing the patriotic feeling that the Fourth of July brings! I saw the blue starred paper and knew I wanted to try to make a flag for an Independence Day scrapbook layout! The white paper with stitching reminded me of the crazy trails that fireworks make in the sky. I couldn’t resist adding some swinging stars to the layout and I shadowed them with the white print from the pack to help them “pop” against the red paper. I couldn’t resist the laser cut cameras, but then I can’t resist any laser cut borders – I love those! The blue cameras were the perfect shade to anchor the layout across the bottom.
To create this layout, you will need:
- Scenic Route Paper Pack or (Shop Canada | Shop Australia)
- Scenic Route Laser Cut Border Embellishments or (Shop Canada | Shop Australia)
- Navy Cardstock or (Shop Canada | Shop Australia)
- Black Serif ABC/123 Stickers or (Shop Canada | Shop Australia)
- Original Border Maker System with Star Banner Chain Border Maker Cartridge or (Shop Canada | Shop Australia)
- 12-inch Trimmer or (Shop Canada | Shop Australia)
- Tape Runner or (Shop Canada | Shop Australia)
- Repositionable Tape Runner Refill or (Shop Canada | Shop Australia)

Step 1: Start with the white stitched patterned paper as your base.
Step 2: Select both sheets of the red, white and blue paper and cut both red strips off. Then cut three strips to measure 2″ wide. Adhere the strips to white base at 2″ intervals.


Step 3: Using the Star Banner Chain Border Maker Cartridge, punch out two strips of stars with the blue patterned paper. Flip one over and line up the two chains so that the blue one is slightly above and to the left of the white chain. Adhere to the red stripe at the top, letting the uneven part of the chain hang slightly off the page. Trim off excess.
Step 4: Select the blue star patterned paper and cut a 6″ x 4-1/4″ rectangle. Note: If you want your rectangle to line up with your stripes, cut it at 6″ x 4″. I liked having mine slightly larger. Adhere to the top left corner of the layout.
Step 5: Cut two 4-1/2″ x 6-1/2″ rectangles out of Navy Cardstock. Cut two 4-1/4″ x 6-1/4″ rectangles from the white stitched patterned paper. Adhere together and then adhere photos to top.
Step 6: Add Black ABC/123 Stickers and the camera laser cut border to the layout as shown.
Marja’s Inspiration
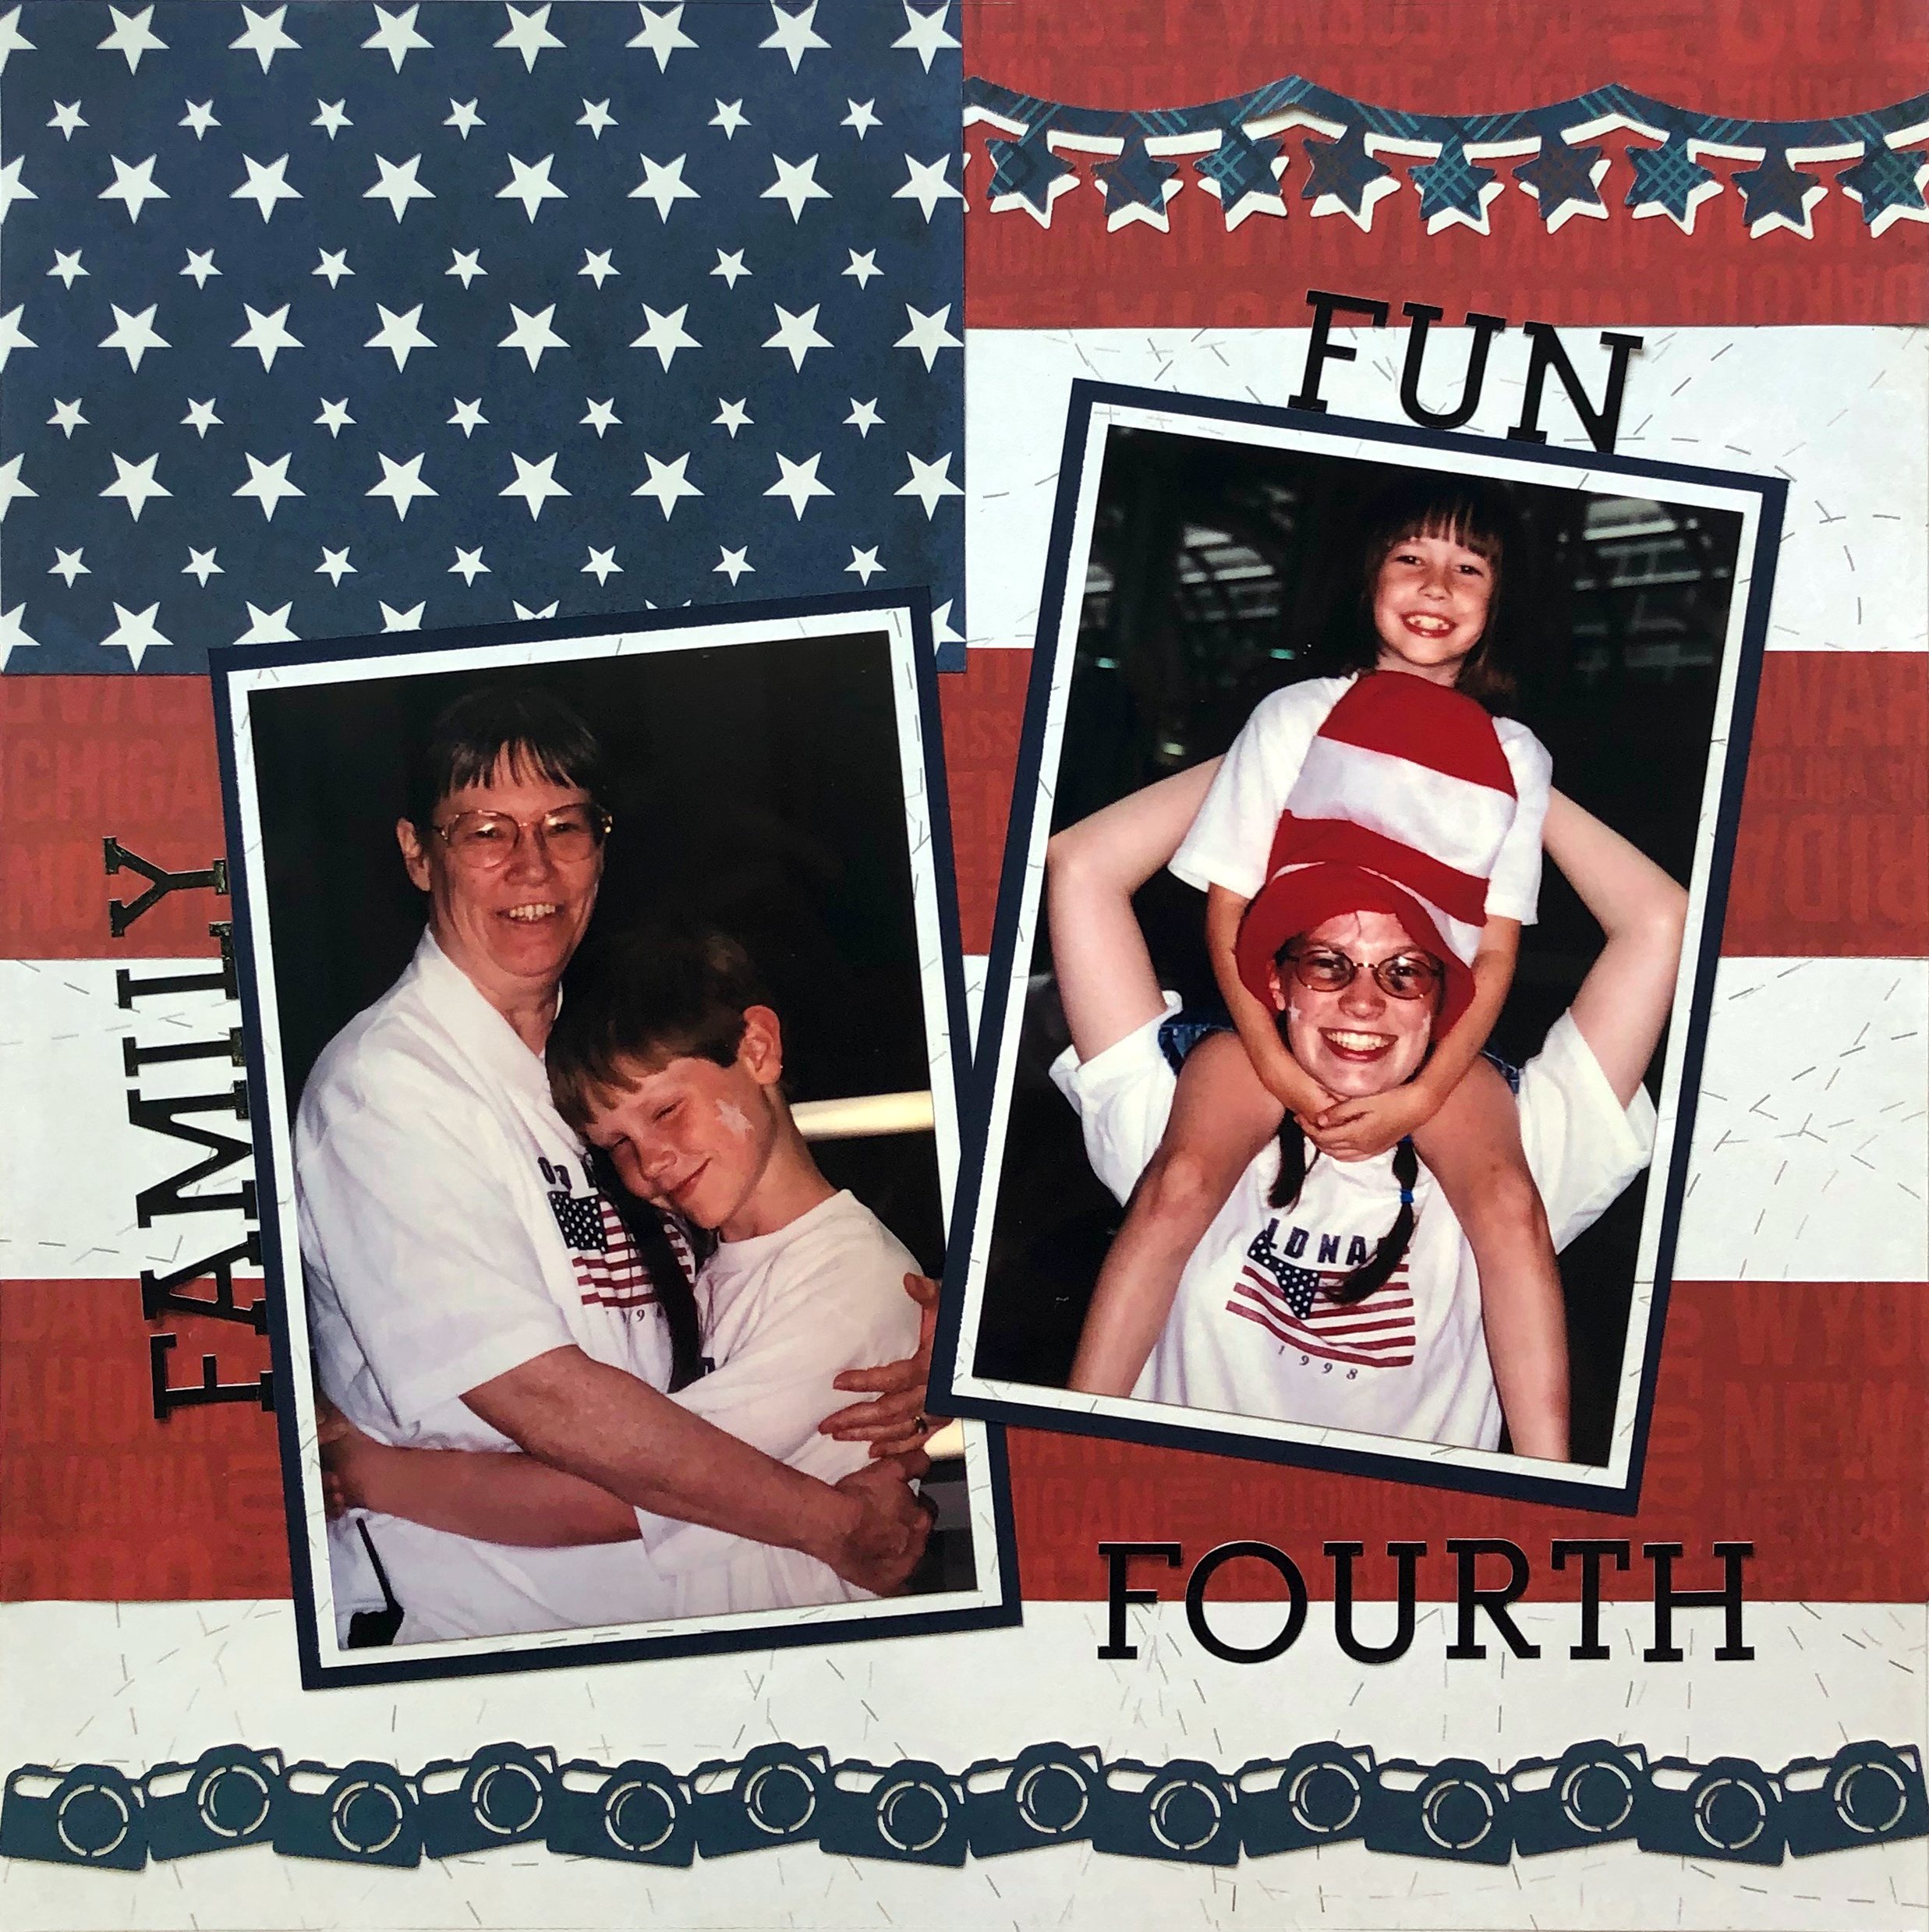
These are some photos that have fallen through the cracks – they aren’t the clearest or perfectly framed, so they’ve been overlooked in the past when I’ve shuffled through my photos. As time passes, their imperfections become less and less noticeable to me. This time when I went to pull Canada Day photos instead of thinking “Shoot, that’s a bit fuzzy,” I thought “Gosh, I remember that little look and that gut giggle!” I’ve got a whole pile of photos that were taken on early digital cameras or early smartphone cameras that were in-the-moment action shots. Their quality may not be perfect, but the memories they convey certainly are and I love how they look on this Canada Day scrapbook layout!
To create this layout, you will need:
- Explorer Paper Pack or (Shop Canada | Shop Australia)
- Explorer Stickers or (Shop Canada | Shop Australia)
- Dark Green Cardstock or (Shop Canada | Shop Australia)
- White Sans Serif ABC/123 Stickers or (Shop Canada | Shop Australia)
- Original Border Maker System with Picket Fence Border Maker Cartridge or (Shop Canada | Shop Australia)
- 12-inch Trimmer or (Shop Canada | Shop Australia)
- All-Purpose Scissors or (Shop Canada | Shop Australia)
- Tape Runner or (Shop Canada | Shop Australia)
- Foam Squares or (Shop Canada | Shop Australia)
- Brown Dual-Tip Pen or (Shop Canada | Shop Australia)
Optional – If you’d like to put a 1/2″ border around your entire page without wasting all of the cardstock that is lost behind the green patterned Explorer paper follow these steps:


- Insert your Dark Green Cardstock into your trimmer lined up with the 2″ guide.
- Before closing the Blade Guide, make sure that the blade is positioned in the middle of the guide rather than at the top or bottom how you would usually use your trimmer.
- Close the Blade Guide and cut up to 2″ from the top and down to 2″ from the bottom (which will land on the 10″ mark on the ruler).
- Open the guide and rotate the cardstock 90 degrees and do the same steps.
- Repeat until all four sides are cut.
You’ll end up with a frame that is 2″ thick, as well as a scrap piece of cardstock that measures 8″ x 8″ that you can use on a different project!
Step 1: Cut a piece of green patterned paper to measure 11″ x 11″ and adhere it to a piece of Dark Green Cardstock (or a frame if you created one with the instructions above).
Step 2: Create a border by:
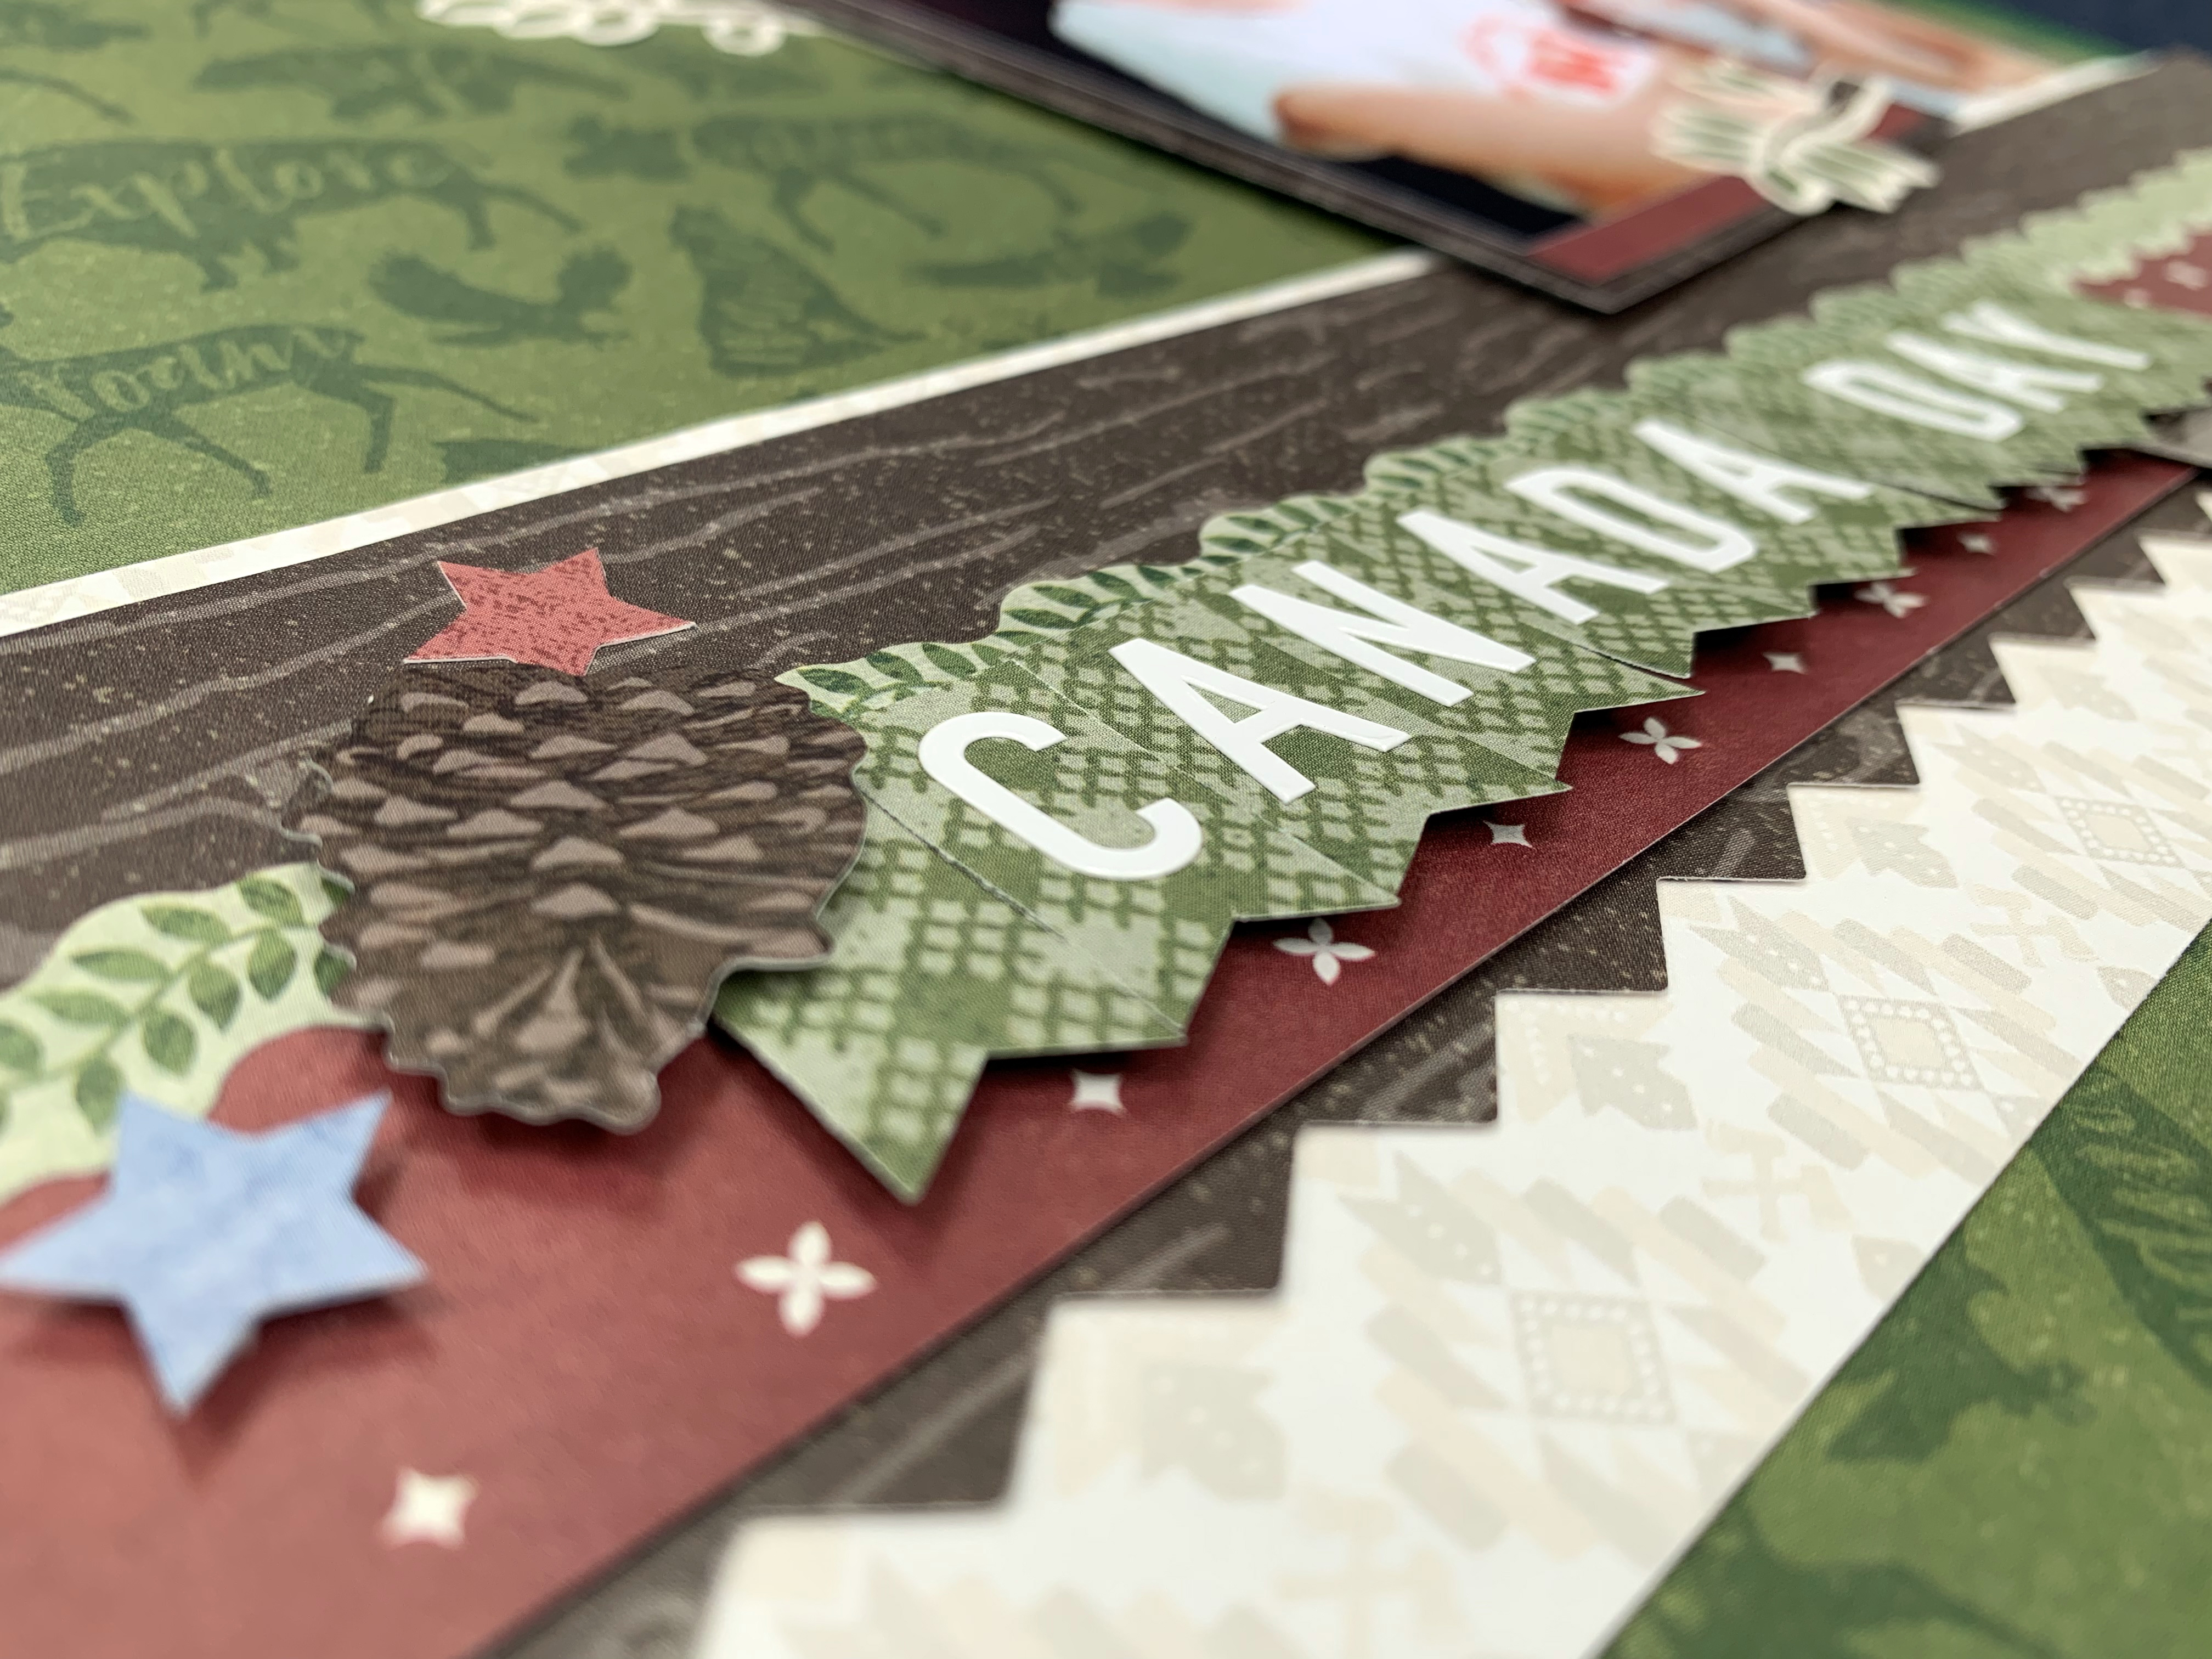
- Cut a piece of white/cream patterned paper to measure 3″ x 12″.
- Cut a piece of woodgrain patterned paper to measure 2-1/2″ x 12″ and run one 12″ side through your Border Maker System using the Picket Fence Border Maker Cartridge. Adhere this piece to the white/cream piece with a 1/8″ border at the top.
- Cut a piece of red/stars patterned paper to measure 1″ x 12″. Adhere this piece to the woodgrain patterned piece with just the zig-zag edge peeking out the bottom.
- Choose one of the borders from the Explorer Stickers and adhere it along the top of the red/stars patterned piece.
- Using one of the 1″ strips that you cut off of the green patterned paper from your page base, cut it into small 1/2″ x 1″ pieces and use your scissors to cut a flag end on one of the 1/2″ sides of each.
- Use ABC/123 Stickers to create a title on the flags. Adhere these to the border by putting a small Foam Square near the flagged end and run adhesive along the top end so that it pops out at the bottom, making it look more like a banner and giving your border some dimension.
- Use stickers to embellish the border some with Foam Squares for added dimension. Journal using a Brown Dual-Tip Pen on the white/cream patterned paper.
Step 3: Trim down photos and create mats for your photos that are 1/4″ wider and taller than your photos measure. For your focal photo, double mat it.


Step 4: Before adhering your photos down, place them on the layout first and then use the leaf sticker from the sticker sheet and find placement on your base layout where your focal picture will have its top left corner. Before adhering the sticker cut off any of the branches that will be covered by the photo. For those branches, add a small Foam Square and overlap the other leaves, positioning so that the cut off end will be hidden under the photo.
Step 5: Adhere your back/right photo down with the Tape Runner. Then adhere your border, overlapping the bottom of your photo.
Step 6: Adhere your focal photo, overlapping the border slightly and on an angle. Use Foam Squares for a little dimension.
Step 7: Use more Explorer Stickers with and without Foam Squares to embellish the photos to coordinate with your layout.
No matter what holiday you celebrate in early July, these scrapbook layout ideas are the perfect way to show pride in your country and showcase the memories you make on these holidays. Which of these layouts do you think you’ll try out? Let us know in the comments below!

Really like both layouts. Love the idea of making a flag with the patterned papers. And, years ago, I was very careful about saving papers…..cutting and placing to conserve. Over the years, I have gotten lazy and used whole sheets. The instructions for cutting make so much sense, and I might actually try it again! LOL!