July 16, 2019
Three Ways to Scrapbook Kit #19 in Your Photo Journal
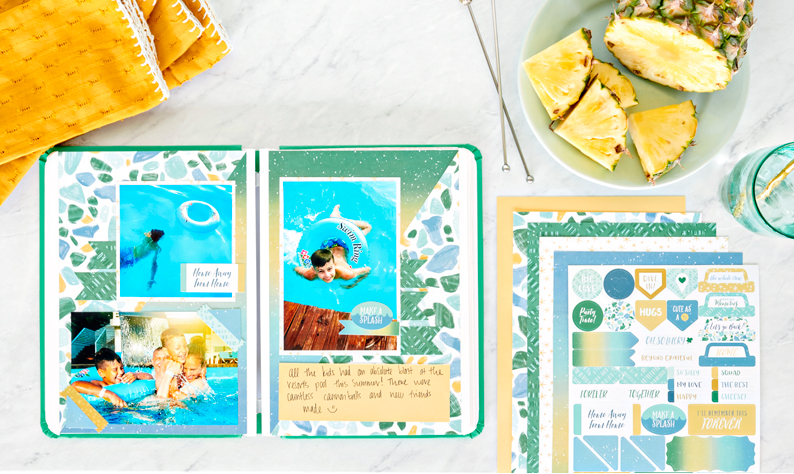
I think we can all agree that Happy Album Kit #19 is filled with happy vibes! With all the vibrant and fun patterns, it’s easy to create a page in your Happy Album that will make you smile. I’m here to show you a few different ways to use this month’s kit and hopefully teach you a new way to scrapbook. Keep reading to find three different ways to use Kit #19, a tutorial video and two new sketches!

This week we are talking about Kit #19 and all the fun ways you can use it. We provide a Project Recipe™ in every kit that allows you to easily create a stunning layout in no time at all… BUT, for those of you who like to walk on the creative side, you are going to love the two alternative layouts I’m going to show you. With four different patterned papers in each kit, your creativity is endless! P.S. If you’re using your Happy Album as your planner, keep reading because there’s a never-before-seen calendar page using Kit #19. Happy reading!

If you prefer to follow instructions so you know your page will turn out as nice as the photo above, we have you covered! Each kit includes easy step-by-step instructions. You can find each kit’s Project Recipe™ instructions here: https://creativememories.com/happy.
Follow the sketch and instructions below!
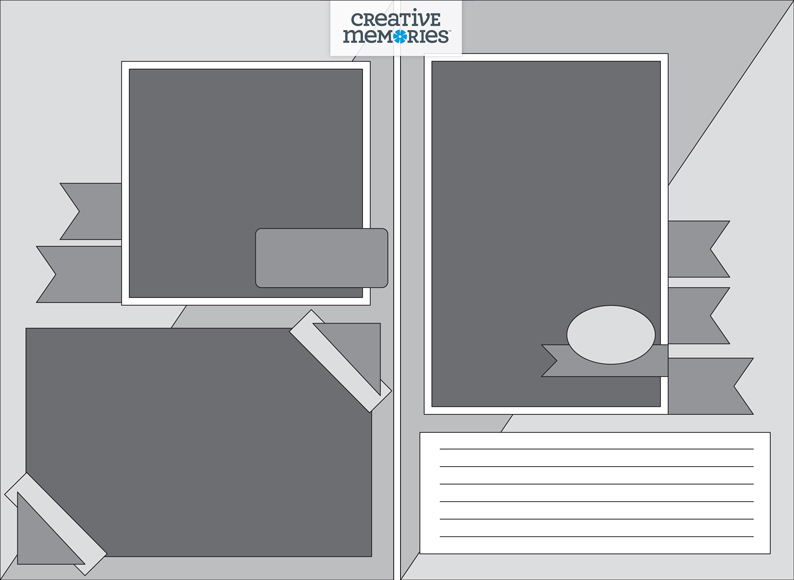
- Use the Cutting Guide included in Kit #19 and cut your papers accordingly.
- Adhere the pieces following the Project Recipe™ included in Kit #19.
- Add photos to your Happy Album pages and journal as desired.
Watch the video to see how to create this layout!

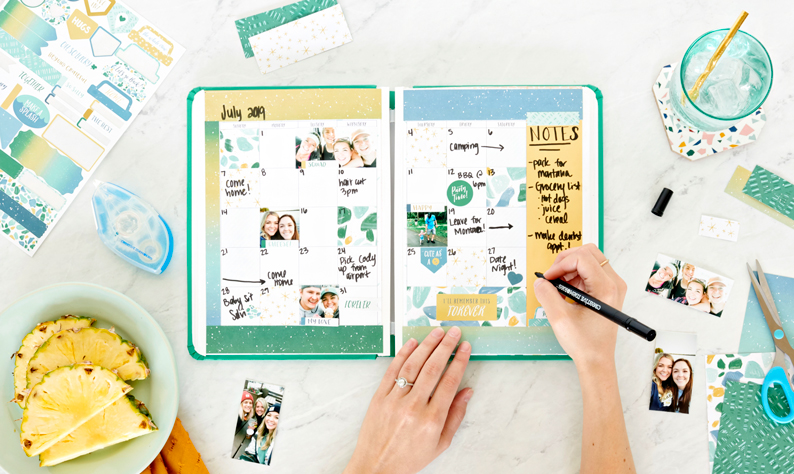
Who said Happy Album kits are just for scrapbook layouts?! If you’re using the planner kit and Happy Album to stay on top of your monthly activities and to-do’s, you can use the kits to decorate your pages! You will love brightening up your calendar with Kit #19.
Follow the sketch and instructions below!

- Cut strips of designer paper to fit the borders of the planner pages.
- Cut as many 1 1/2″ x 1 1/2″ squares of paper as you want to decorate your calendar squares.
- Adhere the pieces to your calendar pages – there is no right or wrong way to do this!
- Fill in the dates and your events.
- Decorate with the stickers in Kit #19.

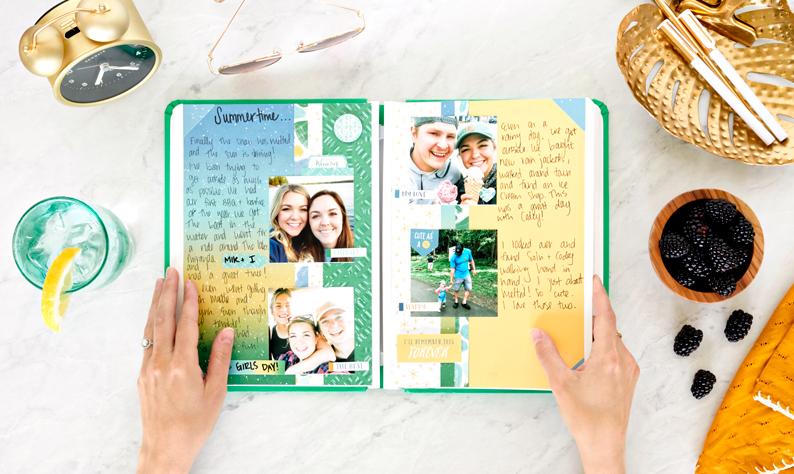
If you’re like me and love to journal along with your photos, then you’ll love this layout! Check out how simple and quick it is to create this page.
Follow the sketch and instructions below!

- Adhere two different patterned papers from Kit #19 to both pages
- Taking two new patterns, cut two 2″ strips and adhere them to the right and left sides of the layout
- Cut four 1/2″ strips using the designer papers you choose, then adhere two of them next to the 2″ strip on each page. (See how the paper strips are adhered in the photo above?)
- Add four 3″ x 3″ photos to your scrapbook layout.
- Journal and add stickers!

- Happy Album or (Shop Canada | Shop Australia)
- Happy Album Kits or (Shop Canada | Shop Australia)
- I used Kit #19 or (Shop Canada | Shop Australia)
- White Refill Pages (optional) or (Shop Canada | Shop Australia)
- Happy Album Starter Bundle or (Shop Canada | Shop Australia)
- Happy Album Planner Bundle or (Shop Canada | Shop Australia)
- Happy Album Planner Kit (optional) or (Shop Canada | Shop Australia)

It was so fun creating three different layouts with Kit #19. I hope this inspires you to re-create one of these layouts or try something new! If you create a page using Kit #19, make sure to share with me on Instagram @BeHappyAlbum using #HappyAlbum.
?? Sadie
Meet Sadie – Happy Album Marketing Manager

Sadie grew up crafting and scrapbooking using Creative Memories products. She has a passion for creating and telling her story through photos! On weekends, you’ll catch her on an outdoor adventure, traveling or spending time with family in her small Minnesota town. Join her on the @BeHappyAlbum Instagram page and Happy Album Blog where she shares all things happy!

Love the variety – shows how versatile the album is! And the colors in this kit are amazing!