December 16, 2019
Get Ready for 2020 with this DIY Desk Calendar

It’s hard to believe that a new year — and a new decade! — is just a few weeks away! As is tradition, with a new year comes a renewed commitment to getting organized. Often, this resolution (and every other one) falls flat on its face a few weeks into the year, but the 2020 Desk Calendar helps you stay on top of all the important dates and events at a glance in an easy and fun way! Best of all, it’s super cute, quick and easy to assemble and makes a fantastic gift! Check it out below and learn how to put together this DIY desk calendar!
For this this project, you will need:
- 2020 Desk Calendar or (Shop Canada | Shop Australia)
- Tape Runner or (Shop Canada | Shop Australia)
- Repositionable Tape Runner Refill or (Shop Canada | Shop Australia)
- Foam Squares or (Shop Canada | Shop Australia)
- Dual-Tip Pen or (Shop Canada | Shop Australia)
Take a look at what’s included with the 2020 Desk Calendar in the video below!

The 2020 Desk Calendar comes with an easel base, a 12-month adhesive-back desk calendar, 12 decorative photo mats (5-1/2″ x 4-1/2″), 24 die-cut and laser-cut embellishments and an instructions sheet.
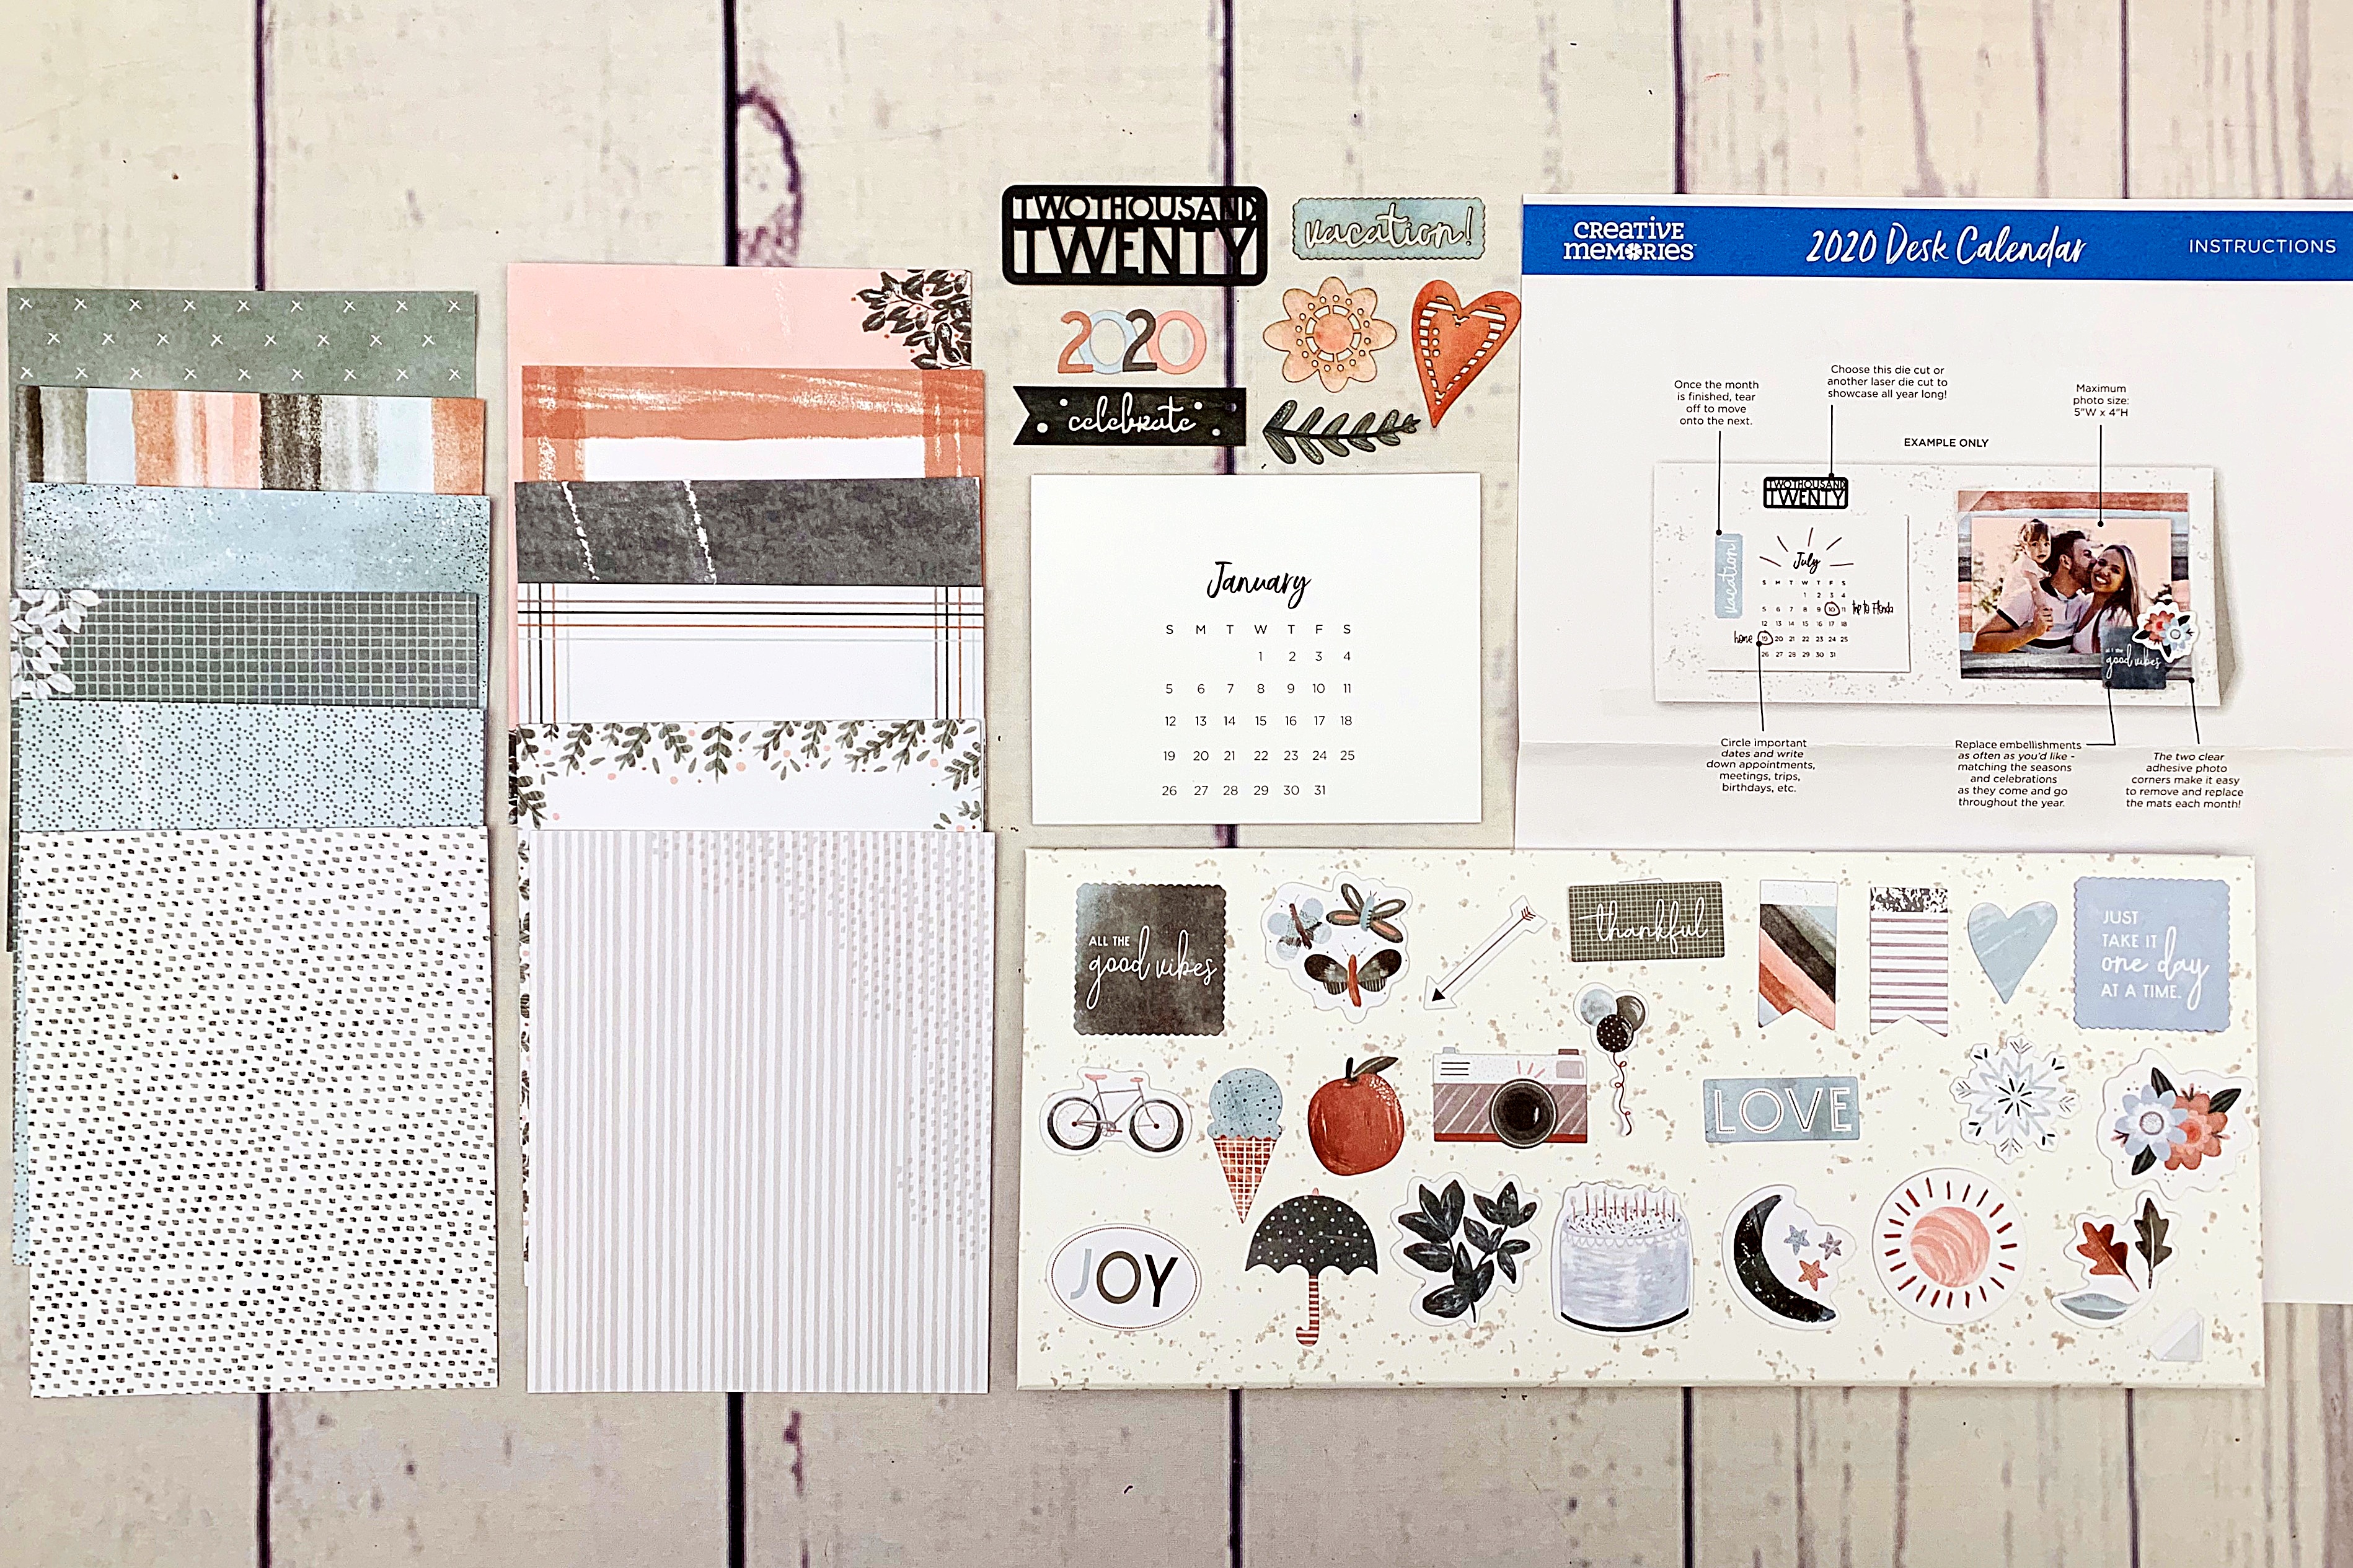
You have lots of flexibility with this kit! One option is to choose a mat, add a photo and embellishments and then display that photo all year long. Another is to create a new photo display for every month. It’s so fun to lay out all the photo mats, pick and choose which one to use for each month and then mix and match embellishments. For example, you could use the snowflake for a wintry Jan. photo, the “Love” tab and heart with a sweet photo for Feb. and the umbrella with a nature photo for April. Play around with any combinations you like! (Tip: Adhere embellishments to the mats with Foam Squares for delightful added dimension!)
You can also choose whether you want to create all 12 of your matted photo displays ahead of time or design them one at a time throughout the year.

For the easel base, adhere the calendar to the left side with the convenient adhesive backing. If desired, choose a laser-cut or die-cut embellishment to add above the calendar to indicate the year. Adhere die cuts with Tape Runner adhesive and use Repositionable adhesive for any laser-cut embellishments you use.

You’ll notice there are two clear triangular photo corners on the right side of the easel base – they secure the photo mats to the base without requiring adhesive and make it easy for you to switch out the mats whenever you want. Just slip your matted photo into the triangles and ensure the calendar is displaying the correct month. It’s so simple! You can even use a Dual-Tip Pen to jot notes or circle important dates on the calendar to stay on top of all the things!
The 2020 Desk Calendar coordinates seamlessly with Happy Album products, too! Keep your 2020 Desk Calendar at home or at the office and take your Happy Album Planner with you on the go! What a fantastic — and beautiful — system to stay on top of this, that and everything else no matter where you are! Here’s to getting organized in 2020!

How can I order this?
Hi Judy – To order this product, visit our website. If you look under the supplies needed for this project, you can just click the 2020 Desk Calendar link!