December 20, 2019
Three Design Tips for Simple and Fast Scrapbook Pages

The holidays are here, and for most of us, life is moving faster than Santa’s sleigh and we’re busier than elves in his workshop. However, this is also a time when we’re taking a ton of pictures and want to get some good scrapbooking time in. We’re all looking for ways to make the best use of our crafting time, and Lauren Hinds from CraftSomeJoy has three design tips to help you do just that! Check them out and try them for yourself!
Lauren’s Inspiration:
Do you ever wish you had a secret formula for scrapbooking? Or a way to power through an album quickly, but still have pages that don’t look rushed? When you learn these three tips, you will have simple and easy ways to create scrapbooking pages quickly and beautifully. Follow along, as I create a two-page scrapbook layout and show you step-by-step how to use these tips yourself.
To create this layout, you will need:
- Winterberry Paper Pack or (Shop Canada | Shop Australia)
- Winterberry Variety Mat Pack or (Shop Canada | Shop Australia)
- Winterberry Stickers or (Shop Canada | Shop Australia)
- Black 12×12 Plain Pages or (Shop Canada | Shop Australia)
- Original Border Maker System with Crystal Chain Border Maker Cartridge or (Shop Canada | Shop Australia)
- Peekaboo Pockets™ or (Shop Canada | Shop Australia)
- 12-inch Trimmer or (Shop Canada | Shop Australia)
- Personal Trimmer or (Shop Canada | Shop Australia)
- Tape Runner or (Shop Canada | Shop Australia)
- Repositionable Tape Runner Refill or (Shop Canada | Shop Australia)
- Foam Squares or (Shop Canada | Shop Australia)
- Black Dual-Tip Pen or (Shop Canada | Shop Australia)
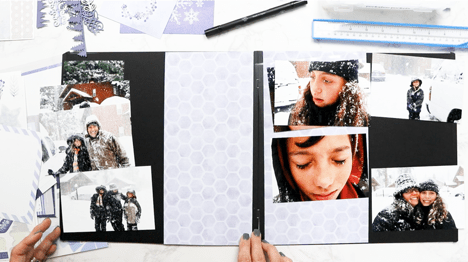
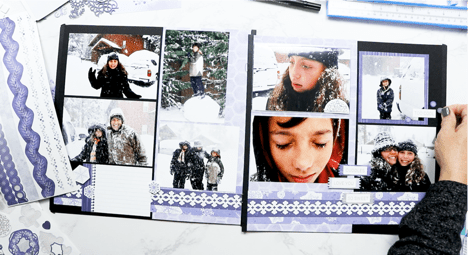
Tip #1: Color Blocking
I love highlighting the photos on my page, and using large blocks of solid and printed paper helps focus the attention on them. There are so many different combinations of sizes and ways of layering with the horizontal and vertical blocks to make your page interesting. These strips can vary in size, but you’ll want to use the full 12″ length of the paper. Tip: Cut your paper 1/2″ larger than your photo, and you have an instant mat!
On this layout ,I cut a 12×12 paper from the Winterberry collection into a 6-1/2″ strip and a 5-1/2″ strip and adhered them vertically in the middle of the spread.
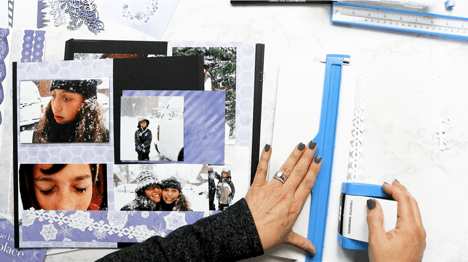
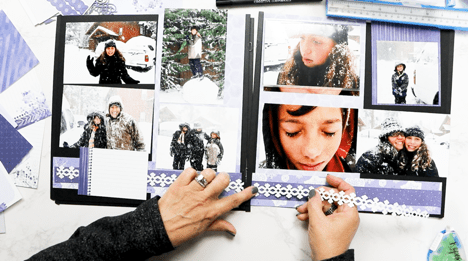
Adding decorative border strips, die-cut strips, punched borders and sticker strips creates layered dimension on your layout (and looks fun, too!).
For this layout, I cut two strips measuring 2″ x 12″ from a complimenting paper to begin building a layered strip that will run horizontally across the bottom of the spread. I cut two strips measuring 1″ x 12″ and punched two strips of paper with the Crystal Chain Border Maker Cartridge. I adhered the punched borders to the 1″ strips with Repositionable adhesive, then layered this on the 2″ strip. Adhere the strips horizontally across the bottom of both pages, 1/2″ from the bottom edge.
Tip #2: Snap to Grid
This tip takes all the guesswork out of where to place your photos on your pages. No sketches or layout designs needed, just think of your pages as having graph paper lines on them and line up your photos, journal boxes, and memorabilia according to that grid. Leave some small spaces (called eyelines) to define your grid and presto! Your layout is done!
For this layout, I left many of the photos in their 4″ x 6″ size, then trimmed the additional photos to 4″x 5″ and 4″ x 4″. I added a mat behind the 4″ x 4″ photo, using a coordinating mat from the Winterberry Variety Mat Pack.

Tip #3: Embellish with Purpose
When it is time to add that special touch, remember a few things:
- Stickers and embellishments like to have a “home” and be grounded on your page.
- Grouping embellishments and adding dimension creates impact. This helps define what is important (like your journal space or story), draw attention to a focal point or tell your eye where to go next.
- Grouping embellishments in odd numbers is usually more appealing.
On this layout I used three snowflake stickers around the journal box and Foam Squares to add dimension to two of the stickers. I also grouped three of the washi tape stickers with word stickers layered on top and used a Foam Square to highlight the middle sticker. I added a few extra stickers to draw attention to the Peekaboo Pocket™ and smaller photo.
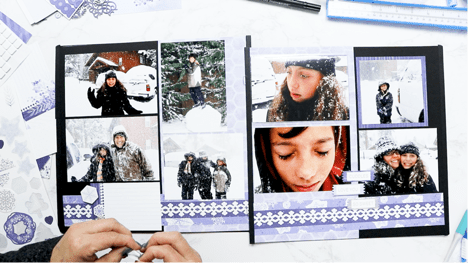
These same tips can be used over and over in different combinations to create simple yet beautiful pages. By varying the size of the papers, the designs of the borders, layered strips and types of embellishments, you can put together endless projects!


Will you be trying these three design tips to make your layouts in a faster fashion? Let us know in the comments below!
Author: Lauren Hinds | CraftSomeJoy.com

Love Lauren’s ideas. She has helped me with scrapbooking concepts and organizing my stash.
Terrific ideas! Love this approach to scrapbooking…simple, fast and FINISHED, with focus on pictures and stories. Thanks so much. Following your blog.
Absolutely love Lauren’s ideas and organization!!! These pages are beautiful!!!
Great versatility! What a helpful post ?
Really loved these ideas, can’t wait to try them
The pages are beautiful and fun! I loved watching your process. I see the Peekaboo pockets were used and adhered to the page, do you use page protectors?
Hi Annette! Yes I still use page protectors and have the pockets on the outside, so they can flip open. A fun interactive element!
Great and simple tips. Can’t wait to try out myself with other themes. Cool!
Thank you, thank you for reminder everyone that not every layout has to be a multi-layered, elaborate work of art. This is how I have scrapbooked for years – right on the page, a little paper here and there, a couple matted photos and some stickers, photos all lined up nicely. Done. :)
Great Ideas! Thank you! You make it look easy….