March 4, 2020
Dote On Your Spring Scrapbook Layouts with NEW Dot Pens
Have you seen the NEW Dot Pens?! They feature a fine tip on one end to journal and draw, and a thicker dot tip on the other that you can press and hold to your page to make the dot grow. They’re perfect for adding hand-drawn designs to your projects, and this spring scrapbook layout is a great example! Let’s take a look…
To create this layout, you will need:
- Spring Medley Paper Pack or (Shop Canada | Shop Australia)
- Spring Medley Tone-on-Tone Paper Pack or (Shop Canada | Shop Australia)
- Spring Medley Stickers or (Shop Canada | Shop Australia)
- Everyday Journal Template or (Shop Canada | Shop Australia)
- 12-inch Trimmer or (Shop Canada | Shop Australia)
- Tape Runner or (Shop Canada | Shop Australia)
- Repositionable Tape Runner or (Shop Canada | Shop Australia)
- Foam Squares or (Shop Canada | Shop Australia)
- Dot Pens or (Shop Canada | Shop Australia)
Get a closer look at Dot Pens in the video below!
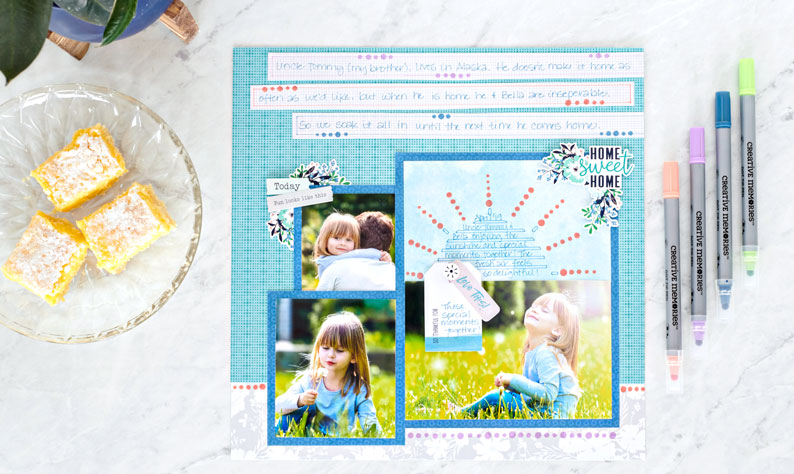
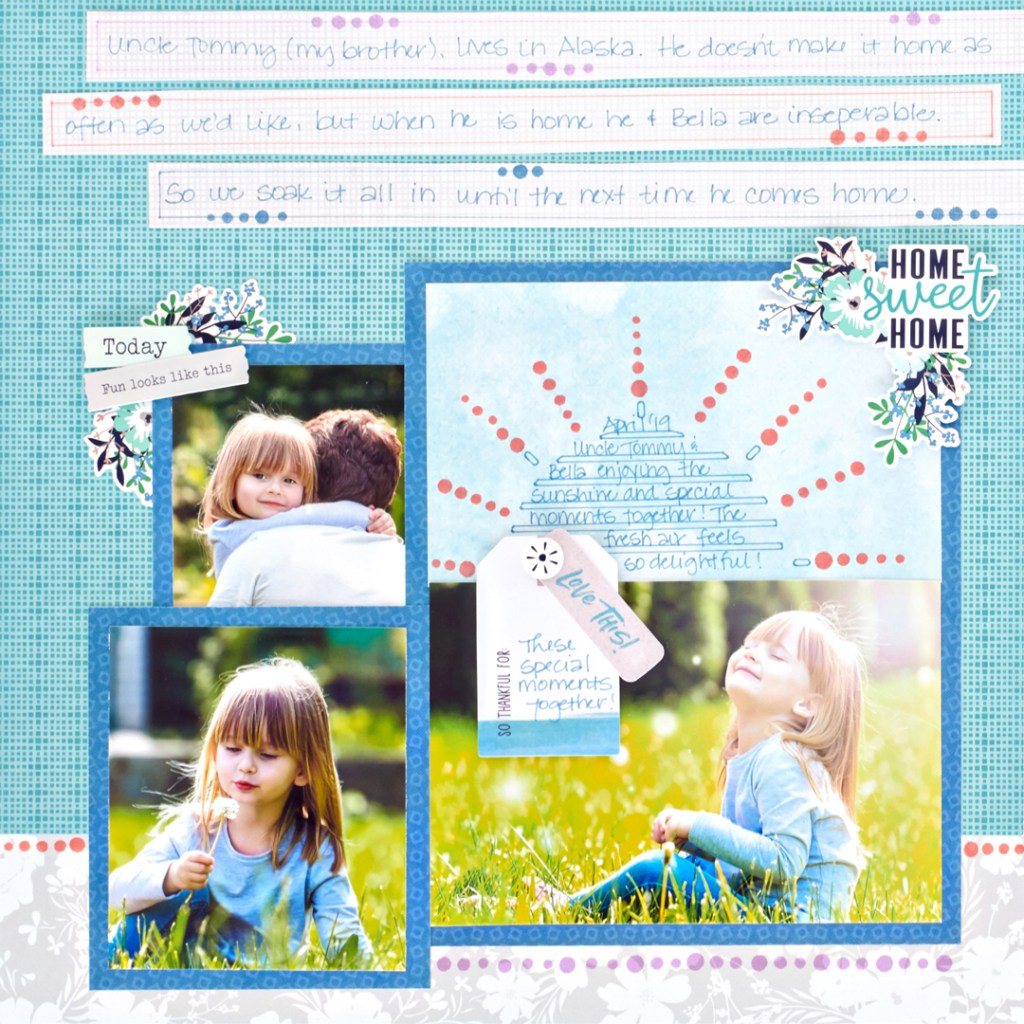
Step 1: Use the teal patterned paper as the base for this layout.
Step 2: Cut a piece of paper from the gray floral patterned paper to measure 12″ x 2-1/4″. Adhere along the bottom edge of the layout.

Step 3: Cut a piece from the blue patterned paper to measure 6-1/2″ x 8″. Adhere a 6″ x 4″ photo on the bottom portion of this mat. Cut a piece from the light blue patterned paper to measure 6-1/2″ x 3-1/2″. Adhere to the top portion of this mat. Use the Everyday Journal Template and Dot Pens to create a “sun” on this piece.
Step 4: Cut two mats from the blue patterned paper to measure 3-1/4″ x 3-1/4″ and 4″ x 4-1/2″. Adhere photos that measure 2-3/4″ x 2-3/4″ and 3-1/2″ x 4″ to the mats. Adhere all mats to the layout.
Step 5: Using the Everyday Journal Template, trace the large journal strips onto white paper, then cut them out using scissors. Journal in the strips and adhere them to the layout. Add decorative dots using the Dot Pens.
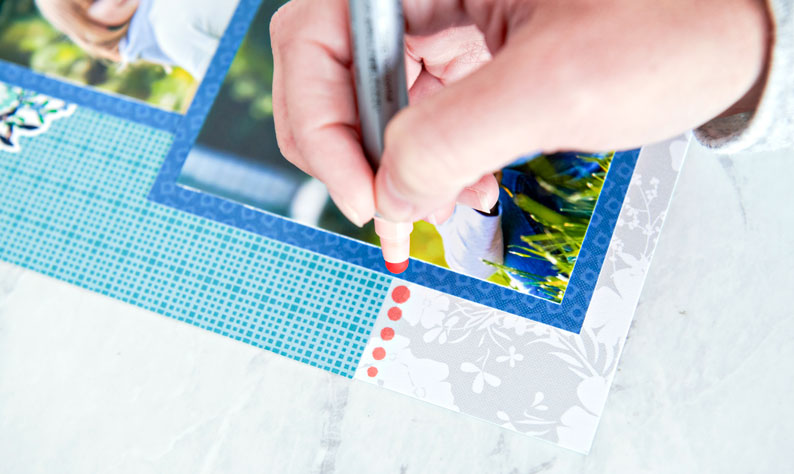
Step 6: Dot along the edges of the paper and photos as desired.
Which one of the new Dot Pens do you like the most and how will you use them to decorate your layouts? Tell us in the comments below!

[…] This layout was made with the Spring Medley collection and Dot Pens — learn how to make it by reading this blog post! […]
[…] You can learn how to create this layout (with some hand-drawn touches) by checking out this blog post! […]
I’m going thru old emails and came across this cute LO.