April 14, 2020
Make Tone-ally Awesome Spring Scrapbook Layouts with Spring Medley
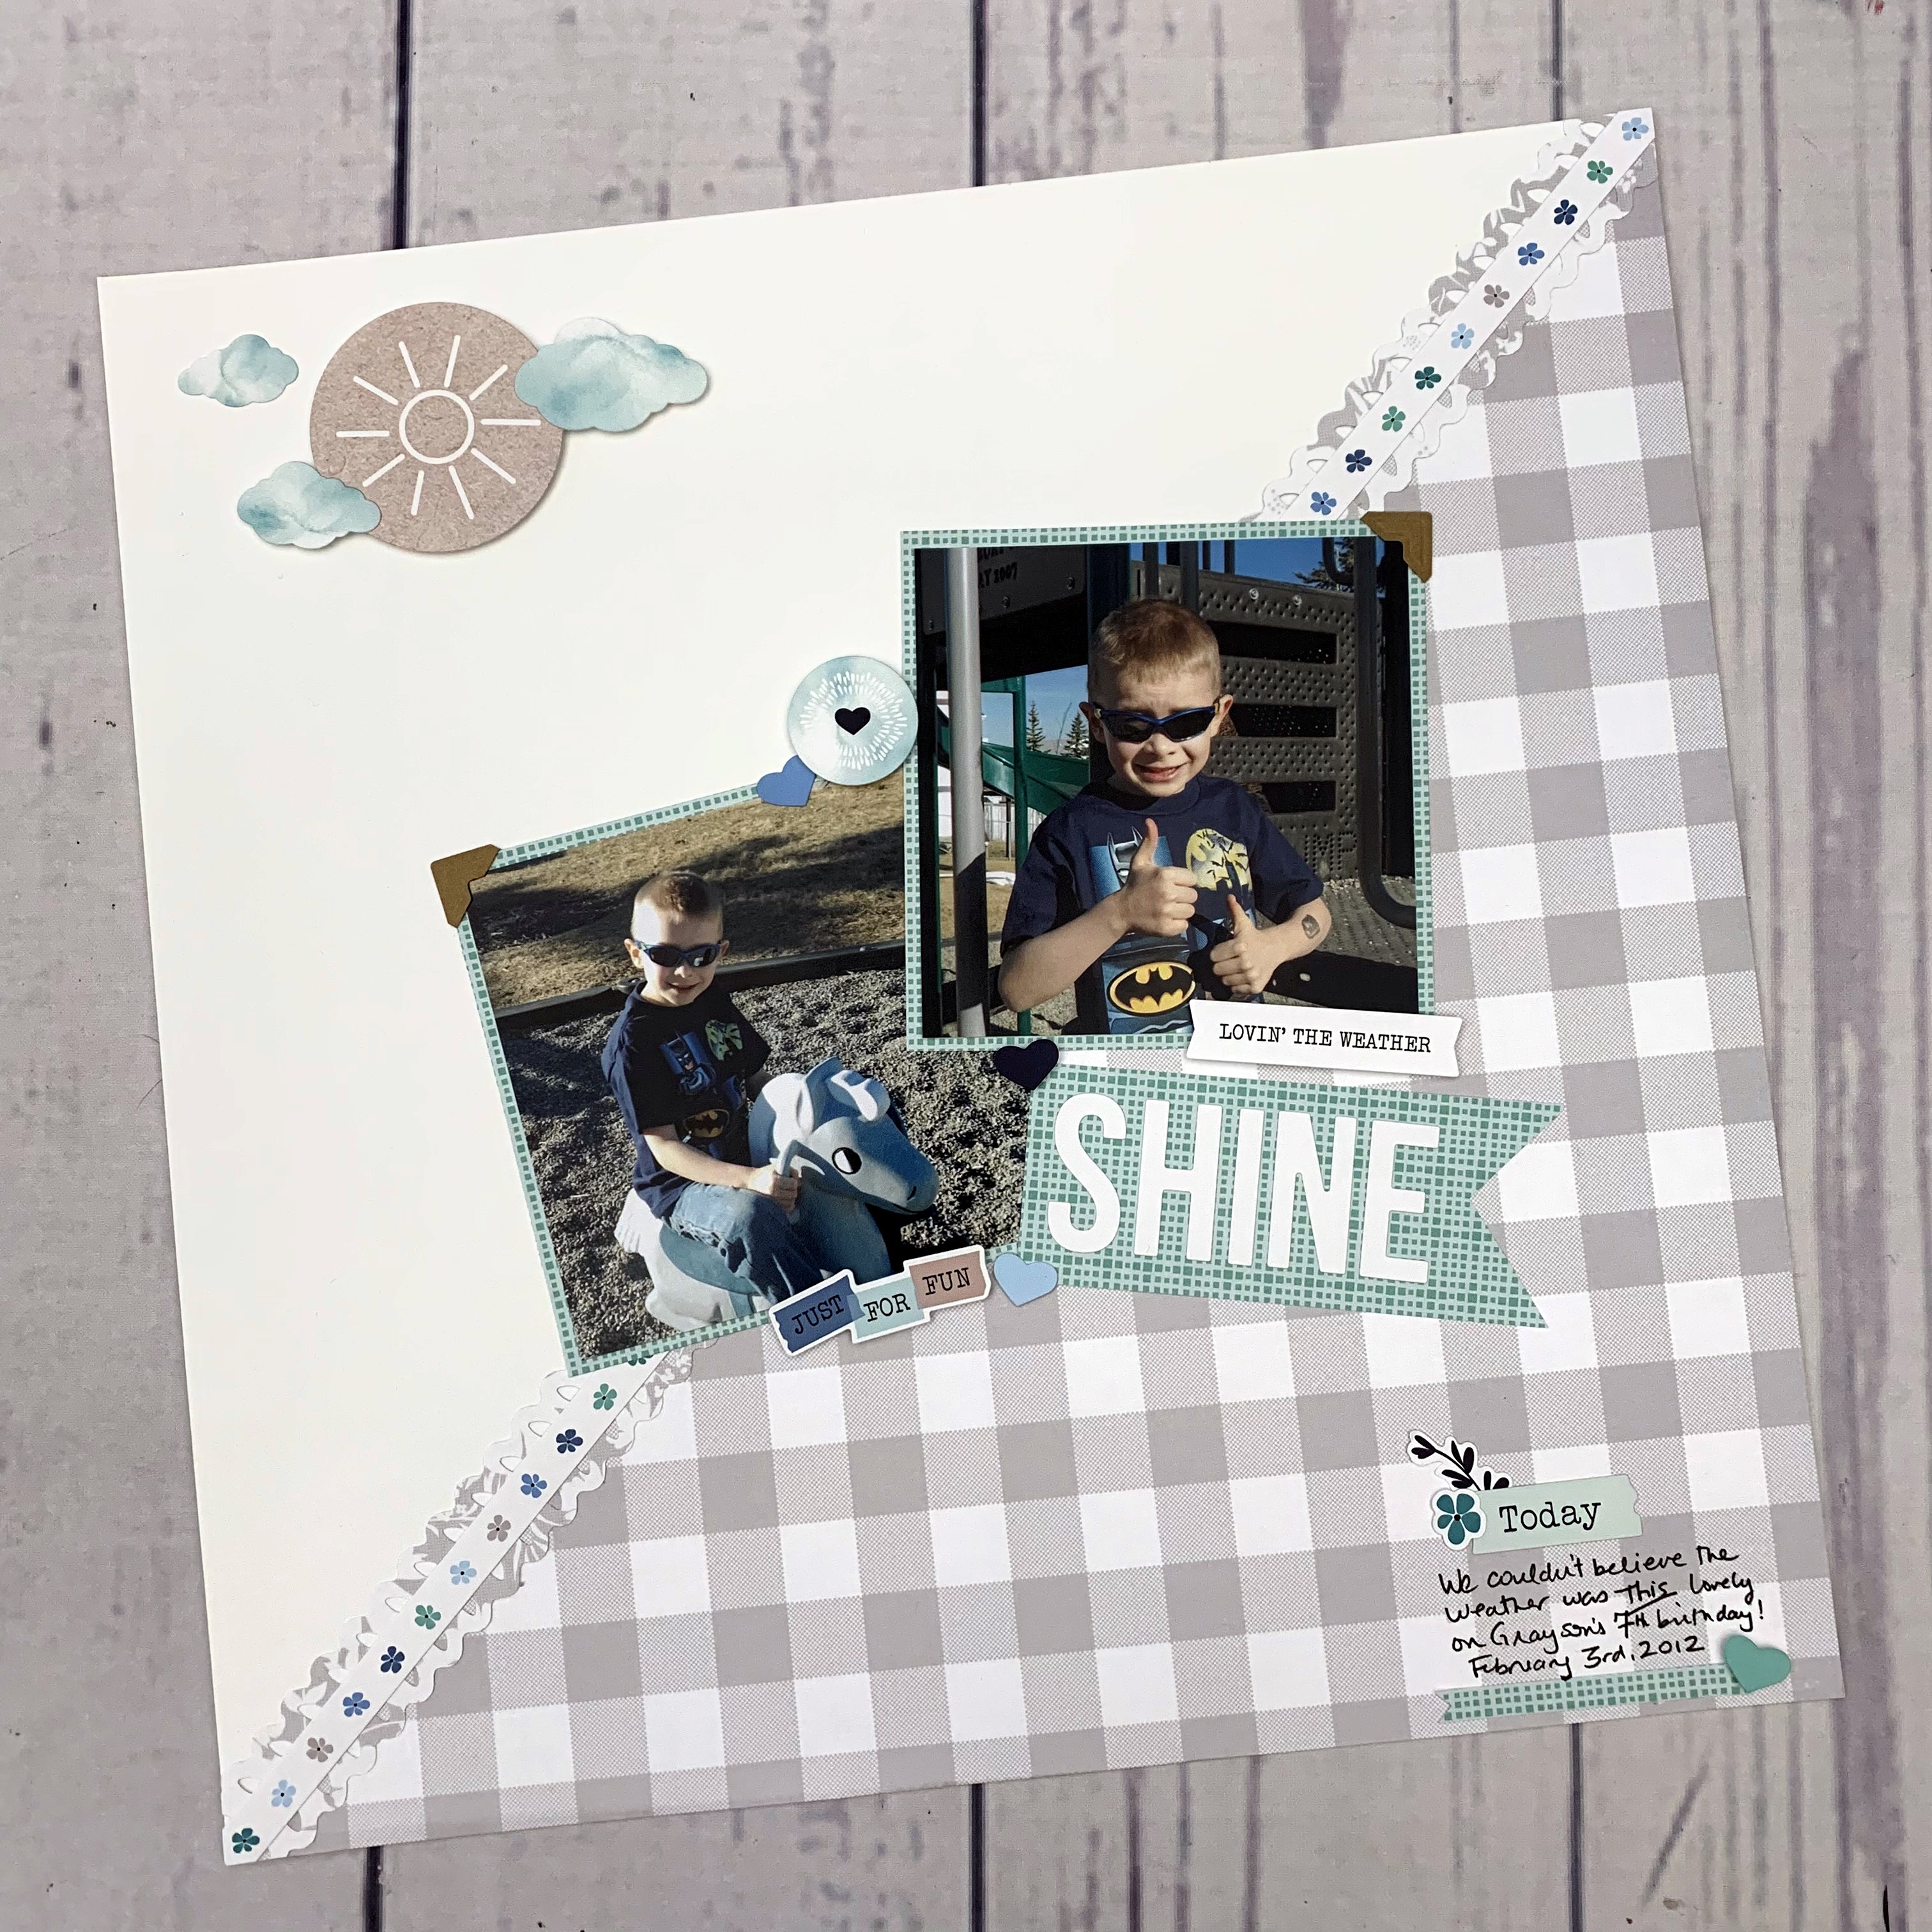
Tone-on-tone paper packs don’t have to settle for being the accent piece in your layout. When you use a bit of creativity, you can bring these shades to life and make them the star of your project. Check out how blog contributor Noreen Smith made this spring scrapbook layout that primarily uses the Spring Medley Tone-on-Tone Paper Pack!
Noreen’s Inspiration
Some memory-keepers might argue that tone-on-tone papers perform well as supporting characters on your scrapbook page, but would rarely be given the starring role. I beg to differ and I think the beautiful, subtle Spring Medley Tone-on-Tone papers can actually steal the show! I decided to use these large scale gray gingham and gray floral patterns on a layout with some outdoor photos of my son. The bonus is the hint of blue and green on the reverse sides of these papers that will make the perfect accent!
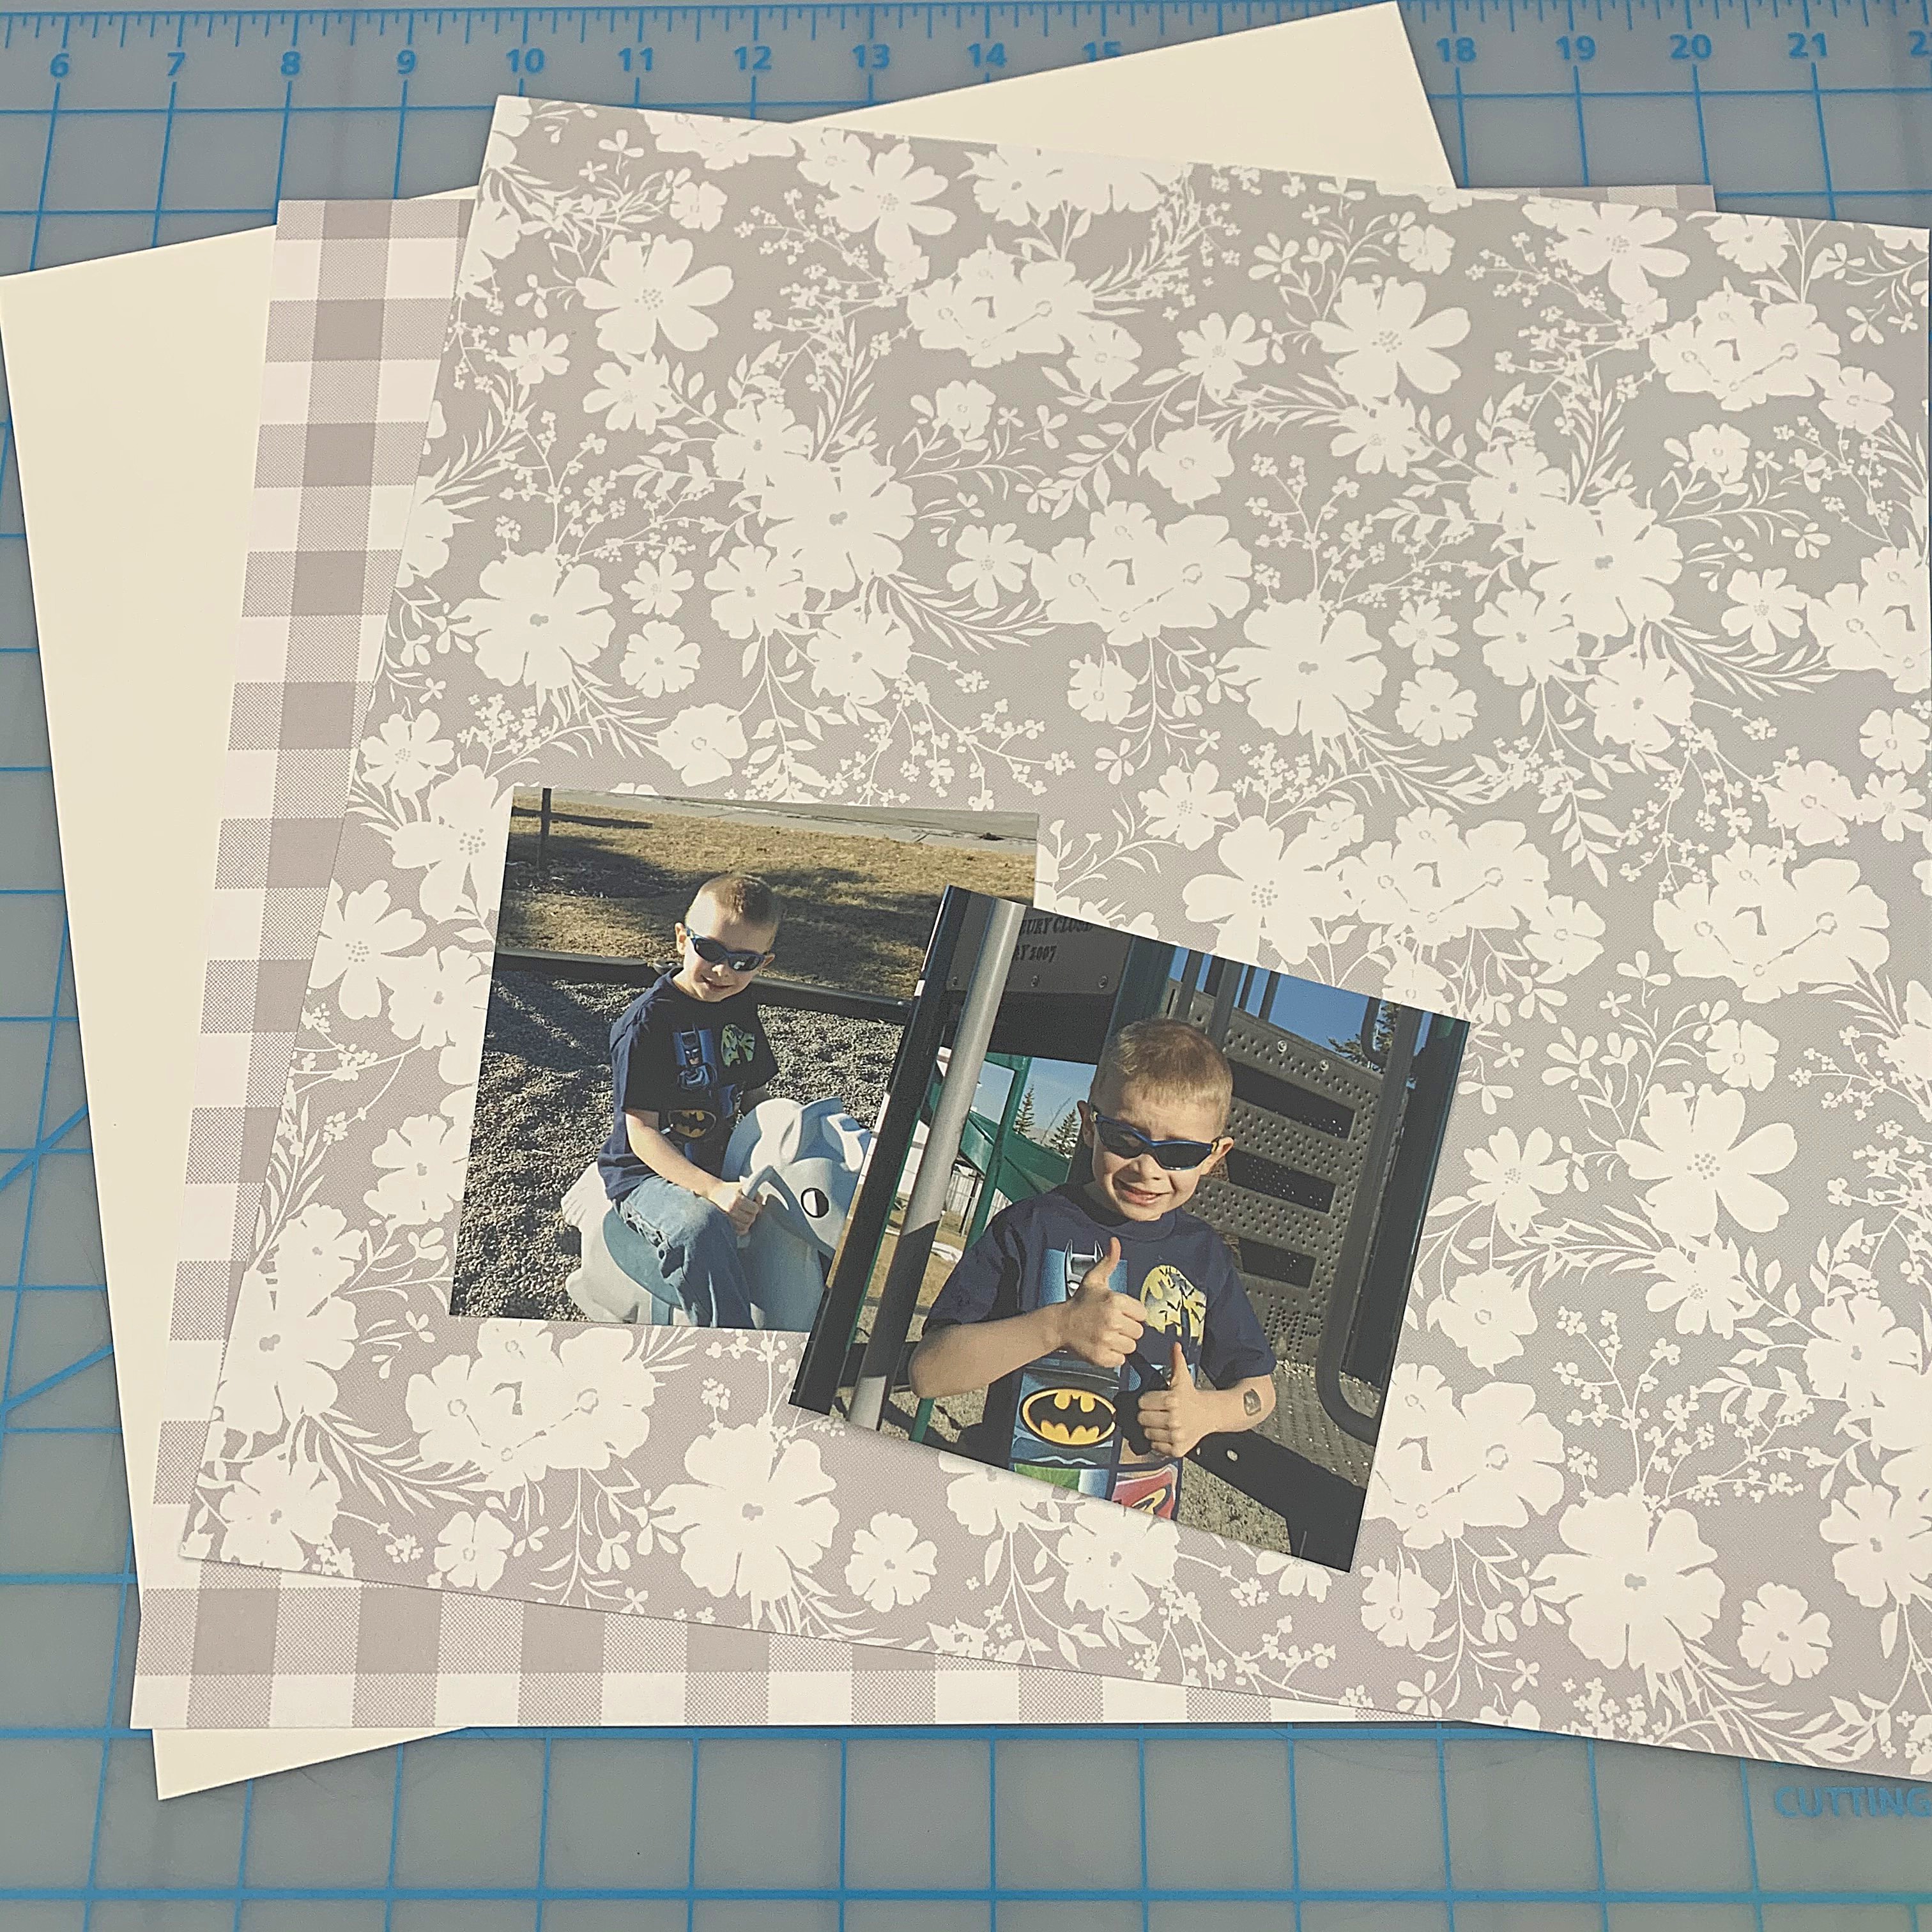
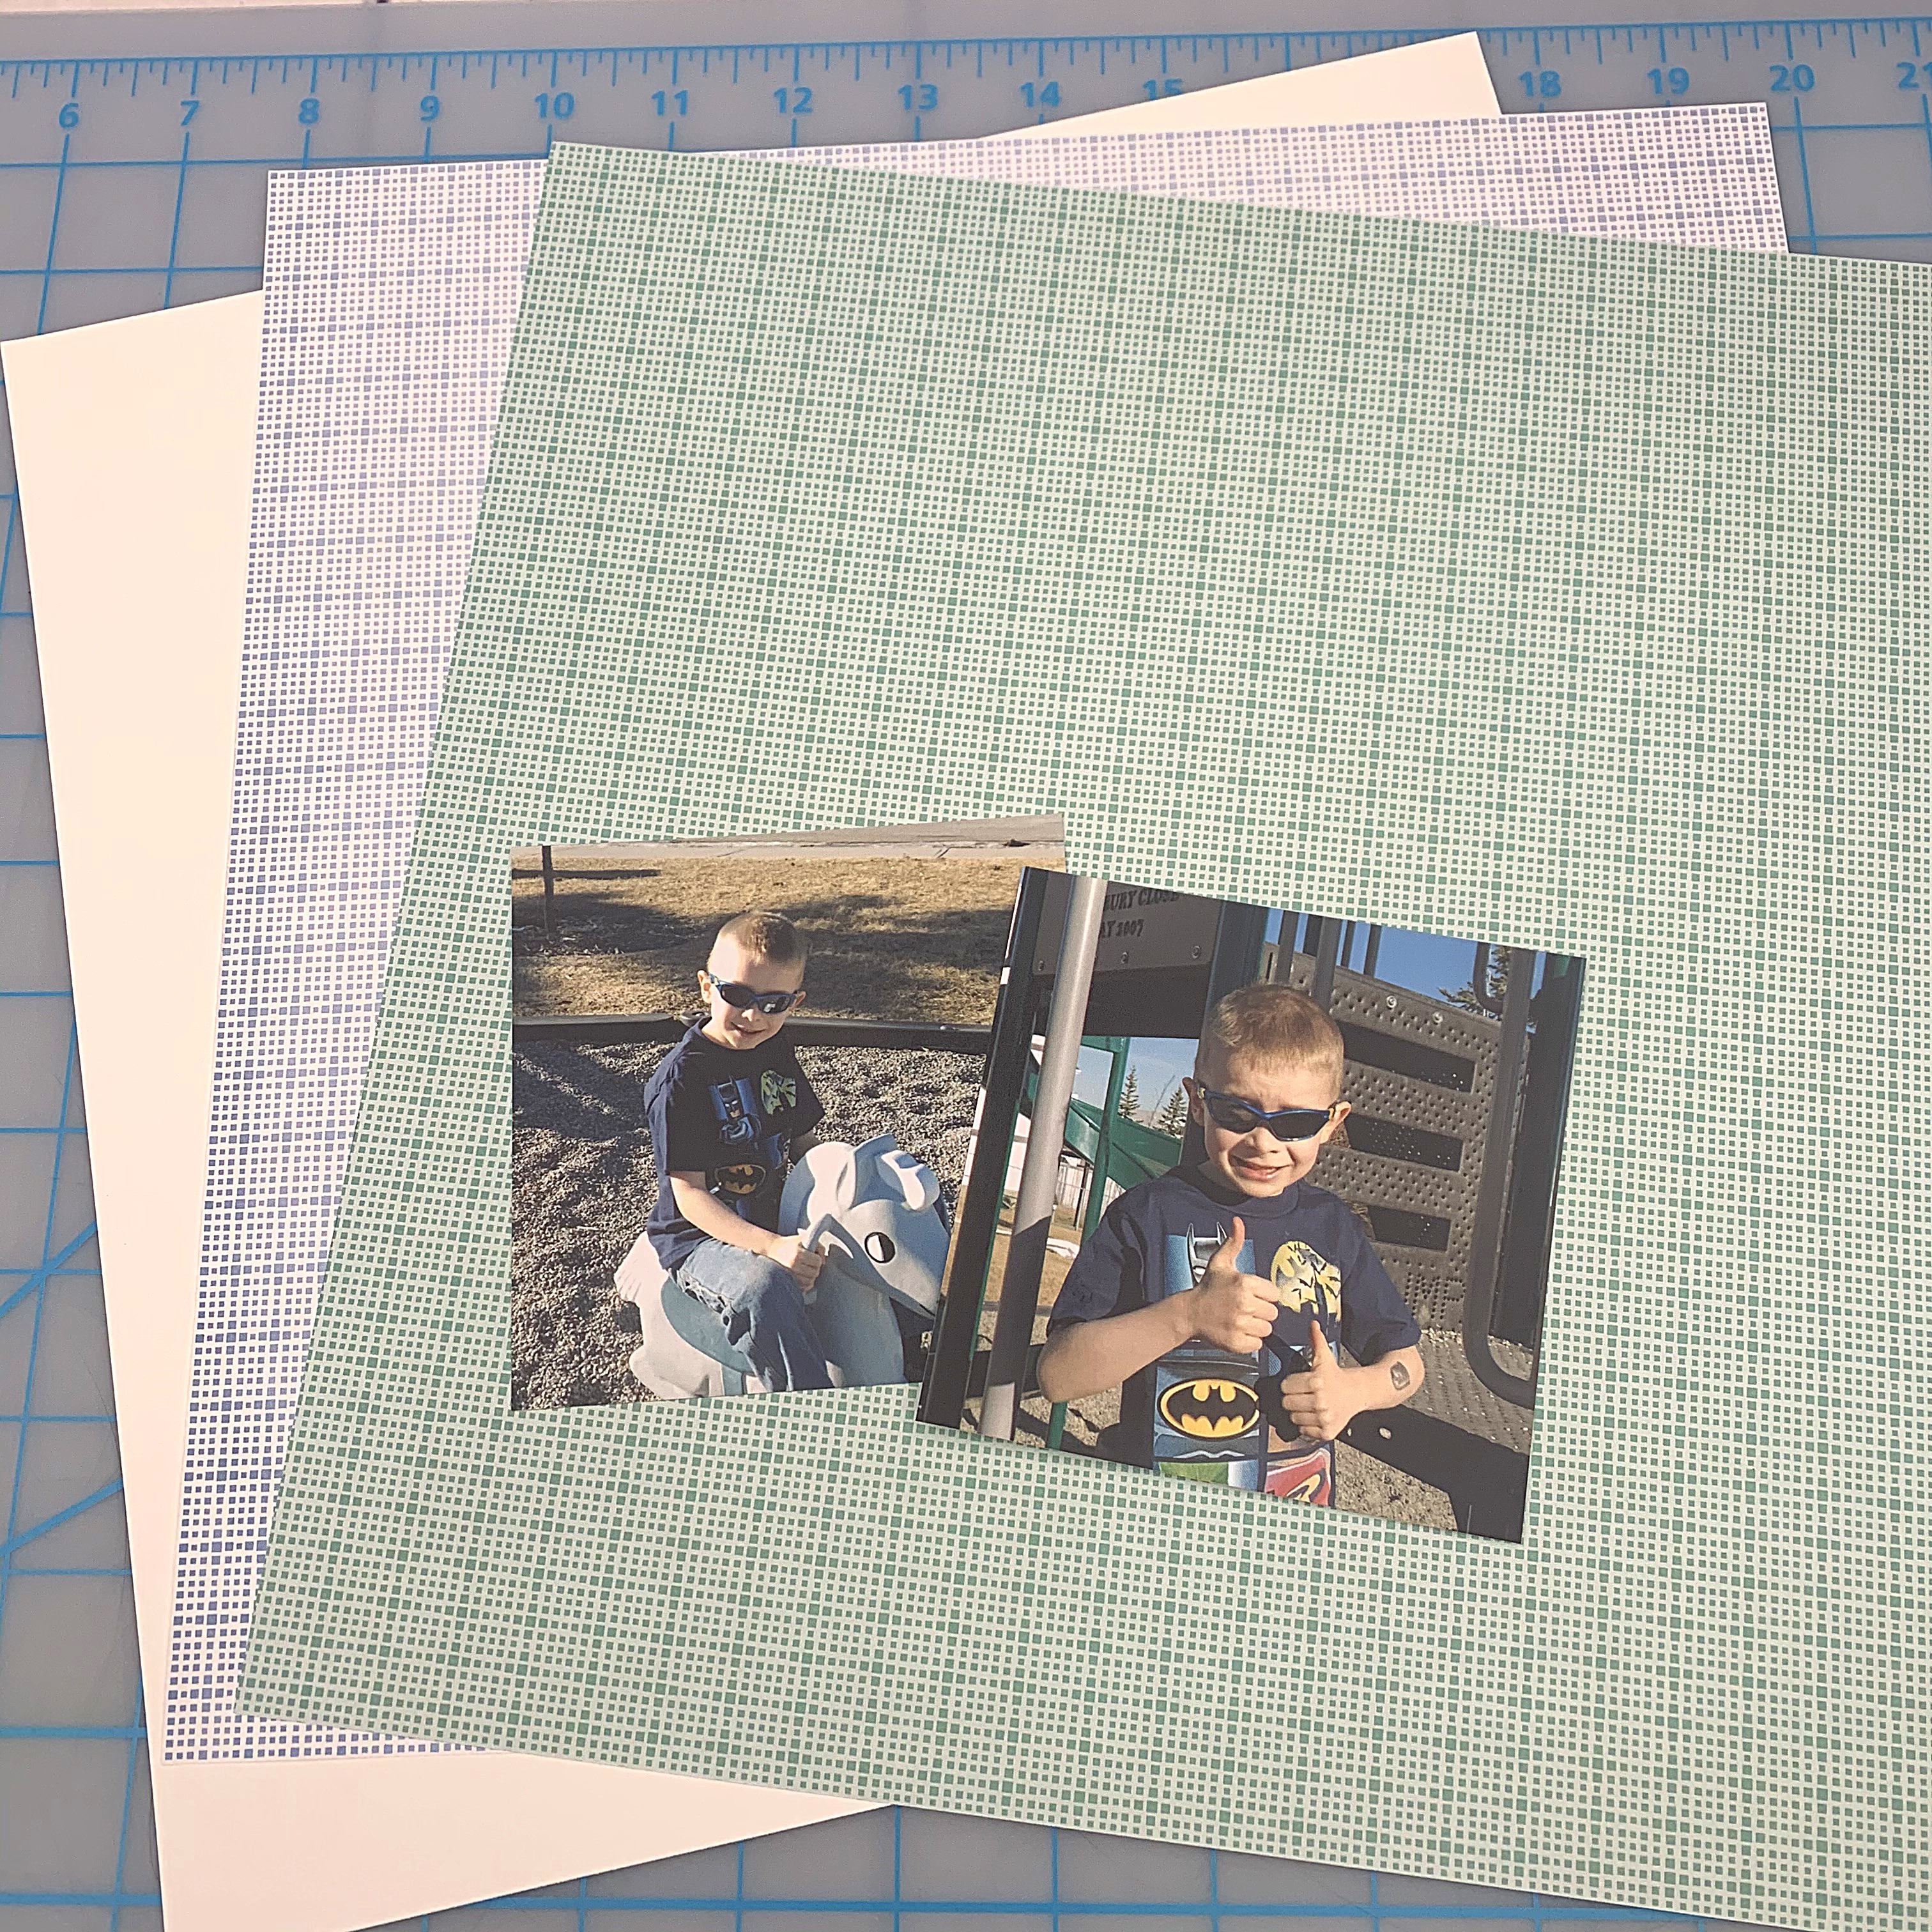
To make this layout you will need:
- Spring Medley Tone-On-Tone Paper Pack or (Shop Canada | Shop Australia)
- White Cardstock or (Shop Canada | Shop Australia)
- Spring Medley Stickers or (Shop Canada | Shop Australia)
- All-Purpose Scissors or (Shop Canada | Shop Australia)
- Spring Leaf Chain Border Maker Cartridge or (Shop Canada | Shop Australia)
- Original Border Maker System or (Shop Canada | Shop Australia)
- Tape Runner Adhesive or (Shop Canada | Shop Australia)
- Repositionable Adhesive or (Shop Canada | Shop Australia)
- Foam Squares or (Shop Canada | Shop Australia)
- Kraft Photo Corners or (Shop Canada | Shop Australia)
- Black Dual-Tip Pen or (Shop Canada | Shop Australia)

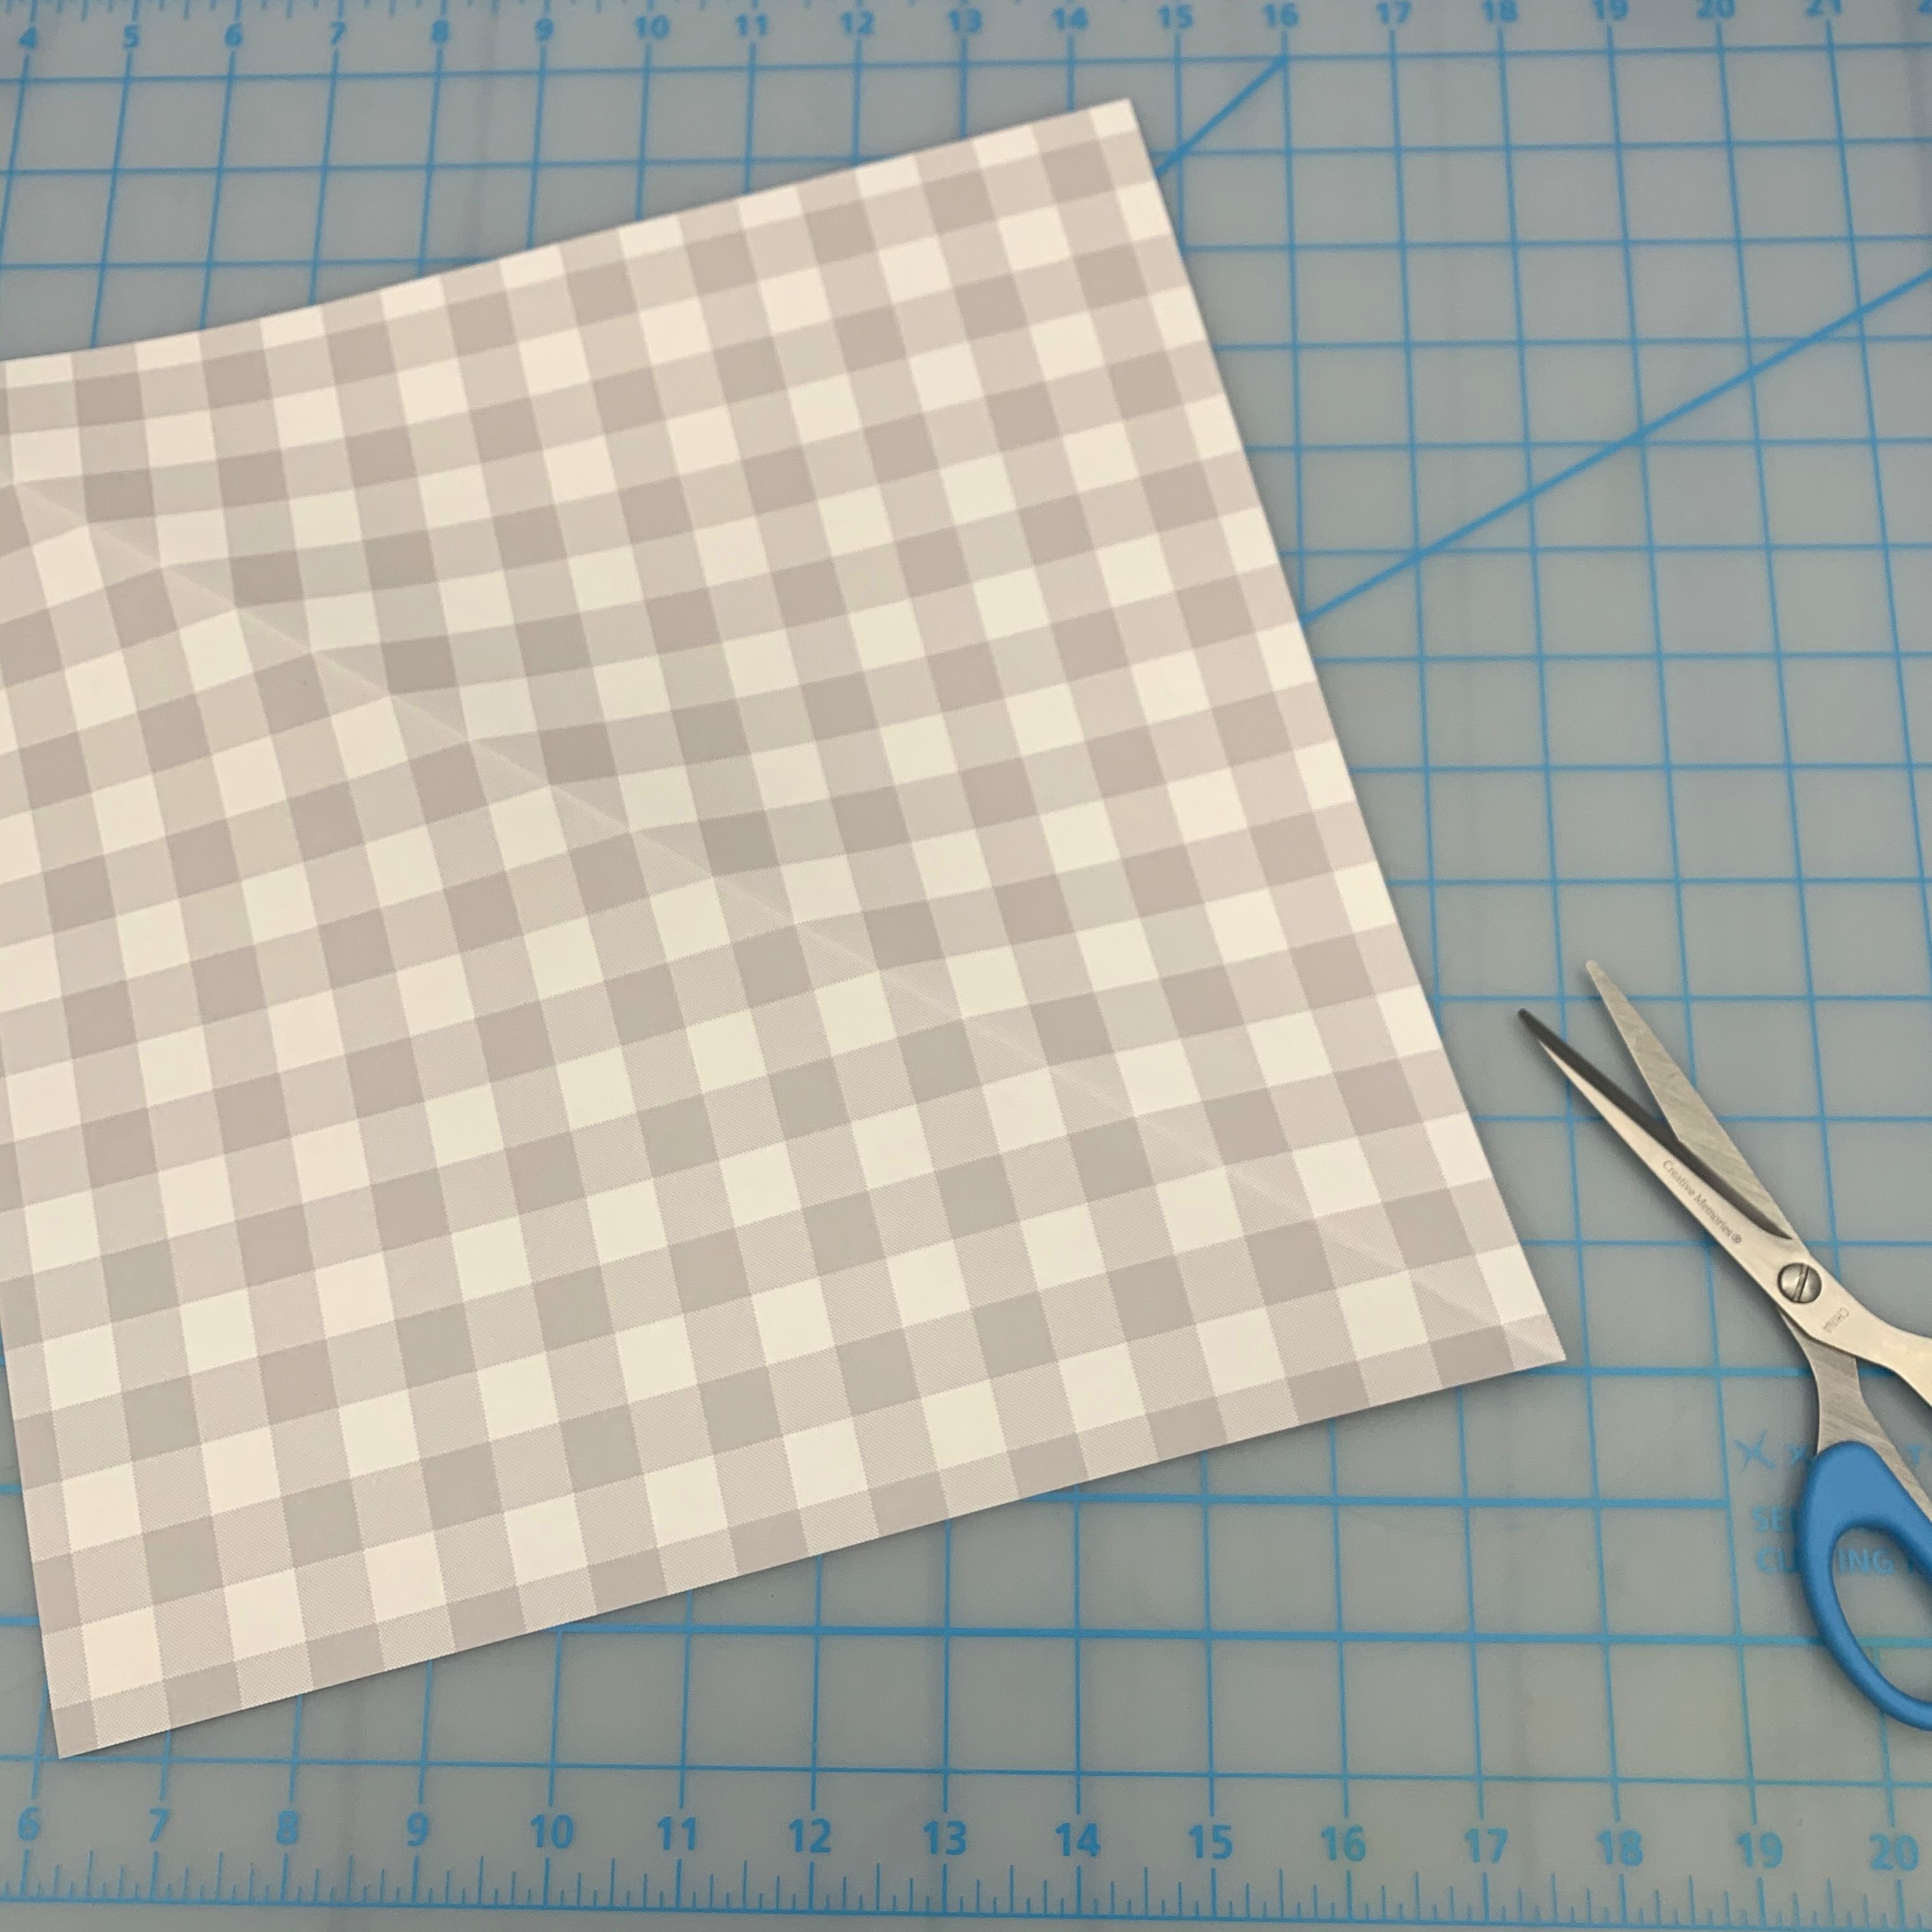

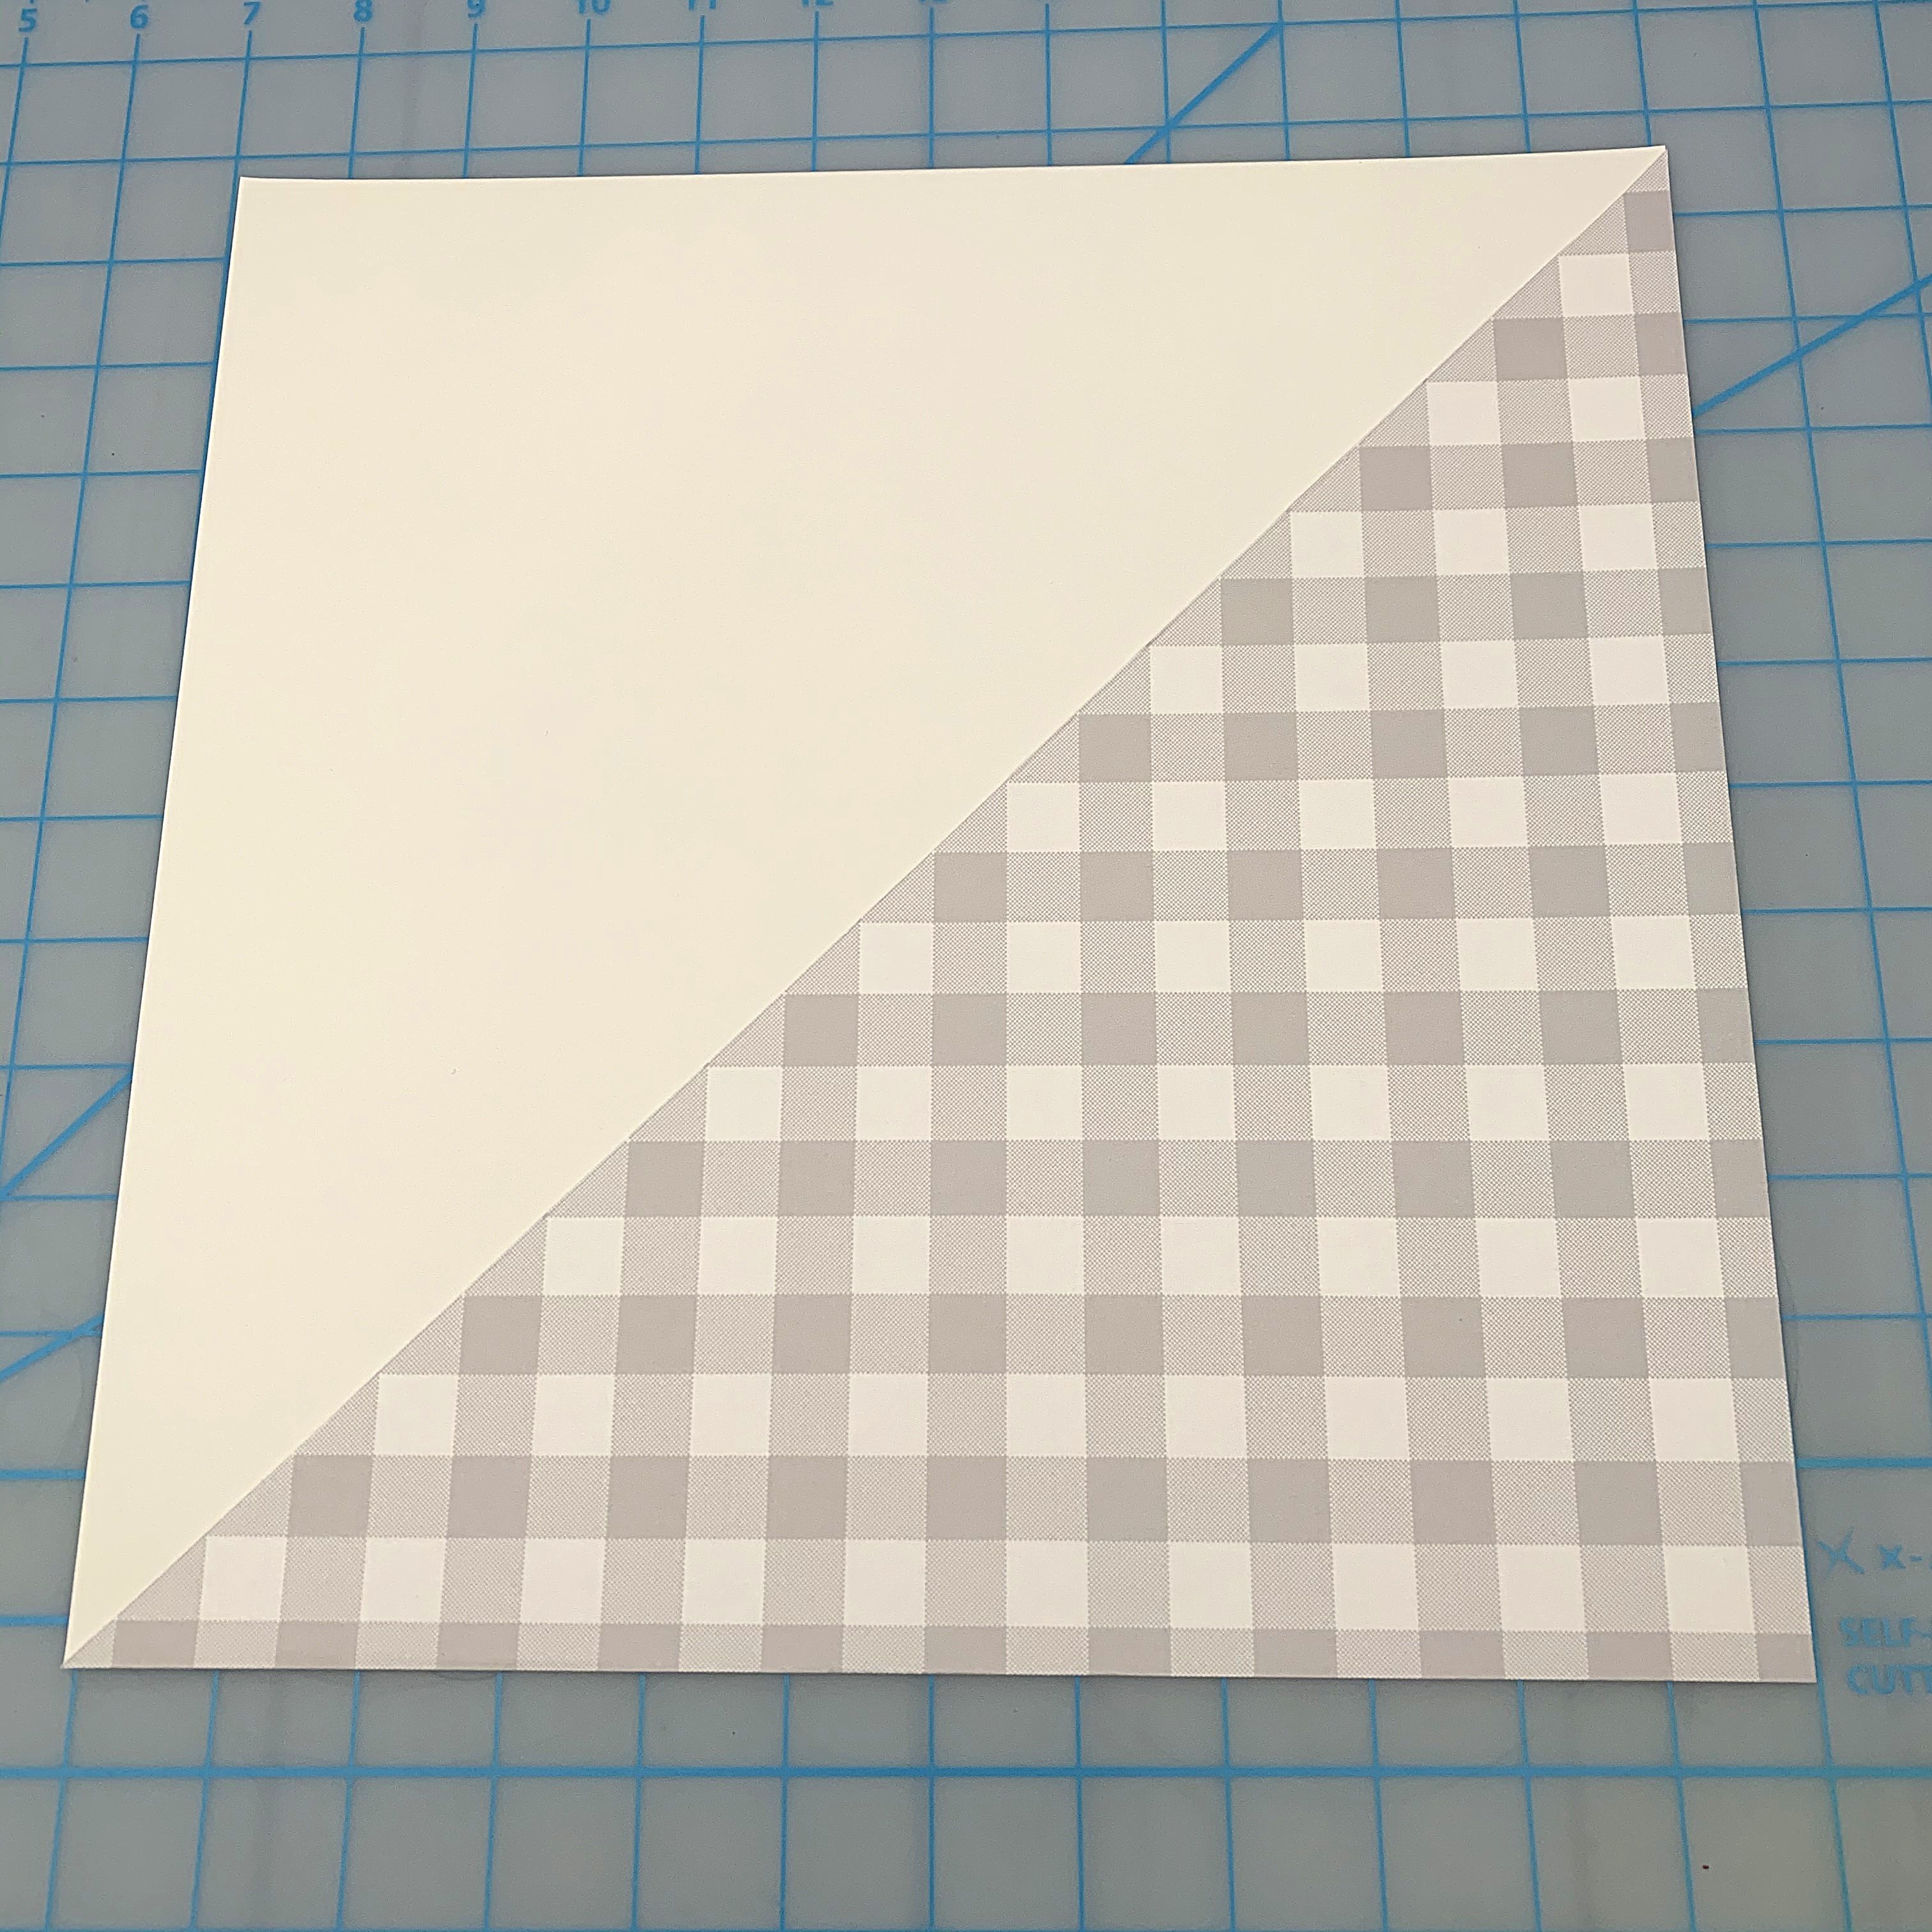
Step 1: Fold the gray gingham paper in half from corner to corner. Unfold and cut along the fold line with All-Purpose Scissors. Don’t worry about making a super straight line as the cut will be covered by borders. Adhere one triangle to the lower half of the White Cardstock base page with Tape Runner Adhesive.
Tip: You can use the other triangle to complete a second page to make this a double-page layout!


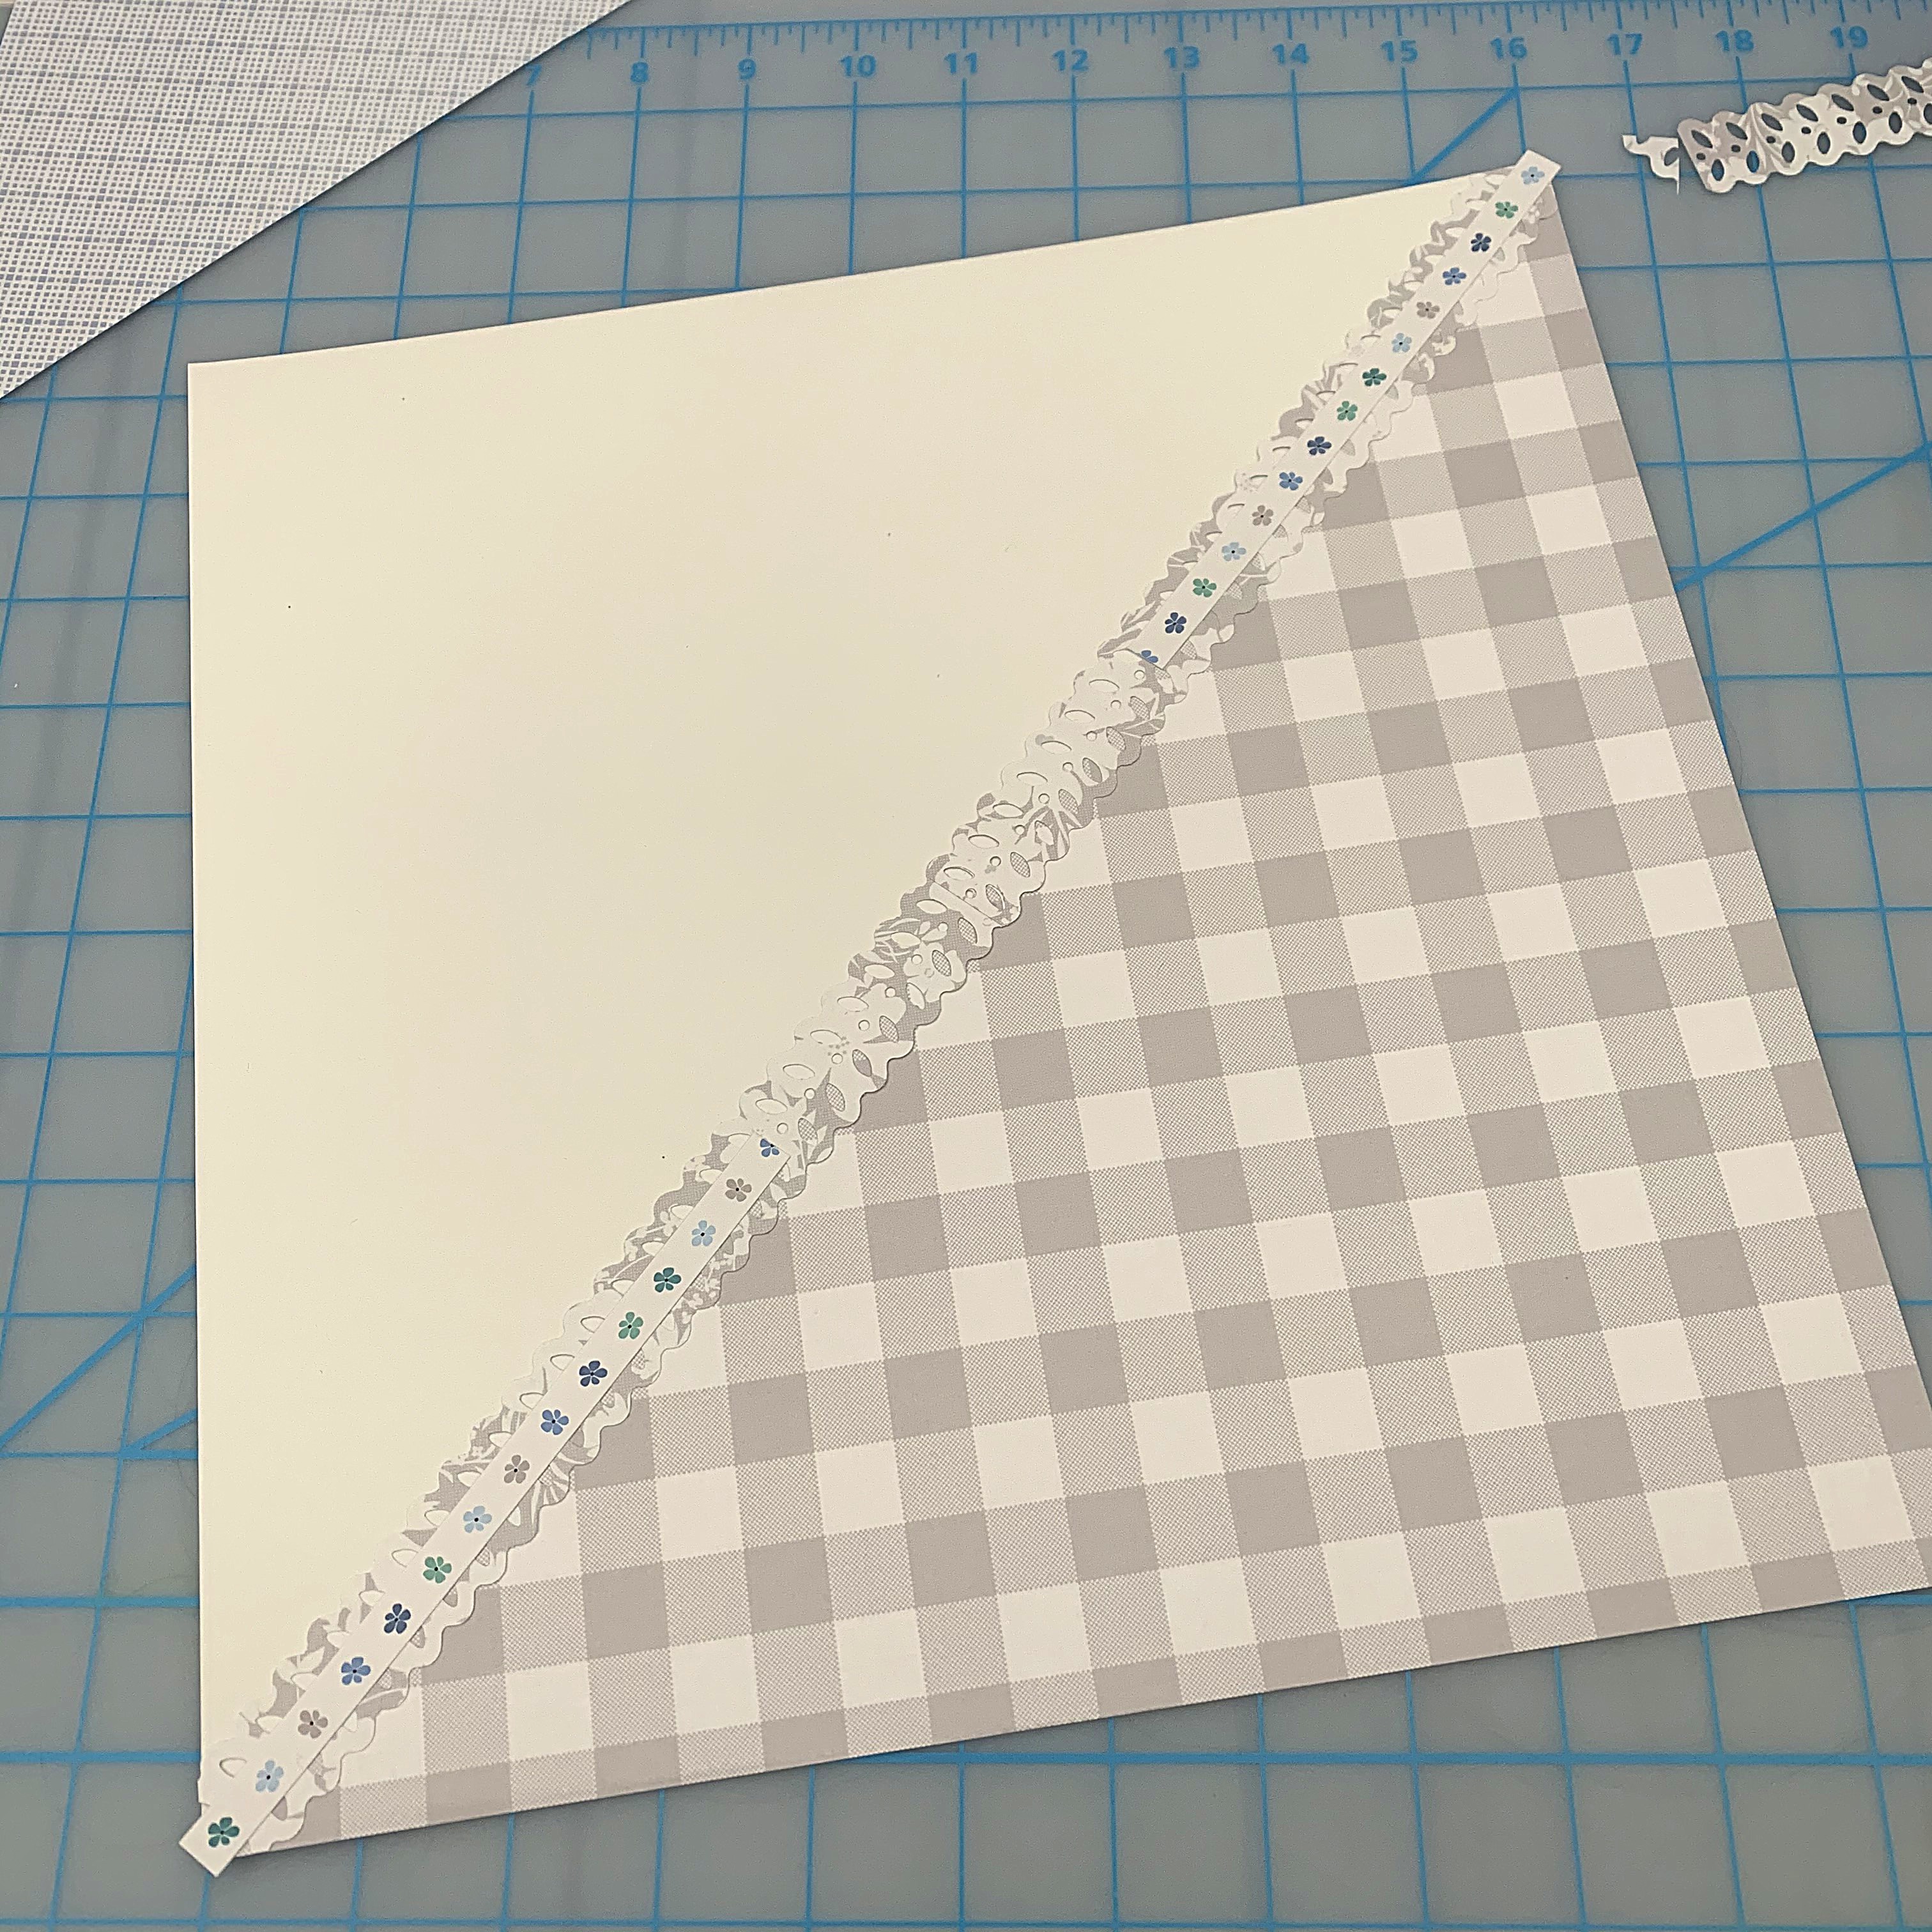
Step 2: Punch two border strips from the gray floral paper with the Spring Leaf Chain Border Maker Cartridge and Original Border Maker System. Adhere the borders using Repositionable Adhesive along the edge of the gray gingham triangle — they will meet and overlap in the middle. Cut off any excess that extends over the edge of the base page with All-Purpose Scissors. Add a border sticker on top of the punched border — because there was only one of the tiny floral borders on the sticker sheet, we opted to cut it in half and adhere it on the outside corners, as we knew photos would cover any empty spots.

Step 3: Cut two 4-1/4″ x 4-1/2″ squares from the green check pattern on the reverse side of the gray floral paper to mat the two 4″ x 4″ photos. Adhere the matted photos in the middle of the layout, covering up any empty spots along the border strips. Trim a 2″ x 4-1/4″ piece of the green check paper and cut a dovetail banner into one end. Add the letter stickers to form the title, “SHINE.” Mount below the top photo.
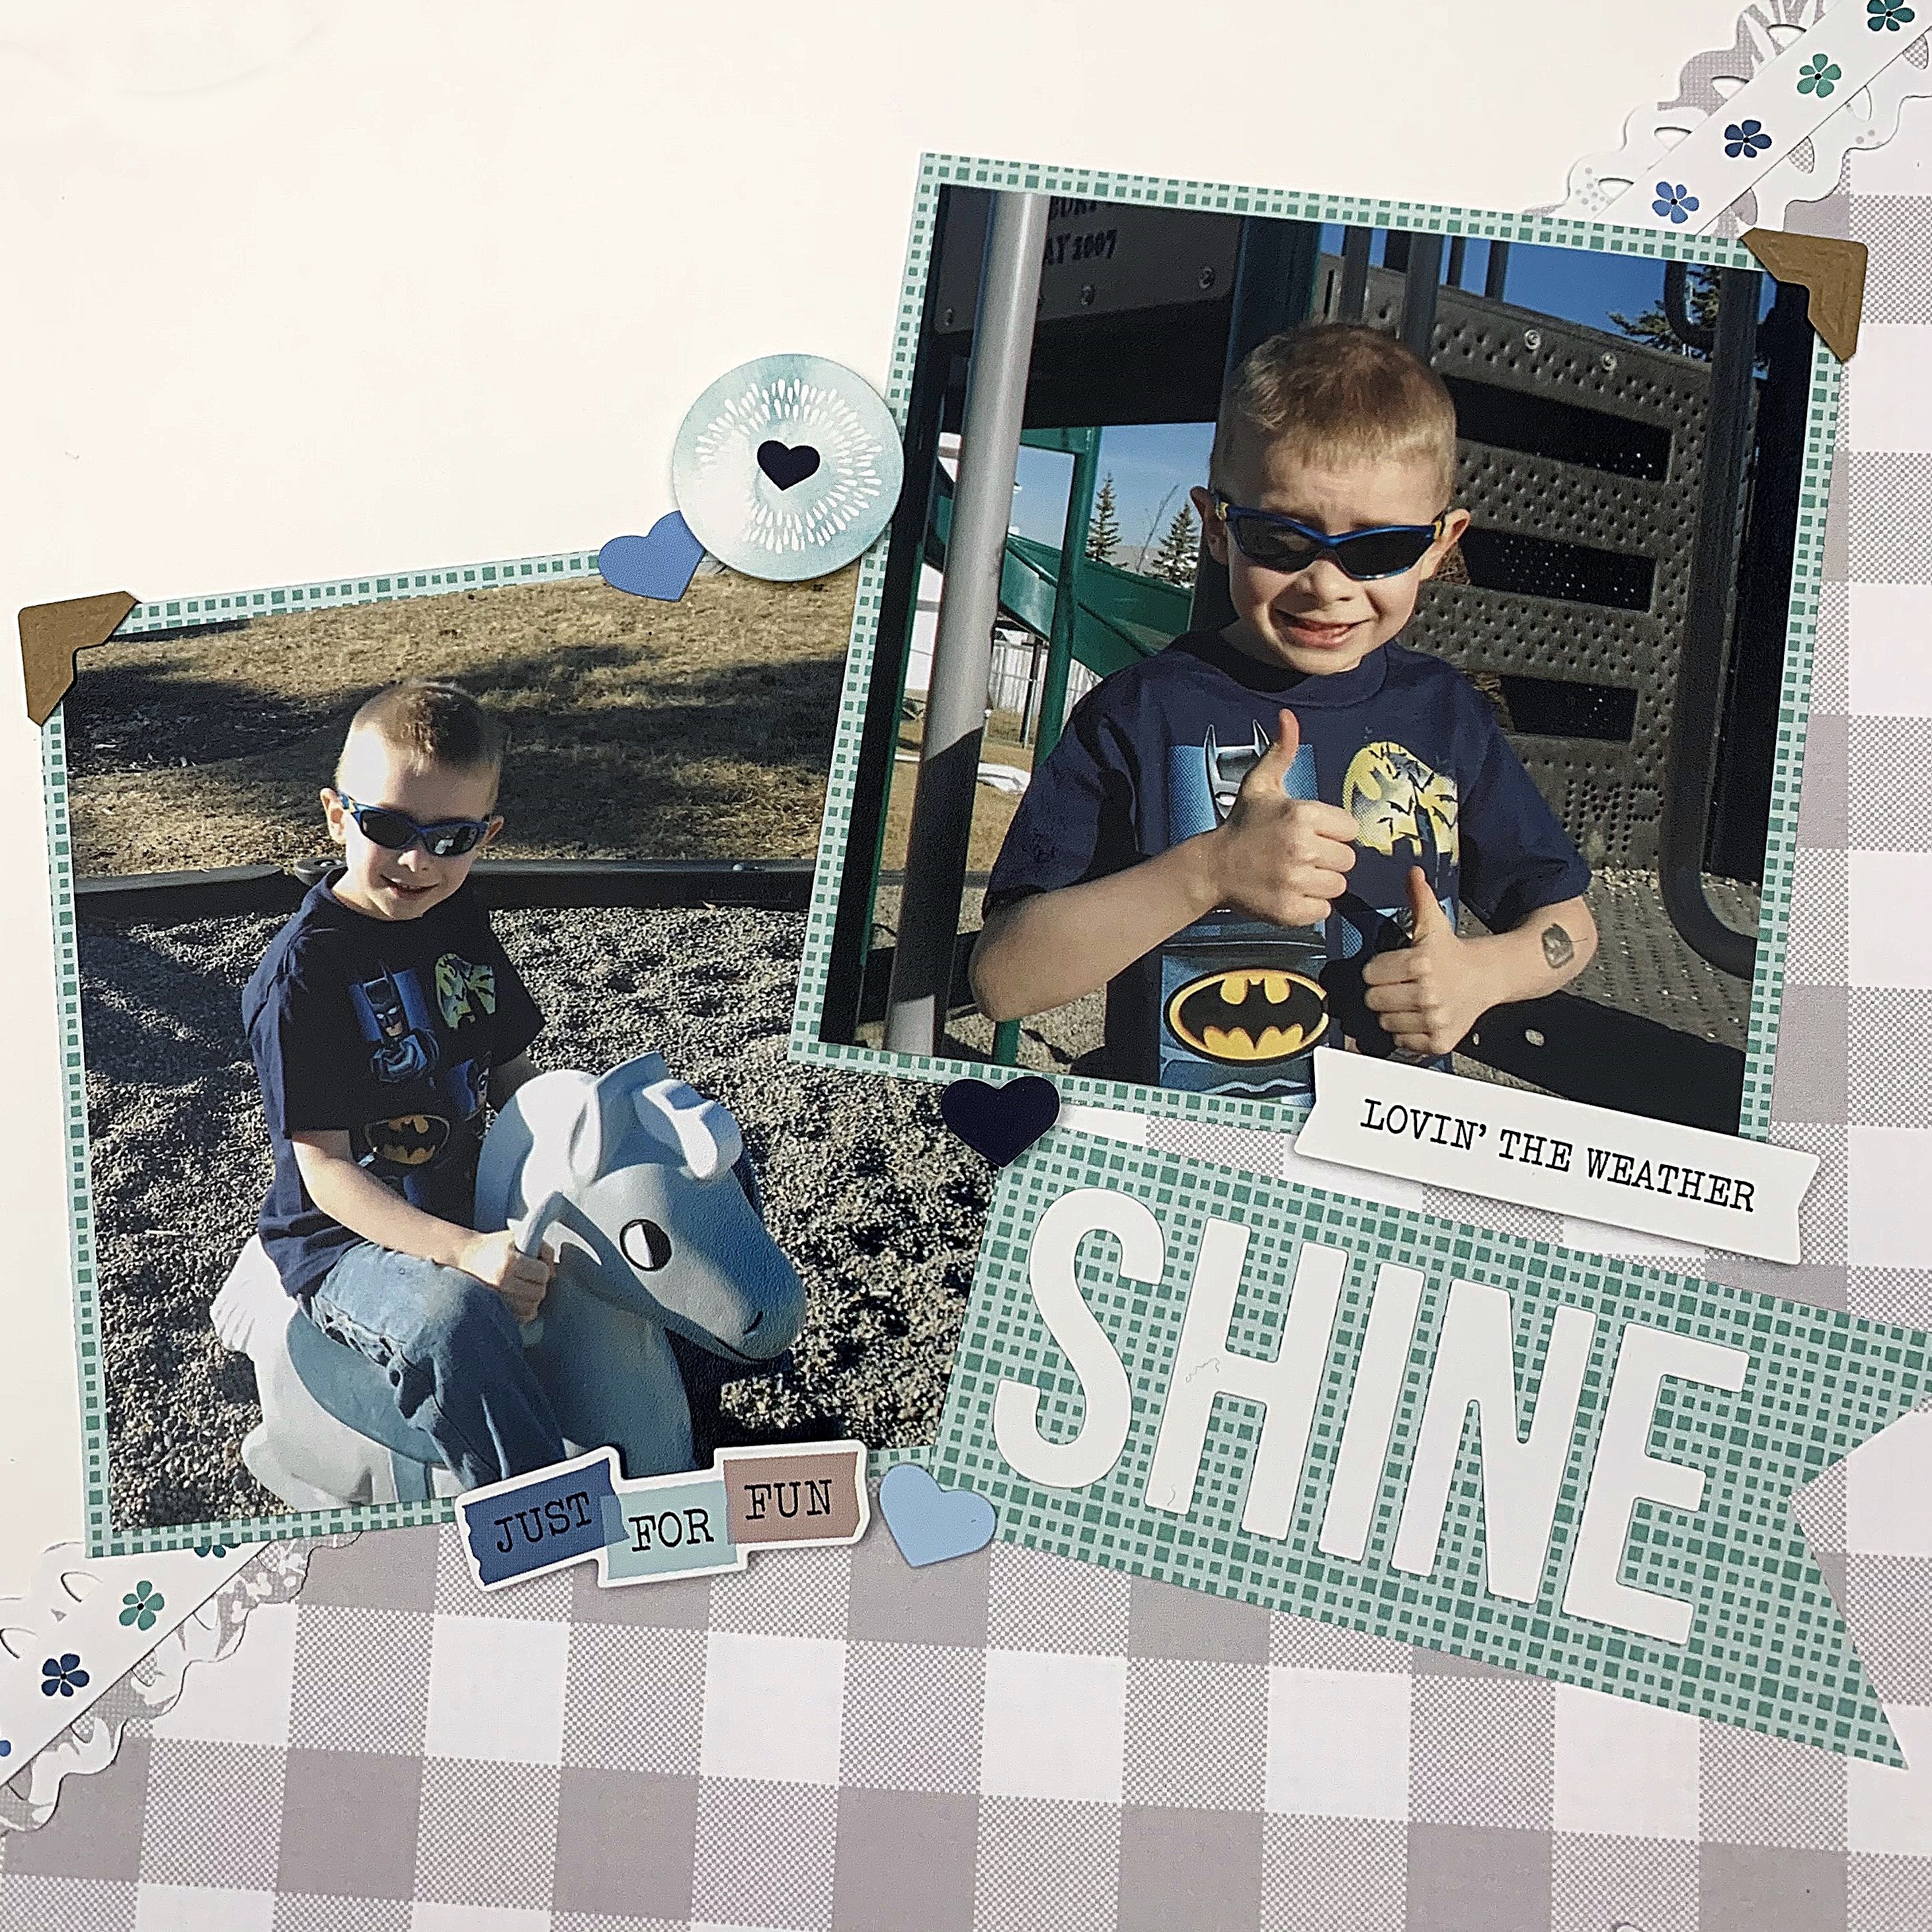
Step 4: Add stickers to this photo/title cluster, mounting some with Foam Squares for a layered, dimensional effect. Add one Kraft Photo Corner to the outside edge of each photo to repeat the neutral tones.
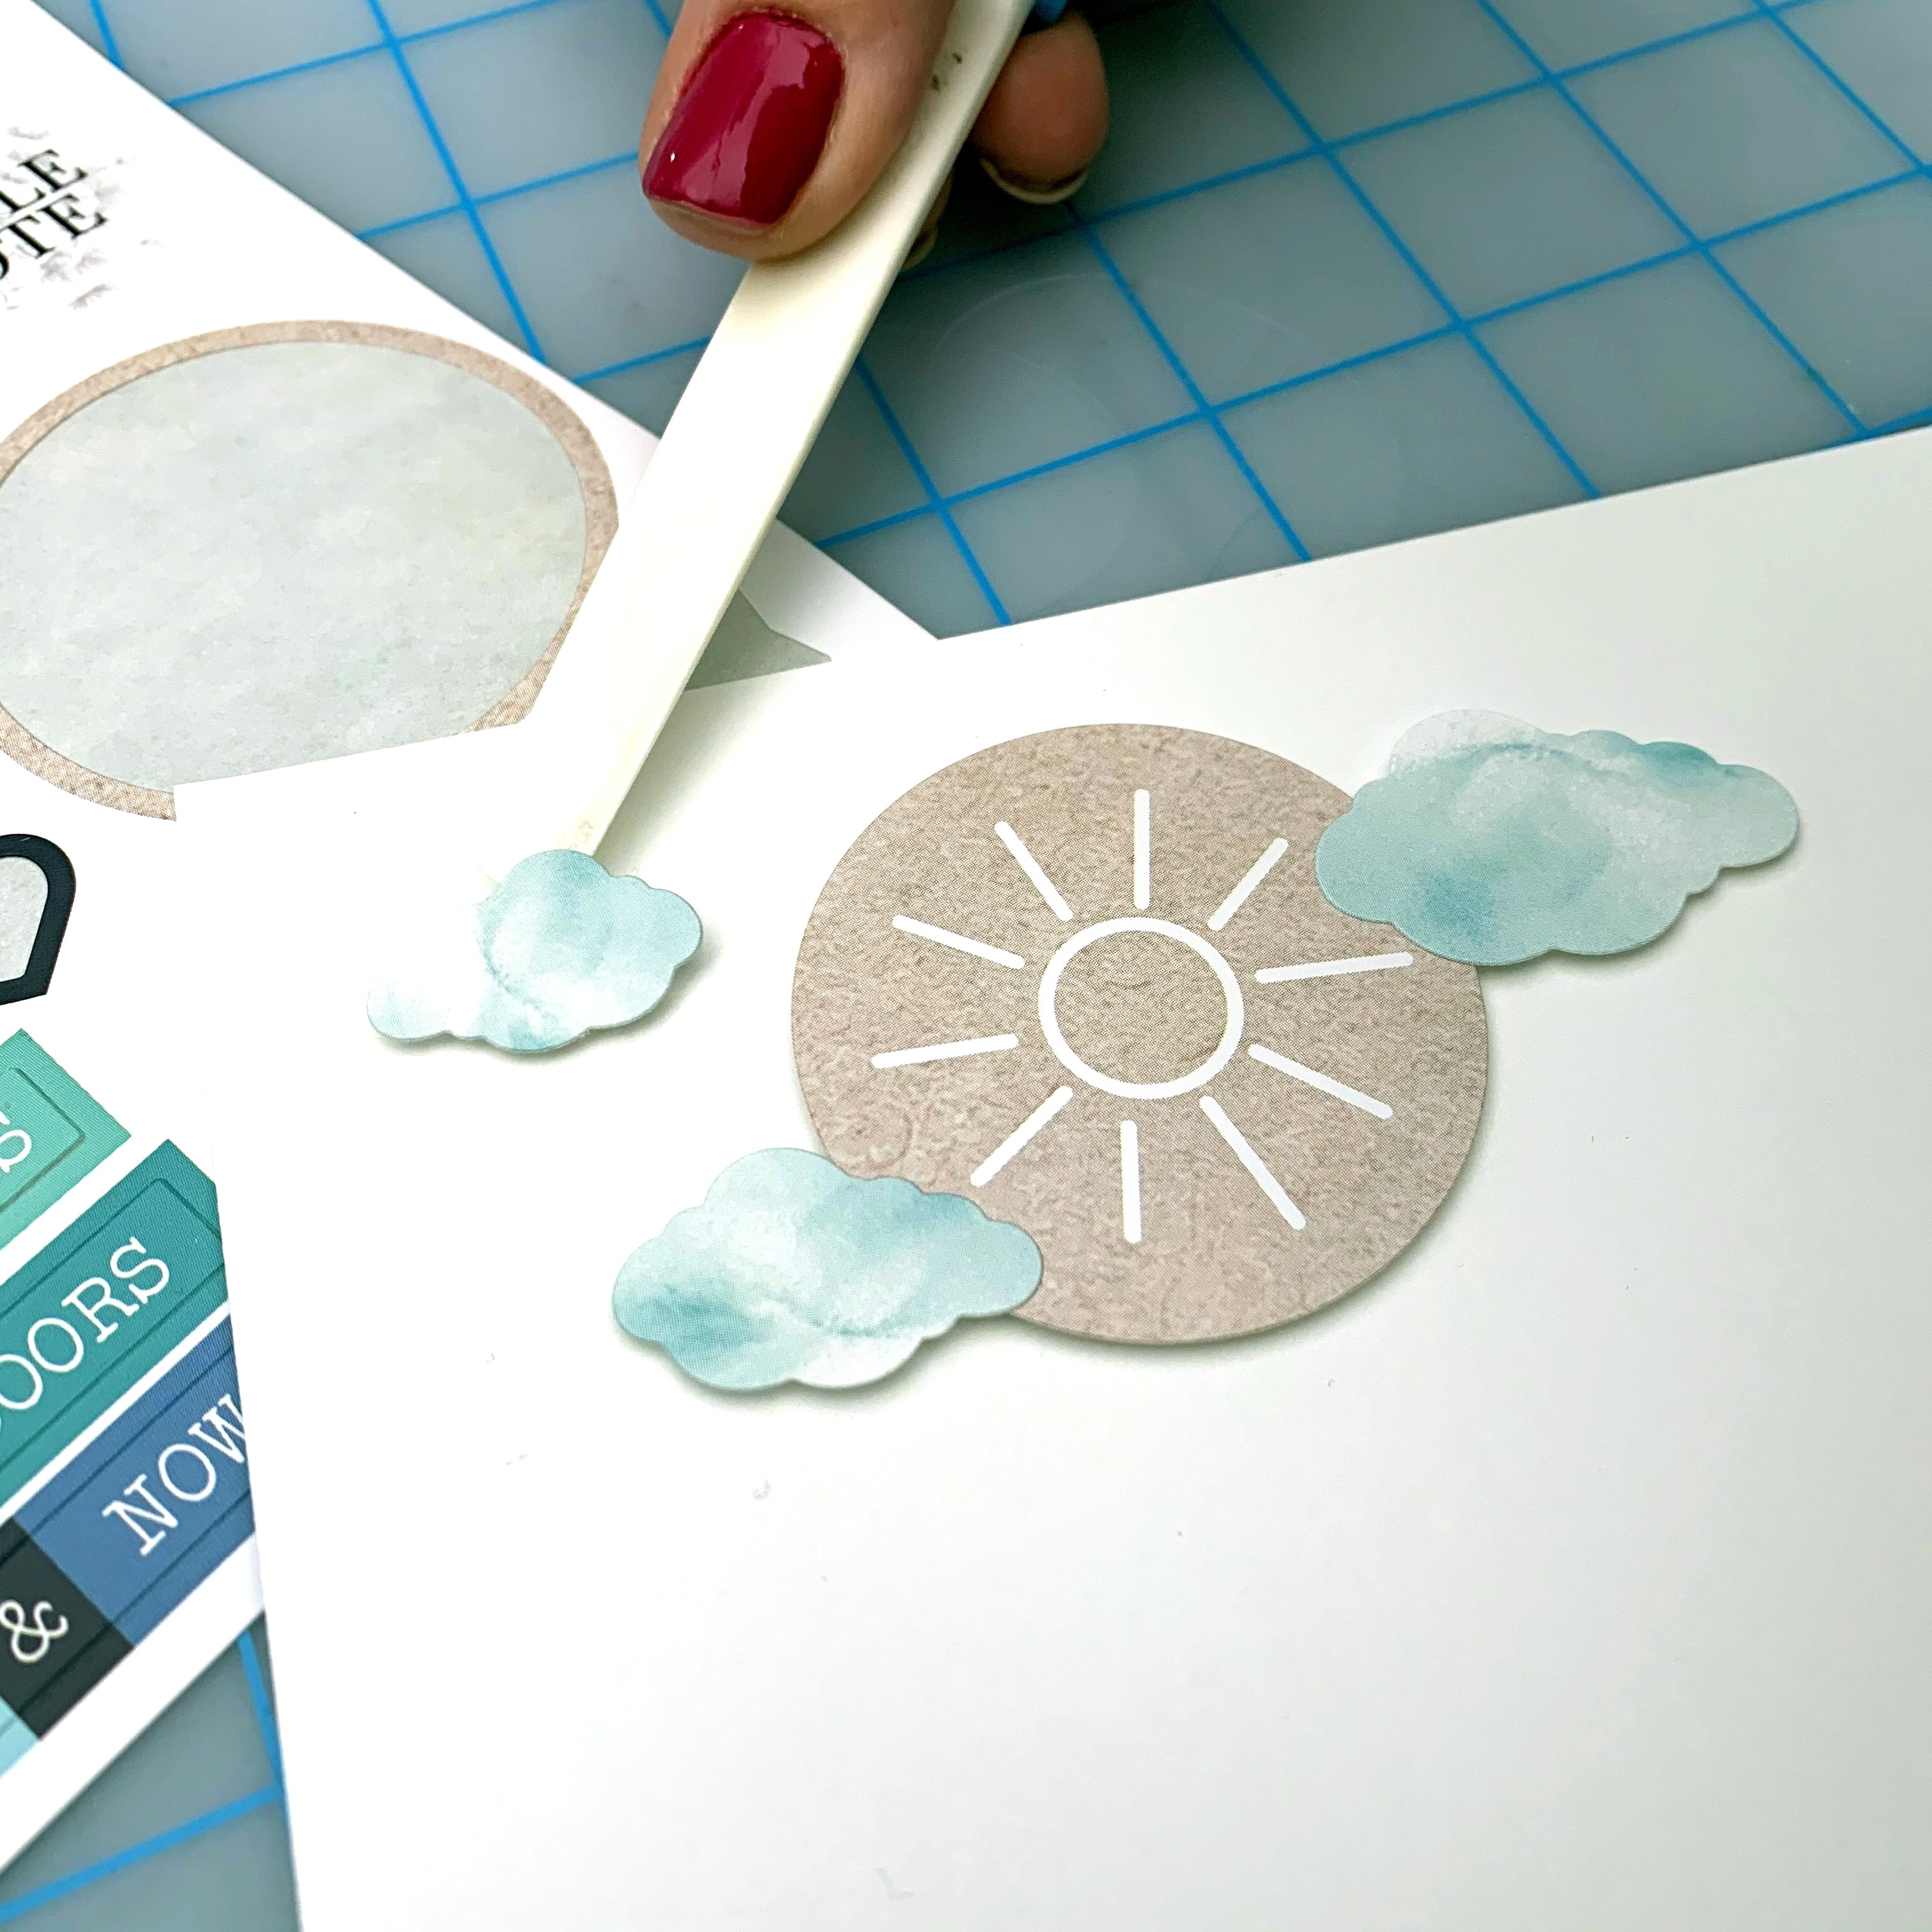
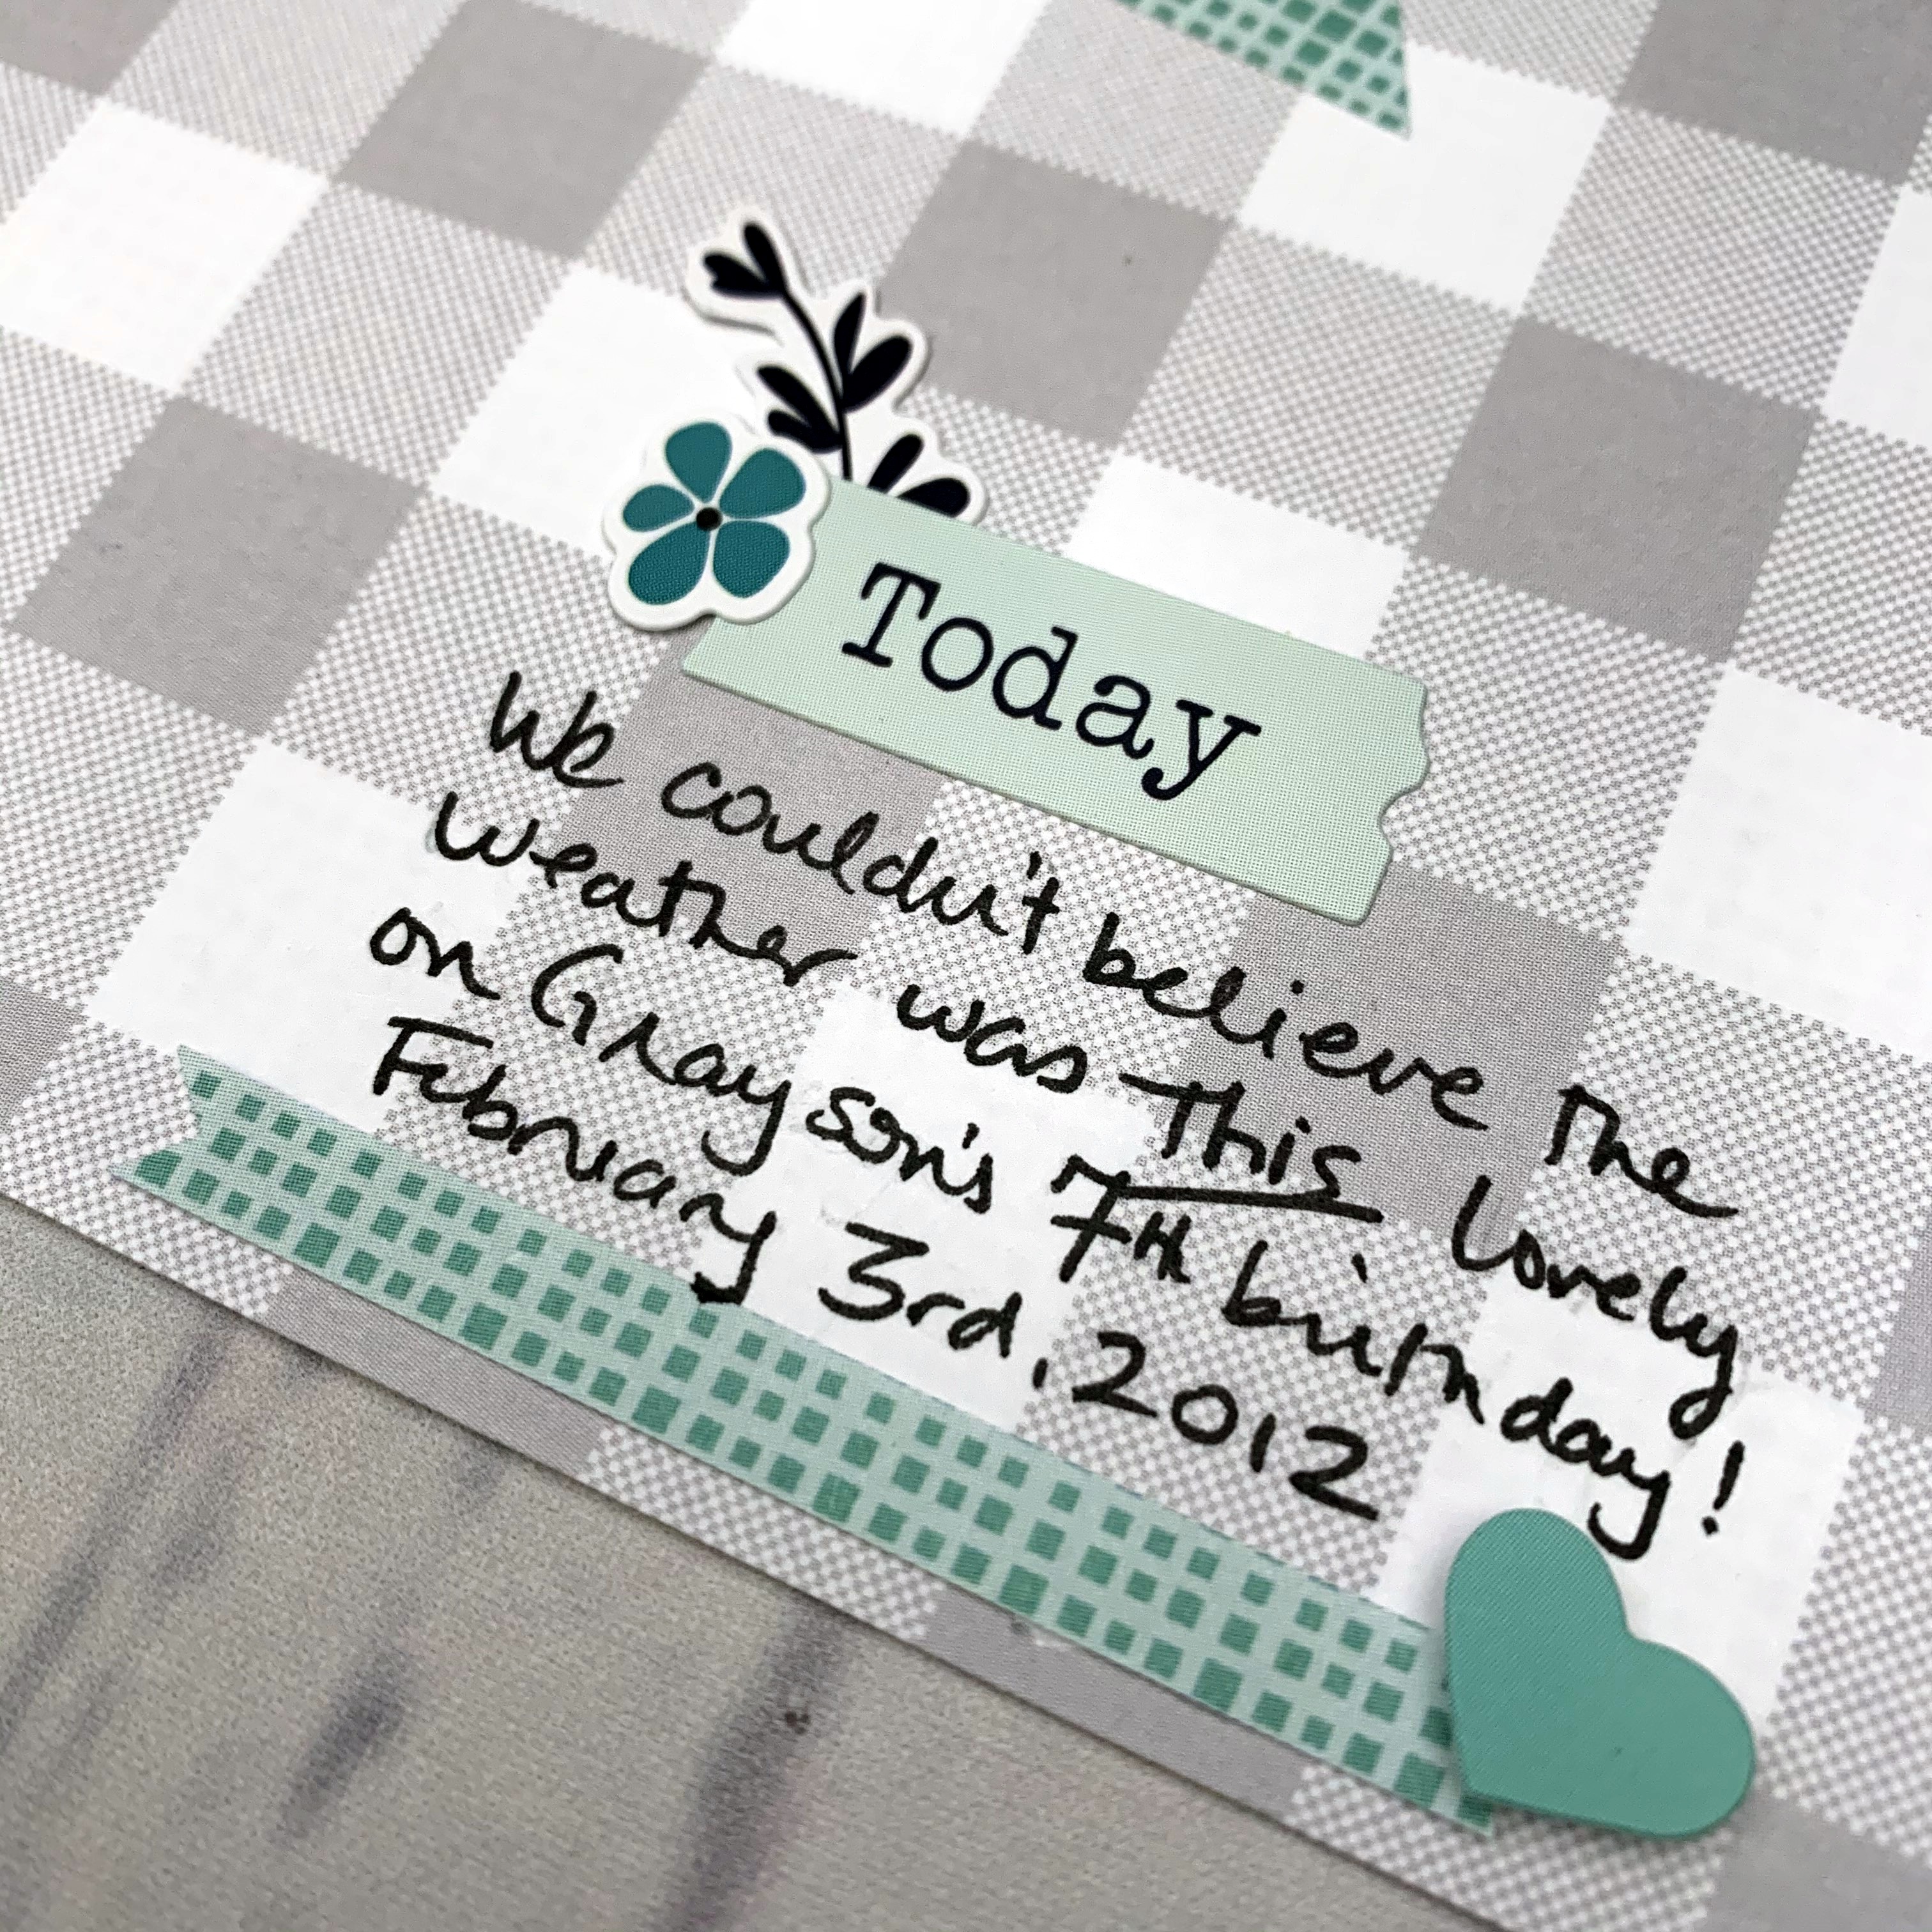
Step 5: Add the circular sun sticker and the cloud stickers to the upper left hand corner of the layout. Create a mini-embellishment cluster with the “Today” sticker, a snip of navy branches and a mini flower, and place in the lower right-hand corner, leaving room to journal underneath with the Black Dual-Tip Pen. Finish this cluster with a skinny banner strip of the green checked paper and a heart sticker.
Tip: The Multi-Purpose Tool is handy for placing stickers exactly where you want them!

What do you like most about this spring scrapbook layout? What tone-on-tone papers do you love most? Let us know in the comments below!

That’s so cute
I like it but not enough pics on the page, rather bare!
See and I totally thought the opposite! At last, a page that isn’t so busy you can’t see the photos! Love this one, can see it used with a two page spread angled opposite. One with a large 7″x5″ or even a 10″x8″, the other like this, all of one theme.
I totally agree with heathersmagic. I love this page because it is not so busy! So many pages have such busy paper and embellishments that the pictures get lost. This one truly is abut the pictures!
I love the color combo…. AND the way you added embellishments around the journaling! Thanks for sharing!
She goes to school for entrance ceremony.
She wears new uniform.
Cute layout!! Love the papers!!
I love the Spring Medley collection. I am using it for my daughter’s wedding album. I love this layout and can’t wait to try it!