June 16, 2020
Delight Dad With These DIY Father’s Day Card Ideas
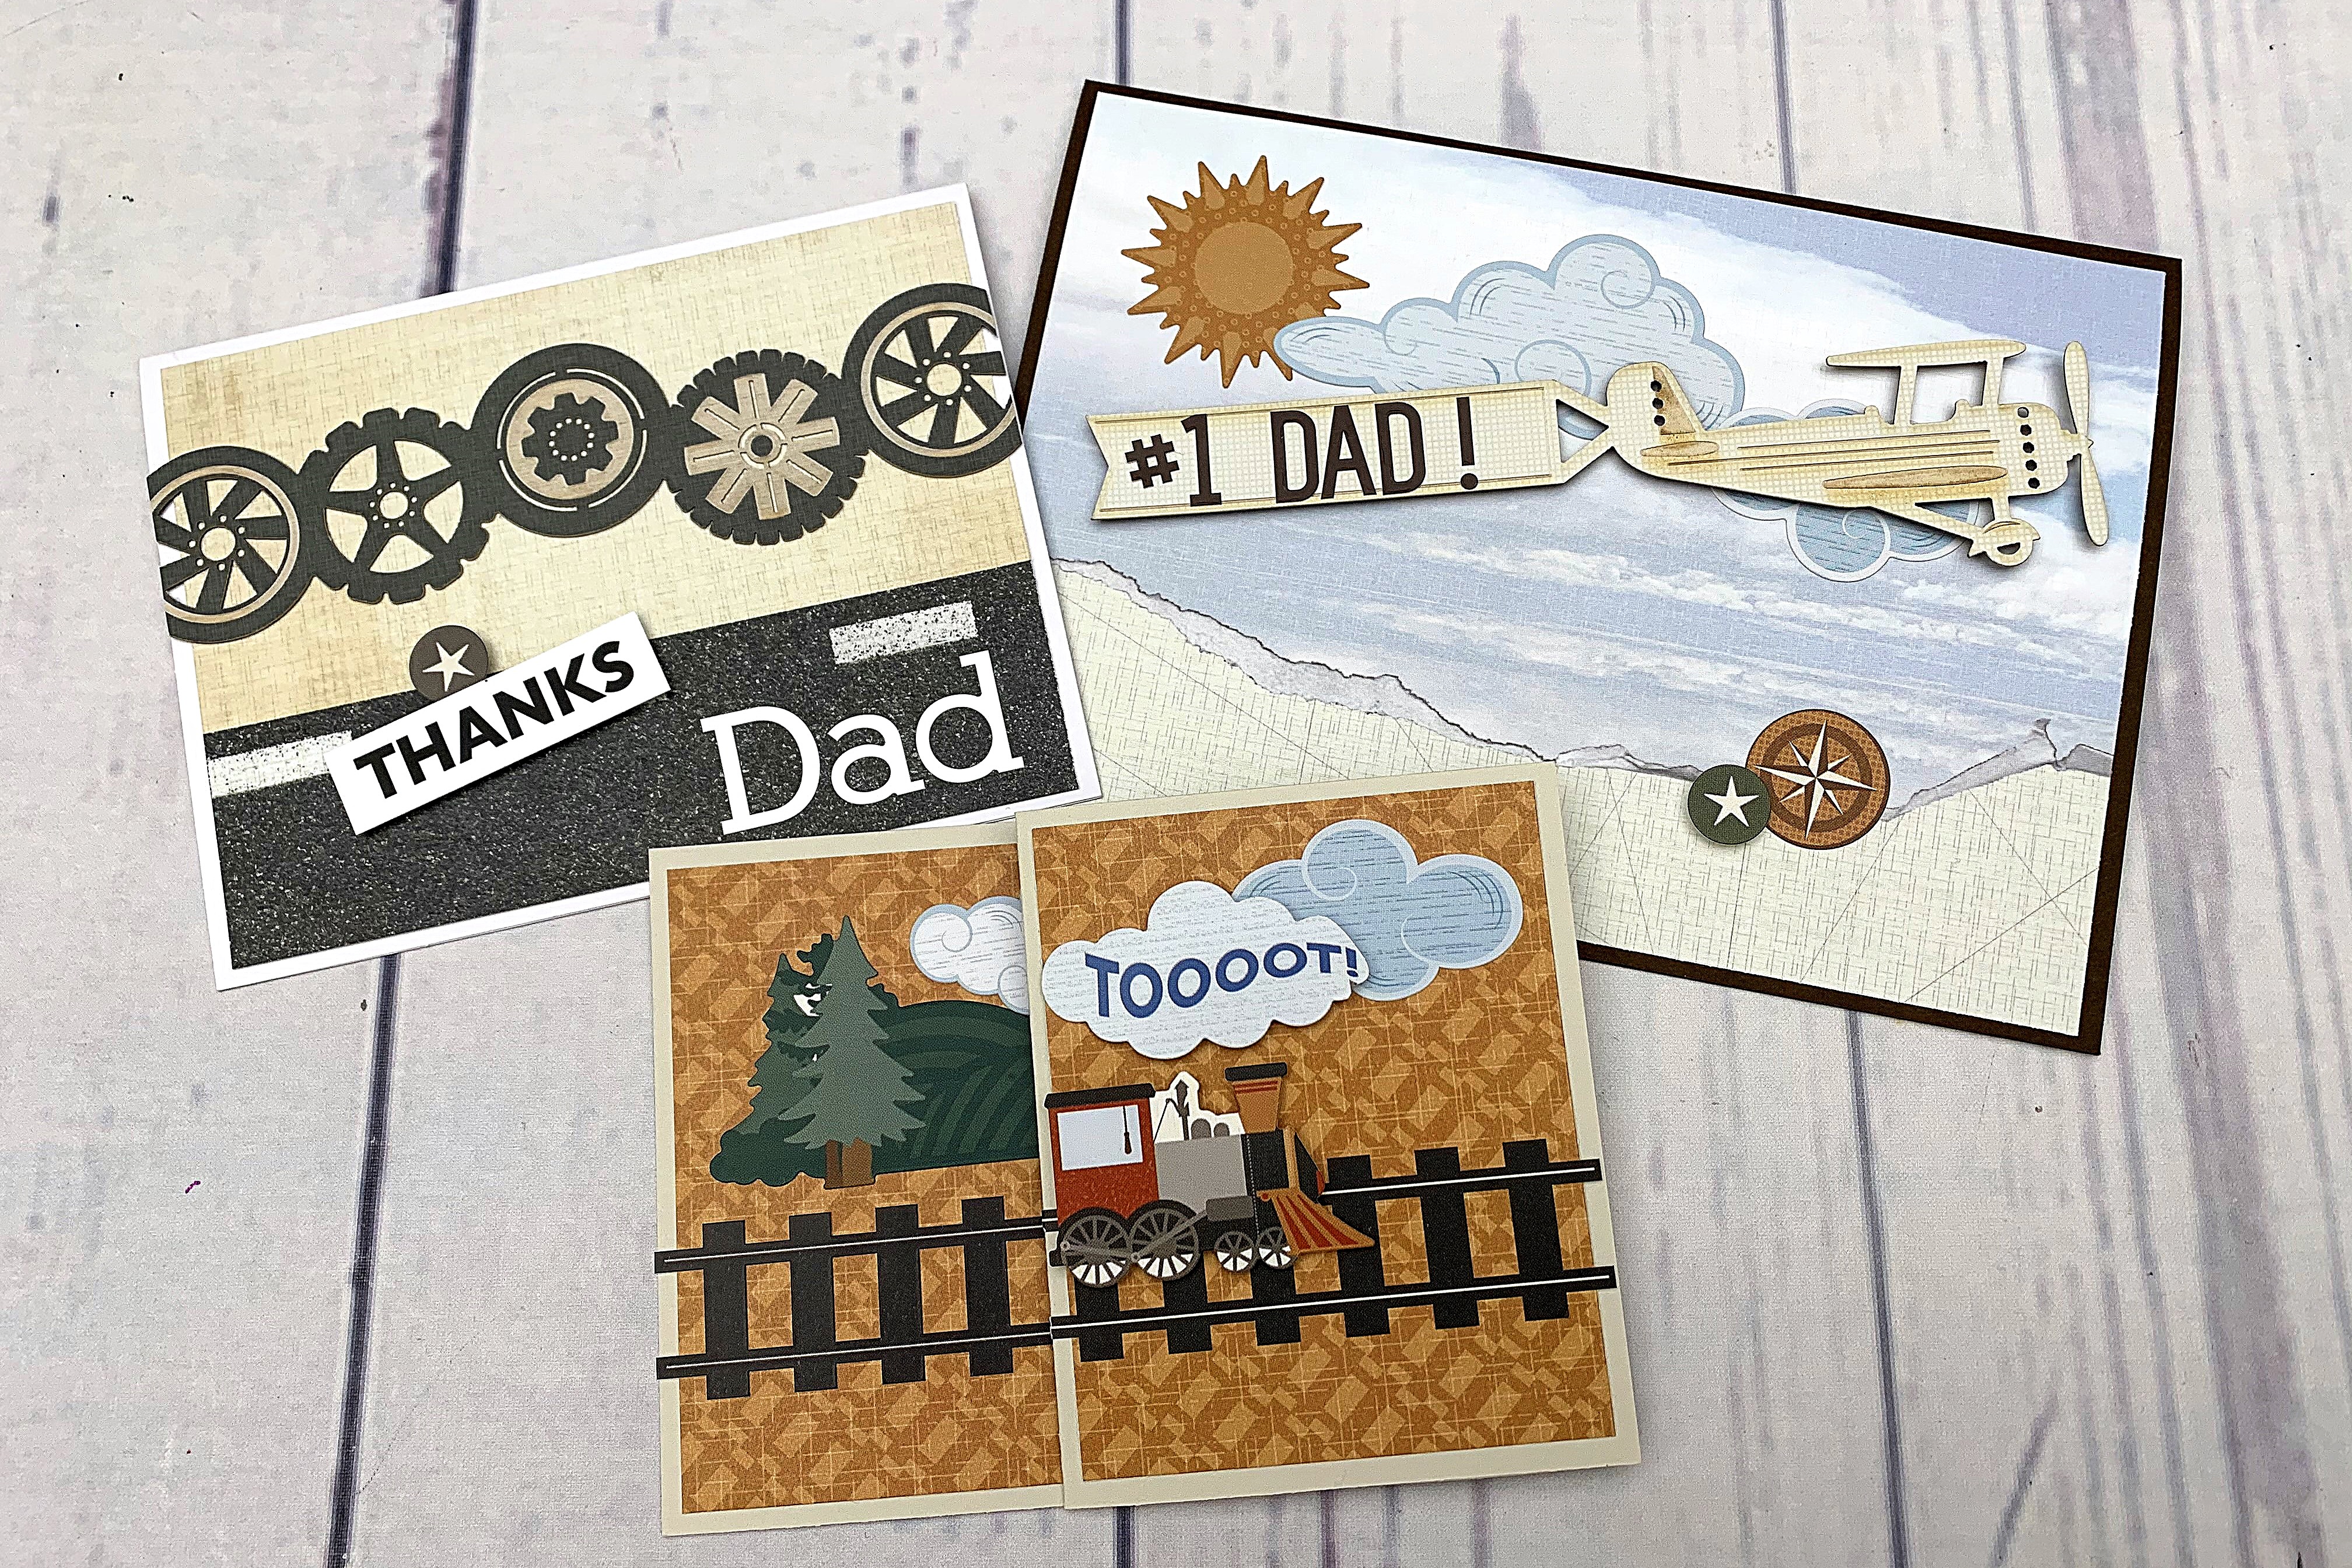
Let’s talk about dad. Is he a gearhead who loves everything about cars? Is he a wannabe pilot, setting his sights high above the clouds? Or maybe he’s fascinated with locomotives — and the opportunity to shout “All aboard?” No matter what dad is into, you can create a DIY Father’s Day card that perfectly suits him using the Planes, Trains and Automobiles collections. Follow the instructions below or watch the video to find out how to make each of these fun Father’s Day cards.
To make the Automobiles Card you will need:
- Automobiles Paper Pack or (Shop Canada | Shop Australia)
- Automobiles Stickers or (Shop Canada | Shop Australia)
- Automobiles Laser Cut Embellishment Accents or (Shop Canada | Shop Australia)
- White Serif ABC/123 Stickers or (Shop Canada | Shop Australia)
- How-Do-You-Do Stickers or (Shop Canada | Shop Australia)
- Blank Card Kit or (Shop Canada | Shop Australia)
- 12-inch Trimmer or (Shop Canada | Shop Australia)
- All-Purpose Scissors or (Shop Canada | Shop Australia)
- Tape Runner or (Shop Canada | Shop Australia)
- Repositionable Tape Runner or (Shop Canada | Shop Australia)
- Foam Squares or (Shop Canada | Shop Australia)
Check out this video and the instructions below to make these fantastic cards!
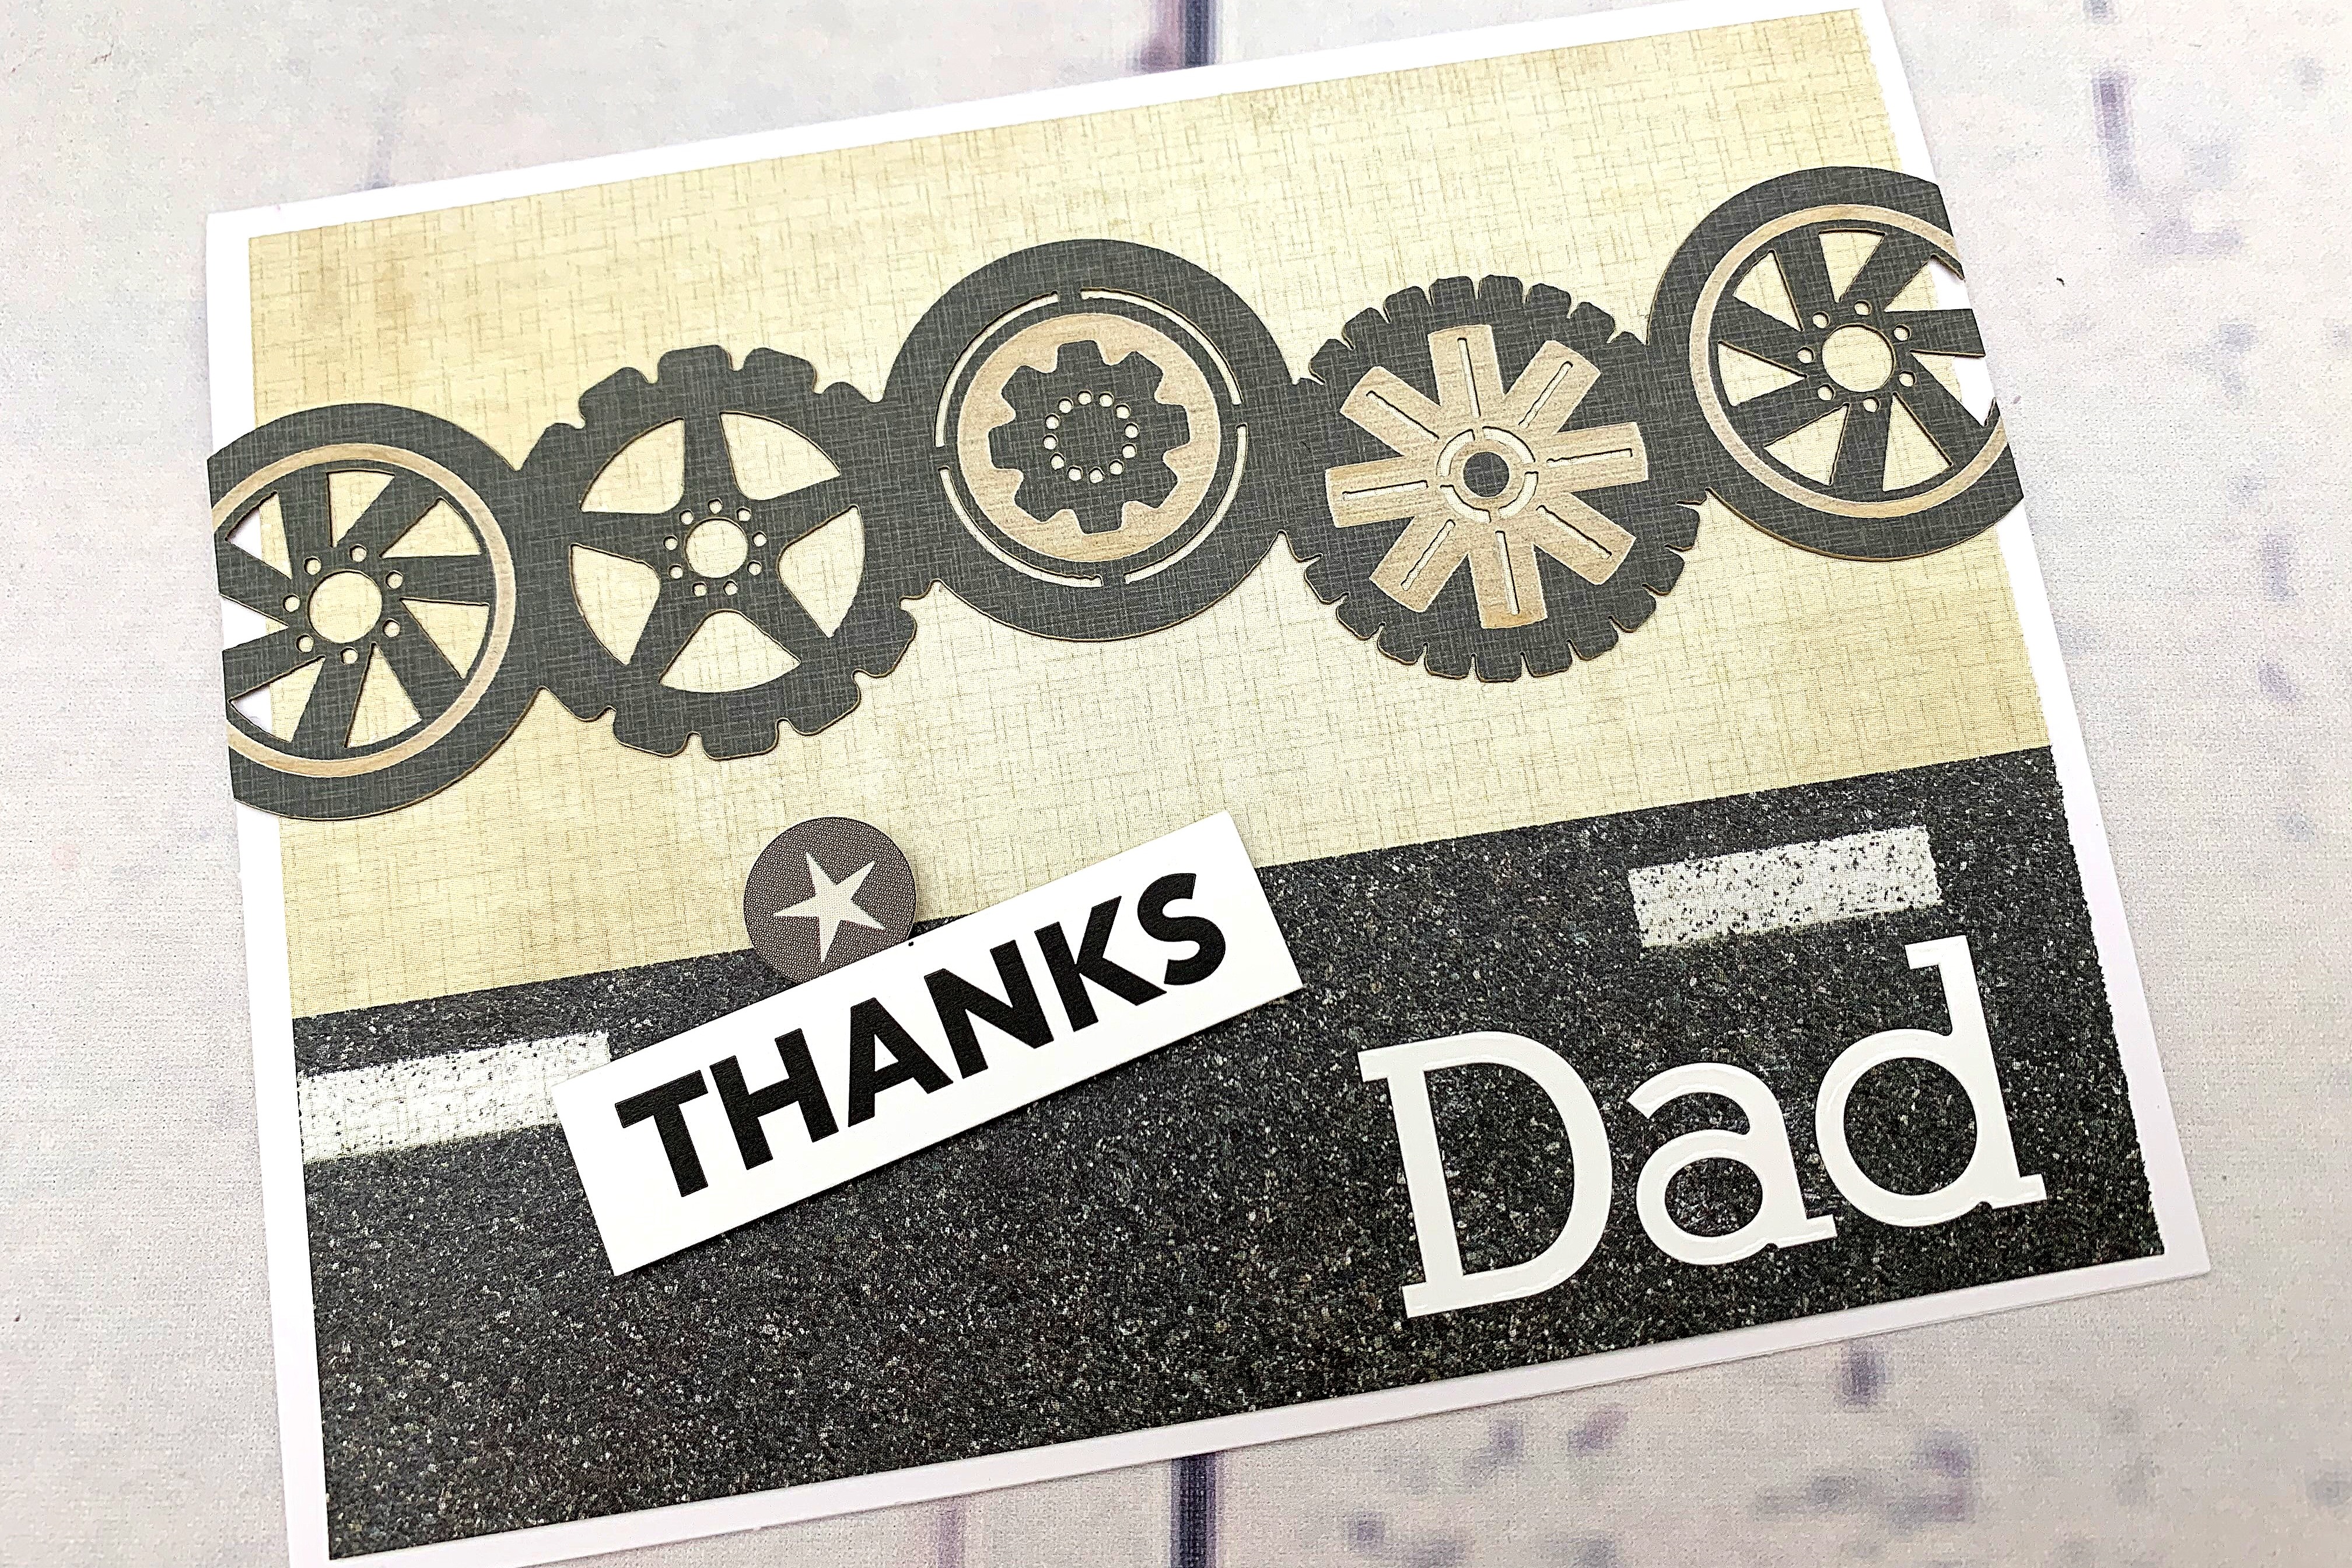
Step 1: Cut a 4″ x 5-1/4″ piece from the paper with the road along the bottom and the beige overall pattern above it. Adhere to the pre-made card base with a Tape Runner.
Step 2: Place the wheels laser cut border above the road, overhanging both edges of the card. Adhere with Repositionable Adhesive. Trim off the ends that overhang the card base with All-Purpose Scissors.
Step 3: Place Foam Squares at the back of the “Thanks” sticker from the How-Do-You-Do Sticker Pack and adhere to the card on a slight angle. Spell the word “Dad” underneath with White Serif ABC/123 Stickers. Add a small accent sticker above the word “Thanks”.
To make the Planes Card you will need:
- Planes Paper Pack or (Shop Canada | Shop Australia)
- Planes Stickers or (Shop Canada | Shop Australia)
- Planes Laser Cut Embellishment Accents or (Shop Canada | Shop Australia)
- Rich Brown Cardstock or (Shop Canada | Shop Australia)
- Brown Sans Serif ABC/123 Stickers or (Shop Canada | Shop Australia) OR Brown Dual-Tip Pen or (Shop Canada | Shop Australia)
- 12-inch Trimmer with Straight & Scoring Blades or (Shop Canada | Shop Australia)
- Tape Runner or (Shop Canada | Shop Australia)
- Repositionable Tape Runner or (Shop Canada | Shop Australia)
- Foam Squares or (Shop Canada | Shop Australia)
Note: You may have to look for a larger greeting card envelope to fit this 5-1/4″ x 7-1/4″ card, or simply give it to dad without an envelope!
Step 1: Cut a 7-1/4″ x 10-1/2″ piece of Rich Brown Cardstock for the card base. Change the Straight Blade to the Scoring Blade. Place the 10-1/2″ edge of the card along the top edge of the trimmer and score at 5-1/4″. Fold along score line into a horizontal card.
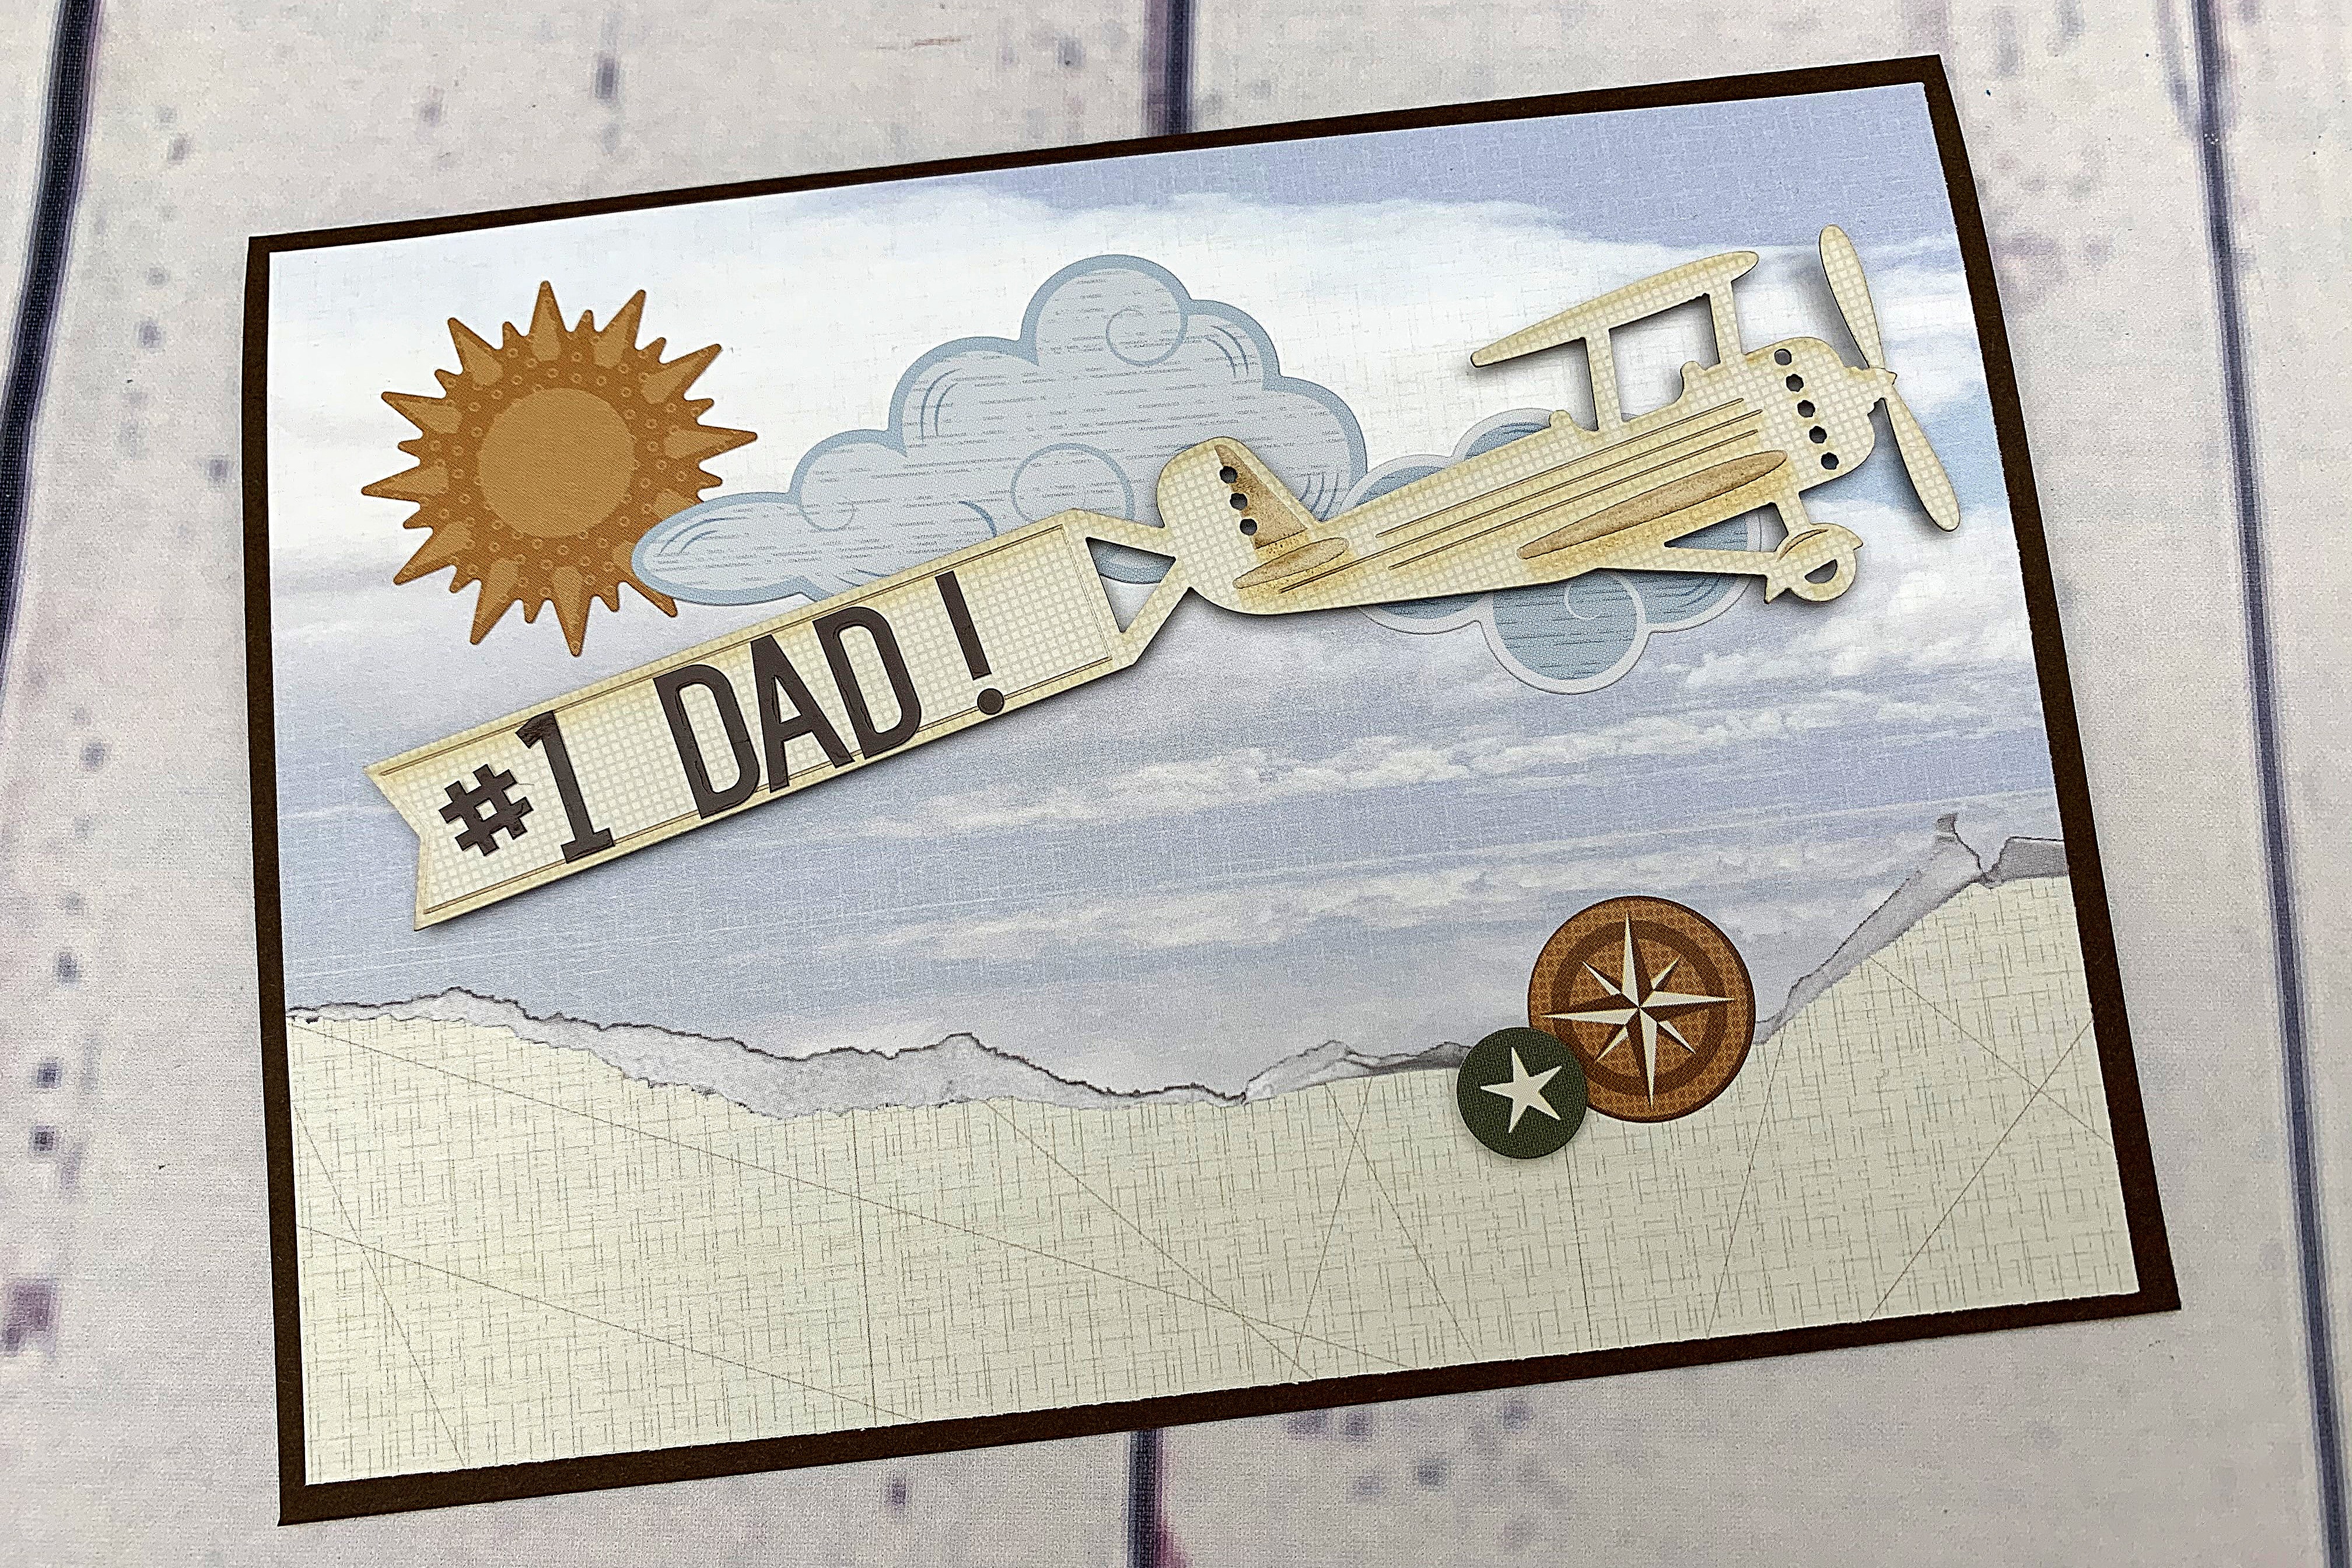
Step 2: Cut a 5″ x 7″ piece from the paper with the sky and clouds along the top and the beige pattern underneath. Adhere to the Rich Brown card base with a Tape Runner.
Step 3: Add the sun and cloud stickers to the sky part of the paper. Use the Brown Sans Serif ABC/123 Stickers to add your sentiment on the plane/banner laser cut embellishment. OR write your sentiment directly on the banner with a Brown Dual-Tip Pen.
Step 4: Add Foam Squares to the back of the plane/banner laser cut embellishment and adhere it on top of the clouds/sky. Add a couple of small accent stickers as shown or desired.

To make the Trains Card you will need:
- Trains Paper Pack or (Shop Canada | Shop Australia)
- Trains Stickers or (Shop Canada | Shop Australia)
- Beige Cardstock or (Shop Canada | Shop Australia)
- How-Do-You-Do Stickers or (Shop Canada | Shop Australia)
- Black Sans Serif ABC/123 Stickers or (Shop Canada | Shop Australia)
- 12-inch Trimmer with Straight & Scoring Blades or (Shop Canada | Shop Australia)
- Tape Runner or (Shop Canada | Shop Australia)
- Repositionable Tape Runner or (Shop Canada | Shop Australia)
- Foam Squares or (Shop Canada | Shop Australia)
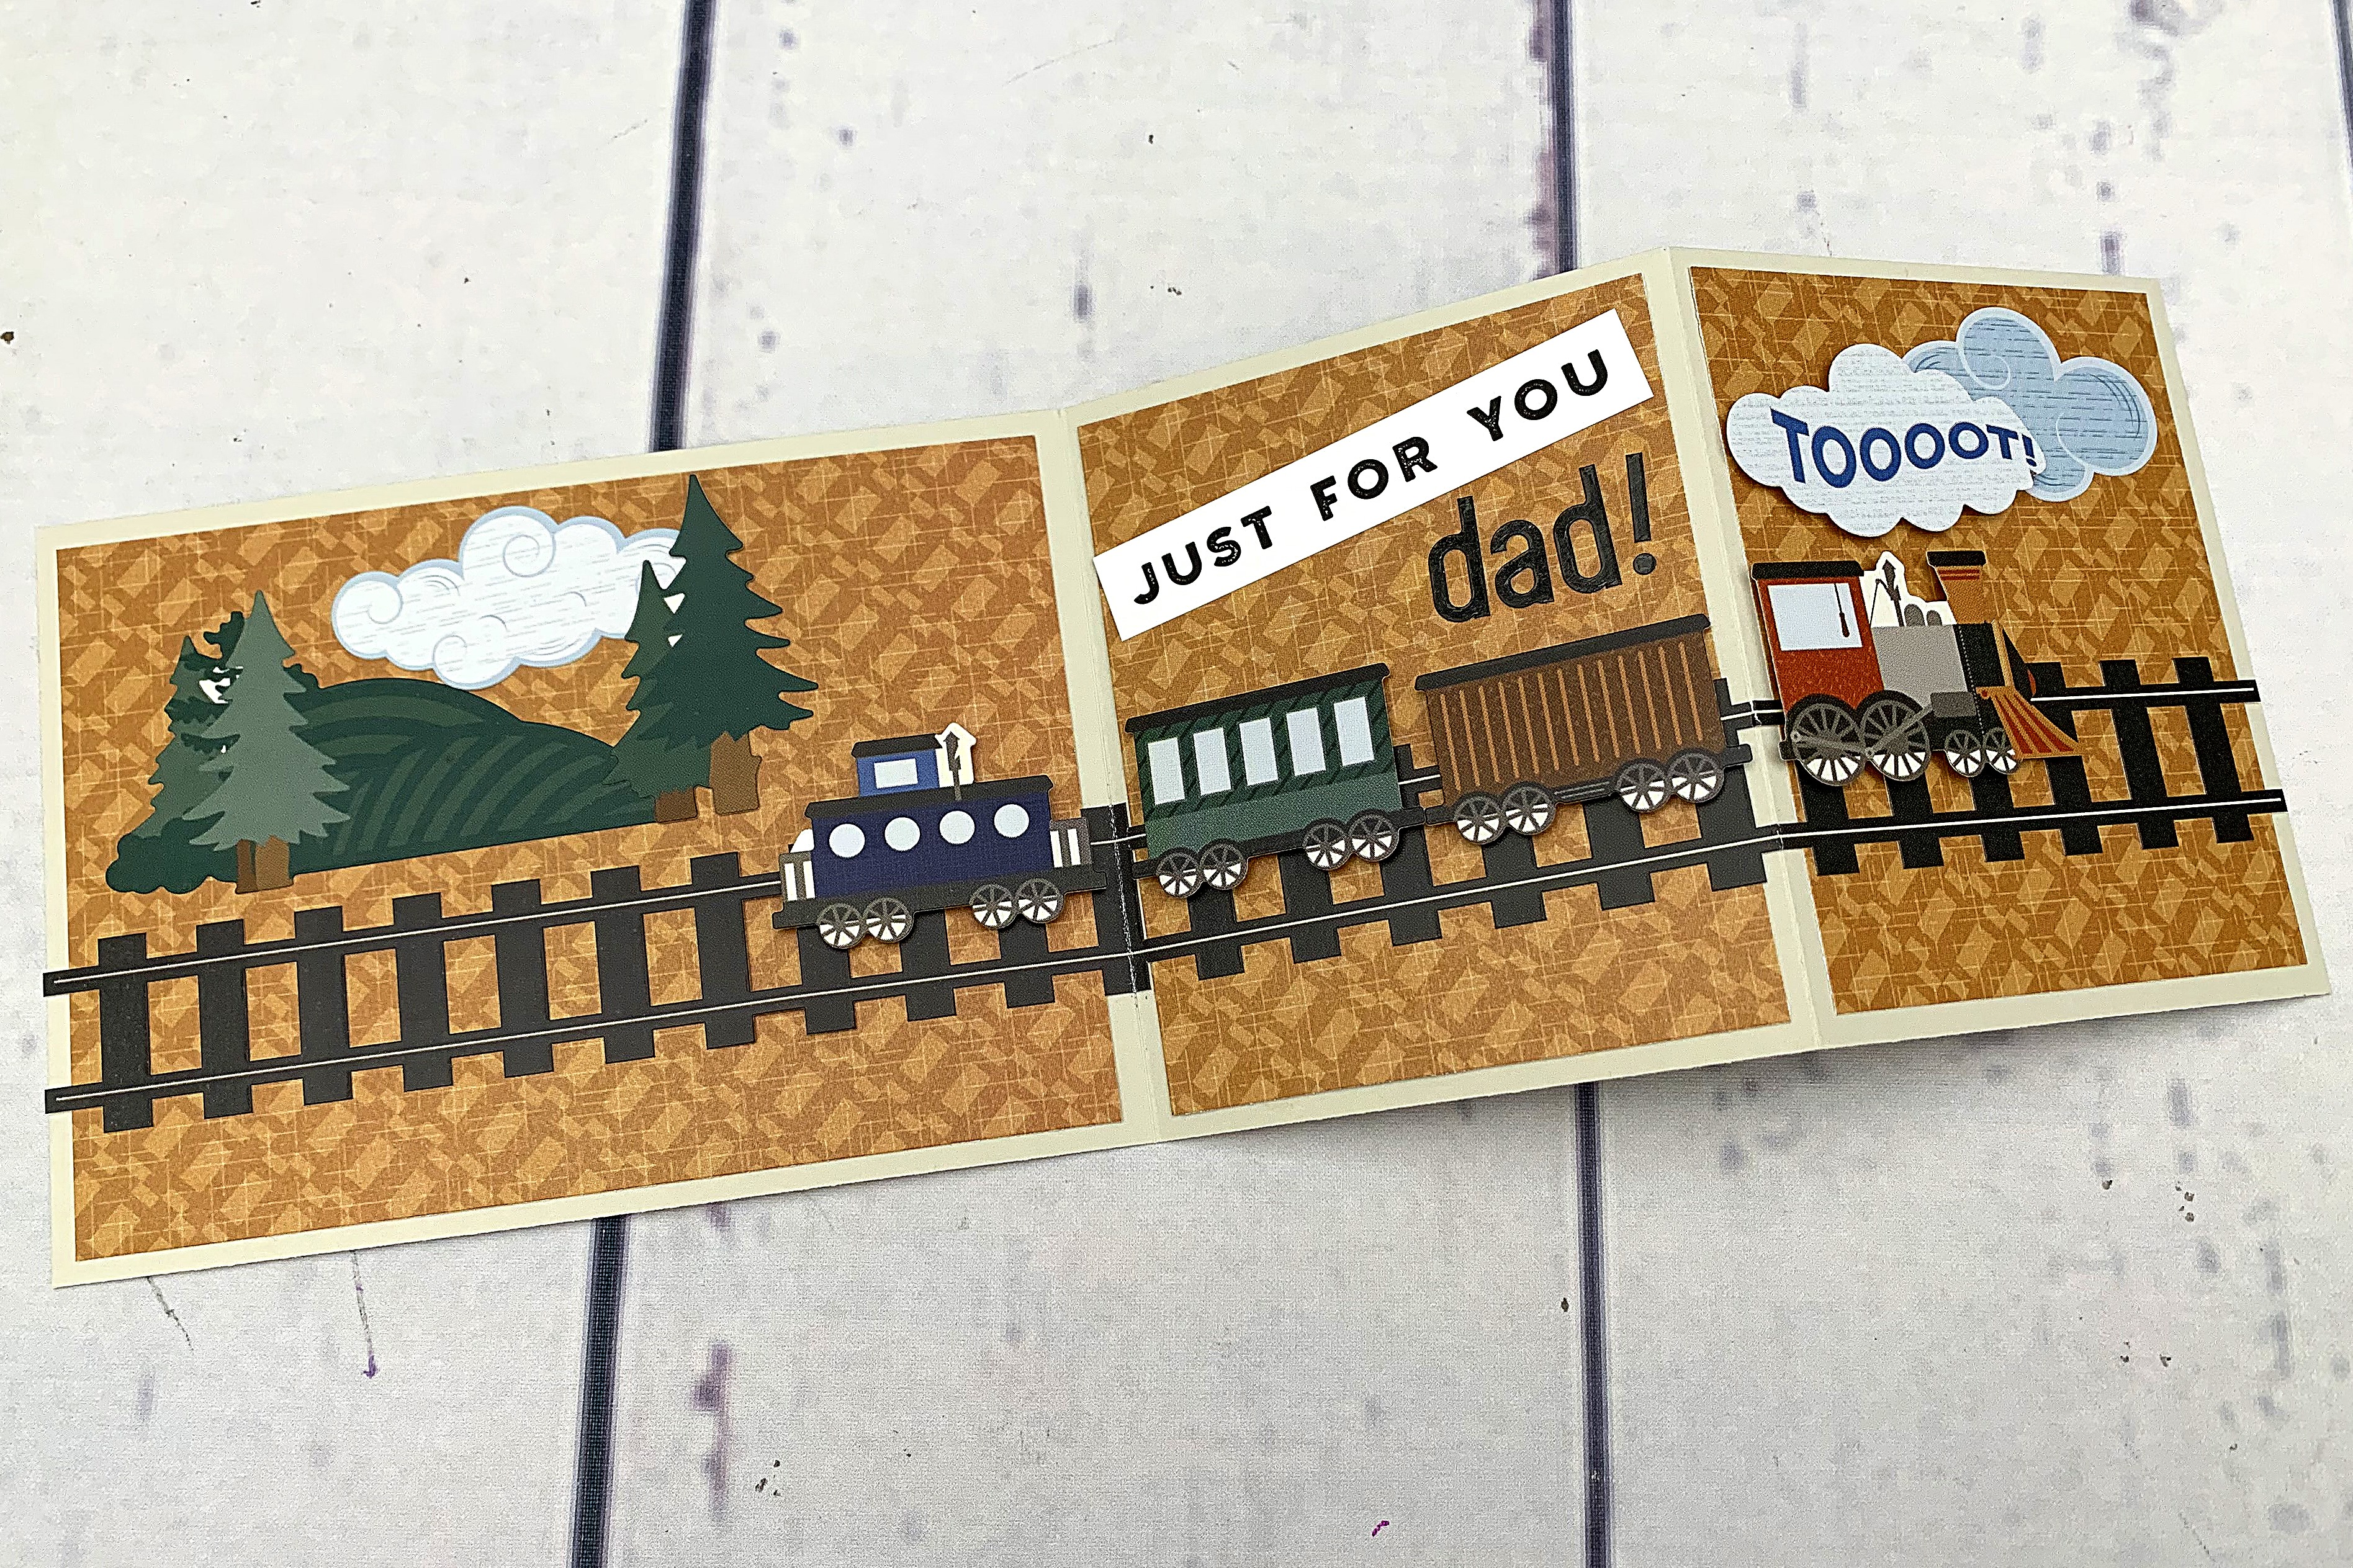
Step 1: Cut a 4″ x 12″ piece of Beige Cardstock for the card base. Change the Straight Blade to the Scoring Blade. Place the 12″ edge of the card along the top edge of the trimmer and score at 5-1/2″ and 8-3/4″. Accordion fold along score lines into a horizontal card that pulls open to the right.
Step 2: Cut one 3-3/4″ x 5-1/4″ piece and two 3-3/4″ x 3″ pieces from the brown tracks patterned paper. Center the pieces on each section of the card base and adhere with a Tape Runner.
Step 3: Lay the card flat and add one of the train tracks border stickers across the entire card. Re-fold along score lines so the sticker will also fold easily. Add the train stickers to the track with Foam Squares. Use the hills, trees and cloud stickers to create a scene in the background.
Step 4: Trim the “Toooot!” smoke cloud sticker and adhere with Foam Squares above the engine’s smoke stack. Add “Just for you” sentiment from the How-Do-You-Do Sticker Pack to the center section of the card, also with Foam Squares. Finally add the word “dad!” using the Black Sans Serif ABC/123 Stickers below the sentiment.
Which one of these DIY Father’s Day card ideas do you like the most? Will you be making one? Let us know in the comments below!

Thank you for the accordian design instructions!
These are fabulous.