September 29, 2020
Spending Time With the Alphabet Stamp Kit System
Have you been able to create captions and titles using the Alphabet Stamp Kit System yet? Blog contributor Pam Winn has been spending a lot of time with the Alphabet Stamp Kit System, and she came up with some great ideas on how to use it — let’s check them out!
Pam’s Inspiration
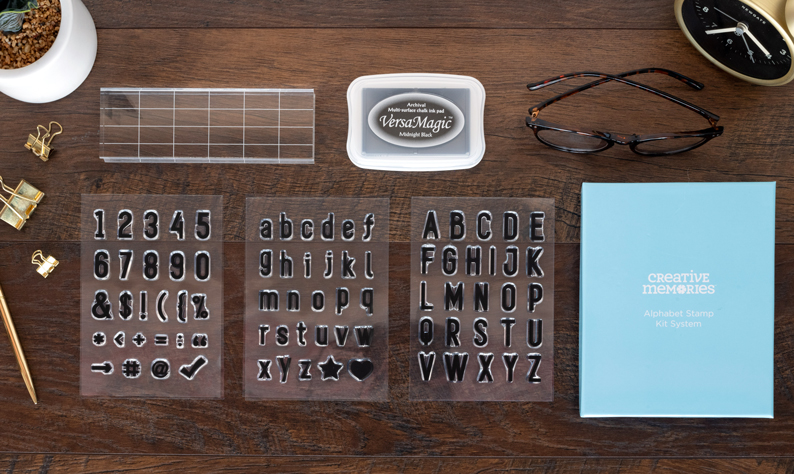
I am so excited about the new Alphabet Stamp Kit System from Creative Memories. This kit will make doing titles for pages much easier. Also, this kit will help me keep that clean and classic look that I love. By using the same font throughout my album, it becomes part of a design element that is repeated from page to page, thus creating that classic look. But, that doesn’t mean my titles have to be boring and look all the same. The font will be the same, but the way I dress up my titles will be so different.
Get more tips on how to use the Alphabet Stamp Kit System in this post.
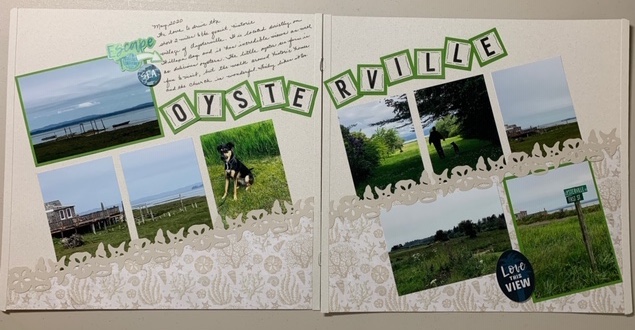
The uppercase ABC letters and the numbers are about 3/4″ tall. The lowercase ABC letters are about 1/2″ tall. So, the perfect tile to mount them on would be about 1″ tall. You can do 1″ tall strips of paper and stamp a long title on that, or for fun and more options, you could cut 1″ squares (tiles) and mount each stamped letter or number on a square.


Let’s look at some of the different options for creating titles using the Alphabet Stamp Kit System.
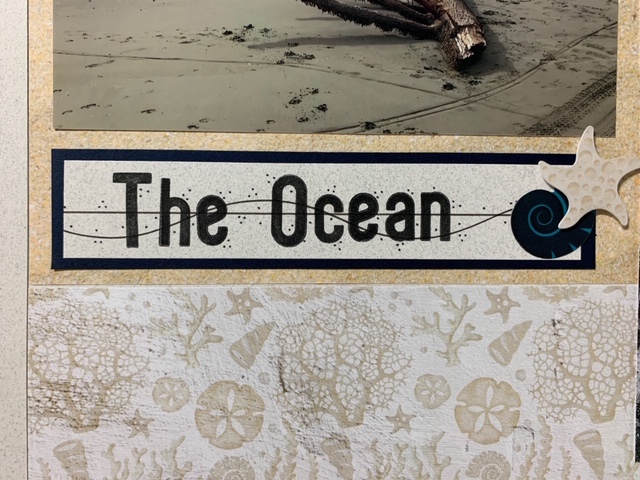
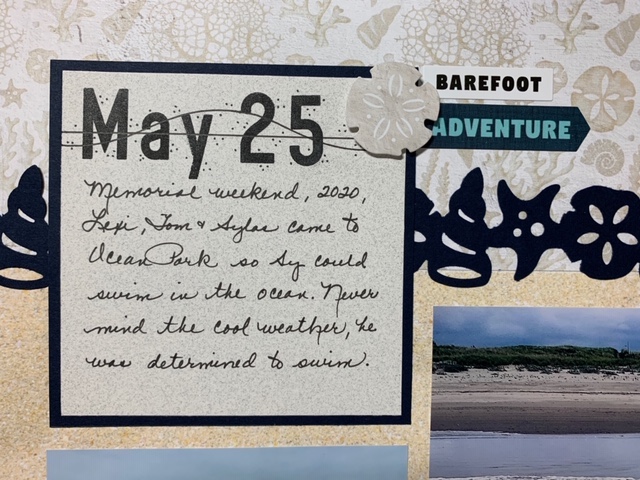
- Stamp your title directly on to your page.
- Stamp your title on to 1″ tall strips of paper, then you can leave that plain or mat it in a solid shade or designer print.
- Take a 1″ square, stamp a letter or number on it and mat it with a cardstock shade that complements your photos.
- Take a 1″ square and mat it with a designer print.
- Take a 1″ square and intersperse it with stickers or embellishments.
- Take a 1″ square and double mat it.
- Take a plain 1″ white, spargo or natural (or any light hue) square and put it directly on your page without matting the squares.
- Take a 1″ square made from a light designer print and stamp directly on that square.
Repeat all of those options for 1″ squares using 1″ circles or ovals instead! Do you see how many different looks you can achieve with this one Alphabet Stamp Kit System?
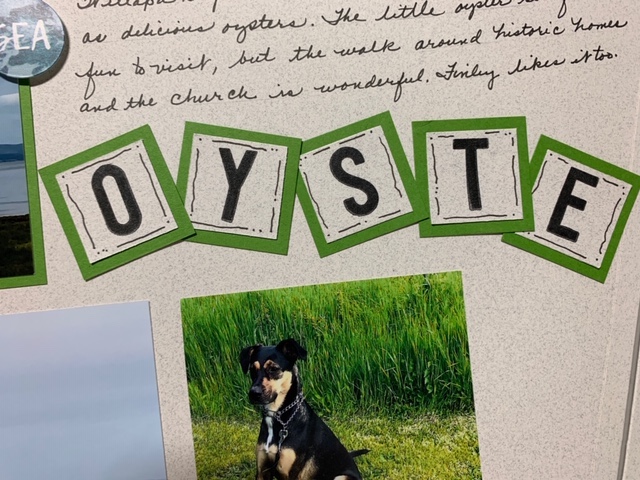
I used my Black Dual-Tip Pen on some of the squares, just to jazz them up a bit on some pages. I still get that same font going on throughout my album, but I can do other things with the squares that change it up a bit.


The options are endless. I just love that we now have the option of doing our title work anywhere we are — home, at a retreat, workshop or crop. We will never, ever run out of vowels again. What have you enjoyed most about the Alphabet Stamp Kit System? Let us know in the comments below!

I have not seen examples of your work before. I like your style! I hope will be seeing more of your work in the future.
You have some great ideas on how to use the stamps. I just might have to add that to my wish list
Thank you for not only tips in stamping but tips suggesting to cut up a Spargo page, I’ve always wanted us to have cardstock of that color! Kudos!
You have such an calming voice, thank you for your presentation ?
Hi Pam,
Beautiful work. Thank you for sharing.
Couple of tips…… Store your ink pads upside down. Keep the ink flow to the top.
I use the styrofoam trays that my meat/veggies come on. I wash the trays off then layer with 2/3 pieces of moist paper towels.
Once I buy the meat or veggies the tray is free. Most of us have paper towels around.
Again, Thank you for sharing your beautiful ideas.
Pamella Wiidanen
Love your layouts, especially incorporating stamping into them! Would really love directions for the “Smile” layout! It’s my favorite!
Great tips & tricks Pam! I am not a “stamper” but I am finding I like this set A LOT! Love your layouts too :)
Need set up closed caption for deaf and hard of hearing people