November 18, 2020
Get a Thrill for Some Frills With These Ruffle Scrapbook Borders
Truth is, some of our best ideas come to us when we are playing around and testing out tools, papers, new techniques and more. For instance, the Ruffle Trim Border Maker Cartridge — sure, it creates a beautiful, continuous ruffle border design, but as blog contributor Sachiyo Omitsu found out, there are newfangled ways to fiddle with frills to create something innovative! (Hint: Sachiyo cued into a familiar fairy tale for one of her two ruffled borders as you’ll see below!) Give both of these ruffle scrapbook borders a go… and think of how you’d think outside the box with the Ruffle Trim Border Maker Cartridge!
Sachiyo’s Inspiration
Playing with tools and finding unexpected ways to use them is something I love to do. When I was playing with some borders I made with the Ruffle Trim Border Maker Cartridge, an image of “Jack and the Beanstalk” came to me. Toying with the idea of a beanstalk, I weaved two borders to make it look like vine. Here, I’ve created two borders using weaved ruffled borders.
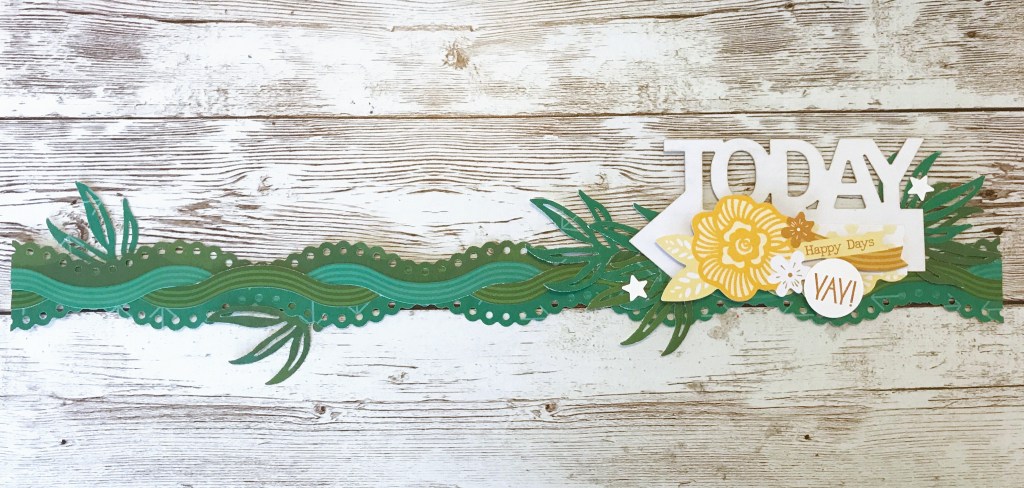
Vine Border
To create this layout you will need:
- Fresh Fusion Bold Paper Pack, Laser Cut Embellishments, Layered Border Embellishments & Stickers – Out of stock
- Get creative and use any other collection you may have!
- Original Border Maker System with the Ruffle Trim Border Maker Cartridge or (Shop Canada | Shop Australia)
- Gum Leaf Punch or (Shop Canada | Shop Australia)
- All-Purpose Scissors or (Shop Canada | Shop Australia)
- Repositionable Tape Runner or (Shop Canada | Shop Australia)
- Foam Squares or (Shop Canada | Shop Australia)


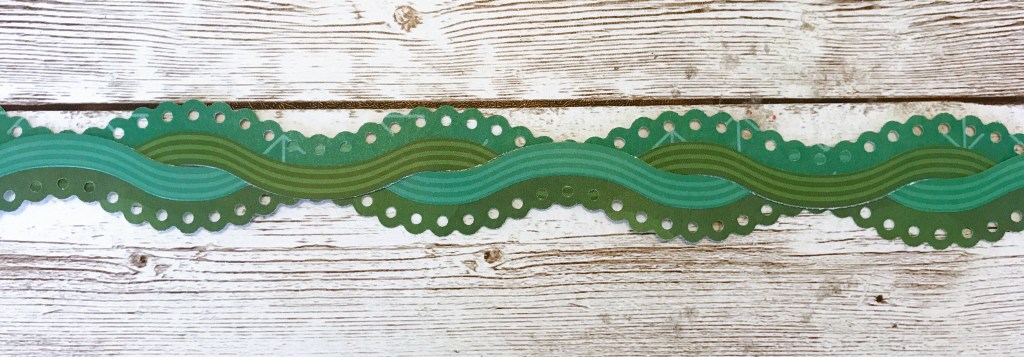
Step 1: Using the Ruffle Trim Border Maker Cartridge, punch a border each from the dark green patterned paper and the green patterned paper. Adhere a dark green border sticker to the edge of green border. Adhere a teal border sticker to the edge of dark green border. Weave two borders as shown.
Step 2: Using the Gum Leaf Punch, punch four green and three dark green gum leaves.
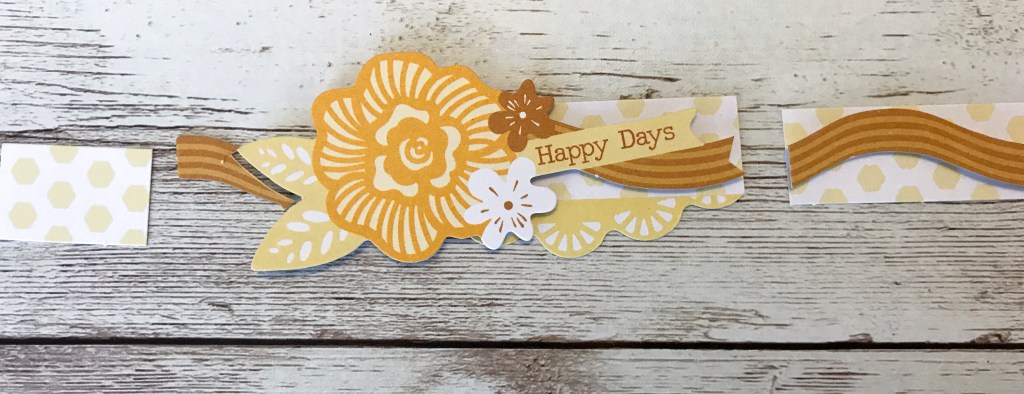
Step 3: Cut the layered border embellishment as shown.
Step 4: Adhere the gum leaves, stickers and embellishments, using Foam Squares on some for added dimension.
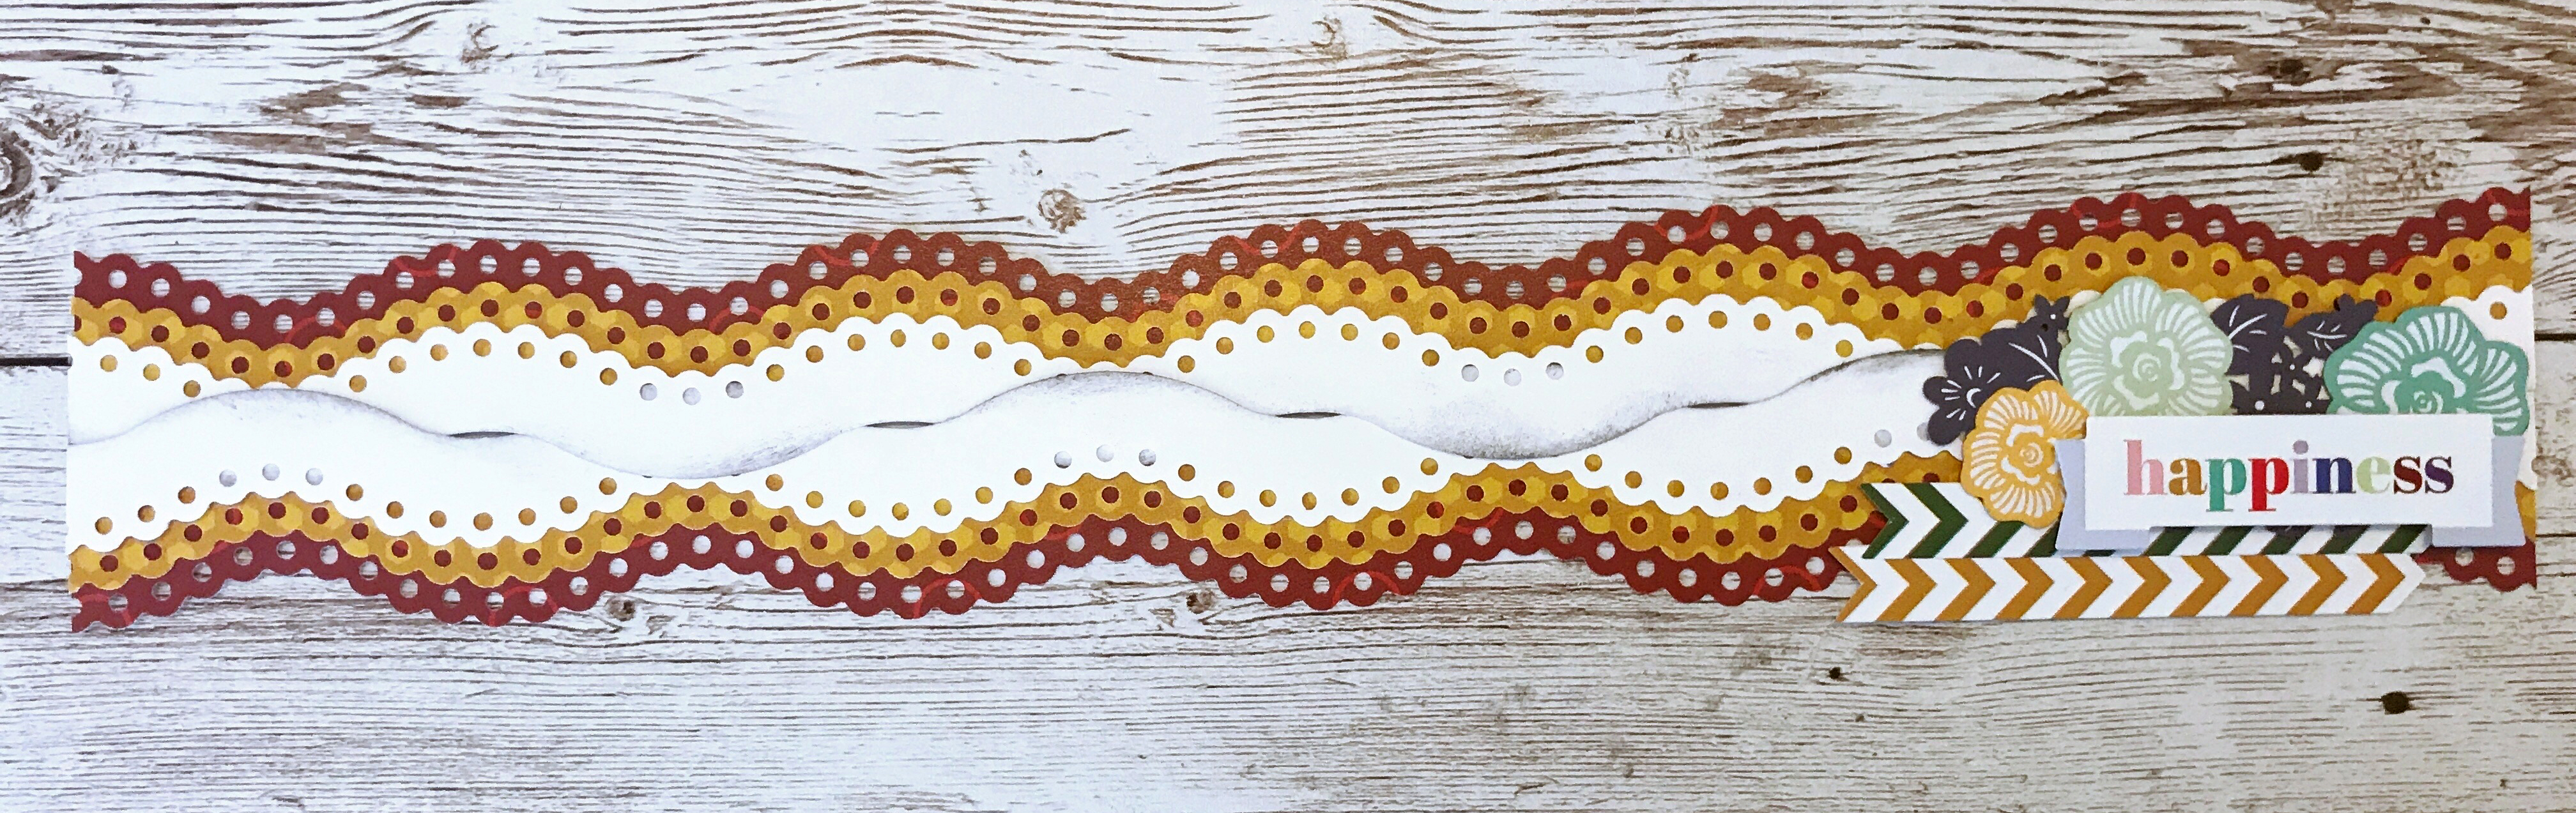
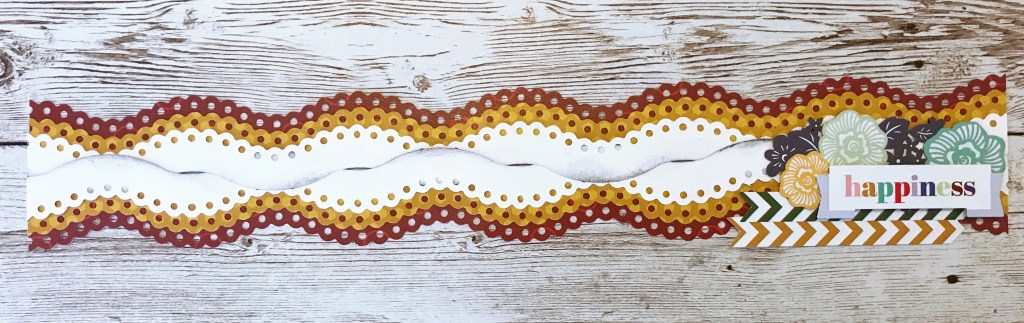
Twisting Border
To create this layout you will need:
- Fresh Fusion Bold Paper Pack, Laser Cut Embellishments & Stickers – Out of stock
- Get creative and use any other collection you may have!
- White Solid Cardstock or (Shop Canada | Shop Australia)
- Original Border Maker System with the Ruffle Trim Border Maker Cartridge or (Shop Canada | Shop Australia)
- Ink pad from the Alphabet Stamp Kit System or (Shop Canada) | Shop Australia)
- All-Purpose Scissors or (Shop Canada | Shop Australia)
- Repositionable Tape Runner or (Shop Canada | Shop Australia)
- Foam Squares or (Shop Canada | Shop Australia)
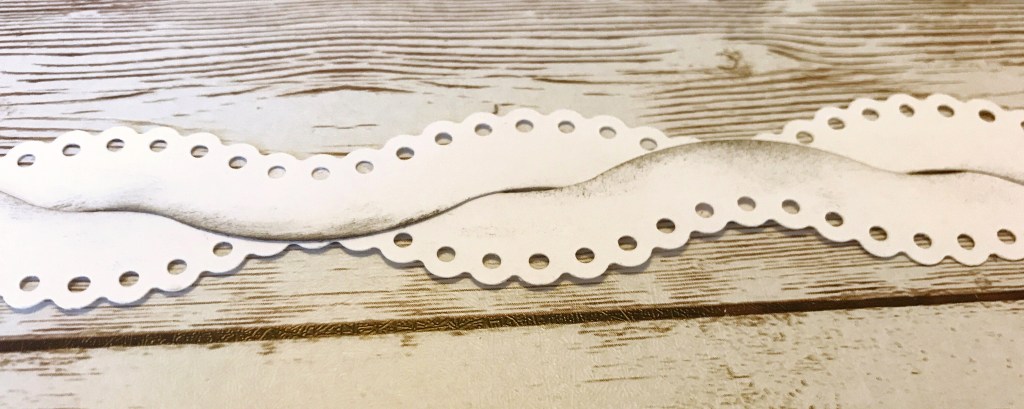
Step 1: Using the Ruffle Trim Border Maker Cartridge, punch two borders from White Solid Cardstock and ink the edges with the ink pad. Weave the two borders as shown.
Step 2: Using the Ruffle Trim Border Maker Cartridge, punch two borders each from the gold and crimson patterned papers. Adhere the gold border on the crimson one, then mount the white border on top.
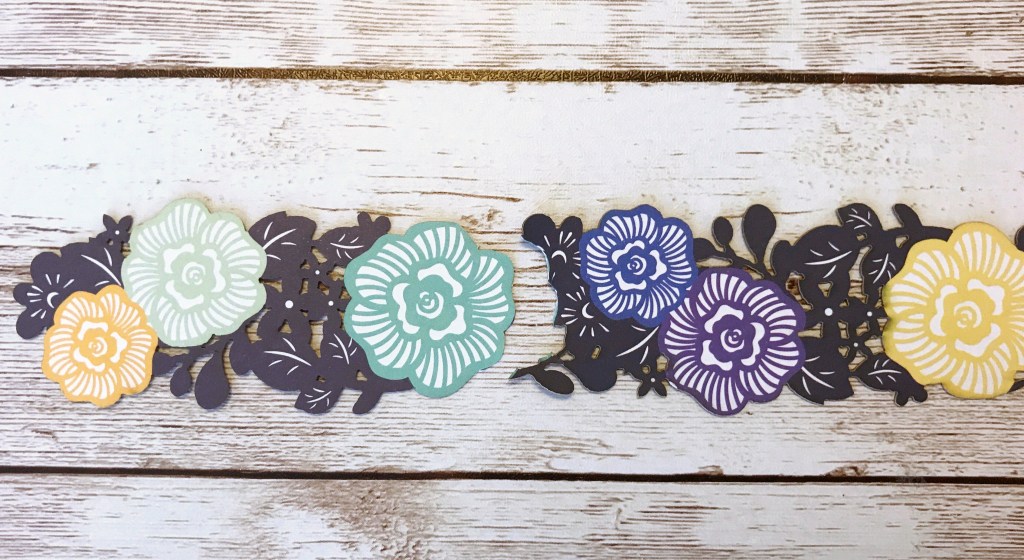
Step 3: Cut the end of dark green and gold chevron stickers like a banner. Cut the floral cluster laser cut embellishment as shown.

Step 4: Adhere stickers and embellishments, using Foam Squares on some for added dimension.
What types of ruffle scrapbook borders have you made with the Ruffle Trim Border Maker Cartridge? Let us know in the comments below!

You are so creative & inspiring to everyone. I love the border & will try to make it:
I used the ruffle trim in white x2. I then centered the new poinsettia punch in scarlet between the two white ruffles. I added a row if spukt evergreen punch, adhered to the platinum shimmer.and finished it off with the gold bow embellishment.