April 16, 2021
Grid Homey Memories With This COVID-19 Scrapbook Layout
With everything going on in the world this past year, many of us have found ourselves spending a lot more time at home. Perhaps you’ve picked up a new hobby or expanded on a current one, whether it would be gardening, scrapbooking, making music, sewing, woodworking and more! Many schools have gone from in-person learning to virtual sessions, and even a hybrid of the two. Maybe you’ve found yourself around the kitchen table more or taught your kids some cooking and baking tips. Video calls graciously give us the ability family, friends and co-workers from the comfort of home. And in light of these times, people have pushed through and found ways to connect with one another… determined to still make memories. And that’s just what blog contributor Noreen Smith did with her COVID-19 scrapbook layout by gridding some at-home memories with the Staycation collection! What memories have you had within the walls of your home this past year?
Noreen’s Inspiration
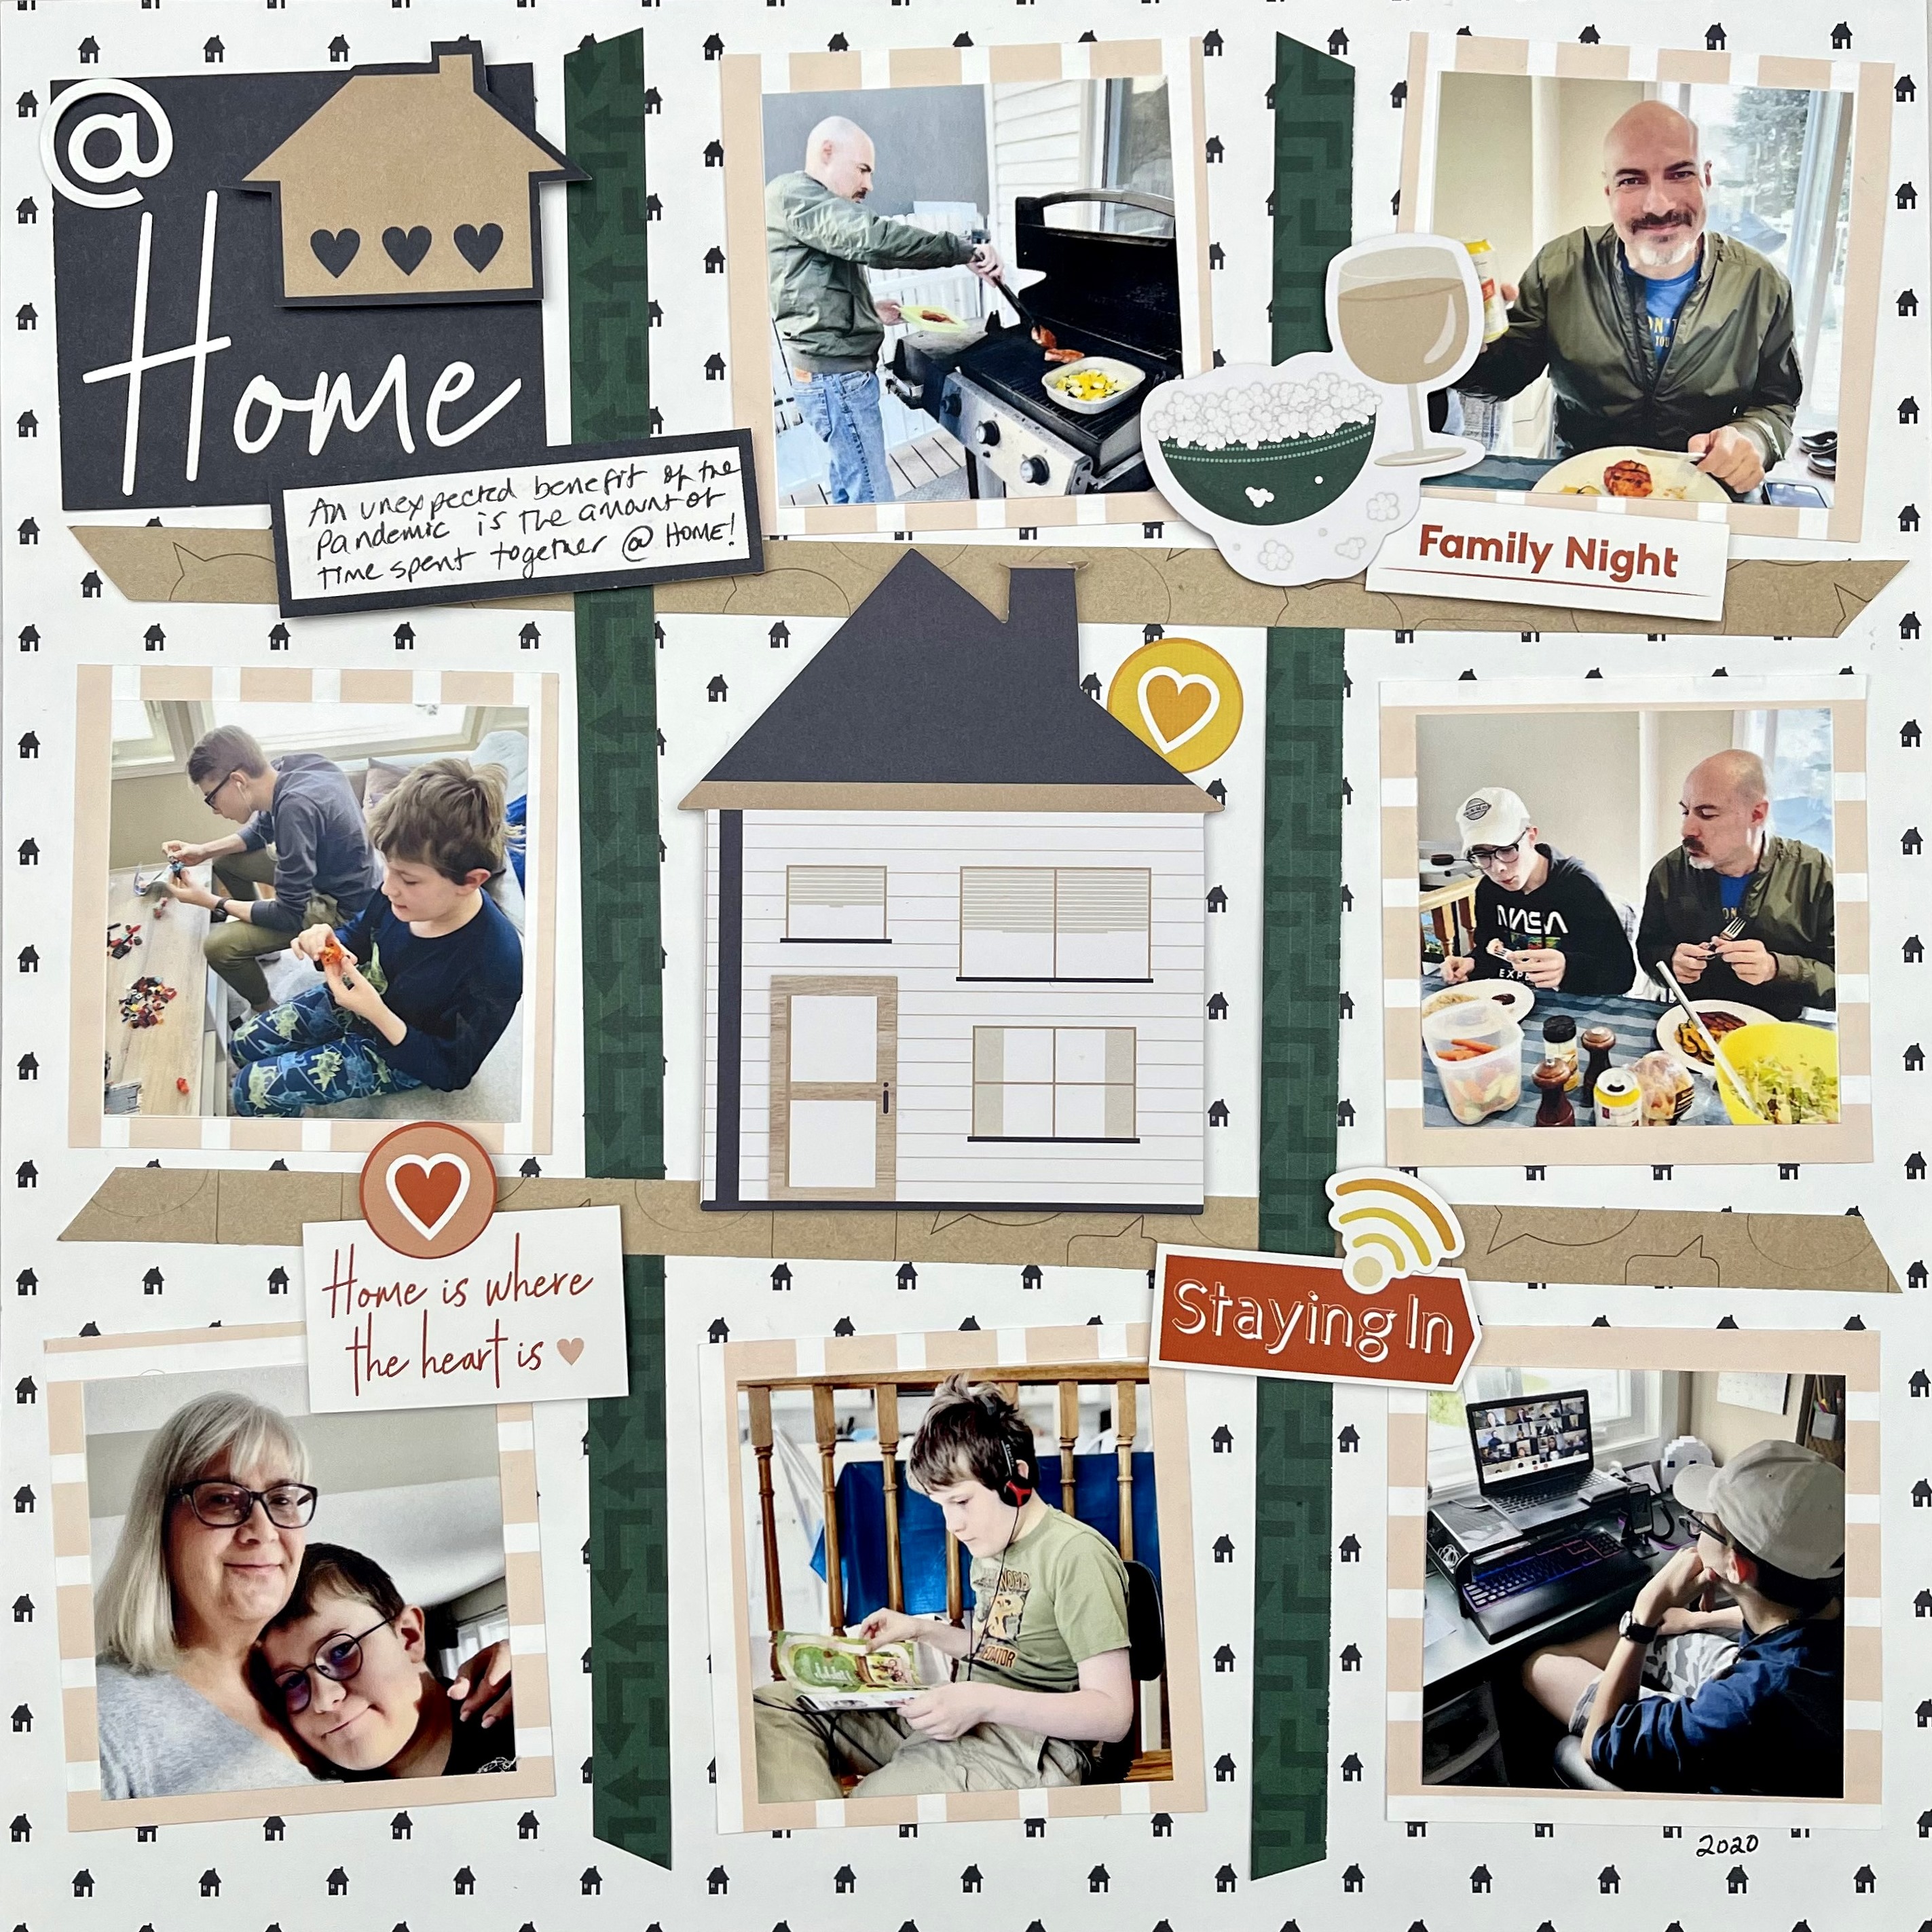
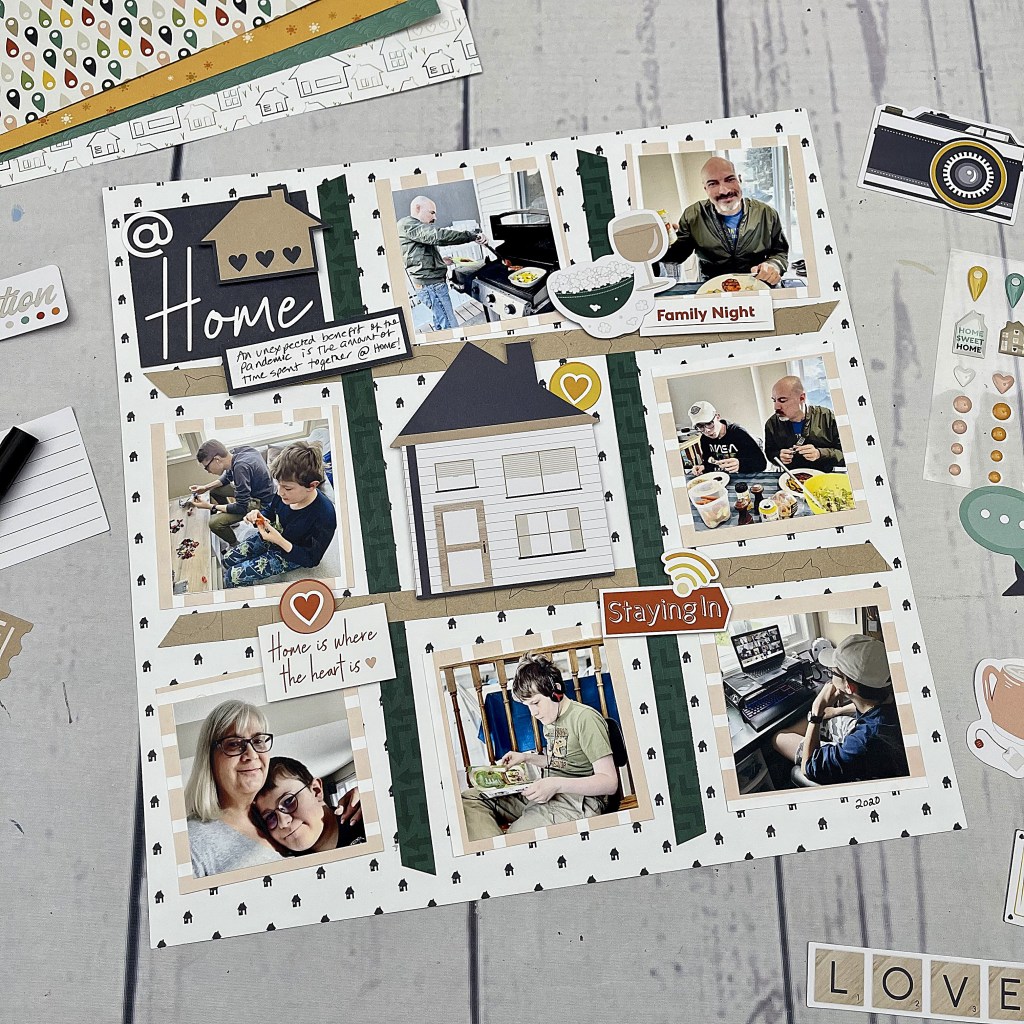
Sometimes you have several photos you want to include on a layout to reinforce a theme or to make sure you capture all the details of an event. In those cases I rely on small photos and a grid! In this one-page layout I was able to use seven photos of some of the things my family and I have been doing at home over the past year. It was easy and fun to create a loose grid structure to “house” all those photos, plus some cute embellishments!

To create the layout you will need:
- Staycation Paper Pack or (Shop Canada | Shop Australia)
- Staycation Embellishments or (Shop Canada | Shop Australia)
- Staycation Stickers or (Shop Canada | Shop Australia)
- Staycation Variety Mat Pack or (Shop Canada | Shop Australia)
- White Serif ABC/123 Letter Stickers or (Shop Canada | Shop Australia)
- 12-inch Trimmer or (Shop Canada | Shop Australia)
- Personal Trimmer or (Shop Canada | Shop Australia)
- All-Purpose Scissors or (Shop Canada | Shop Australia)
- Tape Runner or (Shop Canada | Shop Australia)
- Foam Squares or (Shop Canada | Shop Australia)
- Black Dual-Tip Pen or (Shop Canada | Shop Australia)

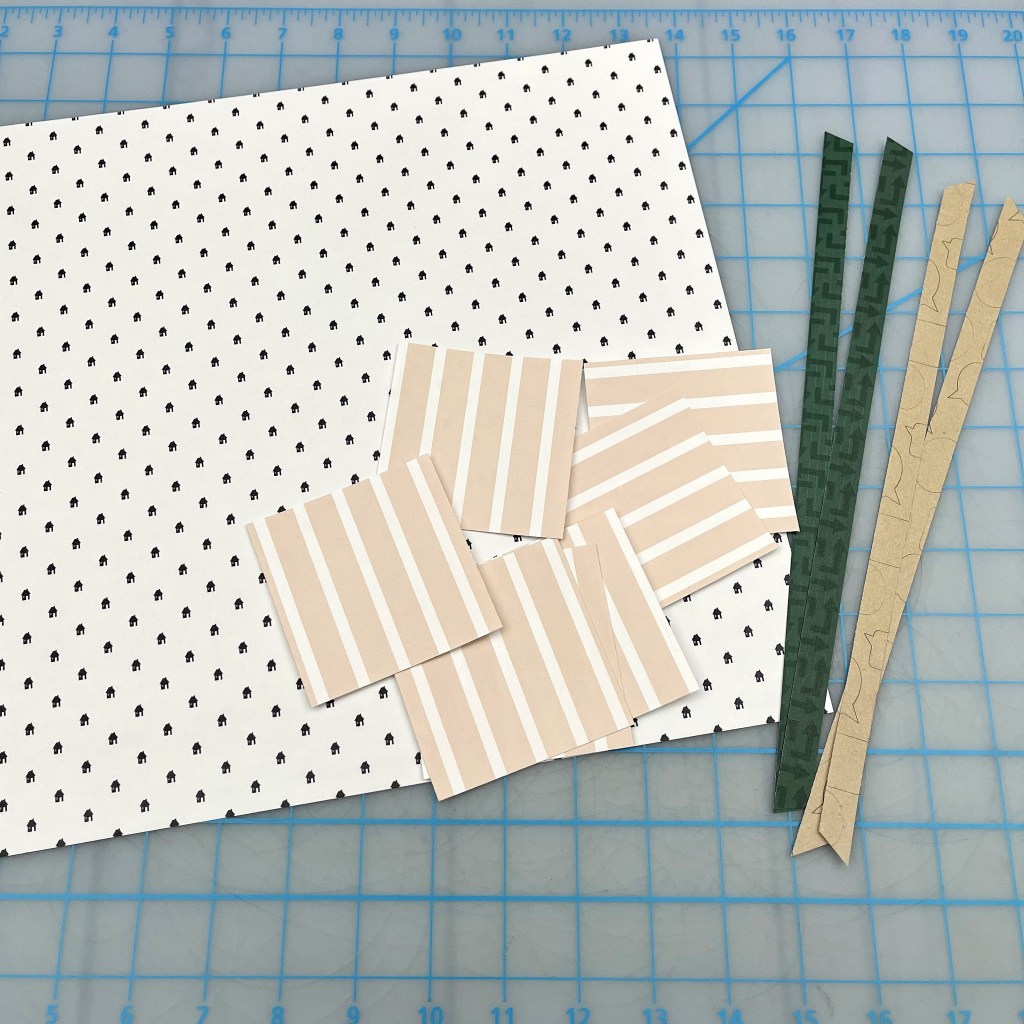
Step 1: Choose which papers from the Staycation Paper Pack you will use for the base page, photo mats and grid strips. Cut seven 3″ x 3″ squares for your photo mats and four 1/2″ x 12″ strips with the 12-inch Trimmer. Use the All-Purpose Scissors to trim off 1/2″ from each end of the strips at various angles. The strips will now measure approximately 1/2″ x 11″.
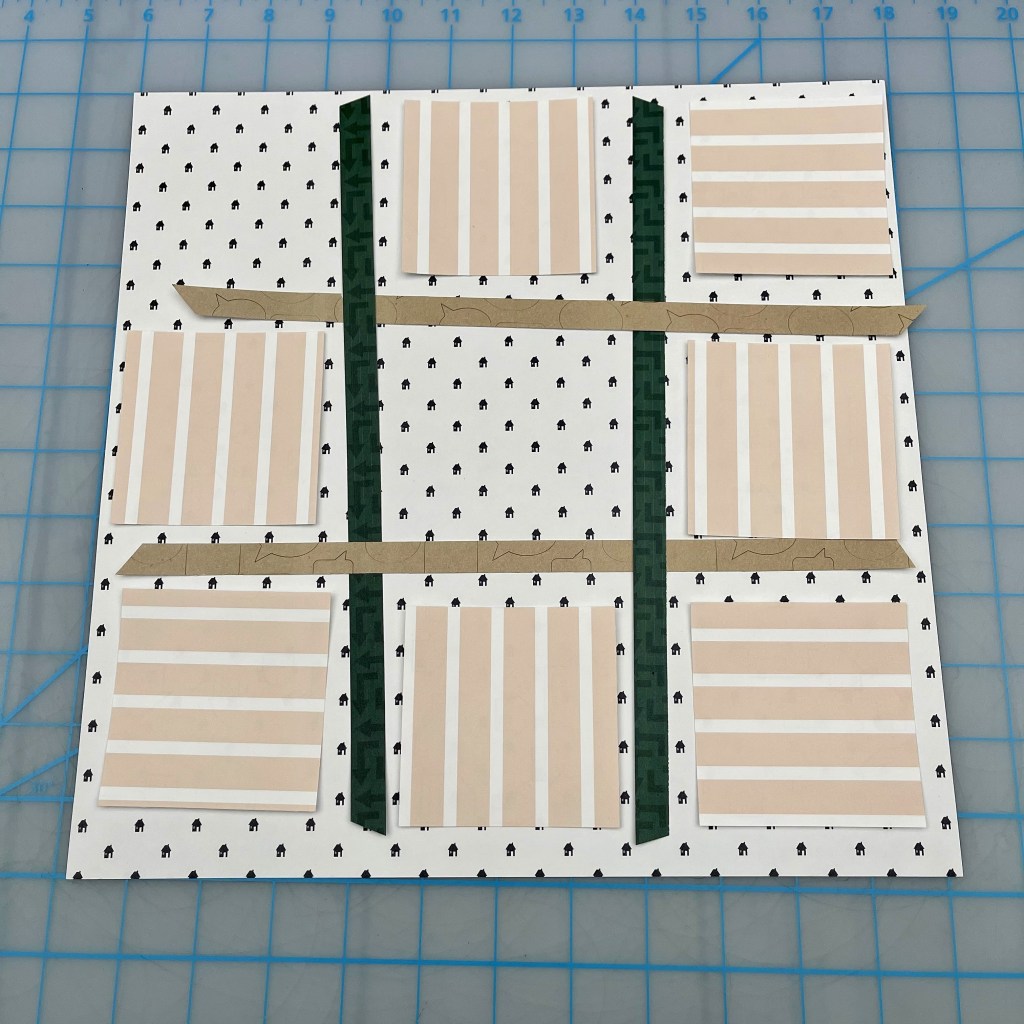
Step 2: Plan your grid by crisscrossing the strips over each other, like a tic-tac-toe grid. Determine where your photos will work best by arranging the photo mats in some of the spaces between the strips.
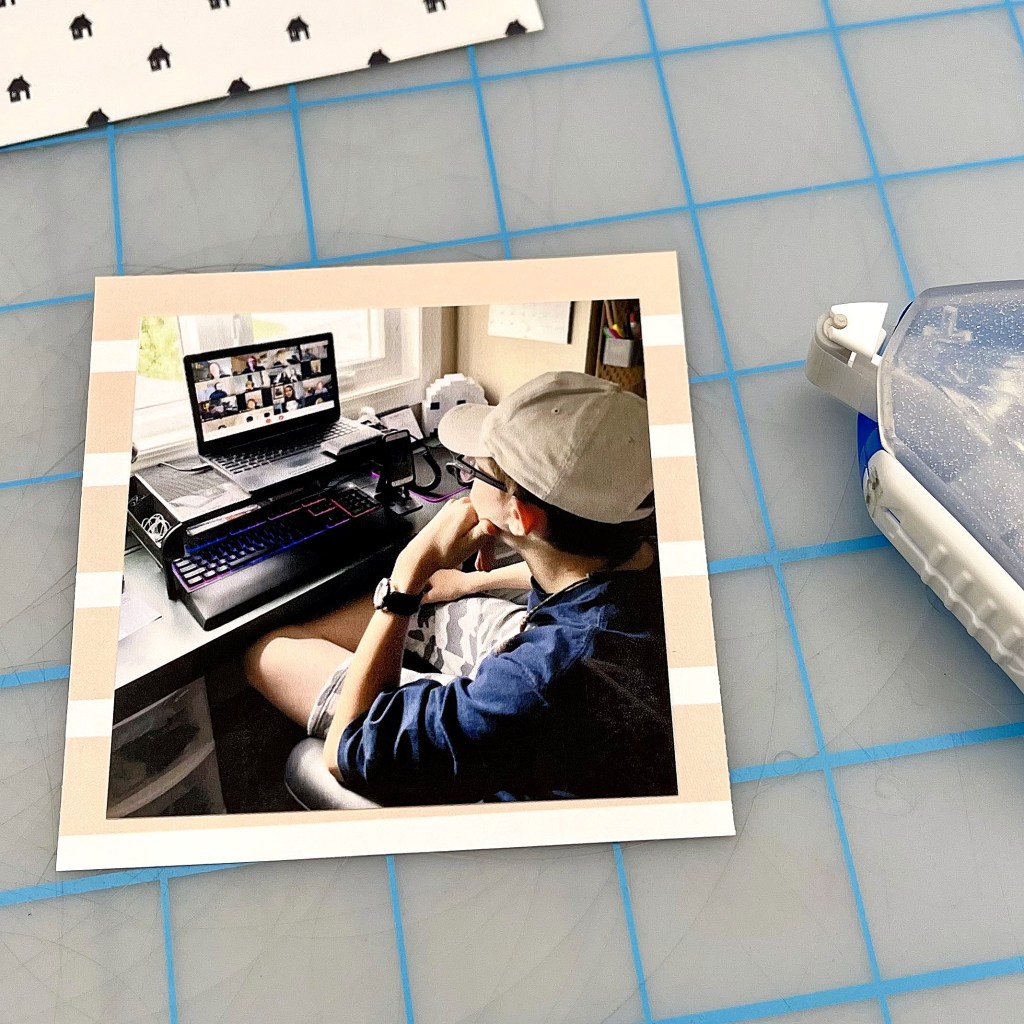
Step 3: Crop your photos to measure 2-3/4″ x 2-3/4″. (Tip: If you don’t want to crop out details on your photos, use photo-editing software to print two small versions of the photo onto one 4″ x 6″ photo.) Mount photos onto the paper squares with the Tape Runner.

Step 4: Adhere grid strips and photos to the base page. Add embellishments to the empty spaces on the page or overlap them at the intersections of the strips as desired. Mount some with Foam Squares Adhesive for added dimension.

Step 5: Create a title by trimming the navy “Home” mat to approximately 3″ x 3″, and fussy-cut the house from that same mat to layer on top. Add the “@” symbol from the White Serif ABC/123 Letter Stickers.

Step 6: Journal on the layout and add any extra stickers or embellishments as desired.
How would you design your own COVID-19 scrapbook layout? Or what event would you document on a grid, like this one? Give a shout-out in the comments below!

Thanks so much for this layout idea, Noreen! I can see it being used for all kinds of themes to tell a story. And for the opposite page, you could add a ruled page, decorated with similar stickers and embellishments, to write everything included in that story, so that it is not lost in just a few years!