July 12, 2021
Create Shipshape Layouts With These Anchor Crafts Featuring The Anchor Punch
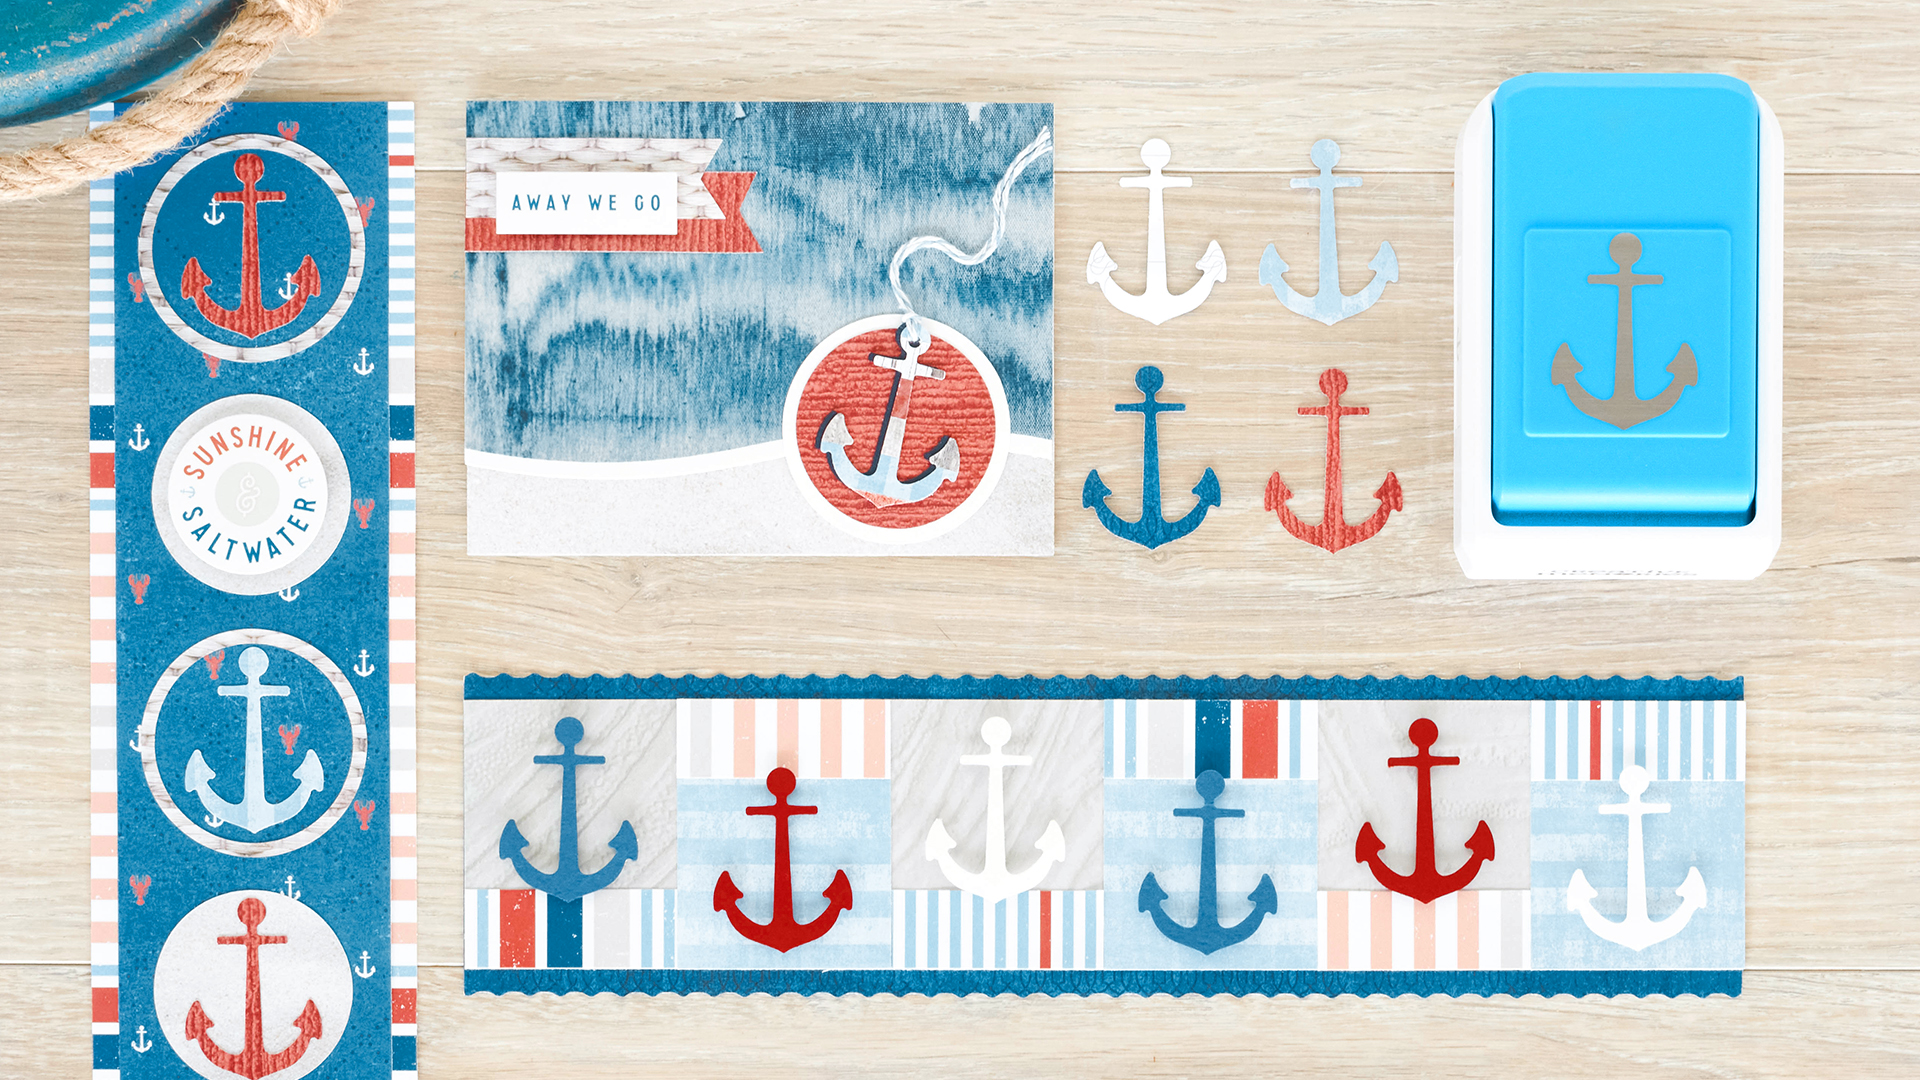
Anchors have been used for eons as a way to keep boats from drifting off into the vast sea (or even your local lake!) and against currents. And while the anchor is obviously a symbol for open waters and sailing, the anchor also represents hope, stability, security, new journeys, determination, eternal love and loyalty. No matter what an anchor means to you, CM’s Anchor Punch will surely create shipshape projects that dock great detail! Cruise onward with these anchor crafts to see how!
To create these borders and card, you will need:
- Seaside Paper Pack or (Shop Canada | Shop Australia)
- Seaside Texture Tone-on-Tone Paper Pack or (Shop Canada | Shop Australia)
- Seaside Stickers or (Shop Canada | Shop Australia)
- Seaside Layered Embellishments or (Shop Canada | Shop Australia)
- Blue, Crimson, Navy & White Solid Cardstocks or (Shop Canada | Shop Australia)
- Anchor Punch or (Shop Canada | Shop Australia)
- Custom Cutting System with Circle Patterns or (Shop Canada | Shop Australia)
- 12-inch Decorative Trimmer or (Shop Canada | Shop Australia)
- 12-inch Trimmer with Straight, Stamping, Scoring & Scallop Blades or (Shop Canada | Shop Australia)
- Micro-Tip Scissors or (Shop Canada | Shop Australia)
- Tape Runner or (Shop Canada | Shop Australia)
- Repositionable Tape Runner or (Shop Canada | Shop Australia)
- Foam Squares or (Shop Canada | Shop Australia)
- Small hole punch & string

Strips Border
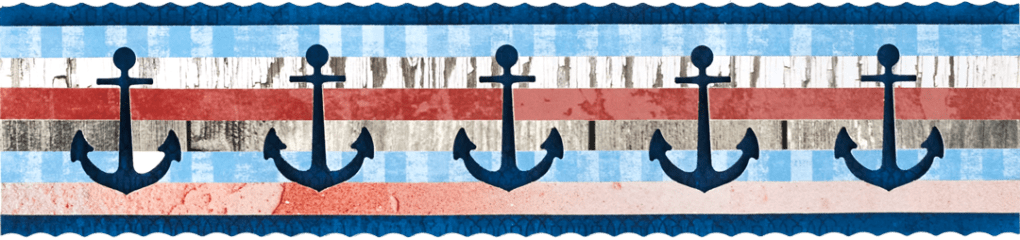
Step 1: Using the 12-inch Trimmer with the Scallop Blade, cut a 12″ x 2-3/4″ strip of ocean blue trellis designer paper for the base.


Step 2: Cut a 12″ x 2-1/4″ strip of cardstock (any shade). Cut six 3/8″ x 12″ strips of various designer papers. Adhere side by side along the cardstock strip. Using the Anchor Punch, punch five times at regular intervals across the strip (save the anchors punched out for another project, like the “Away We Go Card” down below!).
Step 3: Adhere the strip to the base using Foam Squares for added dimension.
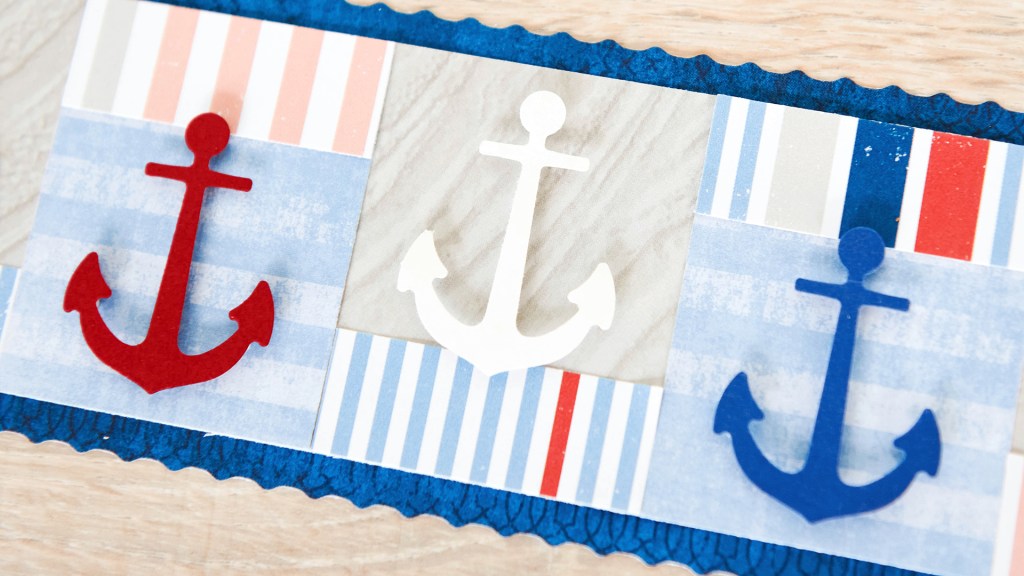
Nautical Anchors Border
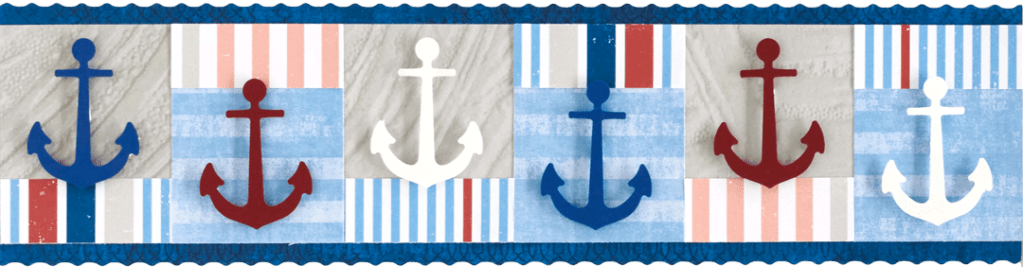
Step 1: Using the 12-inch Trimmer and the Stamping Blade, cut a 12″ x 3″ strip of ocean blue trellis paper for the base. Cut a 12″ x 2-1/2″ strip of cool taupe paper and adhere to the base.
Step 2: Cut three 2″ x 1-3/4″ pieces of sky blue bars paper. Adhere to the border as shown.
Step 3: Cut a 3/4″ x 12″ strip of beach towel stripes paper and cut into 2″ segments. Adhere to the border as shown.
Step 4: Punch six anchors from Blue, Crimson and White Solid Cardstocks. Adhere to the border with Foam Squares.
Sunshine & Saltwater Border

Step 1: Cut a 3″ x 12″ strip of beach towel stripes paper for the base.
Step 2: Cut a 2-1/2″ x 12″ strip of block-print lobsters and anchors designer paper and adhere on top.
Step 3: Using the inside of the medium Custom Cutting Circle Pattern and the Blue Blade, cut a circle with basketweave designer paper. Without moving the pattern, switch to the Green Blade and cut another circle, giving you a circle and a loop. Repeat two more times. Place three loops and two circles on the border as shown.
Step 4: With the Anchor Punch, punch two anchors from the red hemp designer paper and two anchors from the sky blue bars paper. Mount on the border.
Step 5: Add the “Sunshine & saltwater” sticker with Foam Squares.
Away We Go Card

Step 1: Create the card base. Cut an 8-1/2″ x 5-1/2″ piece of White Solid Cardstock. Using the 12-inch Trimmer and the Scoring Blade, score along the long edge at 4-1/4″ and fold in half. Using the swell edge of the Decorative Trimmer, cut a piece (3/4″–1″) off the front of the card.
Step 2: Cut a piece of ocean blue wash designer paper using the swell edge of the Decorative Trimmer. Trim to fit the front of the card. Cut a 1-1/2″ wide strip of sand ripples paper using the swell edge of the Decorative Trimmer. Trim to the fit the inside bottom of the card.
Step 3: Using the inside of the medium Custom Cutting System Circle Pattern and the Green Blade, cut a circle from White Solid Cardstock. Using the Blue Blade, cut a circle from red hemp designer paper. Punch an anchor from Navy Solid Cardstock. Mount an anchor leftover from the “Strips Border” (from up above) on top, slightly offset. Punch a small hole in the anchors, loop some string through and make a knot. Adhere all pieces together. Apply adhesive just to the top of this piece and adhere to the card as shown. Apply some adhesive to the string and arrange as desired.
Step 4: Cut a 2-3/4″ x 3/4″ piece of red hemp paper and a 2-1/2″ x 3/4″ piece of basketweave paper. Notch the ends to form flags. Adhere to the card. Top with the “Away we go” sticker on Foam Squares.
Anchor Flower Card

Step 1: Create the card base. Cut an 8-1/2″ x 5-1/2″ piece of White Solid Cardstock. Using the 12-inch Trimmer and the Scoring Blade, score along the long edge at 4-1/4″ and fold in half.
Step 2: Cut a 5-1/2″ x 4-1/4″ piece of sky blue water ripples paper and adhere to the front of the card. Cut a 5-1/4″ x 4″ piece of ocean blue trellis designer paper (cutting the bottom edge with the Scallop Blade) and mount on top.
Step 3: Punch six anchors from White Solid Cardstock. Adhere in a flower pattern as shown. Place a gem in the middle.
Which of these anchor crafts will you create first? What sorts of projects will you create with the Anchor Punch? Share your thoughts and ideas down below!

I LOVE all of these borders and cards! So cute and, so easy to make! Can’t wait to try them.
Ok add an anchor punch to my order Krislyn ? so cute!