December 8, 2021
One-of-a-Kind Paper Designs: Scrapbooking Borders and DIY Cards

Take a walk on the worldwide wild side. How so? Well, by earning up to 3 exclusive paper packs — featuring one-of-a-kind (and totally stunning!) designs created by 3 guests artists from Australia, Lithuania and Argentina — FREE with qualifying orders of Last Chance products. Talk about global greatness!
For more details, visit: US | CA | AU
Blog contributor Sachiyo Omitsu tapped into these limited-time paper packs (hello, garden-themed goodies, feel-good cool vibes and ravishing-meets-warming abstract patterns!) and created these scrapbooking borders and DIY cards!

Borders

To create these borders you will need:
- Happy Garden Paper Pack — Exclusive in the Last Chance promotion
- Positive Vibes Paper Pack — Exclusive in the Last Chance promotion
- Radiant Reds Paper Pack — Exclusive in the Last Chance promotion
- Coordinating Cardstocks or (Shop Canada | Shop Australia)
- Original Border Maker System with Mirrored Scallops Chain Border Maker Cartridge or (Shop Canada | Shop Australia)
- 12-inch Trimmer or (Shop Canada | Shop Australia)
- All-Purpose Scissors or (Shop Canada | Shop Australia)
- Tape Runner or (Shop Canada | Shop Australia)
- Repositionable Tape Runner Refill or (Shop Canada | Shop Australia)

Step 1: Cut a piece of cardstock to measure 1-3/4″ x 12″ for the base of the border. Cut a piece of designer paper to measure 1-5/8″ x 12″ and add to the base.
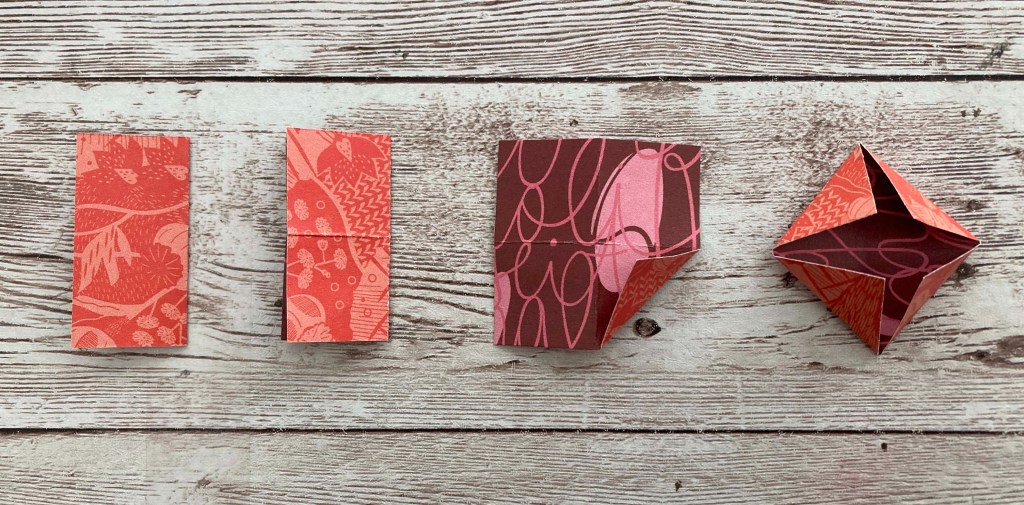
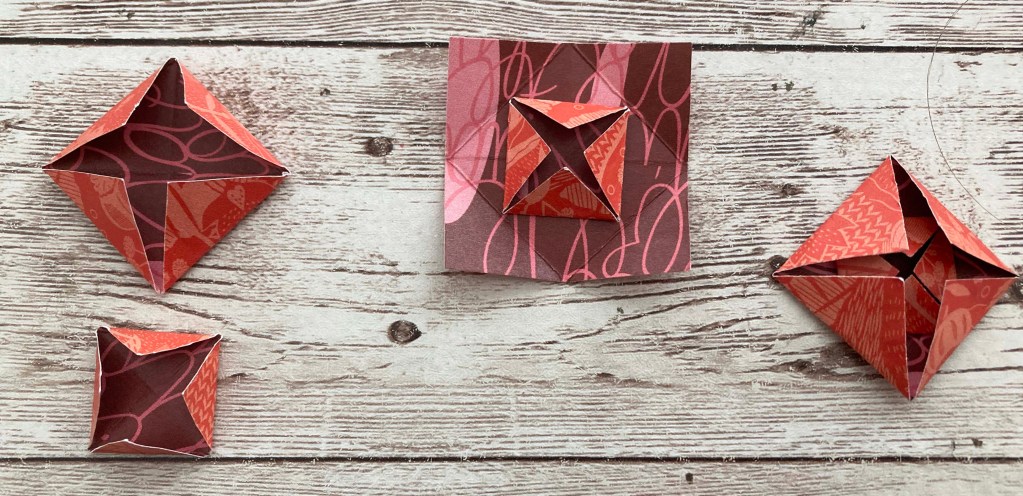
Step 2: Cut a piece of designer paper into eight pieces that measure 1-1/2″ x 1-1/2″ and eight pieces that measure 1″ x 1″. Fold each piece as shown. Add the smaller piece in the middle of a larger piece as shown.
Step 3: Draw a pencil line horizontally on the middle of the border base. Add the square pieces along this pencil line.

Step 4: Use the Mirrored Scallops Chain Border Maker Cartridge to punch two borders from a piece of designer paper and two borders from a piece of cardstock. Adhere the cardstock scallops borders underneath the designer scallops borders. Adhere the border pieces underneath the top and bottom edges of the base as shown.
Cards

To create these cards you will need:
- Happy Garden Paper Pack — Exclusive in the Last Chance promotion
- Positive Vibes Paper Pack — Exclusive in the Last Chance promotion
- Radiant Reds Paper Pack — Exclusive in the Last Chance promotion
- Coordinating Cardstocks or (Shop Canada | Shop Australia)
- Must Have Laser Title Embellishments – Pack 4 or (Shop Canada | Shop Australia)
- Diamond Arches Border Punch or (Shop Canada | Shop Australia)
- 12-inch Trimmer or (Shop Canada | Shop Australia)
- All-Purpose Scissors or (Shop Canada | Shop Australia)
- Tape Runner or (Shop Canada | Shop Australia)
- Repositionable Tape Runner Refill or (Shop Canada | Shop Australia)
- Foam Squares or (Shop Canada | Shop Australia)
Step 1: Cut a piece of cardstock to measure 5-1/2″ x 8-1/2″ and fold it in half to make a card base.
Step 2: Cut a piece of designer paper to measure 4-1/8″ x 5-3/8″ and add to the card base. Cut another piece of designer paper to measure 4″ x 5-1/4″ and add to the card.
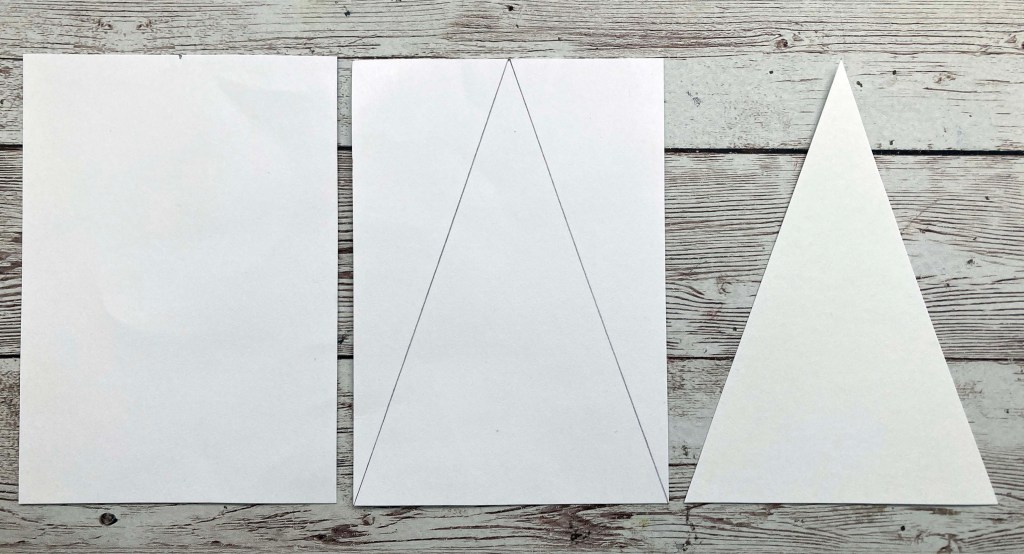
Step 3: Cut a piece of cardstock to measure 3-1/2″ x 4-1/2″. Mark the midway point on the 3-1/2″ side. Cut from the midway point to corners to make a tree base as shown.
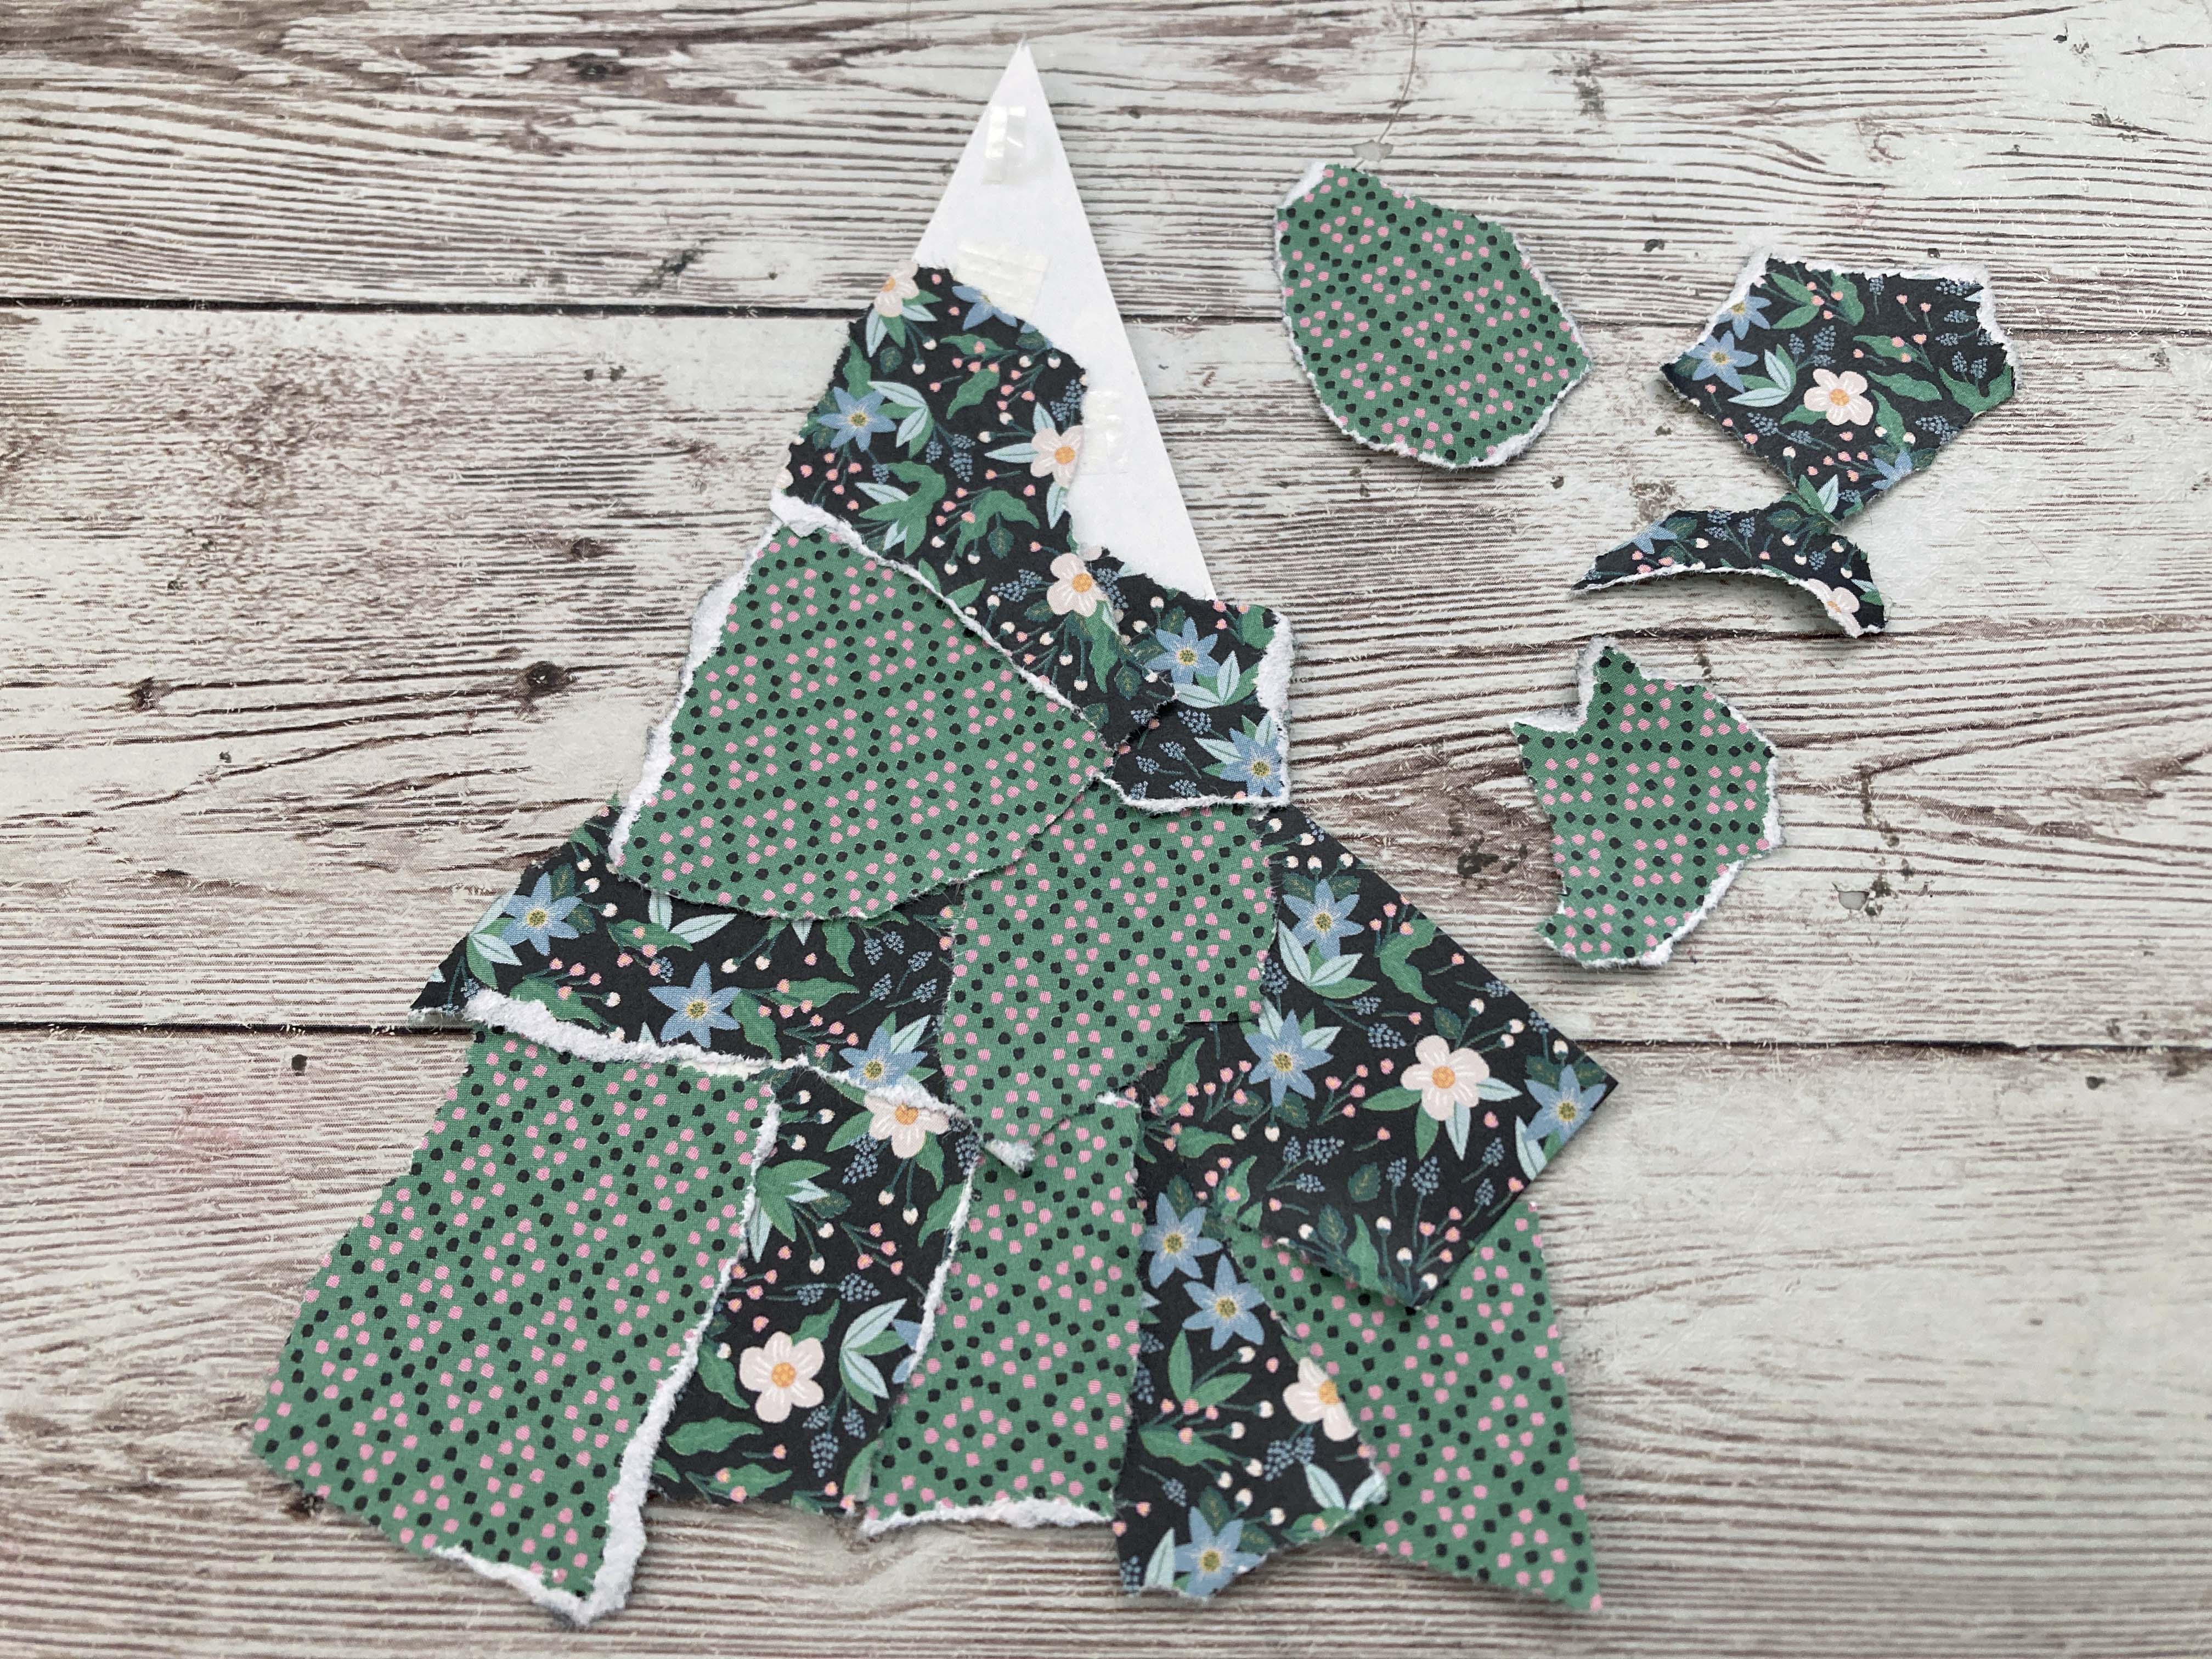
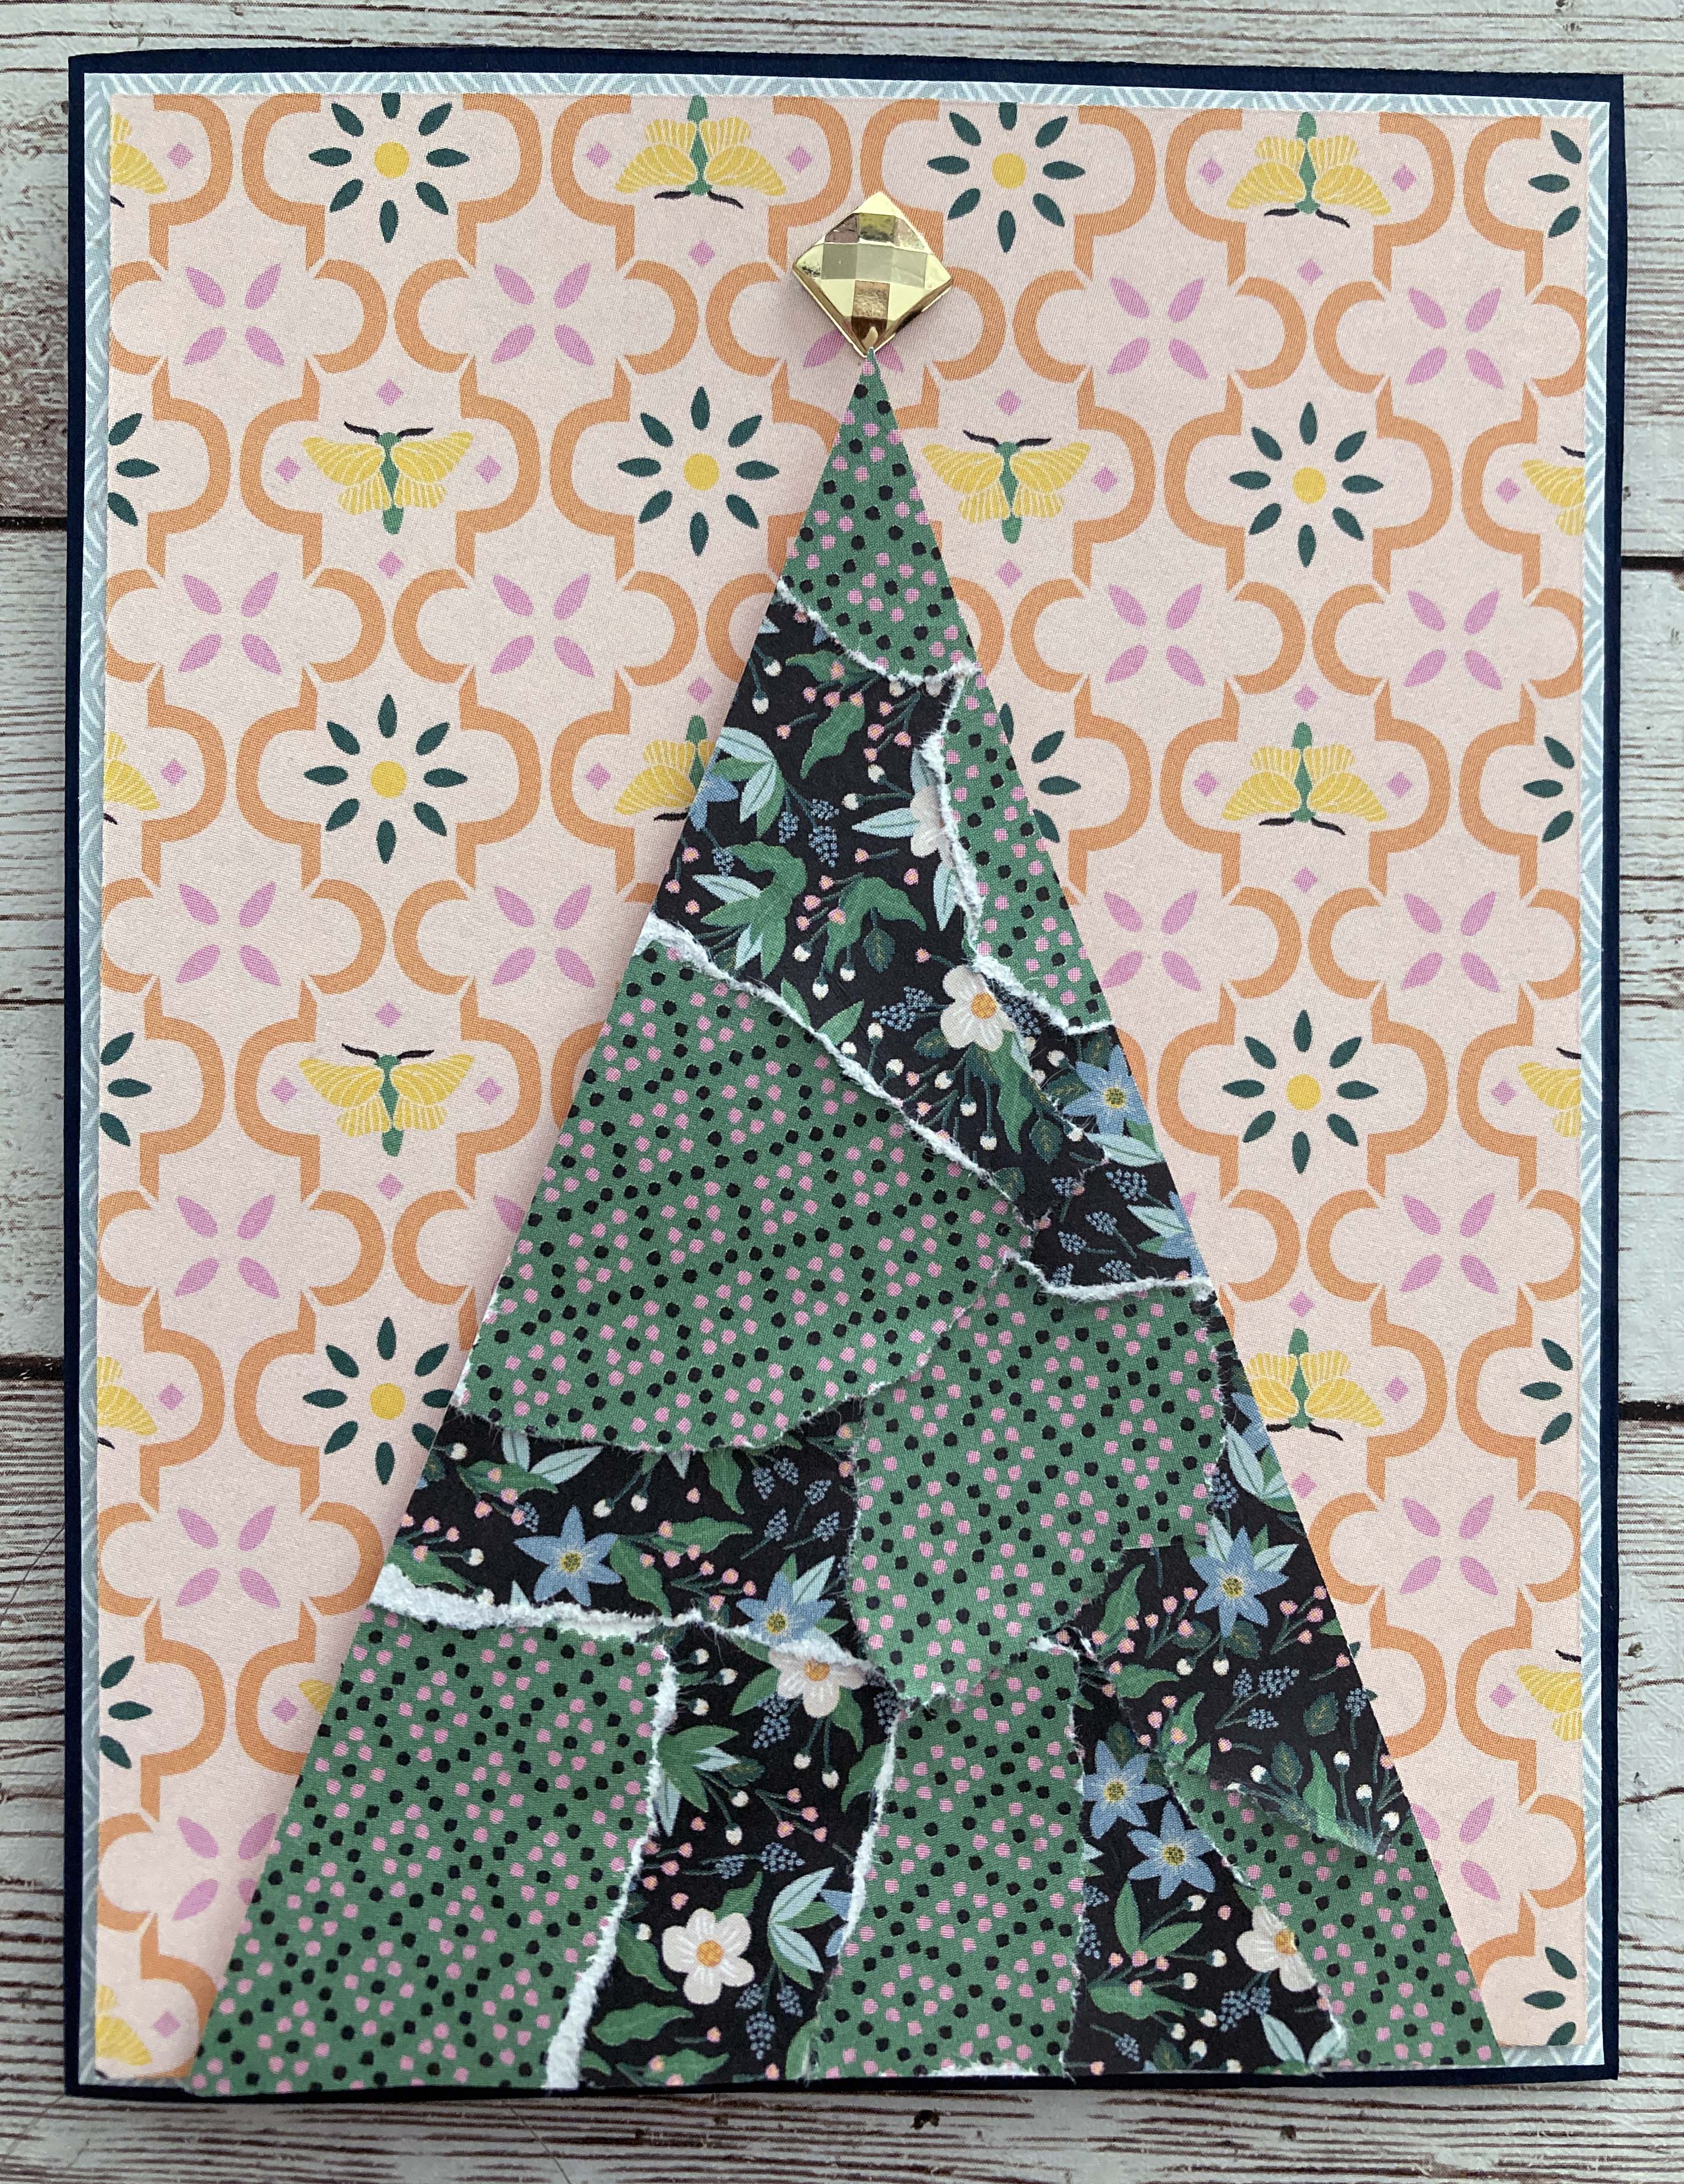
Step 4: Tear pieces of designer paper into small pieces. Adhere the pieces to the tree base. Trim the excess along the cardstock base. Add the tree piece to the card using Foam Squares for added dimension. Add bling of your choice (stickers, embellishments, etc.) to the top of the tree.
Step 5: Punch a border with the Diamond Arches Border Punch. Cut the border to measure 1″ x 4″ and add near the bottom of the card. Cut a piece of designer paper to measure 1/8″ x 4″ and add to the border. Add a Must Have Laser Title Embellishment to the card.
What are your thoughts on these dazzling scrapbook border ideas and DIY cards from Sachiyo? And which of these paper packs will you be getting?
And again, for more info on this Last Chance Promo, click here: US | CA | AU

These cards are so simple and beautiful! The only think I’d add would be a Christmas sentiment.
I have been looking for a unique card for a Card Class and this is it! Thank you, Sachiyo.