December 28, 2021
Relive Out-and-About Moments With These Forest Scrapbook Borders and DIY Card Featuring Laser Cut Titles

Ahh, the great outdoors. Nature is pretty amazing and can make us feel happier and more focused and bring on a renewed sense of being. You know what else feels just as great? Scrapbooking, of course! After you’ve enjoyed your out-and-about moments and fresh-air fun, discover new detail and make these forest scrapbook borders (and bonus DIY card!) featuring the latest laser cut titles from 2021 — the Must Have Laser Title Embellishments – Pack 4!
To create these borders and card, you will need:
- Deep in the Woods Paper Pack or (Shop Canada | Shop Australia)
- Deep in the Woods Texture Paper Pack or (Shop Canada | Shop Australia)
- Deep in the Woods Laser Cut Borders or (Shop Canada | Shop Australia)
- Deep in the Woods Stickers or (Shop Canada | Shop Australia)
- Must Have Laser Title Embellishments – Pack 4 or (Shop Canada | Shop Australia)
- White Solid Cardstock or (Shop Canada | Shop Australia)
- Custom Cutting System with Circle Patterns or (Shop Canada | Shop Australia)
- 12-inch Trimmer with Straight, Deckle & Scoring Blades or (Shop Canada | Shop Australia)
- Micro-Tip Scissors (Shop Canada | Shop Australia)
- Tape Runner or (Shop Canada | Shop Australia)
- Repositionable Tape Runner Refill or (Shop Canada | Shop Australia)
- Precision Point Adhesive Pen or (Shop Canada | Shop Australia)
Check out all of the Must Have Laser Title Embellishments in the video below!

The Great Outdoors Border

Step 1: Cut a piece of White Solid Cardstock to measure 12″ x 3-1/4″.
Step 2: Cut the pine needles texture paper to measure 11-/1/4″ x 2-1/4″.
Step 3: Cut the tree grain texture paper to measure 11-1/4″ x 3/4″.
Step 4: With the outside edge of the smallest Custom Cutting System Circle Pattern and Red Blade, cut a circle from the mossy bark texture paper. With the outside edge of the smallest Custom Cutting System Circle Pattern and Green Blade, cut a circle from White Solid Cardstock. With the inside edge of the largest Custom Cutting System Circle Pattern and Green Blade, cut a circle from the tree grain texture paper. Layer and adhere the circle pieces, and cut in half.
Step 5: Layer the paper strips with a laser-cut border and the semi-circle piece and adhere to the cardstock strip as shown.
Step 6: Add a Must Have Laser Title Embellishment with the Precision Point Adhesive Pen. Add a sticker.
Taking it Easy Border
Step 1: Cut a piece of dark moss designer paper to measure 3-1/2″ x 12″ for the base of this border.
Step 2: Cut the crackled white texture paper to measure 3-1/4″ x 12″ and adhere to the dark moss strip.
Step 3: Cut the mossy bark texture paper to measure 3-1/4″ x 1″ and adhere to the top of the border.
Step 4: Cut birch logs texture, pine needles texture, pine cones texture and fallen leaves designer papers to measure 3-1/4″ x 2″. Adhere the paper pieces as shown to the border.
Step 5: Adhere laser cut borders and border stickers to the paper pieces as desired.
Step 6: Add Must Have Laser Titles Embellishments with the Precision Point Adhesive Pen.
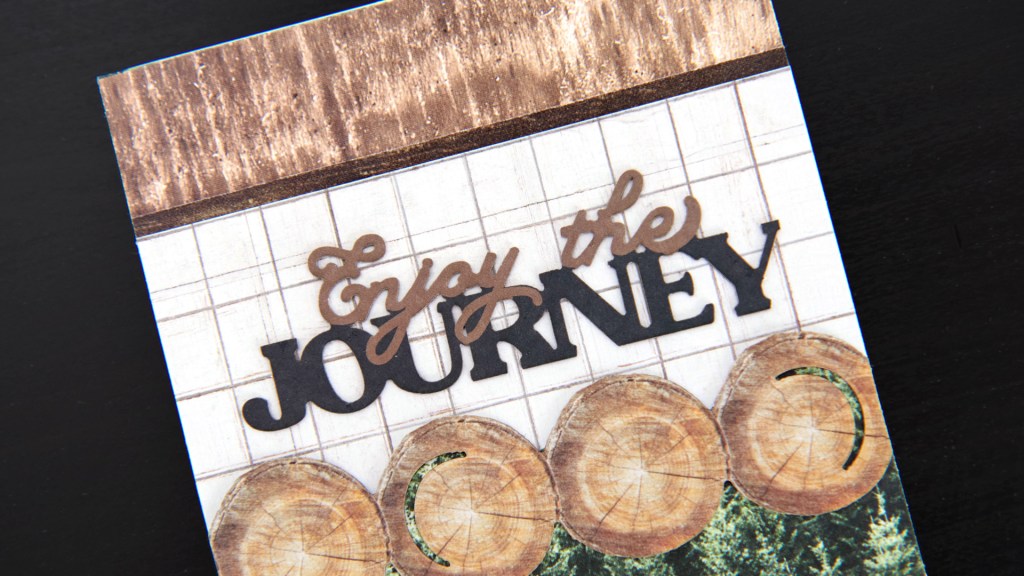
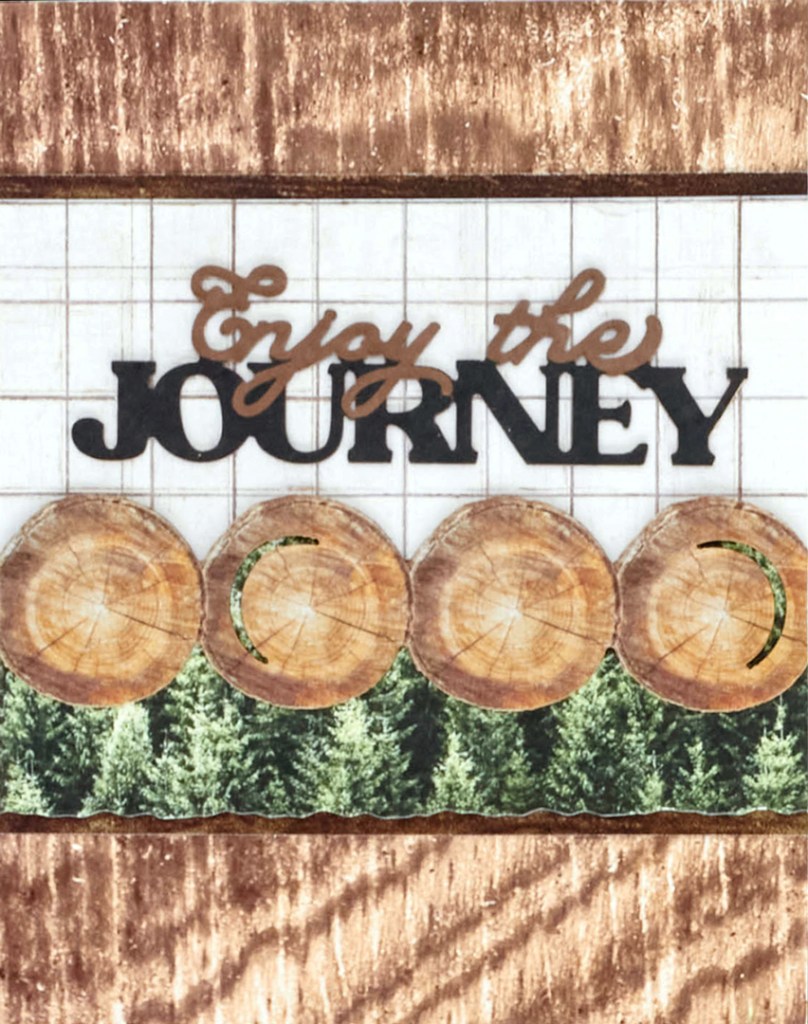
Enjoy the Journey Card
Step 1: Cut a piece of White Solid Cardstock to measure 8-1/2″ x 5-1/2″.
Step 2: Use the 12-inch Trimmer and Scoring Blade to score at 4-1/4″ and fold in half.
Step 3: Cut the ombré woodgrain designer paper to measure 4-1/4″ x 5-1/2″ and adhere to the front of the card.
Step 4: Cut the dark brown woodgrain designer paper to measure 4-1/4″ x 3-1/2″ and adhere to the middle of the card.
Step 5: Cut the wooden plaid paper to measure 4-1/4″ x 2″ and adhere to middle of the card.
Step 6: Cut the pine trees designer paper to measure 4-1/4″ x 1-1/2″, and then use the 12-inch Trimmer with the Deckle Blade on the long bottom edge. Adhere to card as shown.
Step 7: Trim and adhere a tree rings laser-cut border to the card as shown.
Step 8: Add a Must Have Laser Titles Embellishment with the Precision Point Adhesive Pen.
What are your thoughts on these forest scrapbook borders? Will you be making the DIY card, too? What sorts of projects have you made with laser cut titles? Share, share, share in the comments below!

Great, I allways love outdoor’s motifs and colours. Thank you and a happy 2022.
Awesome ideas! Love the enjoy the journey card!