January 18, 2022
Two-Page Bundle of Joy: Newborn Scrapbook Spread
Our hearts are pitter-pattering and we’re cooing with delight — the latest collection, Lullaby Lane, is a complete bundle of joy! Inspired by the newest cute-as-a-button family member, these baby-themed scrapbooking supplies celebrate those big “firsts,” like first words and first tooth, as well as baby showers and baby announcements, cousin playdates, mealtime messes, splish-splashing fun in the bathtub and more. Swaddle your blissful baby beginnings with this two-page newborn scrapbook spread. (It’s pretty aww-dorable!)
To create this layout you will need:
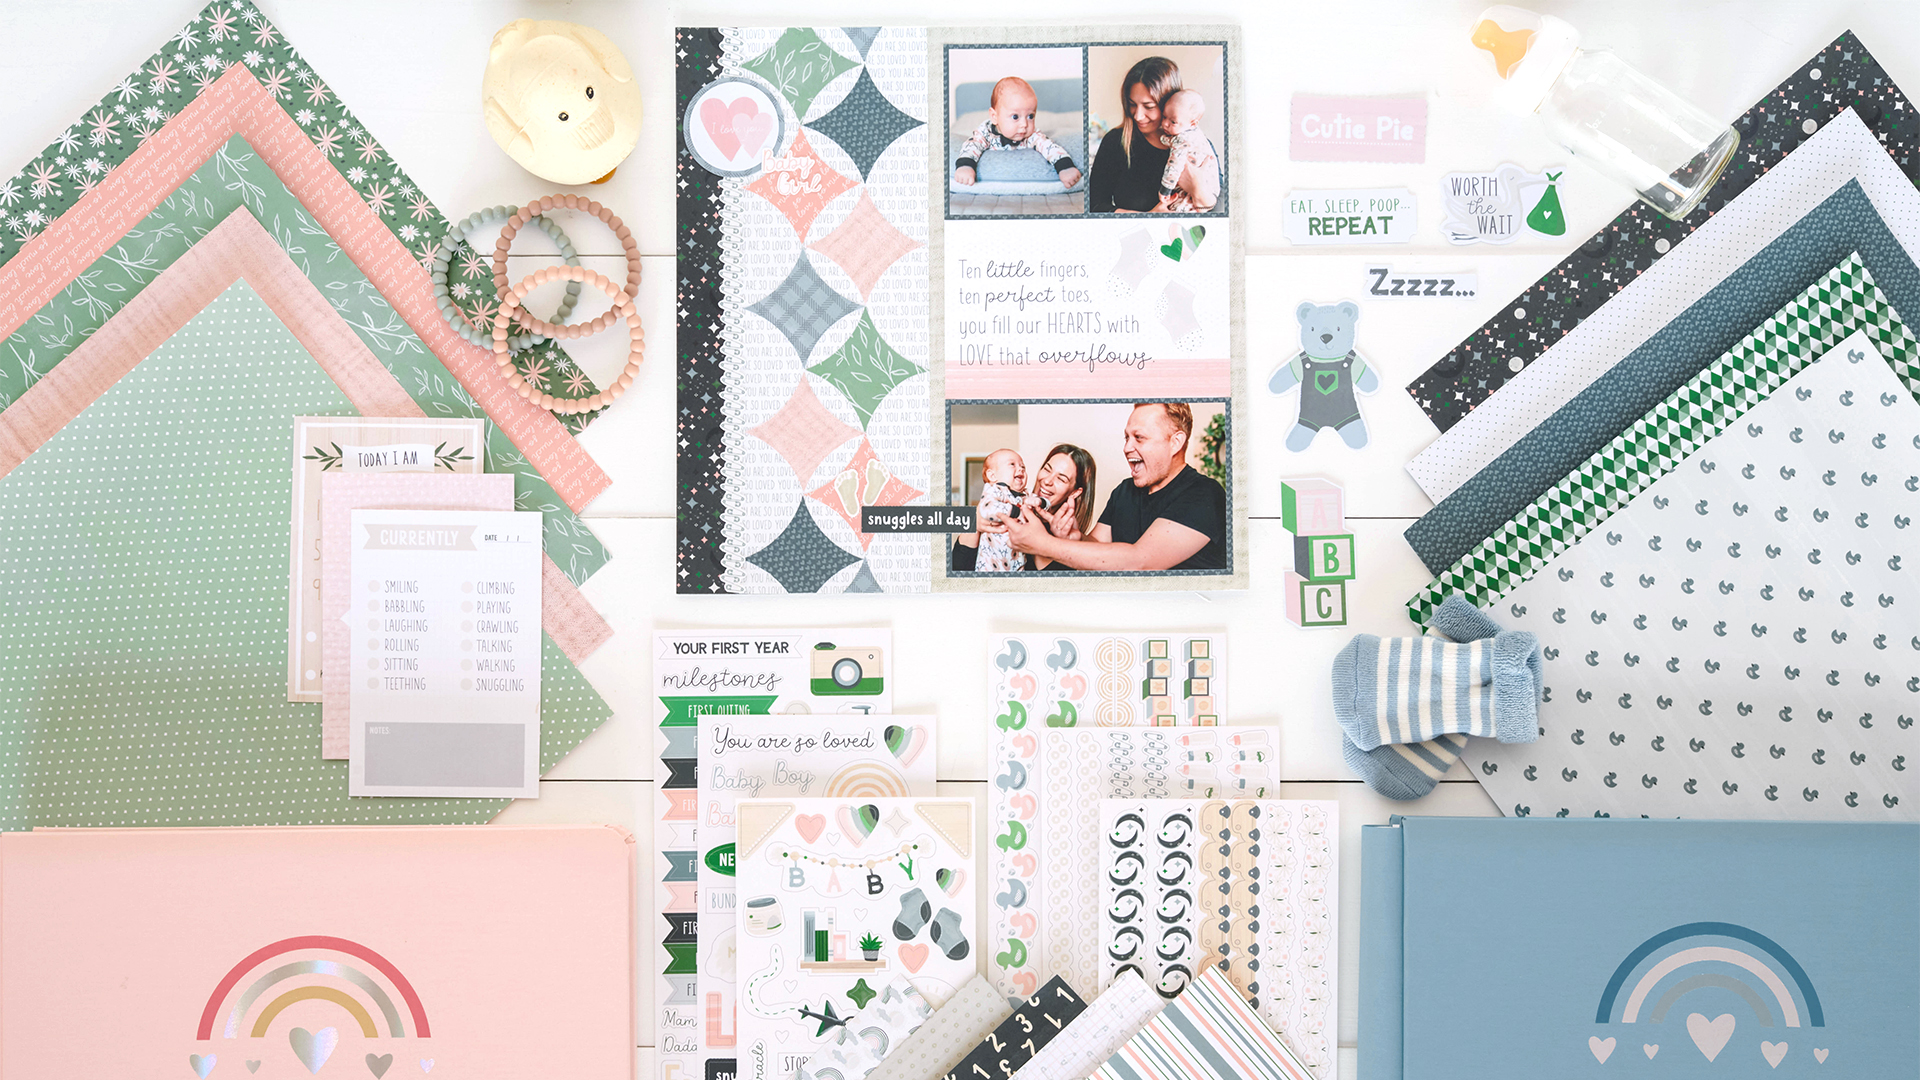
- Lullaby Lane Paper Pack or (Shop Canada | Shop Australia)
- Lullaby Lane Girl Paper Pack or (Shop Canada | Shop Australia)
- Lullaby Lane Boy Paper Pack or (Shop Canada | Shop Australia)
- Lullaby Lane Variety Mat Pack or (Shop Canada | Shop Australia)
- Lullaby Lane Embellishments or (Shop Canada | Shop Australia)
- Lullaby Lane Stickers or (Shop Canada | Shop Australia)
- Lullaby Lane Border Stickers or (Shop Canada | Shop Australia)
- Custom Cutting System with Circle Patterns or (Shop Canada | Shop Australia)
- 12-inch Trimmer or (Shop Canada | Shop Australia)
- Micro-Tip Scissors or (Shop Canada | Shop Australia)
- Tape Runner or (Shop Canada | Shop Australia)
- Repositionable Tape Runner Refill or (Shop Canada | Shop Australia)
- Foam Squares or (Shop Canada | Shop Australia)
- Black Dual-Tip Pen or (Shop Canada | Shop Australia)
Check out the whole Lullaby Lane collection in the video below!

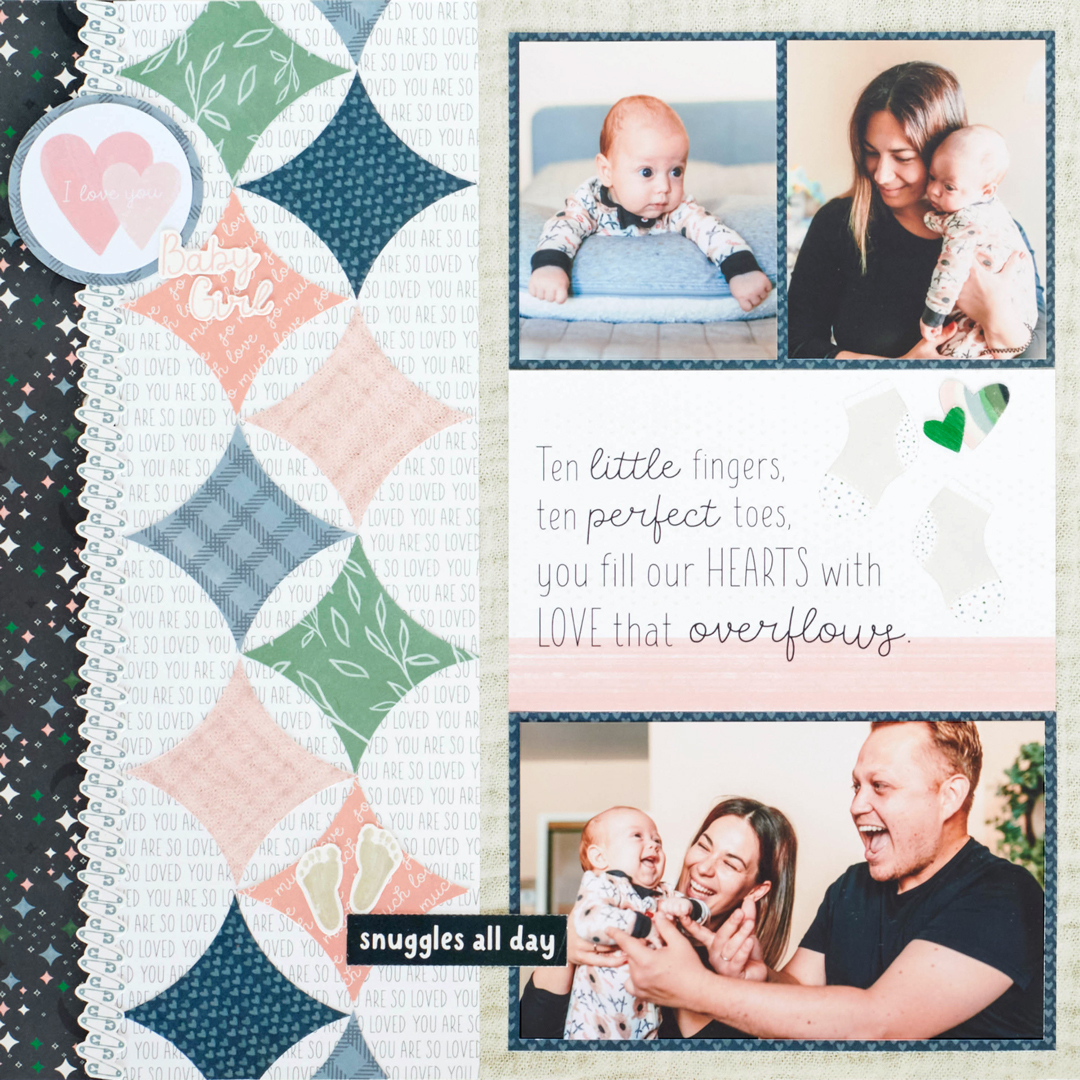
Step 1: Choose two sheets of tan muslin blanket designer paper for the bases of this two-page layout.
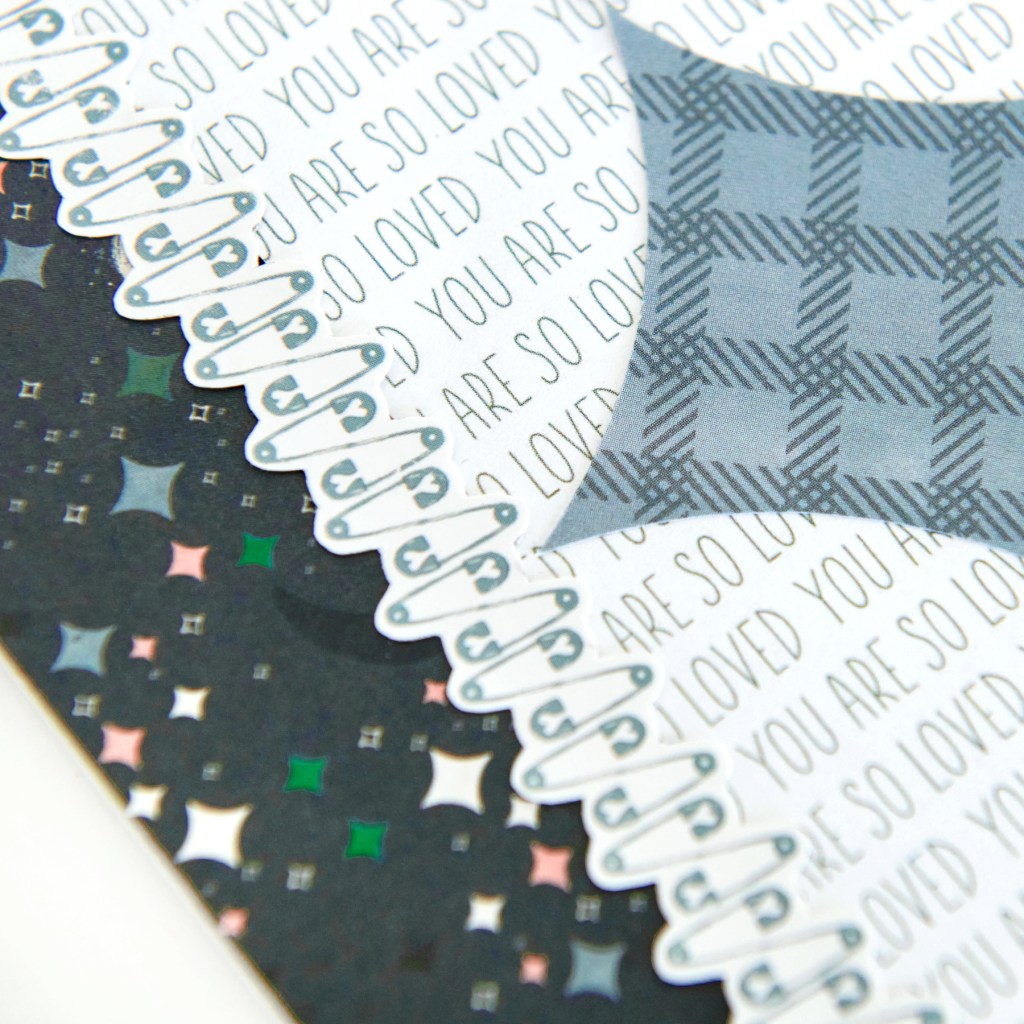
Step 2: Cut a 1-1/2″ x 12″ strip of night sky boy designer paper and adhere it to the left side of the left-hand page. Cut a 4-5/16″ x 12″ strip of “You are so loved” boy designer paper and adhere it next to the night sky strip on the left-hand page. Adhere a safety pins border sticker along the seam.
Step 3: Cut a 5-5/16″ x 12″ strip of night sky boy designer paper and adhere it to the right side of the right-hand page.

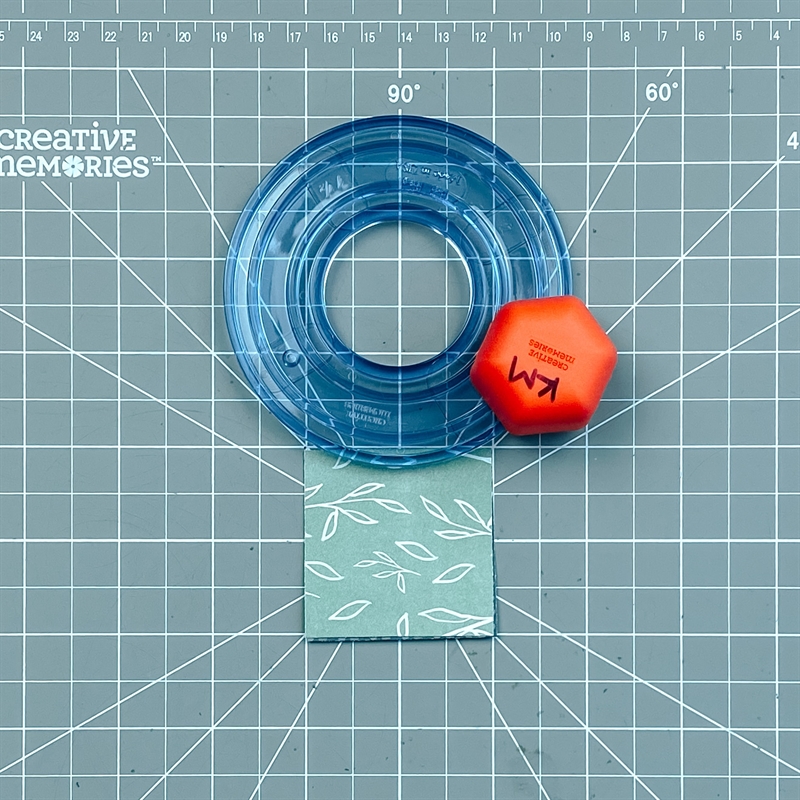
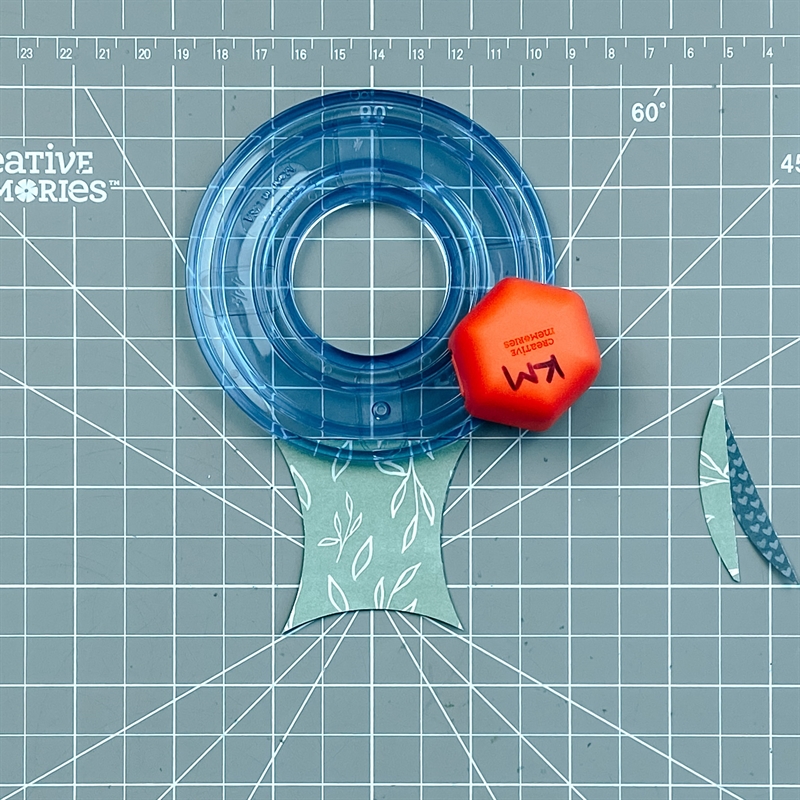


Step 4: Cut ten 2″ x 2″ pieces of various pink, blue and green papers. Stack two to three pieces at a time on the 13×13 Custom Cutting System Mat. Lay the outside of the smallest Custom Cutting System Circle Pattern just over one edge. Using the Red Blade, cut a swell shape from the side of the square. Rotate to each side and repeat. Adhere the squares as shown on the “You are so loved” strip on the left-hand page. Trim as needed.
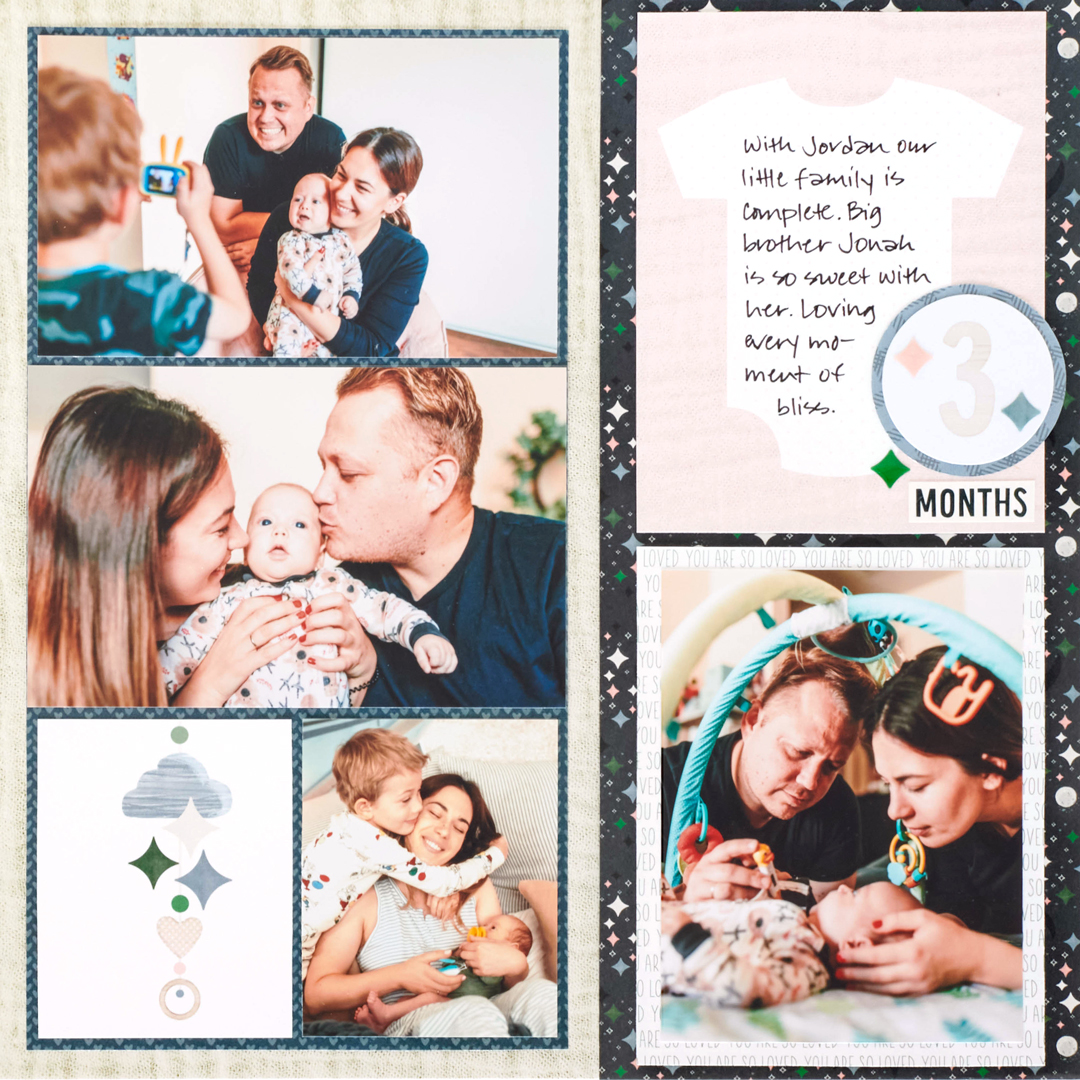
Step 5: Cut two 6″ x 11-1/4″ pieces of blue hearts boy paper. Adhere to each side of the layout as shown. Crop photos and/or mats as follows: (4) 2-13/16″ x 3-1/2″, (2) 6″ x 3-3/4″ and (2) 5-3/4″ x 3-3/4″. Adhere as shown to the blue hearts paper.
Step 6: Crop a variety mat to measure 4-1/2″ x 5-3/4″, as well as a piece of “You are so loved” boy designer paper. Crop a photo to 4″ x 5-1/4″. Mount all on the right side of the right-hand page.
Step 7: Using the inside edge of the medium Custom Cutting System Circle Pattern and the Green Blade, cut two circles with blue muslin blanket boy designer paper. Mount two embellishments on top and adhere to the layout as shown. Add additional stickers and embellishments, popping some up with Foam Squares for added dimension.
Step 8: Journal as desired.
What do you think of the perfectly precious Lullaby Lane collection? What memories and photos would you nestle on top of this newborn scrapbook spread? Share your ideas!

I LOVE this method for making the shaped 2” embellishments out of the printed paper. Best of all, it utilizes tools many of us have, and can of course be used with any papers for any layout! Thanks, Krislyn, for sharing another useful scrapbooking method with us.
[…] Visit their blog for more details. […]
[…] Visit their blog for more details. […]
[…] Visit their blog for more details. […]