January 20, 2022
These Baby Jammies Scrapbook Borders and DIY Card Are Darling Cutie Pies

Babies are so cute with their squishy cheeks, soft skin, tiny fingers and toes and wide eyes. And when you think they couldn’t possibly get any cuter, you get to dress them up in teeny-tiny dresses, overalls, rompers and jammies! Well, enjoy special moments with your own little bundle of joy or newborn grandkids, nieces and nephews, and then make these baby jammies scrapbook borders and DIY card that everyone will go gaa-gaa for!
To create these borders and card, you will need:
- Lullaby Lane Paper Pack or (Shop Canada | Shop Australia)
- Lullaby Lane Girl Paper Pack or (Shop Canada | Shop Australia)
- Lullaby Lane Boy Paper Pack or (Shop Canada | Shop Australia)
- Lullaby Lane Embellishments or (Shop Canada | Shop Australia)
- Lullaby Lane Stickers or (Shop Canada | Shop Australia)
- Lullaby Lane Border Stickers or (Shop Canada | Shop Australia)
- White Solid Cardstock or (Shop Canada | Shop Australia)
- Original Border Maker System with Jammies Chain Border Maker Cartridge or (Shop Canada | Shop Australia)
- 12-inch Trimmer with Straight, Wave, Scallop & Scoring Blades or (Shop Canada | Shop Australia)
- Micro-Tip Scissors or (Shop Canada | Shop Australia)
- Tape Runner or (Shop Canada | Shop Australia)
- Repositionable Tape Runner Refill or (Shop Canada | Shop Australia)
- Foam Squares or (Shop Canada | Shop Australia)
- Black Dual-Tip Pen or (Shop Canada | Shop Australia)
Check out the Jammies Chain Border Maker Cartridge in action in the video below!

Cutie Pie Border
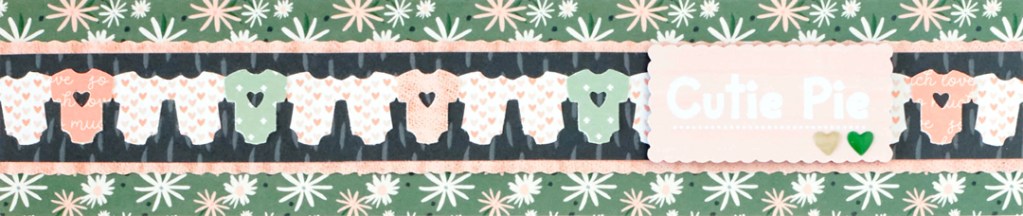
Step 1: Cut a 12″ x 2-1/2″ strip of floral girl designer paper for the base.
Step 2: Using the 12-inch Trimmer and the Wave Blade, cut a 12″ x 1-1/2″ strip of pink muslin blanket girl designer paper and adhere on the base. With the 12-inch Trimmer and the Straight Blade, cut a 12″ x 1-1/4″ strip of navy blue brushstrokes girl designer paper and mount on top.
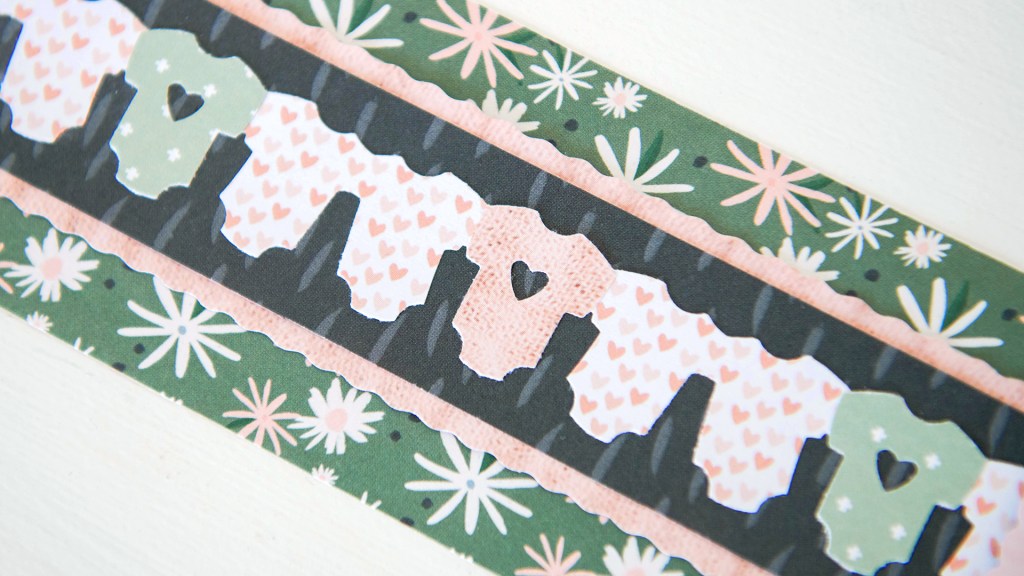
Step 3: Using the Jammies Chain Border Maker Cartridge, punch a border with mini hearts girl designer paper, as well as with “So much love,” green mini crosses and pink muslin blanket girl designer papers. Adhere the mini hearts border to the middle of the navy blue brushstrokes border. Cut out five various jammies and adhere on top as shown.
Step 4: Adhere the “Cutie Pie” embellishment with Foam Squares for added dimension. Add epoxy stickers.
Little Moments, Big Memories Border

Step 1: Cut a 12” x 2-3/4” strip of night sky boy designer paper for the base.
Step 2: Using the 12-inch Trimmer and the Scallop Blade, cut a 12″ x 2″ strip of receiving blanket stripes designer paper and adhere on the base. Using the 12-inch Trimmer and the Straight Blade, cut a 12″ x 1-1/2″ strip of green plaid designer paper and adhere on the receiving blanket stripes border. Top with a 12″ x 1-3/8″ strip of “You are so loved” boy designer paper.
Step 3: Using the Jammies Chain Border Maker Cartridge, punch a border with green mini crosses girl designer paper, as well as with blue muslin blanket and blue hearts boy papers. Trim out sections of the blue papers and mount on the green border. Adhere small pieces of “So much love” girl designer paper behind the cut-out hearts. Adhere to the border.
Step 4: Adhere the elephant embellishment and stickers with Foam Squares for added dimension.
Sweet Baby Border

Step 1: Cut a 3-1/4″ x 12″ strip of green leaves girl designer paper for the base. Cut a 2-5/8″ strip of wooden floor texture designer paper and adhere on the base.
Step 2: Cut two 2-5/8″ x 1″ pieces of pink muslin blanket girl designer paper. Top with two 2-3/8″ x 3/4″ pieces of baby quilt girl designer paper. Mount on top and bottom of the border.
Step 3: Cut a 2-5/8″ x 2-1/2″ piece of pink muslin blanket girl designer paper and top with a 2-3/8″ x 2-1/4″ piece of baby quilt girl designer paper. Adhere to the middle of the border.
Step 4: Using the Jammies Chain Border Maker Cartridge, punch a border from each “So much love” and green mini crosses girl designer papers. Trim into sections of four onesies each. Adhere to the border, alternating hues and angling slightly as shown.
Step 5: Add the “Sweet baby” embellishment with Foam Squares for added dimension. Add epoxy stickers.
Showered With Love Card

Step 1: Create the card base. Cut an 8-1/2″ x 5-1/2″ piece of White Solid Cardstock. Using the 12-inch Trimmer and the Scoring Blade, score along the long edge at 4-1/4″ and fold in half.
Step 2: Cut a 4-1/4″ x 5-1/2″ piece of snackable cereal designer paper and adhere to the front of the card. Cut a 4″ x 2-1/2″ piece of rainbow skies designer paper and mount near the top of the card. Cut a 4″ x 2-3/4″ piece of green plaid designer paper and mount near the bottom of the card. Cut a 4″ x 1/4″ strip of snackable cereal designer paper and adhere along the seam.
Step 3: Using the Jammies Chain Border Maker Cartridge, punch a border with pink muslin blanket girl designer paper. Trim to 4″ and adhere to the card as shown.
Step 4: Adhere the “Showered with love” sticker with Foam Squares for added dimension. Add epoxy stickers.
What are your thoughts on the Jammies Chain Border Maker Cartridge? Will you be putting together these too-cute-to-handle baby jammies scrapbook borders and/or the DIY card? Share your thoughts and ideas in the comments section down below!

Precious!