June 2, 2022
Shovel In The Summer Memories: Sandcastle Borders For Scrapbooking

Sand, shovels, a bucket and a whole lot of imagination — it’s constructing sandcastles! Beaches offer plenty of room to build these sandy sculptures, and it’s not uncommon to see them dotting the shorelines. (You can also build them in summery sandboxes, of course!) Well, today’s blog offers three sand-sational sandcastle borders for scrapbooking that are dandy and sandy!

To create these borders you will need:
- Sunrays for Days Paper Pack or (Shop Canada | Shop Australia)
- Sunrays for Days Fast2Fab™-Inspired Designer Paper Pack or (Shop Canada | Shop Australia)
- Sunrays for Days Stickers or (Shop Canada | Shop Australia)
- Blue, Light Blue, Navy & White Solid Cardstocks or (Shop Canada | Shop Australia)
- Border Maker System with Sandcastles Border Maker Cartridge or (Shop Canada | Shop Australia)
- Custom Cutting System with Circle Patterns or (Shop Canada | Shop Australia)
- 2-Way Corner Rounder or (Shop Canada | Shop Australia)
- Micro-Tip Scissors or (Shop Canada | Shop Australia)
- 12-inch Trimmer or (Shop Canada | Shop Australia)
- Tape Runner or (Shop Canada | Shop Australia)
- Repositionable Tape Runner or (Shop Canada | Shop Australia)
- Foam Squares or (Shop Canada | Shop Australia)
Check out the Flourish Vine Border Maker Cartridge in action in the video below!

Sunkissed Border
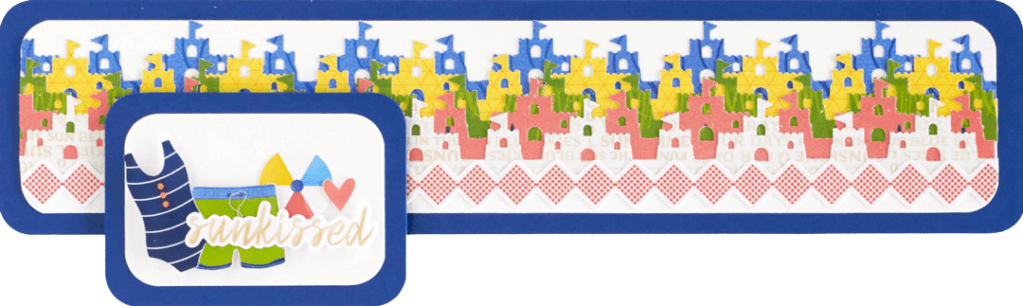
Step 1: Cut a piece of Blue Solid Cardstock to measure 12″ x 2-3/4″. Round the corners with the 2-Way Corner Rounder.
Step 2: Cut a piece of White Solid Cardstock to measure 11-1/4″ x 2-1/4″.
Step 3: Using the Sandcastles Border Maker Cartridge in the Original Border Maker System, punch five borders from various designer papers. Adhere so that the first one touches the top edge of the white cardstock. Then overlap the remaining borders as shown. Adhere a border sticker along the bottom edge of the sandcastles. Trim any excess with a scissors that hangs off the white cardstock edge. Round the corners with the 2-Way Corner Rounder. Adhere to the base of the border.
Step 4: Cut a piece of Blue Solid Cardstock to measure 3-1/2″ x 2-1/2″. Round the corners with the 2-Way Corner Rounder.
Step 5: Cut a piece of White Solid Cardstock to measure 3″ x 2″. Round the corners. Adhere to the blue cardstock piece.
Step 6: Adhere stickers, using Foam Squares on some for added dimension. Adhere this piece to the border base.
Time for an Adventure Border

Step 1: Using the Sandcastles Border Maker Cartridge in the Original Border Maker System, punch along an edge of Navy Solid Cardstock.
Step 2: Using the Sandcastles Border Maker Cartridge in the Original Border Maker System, punch along the edge of the tan summer-themed word art designer paper. Adhere to the top of the navy cardstock piece, leaving a slight shadow behind the sandcastles. Cut bottom edge at 2-1/2″.
Step 3: Cut a piece of Navy Solid Cardstock to measure 12″ x 1-1/4″. Adhere to the border.
Step 4: Cut a piece of flip-flops designer paper to measure 12″ x 1″. Adhere to the navy cardstock strip.
Step 5: Adhere a sticker using Foam Squares for added dimension.
Fun Beach Days Border
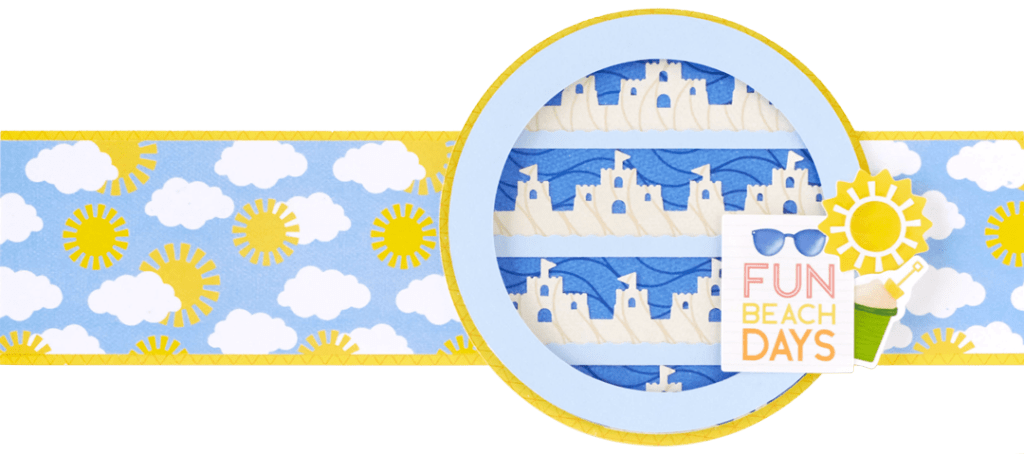
Step 1: Cut a piece of pineapple grid designer paper to measure 12″ x 2-3/4″ for the base of the border.
Step 2: Cut a piece of blue skies designer paper to measure 12″ x 2-1/2″. Adhere to the base.
Step 3: Cut a circle from the yellow paper With the outside edge of the medium Custom Cutting System Circle Pattern and the Green Blade, cut a circle from pineapple grid designer paper. Adhere to the border.
Step 4: Using the Sandcastles Border Maker Cartridge in the Original Border Maker System, punch two borders from the tan waves Fast2Fab™-inspired paper, then cutting at 1-1/4″.
Step 5: Cut two strips of Light Blue Solid Cardstock to measure 12″ x 1/4″. Adhere along the bottom edge of the tan waves paper.
Step 6: Using the outside edge of the medium Custom Cutting System Pattern and the Red Blade, cut a circle from the blue waves designer paper.
Step 7: Adhere the border strips to the top of the blue waves paper as shown. Cut any excess with a scissors. Adhere to the middle of the pineapple grid circle on the border.
Step 8: Using the outside edge of the medium Custom Cutting System Circle Pattern and the Red Blade, cut a circle form Light Blue Solid Cardstock. Then align the smallest Custom Cutting System Circle Pattern on top of it, cutting on the outside edge with the Red Blade. Adhere the “ring” to the top of the circle on the border using Foam Squares for added dimension.
Step 9: Adhere stickers using Foam Squares for added dimension.
Have you played around with the Sandcastles Border Maker Cartridge? What do you think of these sandcastle borders? Relay your thoughts and opinions with us and others!

The Fun Beach Day Bordef is my favorite and I’ve already made it! Cute idea, Melissa!