June 15, 2022
Pitch New Possibilities With This Camping Scrapbook Layout
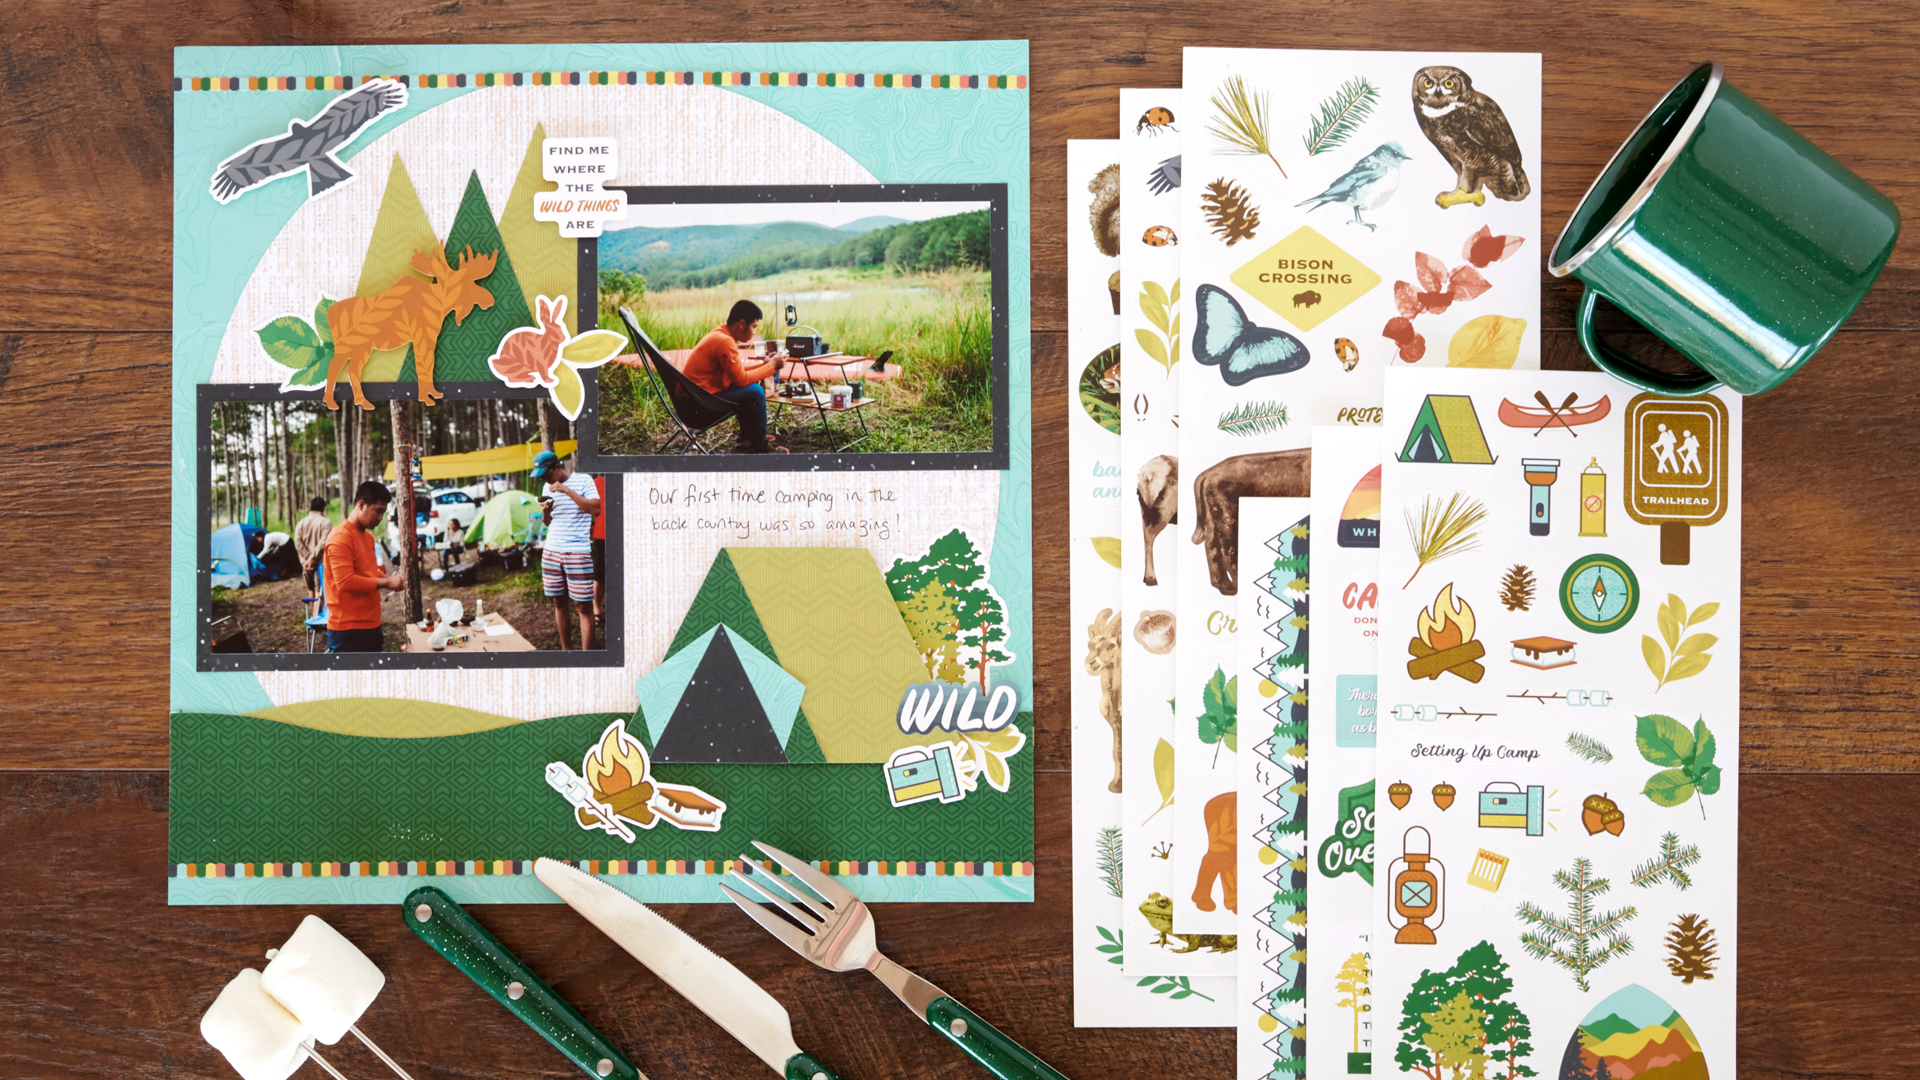
A good old-fashioned tent, pop-up camper, modern RV — it doesn’t matter how you camp and take off your boots and curl up for the night… it’s all about having fun and making memories in the great outdoors along the way! So after you set up your outdoorsy abode, get the campfire roaring, soak up the fresh air while staring off into the yonder and learn about the wildlife around you, make this camping scrapbook layout to hike toward fresh possibilities!
To create this layout you will need:
- Leave Nothing Behind Paper Pack or (Shop Canada | Shop Australia)
- Leave Nothing Behind Texture Paper Pack or (Shop Canada | Shop Australia)
- Leave Nothing Behind Stickers or (Shop Canada | Shop Australia)
- Leave Nothing Behind Wildlife Stickers or (Shop Canada | Shop Australia)
- 12-inch Trimmer or (Shop Canada | Shop Australia)
- Custom Cutting System with the Jumbo Circle Pattern or (Shop Canada | Shop Australia)
- 12-inch Decorative Trimmer or (Shop Canada | Shop Australia)
- All-Purpose Scissors or (Shop Canada | Shop Australia)
- Tape Runner or (Shop Canada | Shop Australia)
- Repositionable Tape Runner or (Shop Canada | Shop Australia)
- Foam Squares or (Shop Canada | Shop Australia)
- Black Dual-Tip Pen or (Shop Canada | Shop Australia)

Step 1: Use the bright teal topography designer paper as your base. Using the 12-inch Trimmer, cut a 8″ square from the middle of the paper. Cut two 6″ x 4″ photo mats from the 8″ square. Flip the mats over to show the night sky side and mount two 5-3/4″ x 3-3/4″ photos on them. (Save the remaining 8″ x 2″ strip for the tent paper piecing embellishment.)
Step 2: Align the burlap designer paper on the 13×13 Custom Cutting System Mat and use the Blue Blade around the outside edge of the Jumbo Circle Custom Cutting System Pattern to cut a large circle. Adhere onto base page, covering up the hollow square frame in the middle.
Step 3: Use the wavy blade of the 12-inch Decorative Trimmer to cut one 2″ x 12″ strip of hunter green geometric designer paper. Cut one 1″ x 12″ strip of the olive green diamonds designer paper from the opposite side to have two waves instead of three. Layer the wavy strips as shown and adhere over the bottom edge of the burlap circle, about 1/2″ up from bottom edge of base page. Then, add two multi-hued border stickers at the top and bottom of the page as shown.
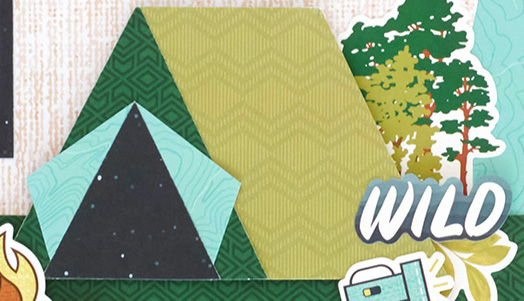
Step 4: To make the tent paper piecing embellishment: Cut a 3″ square of hunter green geometric designer paper, a 5″ x 3″ piece of olive green diamonds designer paper and a 2″ square of night sky designer paper. Mark the middle of one side of the 3″ hunter green geometric square and cut from middle mark to opposite corners to form a triangle. Use edges of triangle to trim sides of olive green diamonds rectangle into a trapezoid shape. Align the left-hand edge of the hunter green geometric triangle with left-hand edge of the olive green diamonds trapezoid and adhere together. Mark the middle of one side of the 2″ night sky square and cut from the middle mark to opposite corners to form a triangle. Flip the leftover pieces over to the bright teal topography side to use as the door flaps, trimming with All-Purpose Scissors to achieve your desired shape. Mount night sky triangle to middle of hunter green geometric triangle and add bright teal “door flaps” to each side. Add trees and leaves stickers on top of wavy olive green diamond and hunter green geometric border, then mount finished tent with Foam Squares for added dimension. Adhere additional stickers on top and in front of tent to complete the scene.
Step 5: To make trees paper piecing embellishment: Cut two 3″ x 4″ rectangles from olive green diamonds designer paper and one from hunter green geometric designer paper. Mark the middle of the 3″ side and cut from the middle mark to opposite corners to form triangles. Layer the triangles together and adhere to the page.
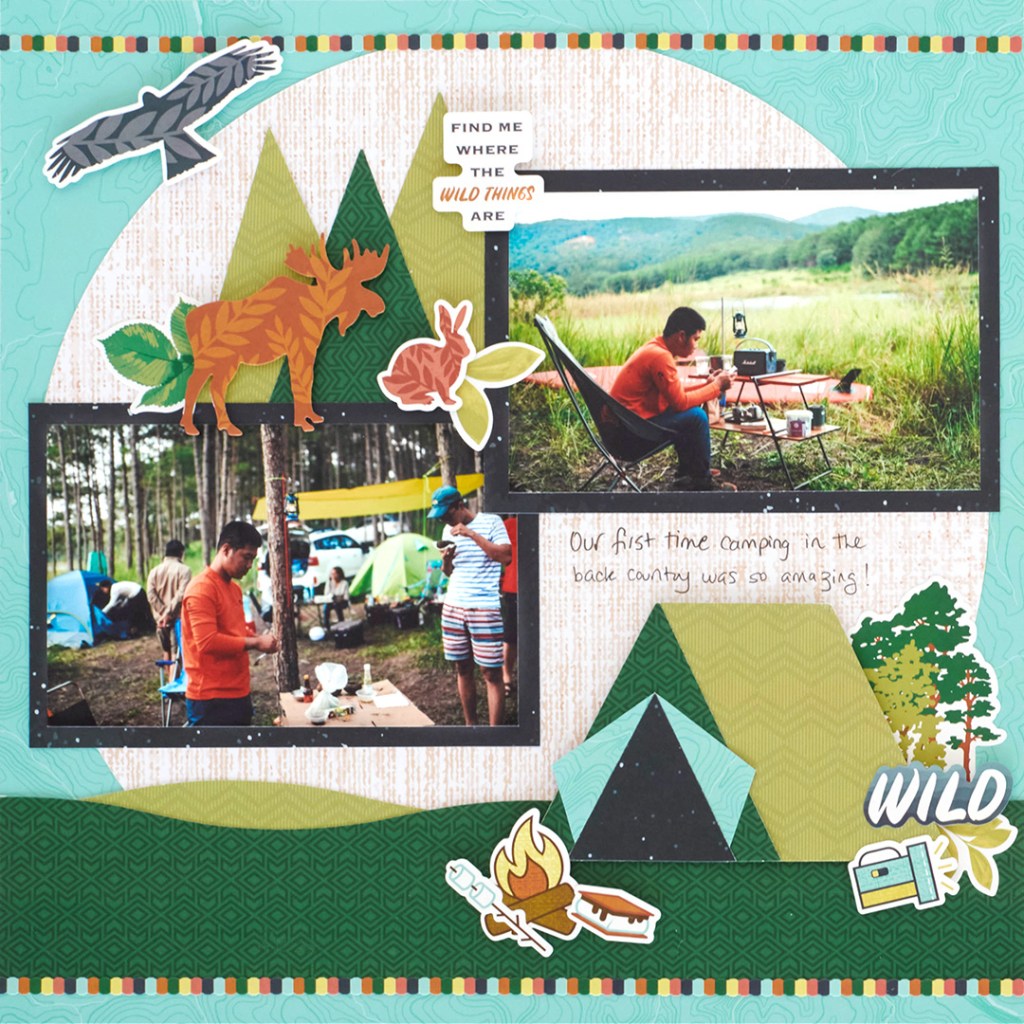
Step 6: Arrange and adhere matted photos as shown, overlapping the triangle trees and leaving space above the tent scene to journal on.

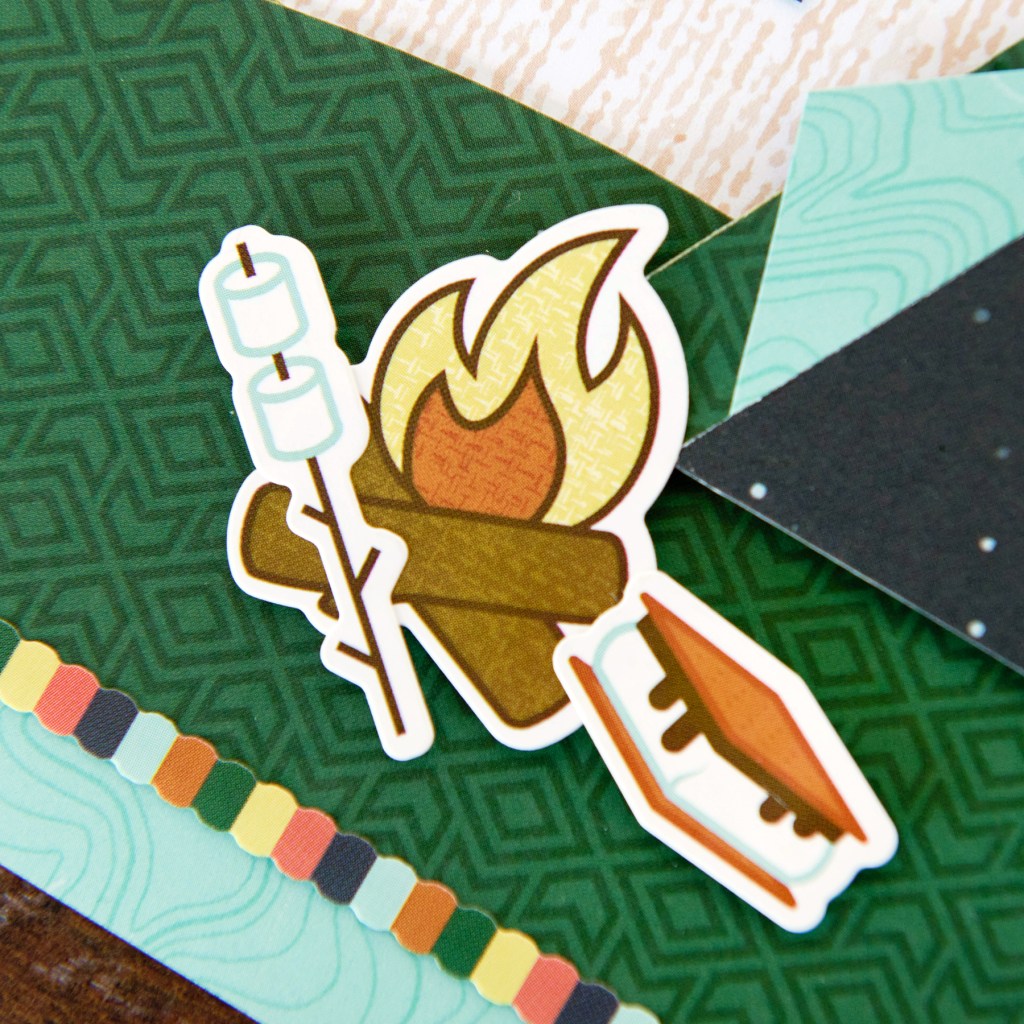
Step 7: Cluster leaves and wildlife stickers on top of triangle trees, using Foam Squares for added dimension.
Step 8: Journal with Black Dual-Tip Pen directly on base page along the side of the 8-1/2″ square.
Where are your go-to camping areas? Will you be making this camping scrapbook layout to preserve those memories? Share down below!

This is adorable! Love love this!!
Super cute!! Love the little tent.
Awesome layout. It makes me want to go camping so that I can use it.
Besides this being an awesomely cute layout, I particularly like the clever paper-saving trick of ‘hollowing out’ the teal topography paper!