July 25, 2022
July Completed Album Challenge PLUS A Family Scrapbook Layout
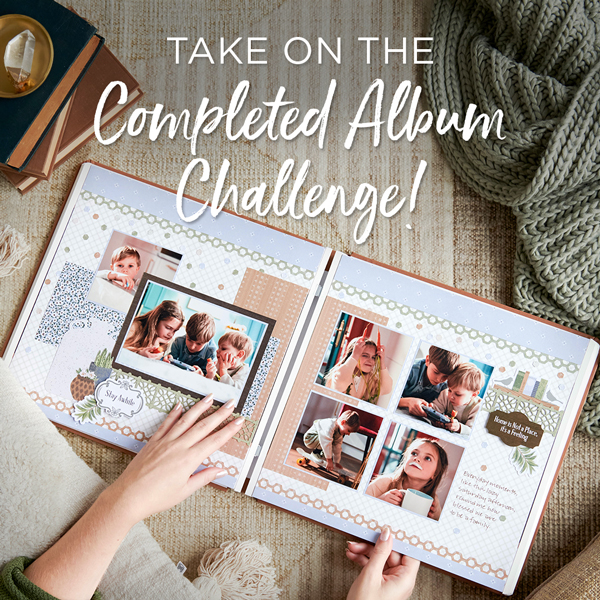
It’s always a great accomplishment to put that last little touch of an embellishment on or scribble a closing journal caption to finish out a layout and place it into an album… and voilà! A completed masterpiece! (Talk about a mood booster, right?!) Well, if you are nearing the finish line of your latest album, then you should take on the July Completed Album Challenge!
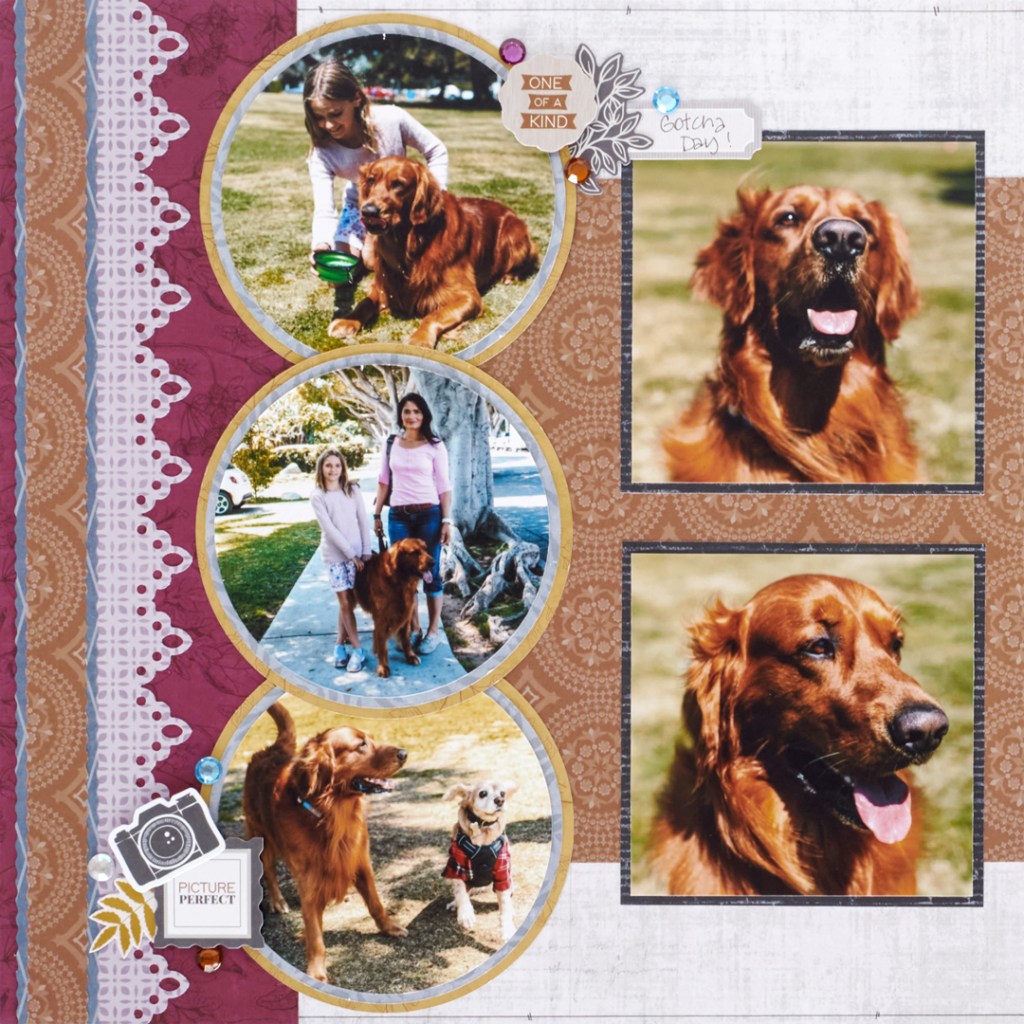
And this family scrapbook layout might just be the extra push you need to end the month on a fabulous (and finished!) note!
(Here’s how it works: If you completed an album this month (does not need to be from start to finish in July, just completed in July), make a short video flipping through each of the pages in your newly completed album. Then, post your video in the Virtual Crop Facebook Group with the hashtag #JulyCropDontStop for the chance to win!
Here’s an example of what your Completed Album Challenge video could look like!
For ALL the details on the Completed Album Challenge, check out this blog post.
And again, if you’re looking for a layout to create to finish your latest album, today’s post is here for you!

To create this layout you will need:
- Our Moments Paper Pack or (Shop Canada | Shop Australia)
- Our Moments Tone-on-Tone Paper Pack or (Shop Canada | Shop Australia)
- Our Moments Foiled Embellishments or (Shop Canada | Shop Australia)
- Our Moments Laser Cut Embellishments or (Shop Canada | Shop Australia)
- Our Moments Stickers or (Shop Canada | Shop Australia)
- Our Moments Variety Mat Pack or (Shop Canada | Shop Australia)
- Dollop Arch Frame Punch or (Shop Canada | Shop Australia)
- Border Maker System with Flourish Vine Border Maker Cartridge or (Shop Canada | Shop Australia)
- 12-inch Trimmer with Straight, Scoring & Wave Blades or (Shop Canada | Shop Australia)
- Custom Cutting System with Jumbo Circle & Circle Patterns or (Shop Canada | Shop Australia)
- Tape Runner or (Shop Canada | Shop Australia)
- Repositionable Tape Runner or (Shop Canada | Shop Australia)
- Foam Squares or (Shop Canada | Shop Australia)
- Black Dual-Tip Pen or (Shop Canada | Shop Australia)

Step 1: Use the neutral vintage tonal paper as the base for the left side of the spread.
Step 2: Use the light plum leaf grid designer paper as the base of the right side of the spread.
Step 3: Using the Dollop Arch Frame Punch, punch long one edge of a piece of neutral vintage tonal paper. Score at 1-1/2″. Fold over.
Step 4: Using a piece of mustard leaf outline tonal paper, punch along the edge with the Flourish Vine Border Maker Cartridge and System. Cut to measure 3″ x 12″. Tuck behind the fold.
Step 5: Using the outside edge of the Custom Cutting System Jumbo Circle Pattern and Red Blade, cut from dusted blue diamonds tonal paper. Cut to measure 9″ wide. Adhere behind the mustard paper.
Step 6: Adhere this whole piece to the right side of the spread.
Step 7: Cut a piece of the maroon vintage florals tonal paper to measure 3-1/2″ x 12″. Adhere along the left edge of the spread.
Step 8: Using the Dollop Arch Frame Punch, punch along an edge of the light plum leaf grid designer paper. Cut to measure 1-1/2″. Adhere 1/2″ from the left edge.
Step 9: Using the 12-inch Trimmer with the Wave Blade, cut a piece from the dusted blue diamonds tonal paper to measure 1″ x 12″. Adhere along the seam of the previous piece.
Step 10: Using the 12-inch Trimmer with the Wave Blade, cut a piece of the copper medallion designer paper to measure 3/4″ x 12″. Adhere to the top of the previous piece.
Step 11: Cut a piece of the copper medallion designer paper to measure 12″ x 8″. Cut this piece into two (8-1/2″ x 8″ and 3-1/2″ x 8″). Adhering on each side of the spread.
Step 12: Using the outside edge of the Custom Cutting System Circle Pattern and the Blue Blade, cut three circles from the mustard leaf outline designer paper. Using the outside edge of the Custom Cutting System Circle Pattern and the Green Blade, cut three circles from dusted blue leaf scatter designer paper. Using the outside edge of the Custom Cutting System Circle Pattern and the Red Blade, cut 3 photos. Layer and adhere to the spread.
Step 13: Cut photo mats from the charcoal brick designer paper to measure (2) 4-1/4″ x 4-1/4″ and (2) 6-1/4″ x 4-1/4″. Adhere to the spread.
Step 14: Cut a variety mat in half using the 12-inch Trimmer and Wave Blade. Turn one side over, adhering together by offsetting them. Adhere to the right side of the spread.
Step 15: Cut a piece of dusted blue diamonds tonal paper to measure 1/8″ x 12″. Weave into the laser-cut embellishments border. Adhere to the right side of the spread, along the top of the seam.
Step 16: Cut a piece of dusted blue diamonds tonal paper to measure 1/4” x 12″. Create bow by looping them, adhering in the middle with Precision Point Adhesive. Adhere to the spread.
Step 17: Adhere stickers and embellishments to the spread using Foam Squares on some for added dimension.
Step 18: Journal as desired.
Raise of hands — who is ready for finish their latest album by taking on the July Completed Album Challenge? Has this family scrapbook layout inspired you to craft to the album finish line?
