November 18, 2022
Be Brilliant And Bold: Mix And Match Scrapbooking Borders and DIY Card
There’s snow on the ground here at CM headquarters, but that doesn’t mean we can’t think warm thoughts! The Vivid Melodies collection is the perfect antidote to bloom forth brilliance, brightness and bold ideas! Turn up the dial with your next project with these mix and match scrapbooking borders and DIY card.
To create these borders and card, you will need:
- Vivid Melodies Jazzberry, Butterscotch, Lime Tart & Capri Blue Paper Packs or (Shop Canada | Shop Australia)
- Vivid Melodies Jazzberry, Butterscotch, Lime Tart & Capri Blue Embellishments or (Shop Canada | Shop Australia)
- White & Parakeet Shimmer Solid Cardstocks or (Shop Canada | Shop Australia)
- Leafy Vine Border Punch or (Shop Canada | Shop Australia)
- Custom Cutting System with Circle Patterns or (Shop Canada | Shop Australia)
- 12-inch Decorative Trimmer or (Shop Canada | Shop Australia)
- 12-inch Trimmer with Straight, Scoring & Scallop Blades or (Shop Canada | Shop Australia)
- Tape Runner or (Shop Canada | Shop Australia)
- Micro-Tip Scissors or (Shop Canada | Shop Australia)
- Repositionable Tape Runner or (Shop Canada | Shop Australia)
- Foam Squares or (Shop Canada | Shop Australia)
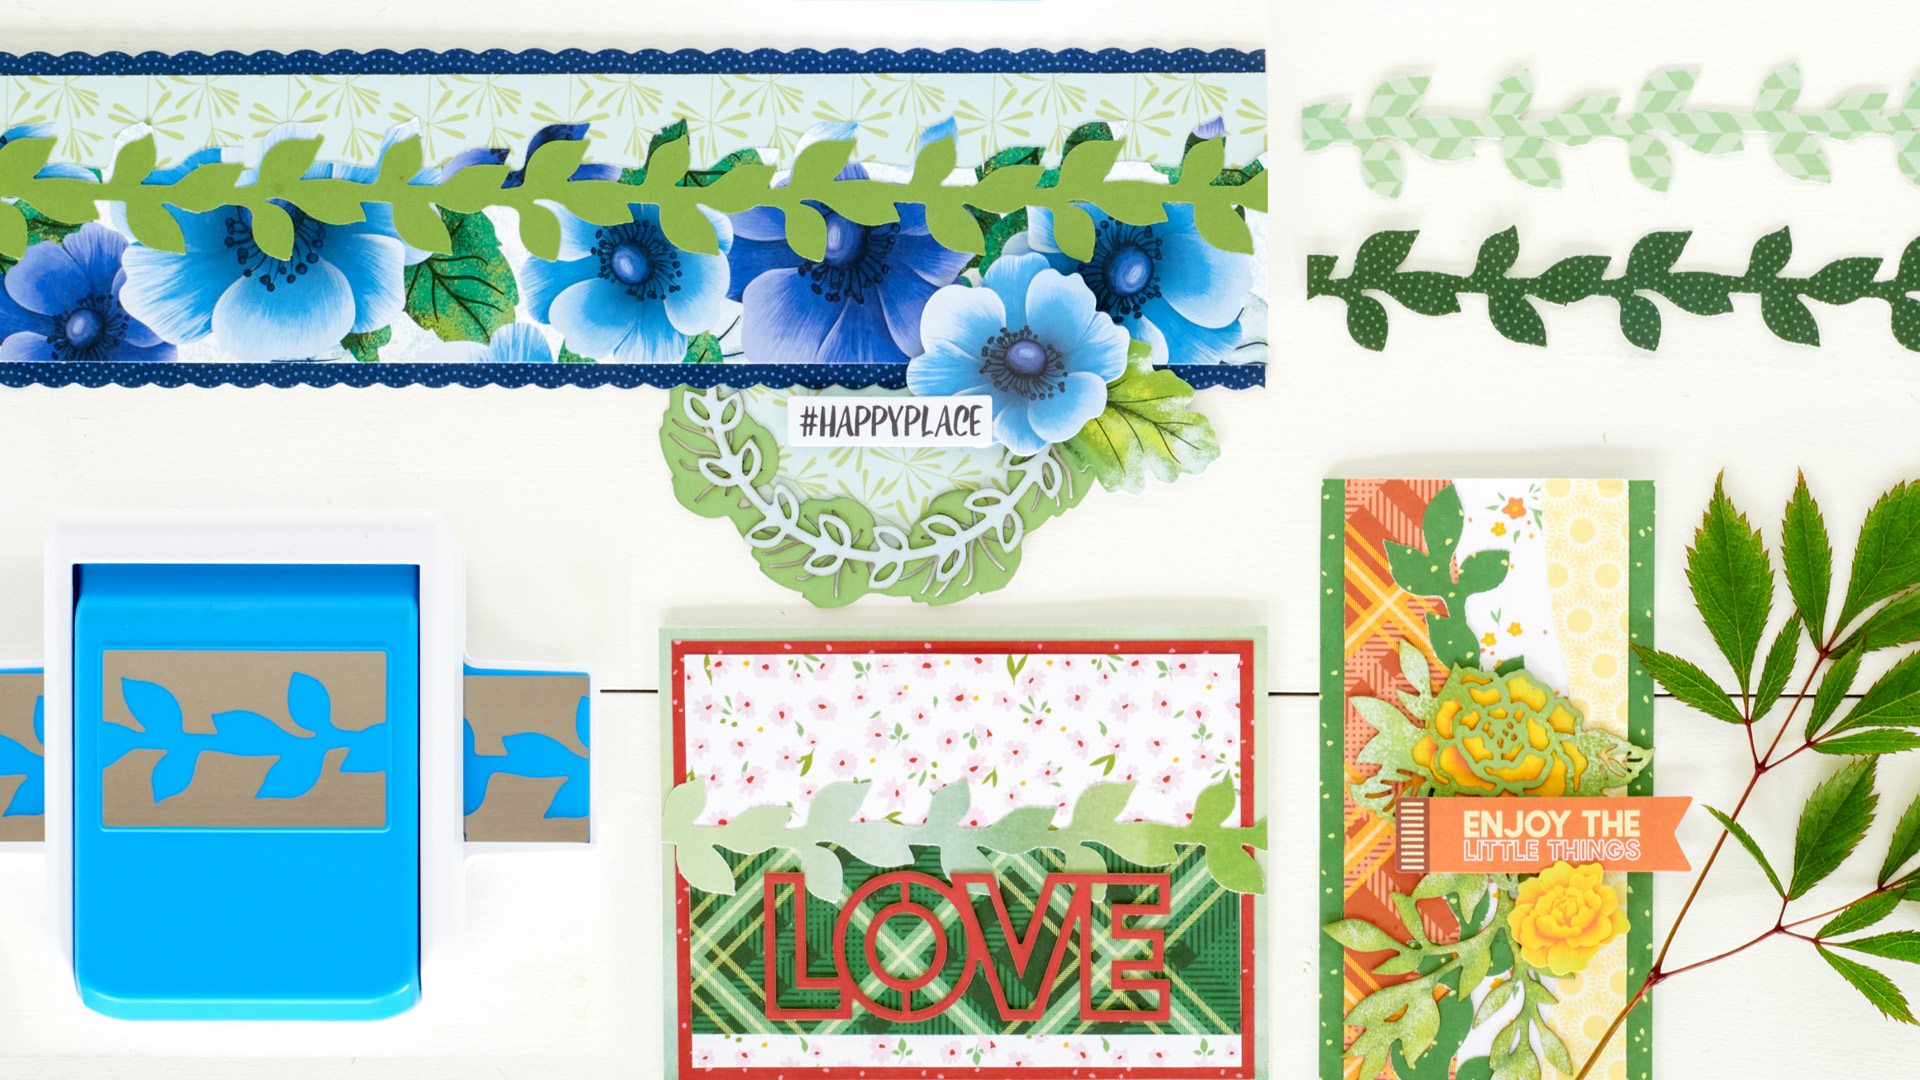
#HappyPlace Border

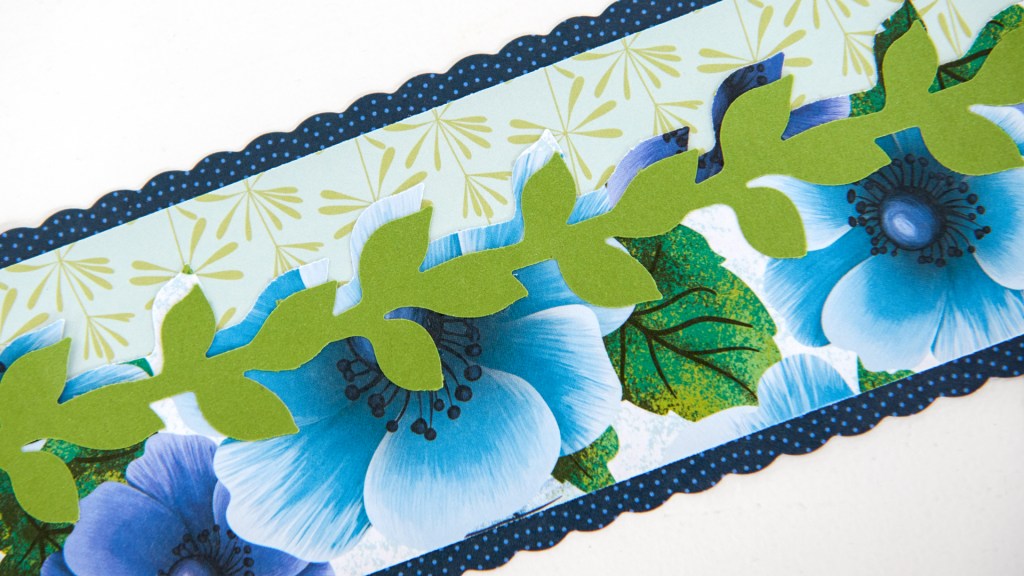
Step 1: Using the 12-inch Trimmer and the Scallop Blade, cut a 12″ x 3””strip with capri blue dotted scallop paper for the base. Using the 12-inch Trimmer and the Straight Blade, cut a 12″ x 1″ strip with lime tart dancing leaf bursts paper and adhere on the base, about 1/4″ from the top edge. Cut a 12″ x 1-1/2″ strip with capri blue anemones paper and adhere on the base, about 1/4″ from the bottom edge.
Step 2: Using the Leafy Vine Border Punch, punch a shape with capri blue anemone paper and another with Parakeet Shimmer Solid Cardstock. Layer and adhere on the border as shown.
Step 3: Using the inside edge of the largest Custom Cutting System Circle Pattern and the Green Blade, cut a circle with lime tart dancing leaf bursts paper. Adhere behind the circle capri blue green leafy laser-cut embellishment. Adhere the circle capri blue aqua leafy laser-cut embellishment on top. Adhere behind the border as shown.
Step 4: Top with capri blue anemone flower, leaf and “#HappyPlace” embellishment.
Enjoy The Little Things Border

Step 1: Cut a 3″ x 12″ strip of lime tart scattered dots paper for the base. Cut a 2-1/2″ x 12″ strip with butterscotch petite flowers paper and adhere on the base.
Step 2: Using the swell edge of the 12-inch Decorative Trimmer, cut a 1-1/4″ x 12″ strip with butterscotch plaid paper. Adhere along the left edge of the petite flowers strip. Cut a 3/4″ x 12″ swell strip with butterscotch shining suns paper and adhere along the right edge of the petite flowers strip.
Step 3: With the Leafy Vine Border Punch, punch two borders with lime tart scattered dots paper. Using scissors, cut the strip into 2-1/2″ segments. Adhere along the plaid swell edge, overlapping as necessary.
Step 4: Adhere a butterscotch yellow rose behind the green rose laser-cut embellishment. Adhere on the border, along with the lime tart laser-cut branches and butterscotch rose and title embellishments.
Love Card

Step 1: Create the card base. Cut an 8-1/2″ x 5-1/2″ piece with White Solid Cardstock. Using the 12-inch Trimmer and the Scoring Blade, score along the long edge at 4-1/4″ and fold in half.
Step 2: Cut a 5-1/2″ x 4-1/4″ piece with lime tart ombré wash paper and adhere on the front of the card. Cut a 5-1/4″ x 4″ piece with jazzberry scattered dots paper and adhere on the ombré wash piece. Cut a 5″ x 3-3/4″ piece with Jazzberry petite flowers paper and mount on top.
Step 3: Cut a 5″ x 1-3/4″ strip with lime tart plaid paper and adhere on the card, about 1/2″ from the bottom edge. With the Leafy Vine Border Punch, punch a border with lime tart ombré wash paper and adhere on the card, trimming the ends.
Step 4: Adhere the jazzberry “Love” laser-cut embellishment.
Which of these mix and match scrapbooking projects will you try first?

Love the ideas for the borders