November 25, 2022
Have Your Albums Be Dressed To Chill With These Winter Scrapbook Borders And DIY Card
Spring can call for rain boots and the rebirth of vibrant hues and clothing. Summer makes a statement with hot-hot-hot trends of flowing dresses, shorts and flip-flops. Autumn is all about comfy layering — think flannels, cardigans and boots. And winter is a wardrobe wonder on its own with puffer jackets and long coats, mittens and chunky turtleneck sweaters — this season comes dressed to chill! You know what else comes dressed to chill? These winter scrapbook borders and DIY card that are perfect for your fun and frosty days when you bundle up for beautiful memories.
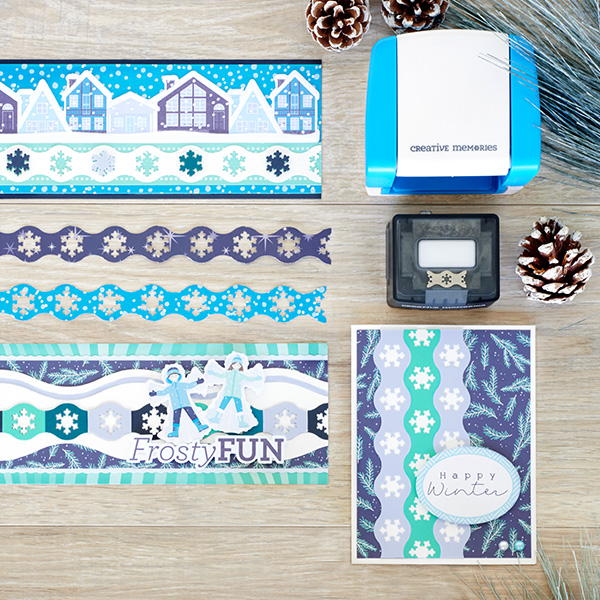
To create these borders and card, you will need:
- Polar Lights Paper Pack or (Shop Canada | Shop Australia)
- Polar Lights Flocked Borders or (Shop Canada | Shop Australia)
- Polar Lights Embellishments or (Shop Canada | Shop Australia)
- Polar Lights Stickers or (Shop Canada | Shop Australia)
- White, Beige, Navy, Island Waters, Dark Sea Green & Baby Blue Solid Cardstocks or (Shop Canada | Shop Australia)
- Original Border Maker System with Snowflake Circle Chain Border Maker Cartridge or (Shop Canada | Shop Australia)
- 12-inch Decorative Trimmer or (Shop Canada | Shop Australia)
- 12-inch Trimmer with Straight, Wave & Scoring Blades or (Shop Canada | Shop Australia)
- Micro-Tip Scissors or (Shop Canada | Shop Australia)
- Tape Runner or (Shop Canada | Shop Australia)
- Repositionable Tape Runner or (Shop Canada | Shop Australia)
- Foam Squares or (Shop Canada | Shop Australia)

Dressed To Chill Border
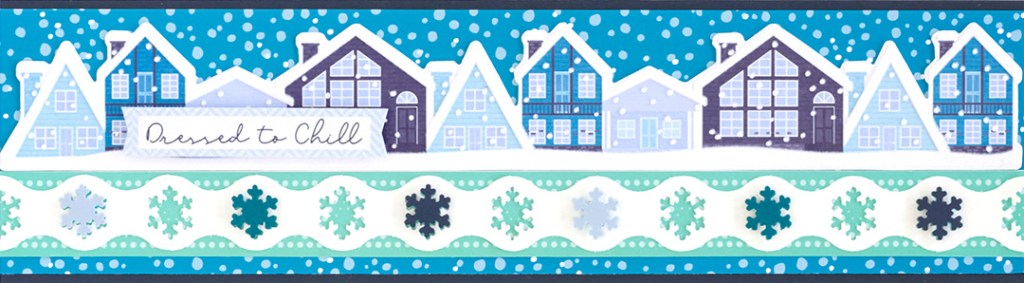
Step 1: Cut a 12″ x 3-1/4″ strip with Navy Solid Cardstock for the base. Cut a 12″ x 3″ strip with snow designer paper and adhere on the base.
Step 2: Cut out a 12″ x 1″ mint dotted triangles strip from border strips designer paper and adhere on the border. Using the Snowflake Circle Chain Cartridge, punch a border with White Solid Cardstock. Adhere on the mint strip. Using the Snowflake Circle Chain Cartridge, punch borders with Baby Blue, Dark Sea Green and Navy Solid Cardstocks, saving the borders for another purpose. Adhere a few of the snowflakes on the border with Foam Squares for added dimension.
Step 3: Mount the village flocked border above the mint dotted triangles piece. Adhere the “Dressed to chill” sticker using Foam Squares for added dimension.
Frosty Fun Border
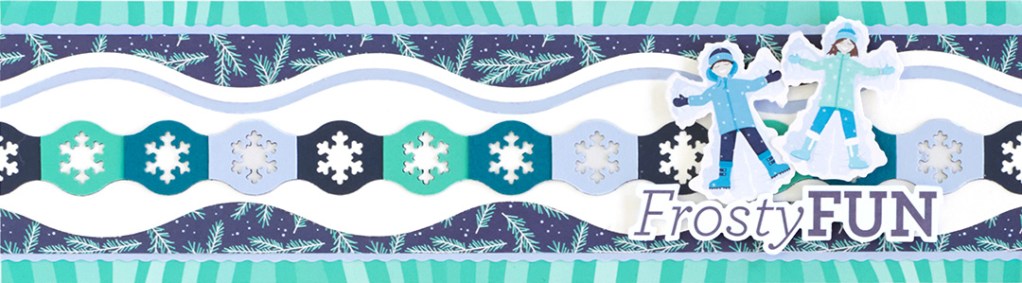
Step 1: Cut a 12″ x 3-1/4″ strip with turquoise northern light swells designer paper for the base. Using the 12-inch Trimmer and the Wave Blade, cut a 12″ x 2-3/4″ strip with Baby Blue Cardstock and adhere on the base. With the 12-inch Trimmer and the Straight Blade, cut a 12″ x 2-1/2″ strip with navy pine needles designer paper and mount on top.
Step 2: Using the wavy edge of the 12-inch Decorative Trimmer, cut a wavy edge on both sides of a 12″ x 2″ strip of White Solid Cardstock. Cut off a 1/8″ sliver from one of the sides. Cut another wavy strip with Baby Blue Solid Cardstock, about 1/2″ wide. Adhere all together on the border as shown.
Step 3: Using the Snowflake Circle Chain cartridge, punch a border with each Navy, Island Waters, Dark Sea Green and Baby Blue Solid Cardstocks. Use the navy border as the base. Cut apart the other three borders and adhere sections on the navy base, alternating hues as shown. Mount on the border.
Step 4: Adhere stickers and embellishments using Foam Squares for added dimension.
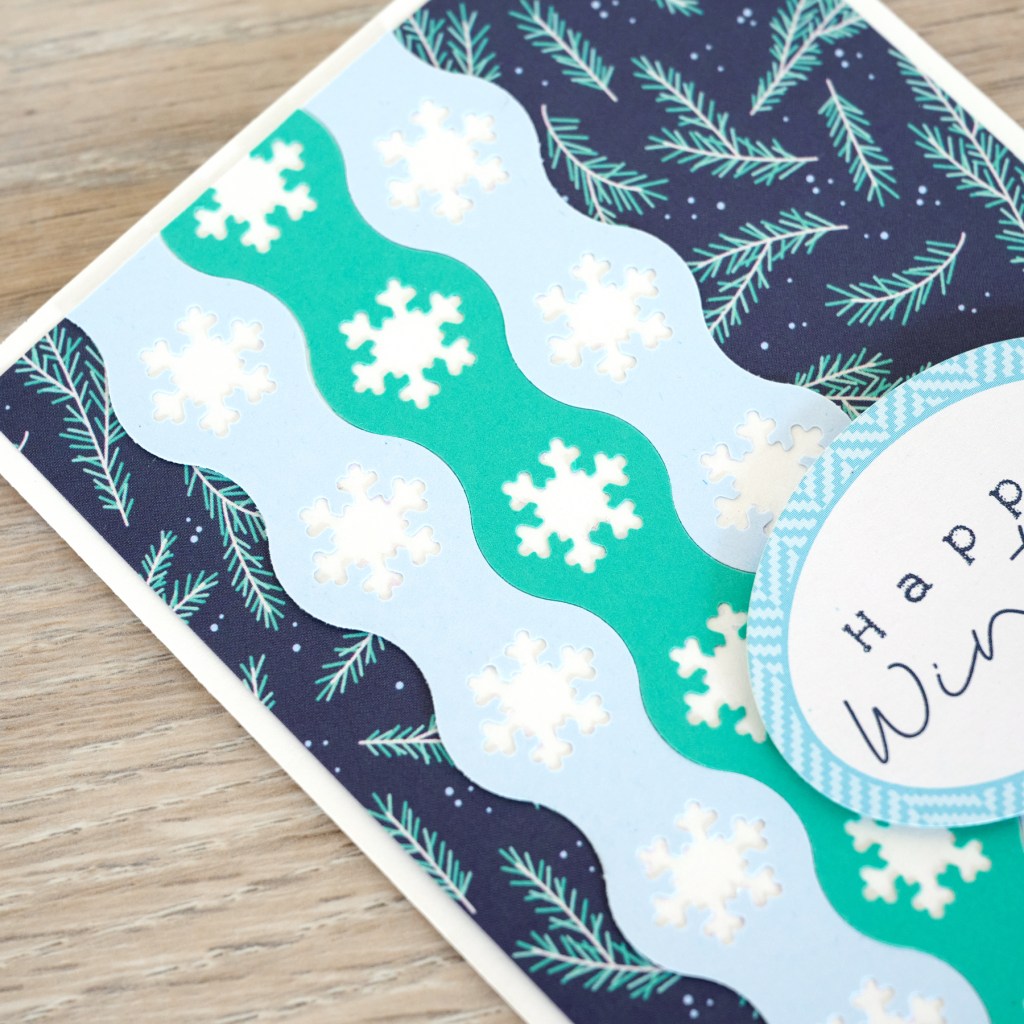
Happy Winter Card
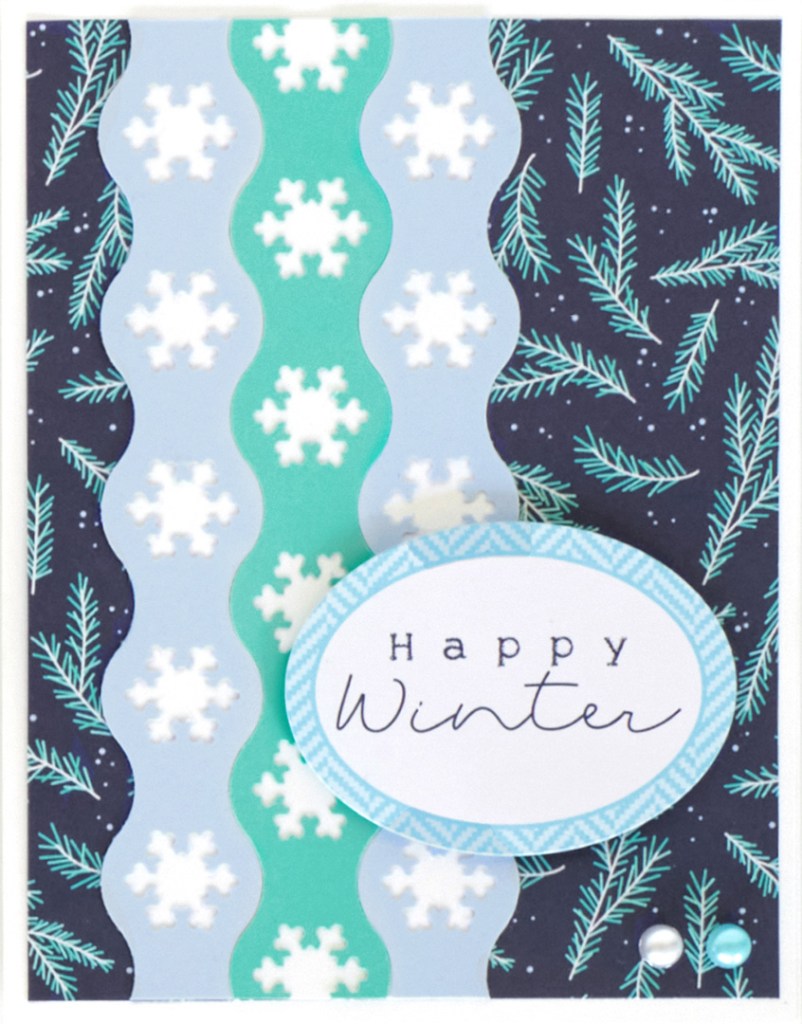
Step 1: Create the card base. Cut an 8-1/2″ x 5-1/2″ piece of White Solid Cardstock. Using the 12-inch Trimmer and the Scoring Blade, score along the long edge at 4-1/4″ and fold in half.
Step 2: Cut a 4″ x 5-1/4″ piece with navy pine needles designer paper and adhere on the front of the card.
Step 3: Using the Snowflake Circle Chain cartridge, punch a border with both Baby Blue and Island Waters Solid Cardstocks. Cut a 5-1/4””x 2″ piece of White Solid Cardstock. Adhere the borders on the strip as shown, trimming off the excess. Mount on the card.
Step 4: Adhere a title sticker using Foam Squares for added dimension Add gems as desired.
Will you be making these winter scrapbook borders for your winter-themed albums? Do you like the dramatic fashion statement of the DIY card?

I LOVE the card and border ideas, Krislyn! The side-by-side punched borders look great and the layered borders are great!
Where did you get the border with houses?
Deb, it’s one of the Polar Lights Flocked Borders.