January 20, 2023
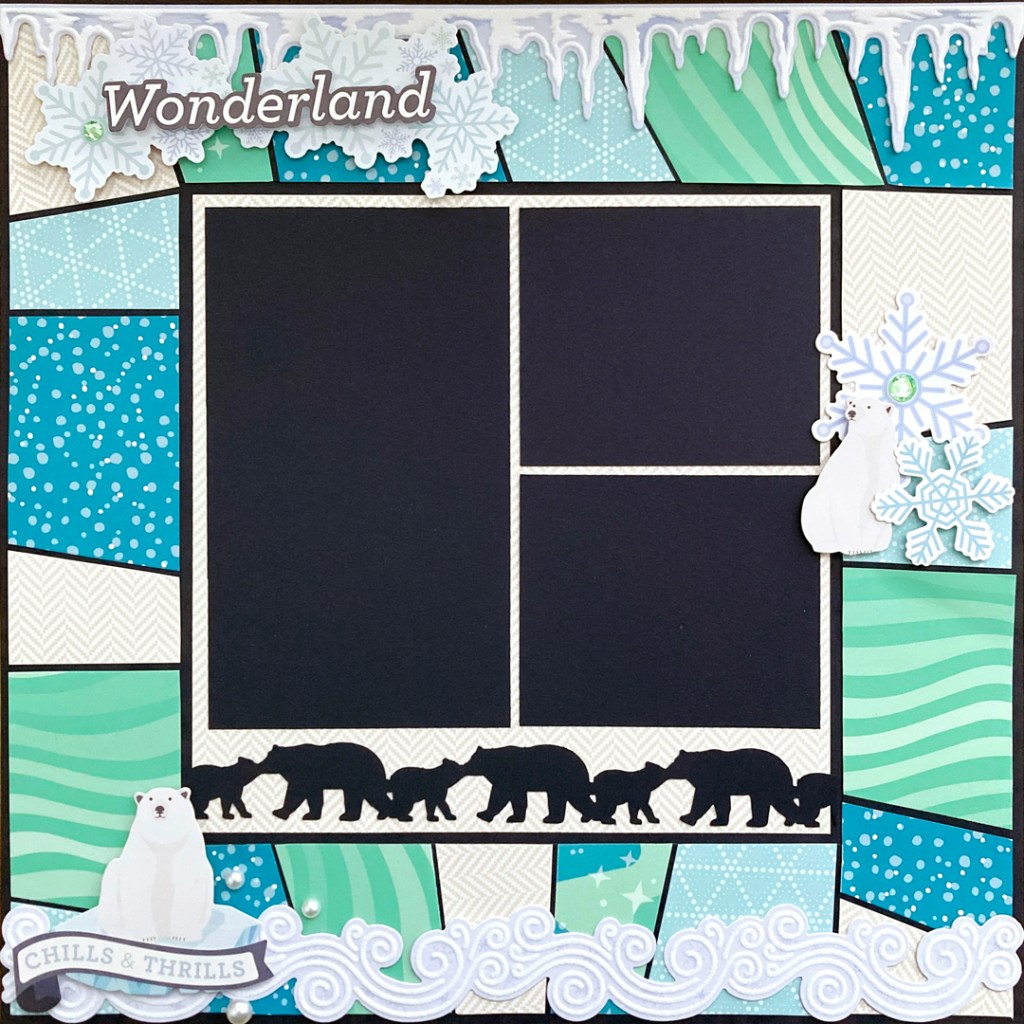
Frame A Frosty Presence With This Winter Scrapbook Layout

Some like to hibernate during winter (and we don’t blame you!), but others like to embrace the cold with an array of activities — winter festivals, dogsledding, ice bars, golfing on a frozen lake, ski races, ice-sculpting and so much more! Blog contributor Sachiyo Omitsu put the magic of winter at the forefront and made this frosty and framing winter scrapbook layout! Ready, set, snow!
To create this layout you will need:
- Polar Lights Paper Pack or (Shop Canada | Shop Australia)
- Polar Lights Embellishments or (Shop Canada | Shop Australia)
- Polar Lights Flocked Borders or (Shop Canada | Shop Australia)
- Polar Lights Stickers or (Shop Canada | Shop Australia)
- Navy Solid Cardstock or (Shop Canada | Shop Australia)
- Polar Bears Border Punch or (Shop Canada | Shop Australia)
- 12-inch Trimmer or (Shop Canada | Shop Australia)
- All-Purpose Scissors or (Shop Canada | Shop Australia)
- Tape Runner or (Shop Canada | Shop Australia)
- Repositionable Tape Runner or (Shop Canada | Shop Australia)
- Foam Squares or (Shop Canada | Shop Australia)

Step 1: Use a piece of Navy Solid Cardstock as the base.
Step 2: Cut a piece of Navy Solid Cardstock to measure 11-3/4″ x 11-3/4″ and cut out a 2″-wide frame. Set aside the square piece.

Step 3:
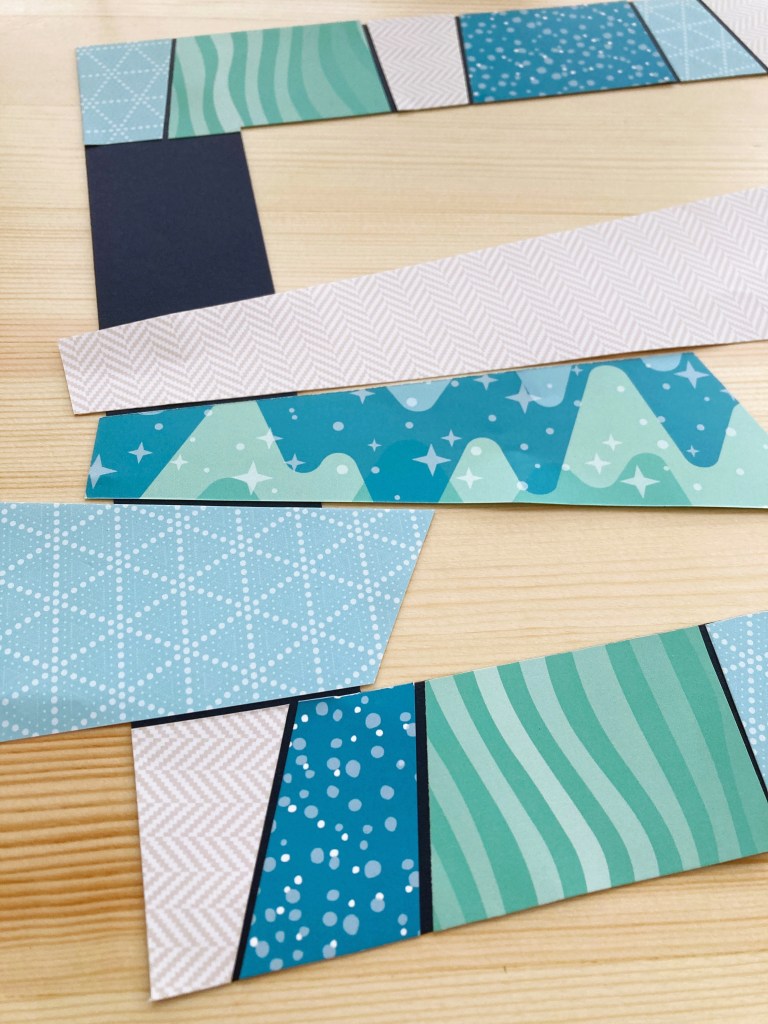
- Cut four 4″ x 12″ strips of various designer papers.
- Cut each strip as shown.
- Adhere the strip to the navy frame, spacing 1/8″ each other as shown. Trim the excess.
- Add to the base.
Step 4: Cut a 7-1/2″ x 7-1/2″ from the herringbone designer paper and adhere to the page.
Step 5: Use the Polar Bears Border Punch to punch a border from the navy square piece that you cut in Step 2. Add to the page.
Step 6: Cut one 3-9/16″ x 6-1/8″ mat and two 3-9/16″ x 3″ mats from a piece of Navy Solid Cardstock.
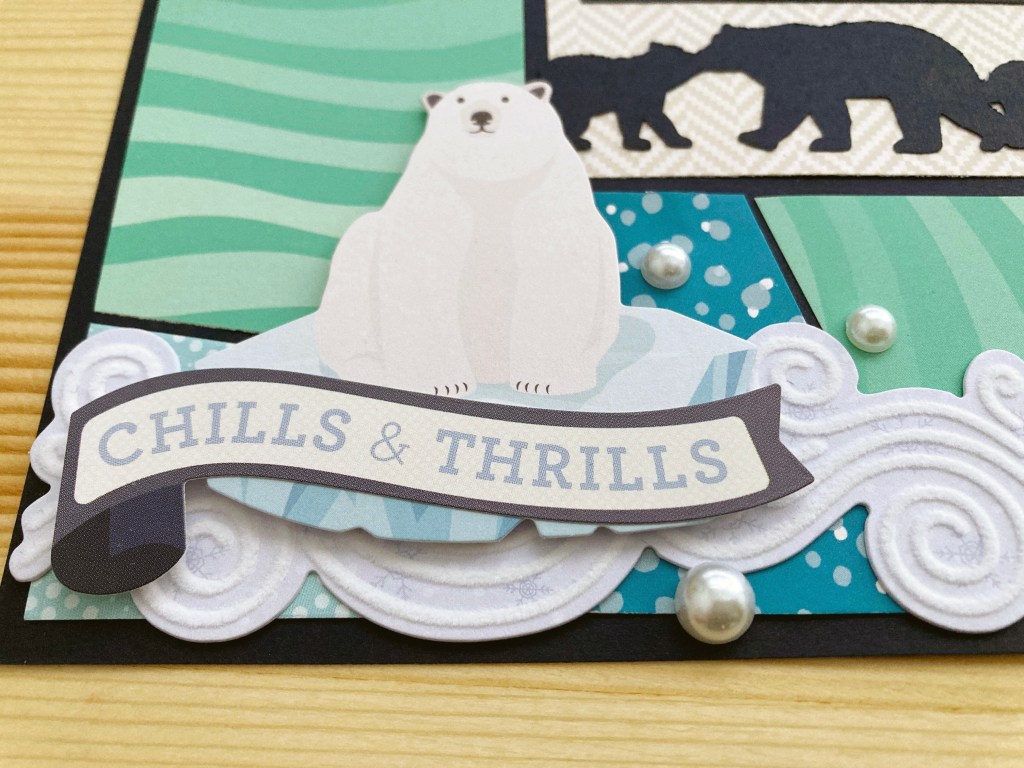


Step7: Adhere flocked borders, stickers, embellishments and mats, using Foam Squares on some for added dimension.
What cold-weather, wintertime memories would you shovel onto this winter scrapbook layout?

Fabulous! Thank you for sharing this
I love this
I’m going to try to adapt this for the 7×7 albums I’m making for my granddaughters. (Yes, I still have some CM 7×7 albums!)
I’m confused why she started didn’t start with a full 12” navy piece? Would you mount the whole thing on a 12x 12 when done? Maybe I missed something.
Julie, I see what you mean. Maybe it has to do with the 1/8″ spacing between the border strips, so that you have an equal 1/8″ around the outside as well as between the paper strips?? I think I will cut the strips as indicated and mock it up in a dry fit before cutting the navy paper to see if that is the case. Good luck!
Do you have a pattern to make the pieces? Needs more instructions
Yes. I am confused. Lol
Could someone please give sizes of small pieces
I’d also like some more instructions on how to do the mosaic/ frame pieces.
I am confused. Lol. Are each strip of the designer papers cut into 4 to make the design.
I found this video on youtube. Sachi’s Creative Mind
It shows the sizes and it is very easy.