January 27, 2023
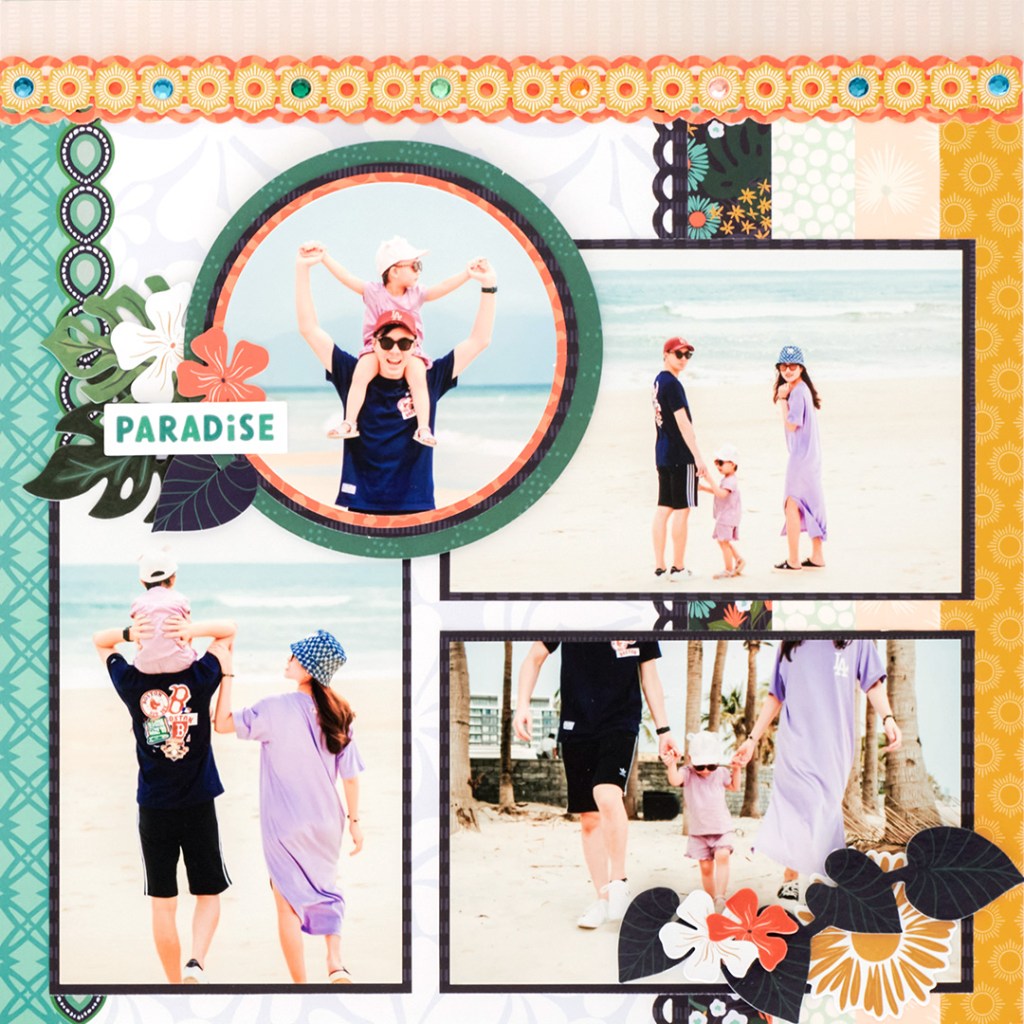
This Tropical Scrapbook Layout is Turtle-y Awesome

Let’s be honest, nature is amazing. And whether you’re on a solo trip, honeymoon or family vacation, visiting beautiful beaches and jaw-dropping tropical forests can leave you pondering, “Wow, how can this be real?!” Idyllic locations across the world — from Aruba to Fiji, Isla Mujeres to Zakynthos, the Great Barrier Reef and Tahiti (and more!) — are home to some of Earth’s most amazing plants, exotic flowers, majestic mammals, sea creatures, soaring birds and reptiles. Well, after soaking up the sunshine and wondering about the wildlife, make this turtle-y awesome tropical scrapbook layout to remember these moments of paradise forever.
To create this two-page spread you will need:
- Tropic Time Paper Pack or (Shop Canada | Shop Australia)
- Tropic Time Tone-on-Tone Paper Pack or (Shop Canada | Shop Australia)
- Tropic Time Stickers or (Shop Canada | Shop Australia)
- Tropic Time Letter Stickers or (Shop Canada | Shop Australia)
- Tropic Time Embellishments or (Shop Canada | Shop Australia)
- Tropic Time Variety Mat Pack or (Shop Canada | Shop Australia)
- 12-inch Trimmer or (Shop Canada | Shop Australia)
- Original Border Maker System with Mirrored Scallops Chain Border Maker Cartridge or (Shop Canada | Shop Australia)
- Piece by Piece Mini Trio Punch Set or (Shop Canada | Shop Australia)
- Custom Cutting System with Circle & Gemstone Patterns or (Shop Canada | Shop Australia)
- 2-Way Corner Rounder or (Shop Canada | Shop Australia)
- Tape Runner or (Shop Canada | Shop Australia)
- Repositionable Tape Runner or (Shop Canada | Shop Australia)
- Foam Squares or (Shop Canada | Shop Australia)
- Black Dual-Tip Pen or (Shop Canada | Shop Australia)
- Scissors

Step 1: Use the baby blue oversized petals tonal paper as the base for the spread.
Step 2: Cut 10 pieces of various papers to measure 1″ x 12″.
Step 3: Adhere four strips to the inside edges of the spread.
Step 4: Adhere two strips to the outside edges of the spread.
Step 5: Cut two strips from the sand tick marks tonal paper to measure 12″ x 1″. Adhere along the top edge of both sides of the spread.
Step 6: Using the Original Border Maker System with the Mirrored Scallops Border Maker Cartridge, punch two borders from tangerine geometric weaves paper. Adhere the border along the edges of the previous strips along the top.
Step 7: Using the Original Border Maker System with the Mirrored Scallops Border Maker Cartridge, punch a border from the navy tick marks tonal paper. Cut this border in half vertically on the 12-inch Trimmer. Adhere a half along each of the edges of the four strips (inside edges) as shown. Next, still using the Mirrored Scallops Border Maker Cartridge, punch a 4-1/2″ border from the navy tick marks tonal paper. Cut this border in half vertically and set aside.
Step 8: Make photos mats — (3) 4-1/4″ x 6-1/4″ and (1) 4-1/4″ x 4-1/4″ using navy tick marks tonal paper.
Step 9: Cut circles using the Circle Custom Cutting System Pattern — (2) from the outside edge of the smallest pattern and the Green Blade, (2) from the outside edge of the smallest pattern and the Blue Blade and (2) from the outside edge of the medium pattern and the Red Blade. Cut photos — (2) from the outside edge of the smallest pattern and the Red Blade. Layer circles and photos.
Step 10: Adhere all of the photos/mats to the spread.
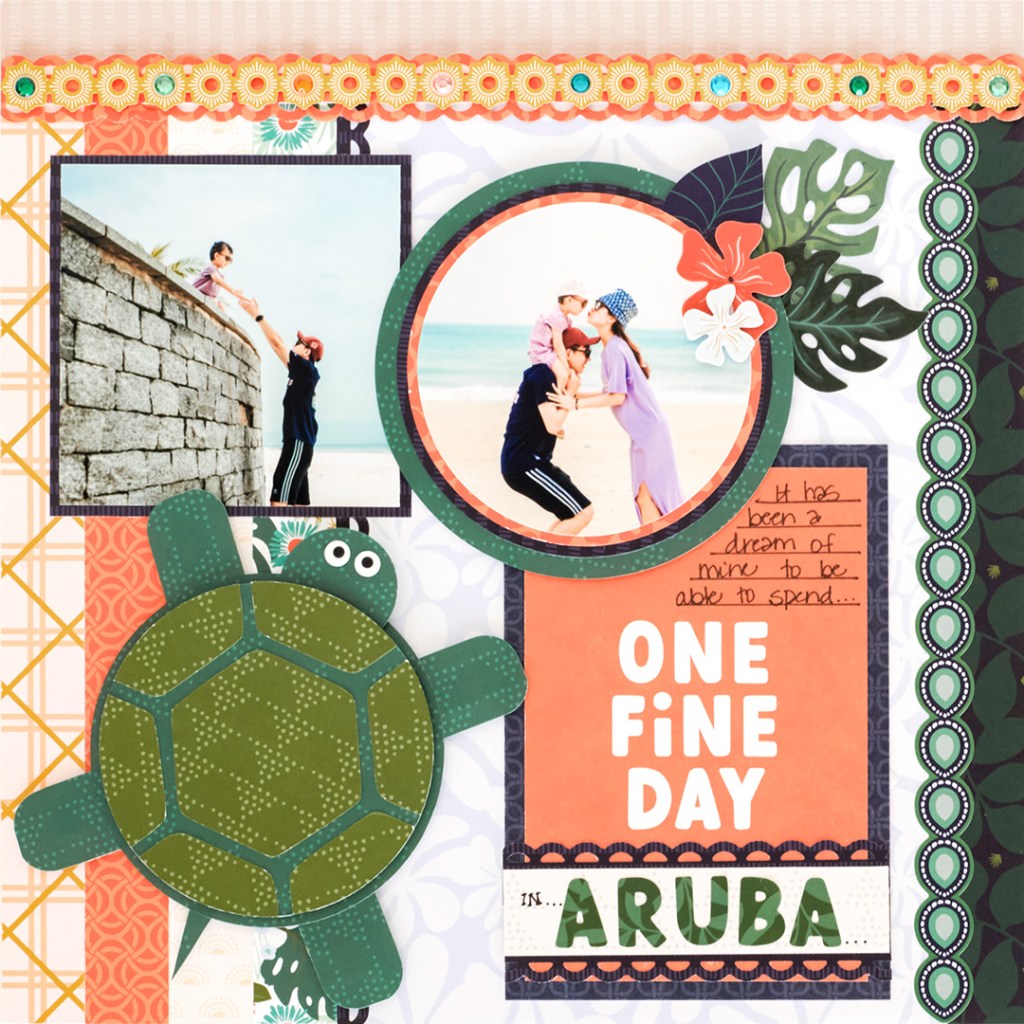
Step 11: Create the turtle:
- Cut four hexagons from the inside edge of the Gemstone Custom Cutting System Pattern and the Blue Blade from green dotted triangles tonal paper.
- Adhere to the dark green dotted triangles tonal paper, with one hexagon in the middle. Cut the remaining three hexagons in half, then adhere them around the outer edges of the previous piece. Place the smallest Circle Custom Cutting System Pattern over the top of the shapes, aligning it, then cut on the outside edge with the Red Blade.
- Cut another circle from the dark green dotted triangles tonal paper with the outside edge of the smallest Circle Custom Cutting System Pattern and the Green Blade.
- Layer the piece with the hexagons on top of this one using Foam Squares for depth on the shell.
- Cut two pieces from the dark green dotted triangles tonal paper to measure 4″ x 1″. Round corners with the 2-Way Corner Rounder. Cut each strip in half, then adhere behind the shell for the legs.
- Using the inside edge of the smallest Circle Custom Cutting System Pattern and the Red Blade, cut from the dark green dotted triangles tonal paper. Adhere behind the shell for the head.
- Use the large and small circle punches from the Piece by Piece Mini Trio Punch Set to punch from White and Black Solid Cardstock for the eyes.
- Using a scissors, hand-cut a small piece for the tail from dark green dotted triangles tonal paper.
- Adhere the turtle to the layout using Foam Squares for added dimension.
Step 12: Adhere the small “One fine day” variety mat on top of a larger variety mat. Add Tropic Time Letter Stickers for a title on a small piece of light sand dotted triangles tonal paper and back it with the 4-1/2″ mirrored scallops border strips you set aside in Step 7.
Step 13: Adhere the remaining stickers and embellishments, using Foam Squares on some for added dimension.
Step 14: Journal as desired.
Do you like the cute turtle on this tropical scrapbook layout? What photos, memories or tropical locations would you showcase on it?

This is an interesting layout and the turtle instructions are great. Thank you for having something new in the layout.
Melissa, I love this layout. I have a trip planned to go to Aruba in August so definitely will use this. Thanks!
Cute Layout!! ?
I love that turtle! Thanks for sharing!