February 1, 2023
Give These Winter Scrapbook Borders A Bear Hug
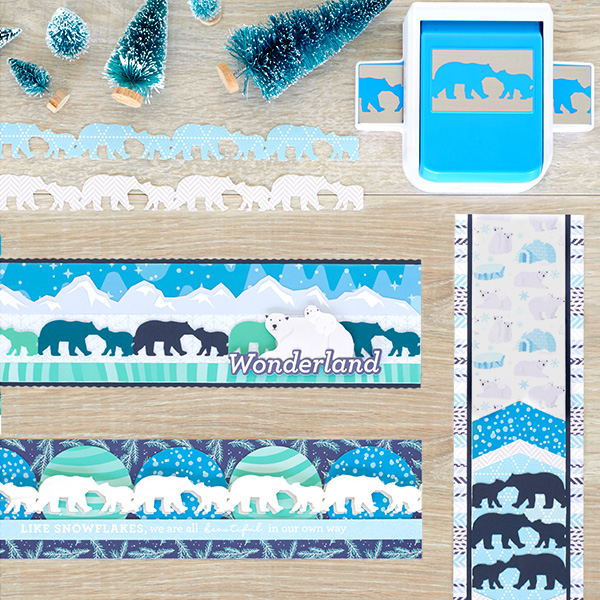
Bundle up because today’s blog features a few border ideas that’ll have your layouts looking cool in no time! Whether you’re scrappin’ your memories of playing in the snow, trips to the zoo or visiting cold-weather destinations, you’ll want to check these bear-y cute borders out!
To create these borders and card you will need:
- Polar Lights Paper Pack or (Shop Canada | Shop Australia)
- Polar Lights Embellishments or (Shop Canada | Shop Australia)
- Polar Lights Stickers or (Shop Canada | Shop Australia)
- White, Beige, Navy, Island Waters, Baby Blue & Dark Sea Green Solid Cardstocks or (Shop Canada | Shop Australia) — Dark Sea Green Solid Cardstock is currently out of stock and will be returning in March
- Polar Bears Border Punch or (Shop Canada | Shop Australia)
- Custom Cutting System with Circle Patterns or (Shop Canada | Shop Australia)
- 12-inch Trimmer with Straight & Wave Blades or (Shop Canada | Shop Australia)
- Micro-Tip Scissors or (Shop Canada | Shop Australia)
- Tape Runner or (Shop Canada | Shop Australia)
- Repositionable Tape Runner or (Shop Canada | Shop Australia)
- Foam Squares or (Shop Canada | Shop Australia)

Wonderland Border

Step 1: Using the Wave Blade, cut a 12? x 3-1/4? strip with Navy Solid Cardstock for the base. Cut a 12? x 1-1/4? strip of aurora paper and adhere near the top of the base. Cut a 12? x 1/2? strip of green swells paper and adhere near the bottom. And cut a 12? x 1-1/4? strip of snowflakes paper and adhere in the middle.
Step 2: Using the Polar Bears Border Punch, punch borders with White, Island Waters, Dark Sea Green and Navy Solid Cardstock. Use the white border as the base. Cut apart the other borders into mama/baby bear sections. Adhere sections on the base, alternating colors. Mount on the border.
Step 3: Add a mountain border sticker. Adhere embellishments using foam squares.
Like Snowflakes Border
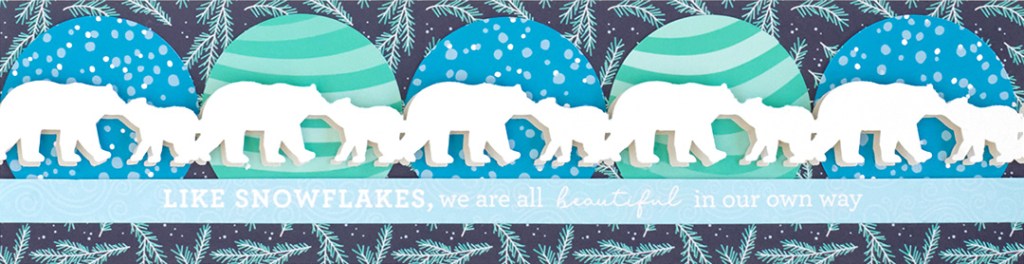
Step 1: Cut a 12? x 3? strip of pine boughs paper for the base.
Step 2: Using the inside of the medium Custom Cutting System Circle Pattern and the Red Blade, cut three circles of snowy paper and two circles of green swells paper. Trim off the bottom 1/4? of each circle and adhere side by side on the border, alternating colors as shown. Trim out the “Like Snowflakes…” strip from designer paper and adhere just beneath them, about 1/2? from the bottom edge of the base.
Step 3: Using the Polar Bears Border Punch, punch borders with Beige and White Solid Cardstock. Adhere the beige polar bears border on top of the circle border you created in Step 2. Adhere the white polar bears border on top and offset slightly, using foam squares.
Polar Bears Border

Step 1: Cut a 3-1/4? x 12? strip of striped paper for the base. Cut a 2-5/8? strip of Navy Cardstock and adhere on the base. Cut a 12? x 2-3/8? strip of polar bears paper and mount on top.
Step 2: Cut a 2-3/8? x 1-1/2? strip of snowy paper. Fold in half and snip off a small section from one side. Trim off an equal section from the opposite side so that when unfolded, it forms a chevron. Repeat with another strip of snowy paper and two of beige chevrons paper.
Step 3: Cut a 2-3/8? x 4? piece of aqua triangles paper. Adhere on the border, about 2” from the bottom edge. Adhere the chevrons above and below, as shown.
Step 4: Using the Polar Bears Border Punch, punch a border with Navy Cardstock. Trim into 2-3/8? sections and adhere on the border.
What are your thoughts on these scrapbook borders? Will you be making them for your wintertime albums?

These are all super cute!
love them all!