February 7, 2023
Meditate On These Marvels: Tranquil Scrapbook Borders And DIY Card

Sometimes in life, you just need to step back, take a deep breath and meditate in the moment. And an activity that requires focus and mindfulness… it’s scrapbooking! It can help with stress management and promote relaxation. (Do you agree?!) Losing oneself in the pictures, the memories, the hands-on creativity, the embellishing. If you need a moment to kick back or reflect on relaxing moments near and dear to you, then take a look at these tranquil scrapbook borders and DIY card!
To create these borders and card you will need:
- Serenity Paper Pack or (Shop Canada | Shop Australia)
- Serenity Fast2Fab™-Inspired Designer Paper Pack or (Shop Canada | Shop Australia)
- Serenity Laser Cut Borders or (Shop Canada | Shop Australia)
- Serenity Stickers or (Shop Canada | Shop Australia)
- Baby Blue, Purple Ice, Beige & White Solid Cardstocks or (Shop Canada | Shop Australia)
- Square Tile Punch or (Shop Canada | Shop Australia)
- 12-inch Trimmer or (Shop Canada | Shop Australia)
- Micro-Tip Scissors or (Shop Canada | Shop Australia)
- Tape Runner or (Shop Canada | Shop Australia)
- Repositionable Tape Runner or (Shop Canada | Shop Australia)
- Foam Squares or (Shop Canada | Shop Australia)

Serenity Border
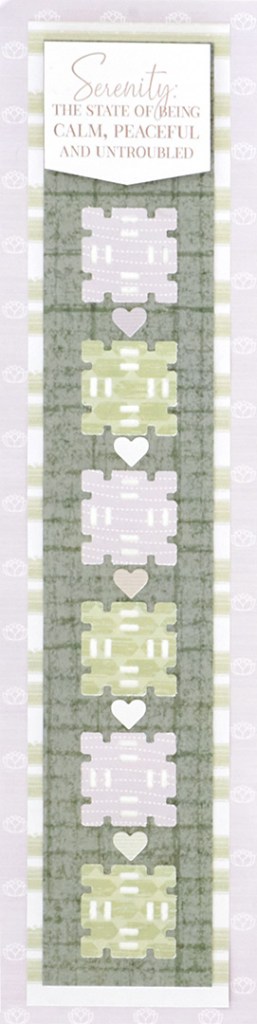
Step 1: Cut a 3” x 12” strip with lavender water lilies paper for the base. Cut a 2-1/4” x 11-1/2” strip with stripes paper and adhere on the base.
Step 2: Using the Square Tile Punch, punch six times at regular intervals along a 2″ x 11″ strip of green robe texture designer paper. Adhere on a 2″ x 11″ strip of White Solid Cardstock and then adhere the strip on the border. (Save the punched squares for another purpose.)
Step 3: Punch three green tub tiles designer paper and three lavender lines Fast2Fab™-inspired paper square tiles. Adhere in the punched-out spaces on the green strip.
Step 4: Adhere stickers.
Square Tiles Border

Step 1: Cut a 12″ x 2-3/4″ strip with Beige Solid Cardstock for the base. Cut a 12″ x 2-1/2″ strip with white petals designer paper and adhere on the base.
Step 2: Cut five 1-3/4″ x 1-3/4″ squares with green tub tiles designer paper and five with blue petal mosaic paper. Adhere on the border, alternating hues and angles, using the photo as a guide for placement. Adhere a laser-cut border down the middle.
Step 3: Using the Square Tile Punch, punch three shapes with Purple Ice Solid Cardstock and two with Baby Blue Solid Cardstock. Adhere, alternating hues, and use Foam Squares.
So Relaxing Card
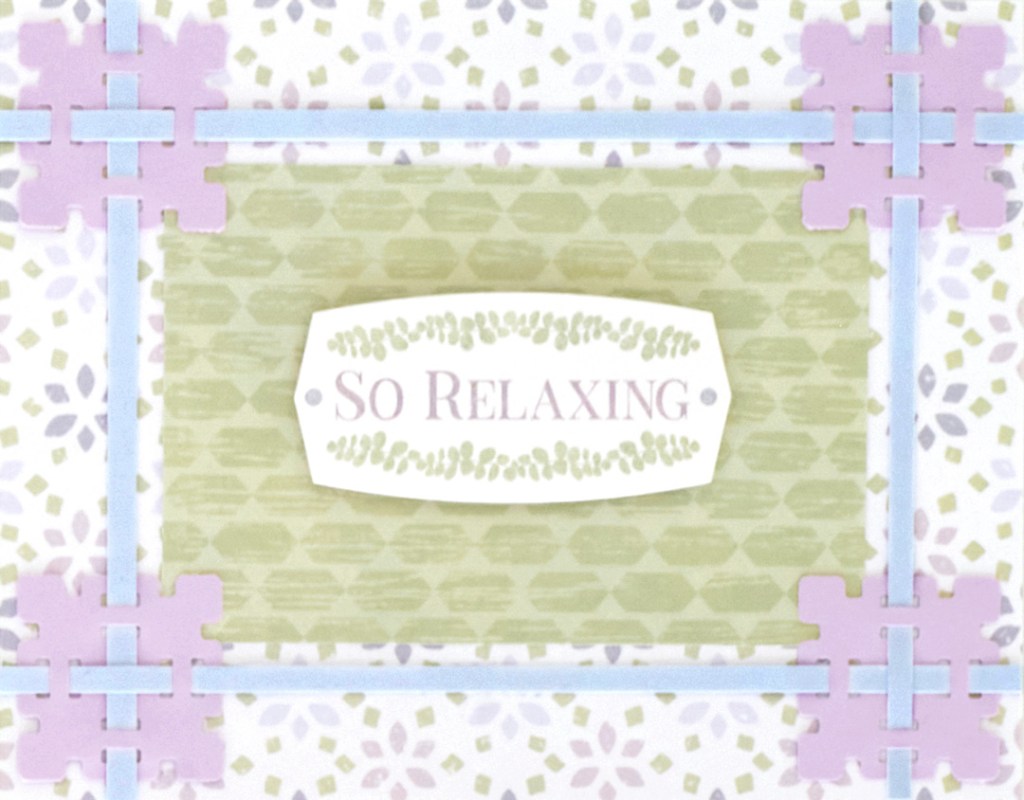
Step 1: Create the card base. Cut an 8-1/2″ x 5-1/2″ piece of White Solid Cardstock. Using the 12-inch Trimmer and the Scoring Blade, score along the long edge at 4-1/4″ and fold in half.
Step 2: Cut a 5-1/2″ x 4-1/4″ piece of white petals designer paper and adhere on the front of the card. Cut a 3-3/4″ x 2-1/2″ piece with green tub tiles designer paper and adhere on the middle of the card.
Step 3: Using the Square Tiles Punch, punch four shapes with Purple Ice Solid Cardstock. Cut two 1/8″ x 4-1/4″ strips and two 1/8” x 5-1/2” strips with baby blue cardstock. Thread through the square tiles as shown. Mount on the card.
Step 4: Adhere the “So relaxing” title sticker using Foam Squares for added dimension.
Will you be making these tranquil scrapbook borders or DIY card soon?
P.S. Are YOU a member of the Virtual Crop Facebook Group? It’s your go-to place for MONTHLY Virtual Crops, MONTHLY Completed Album Challenges, WEEKLY LIVE STREAMING of Fast & Fun Projects with Noreen, LIVE QUARTERLY Secret Box Openings with project tutorials and so much more! We hope you’ll join our community of more than 30,000 fellow memory-keeping enthusiasts — you’ll feel right at home!

Wow! Very impressive and inspiring!
Very Impressive Ideas with these new punches!
Thanks for sharing!