February 13, 2023
Say “Blue-ya” With This Blue Scrapbook Layout
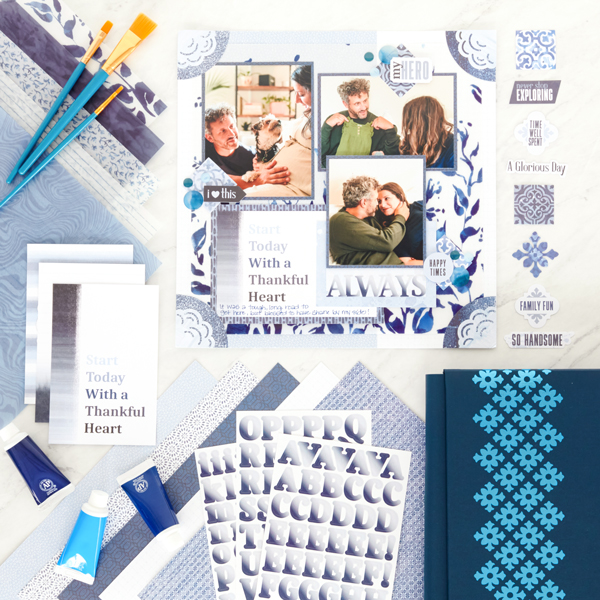
We’re saying “blue-ya” to today’s launch — the Cue the Blue collection is live! These blue scrapbooking supplies were inspired by sparkling ocean waves, moody rain drops, cloudless skies and every shade of blue’s classic character, from baby blue to midnight. You’ll love it for photos of time spent outside, family get-togethers, Father’s Day, birthdays and anniversaries. Let’s say bring on the hue with this blue scrapbook layout.
To create this layout you will need:
- Cue the Blue Paper Pack or (Shop Canada | Shop Australia)
- Cue the Blue Variety Mat Pack or (Shop Canada | Shop Australia)
- Cue the Blue Vellum Paper Pack or (Shop Canada | Shop Australia)
- Blue Ombre Serif ABC/123 Letter Stickers or (Shop Canada | Shop Australia)
- Cue the Blue Embellishments or (Shop Canada | Shop Australia)
- Cloud Frame Punch or (Shop Canada | Shop Australia)
- 12-inch Trimmer or (Shop Canada | Shop Australia)
- Custom Cutting System with Circle Patterns or (Shop Canada | Shop Australia)
- Tape Runner or (Shop Canada | Shop Australia)
- Repositionable Tape Runner or (Shop Canada | Shop Australia)
- Vellum Tape Runner Refill or (Shop Canada | Shop Australia)
- Foam Squares or (Shop Canada | Shop Australia)
- Pure Blue Dual-Tip Pen or (Shop Canada | Shop Australia)
Check out the Cue the Blue collection in the video below.

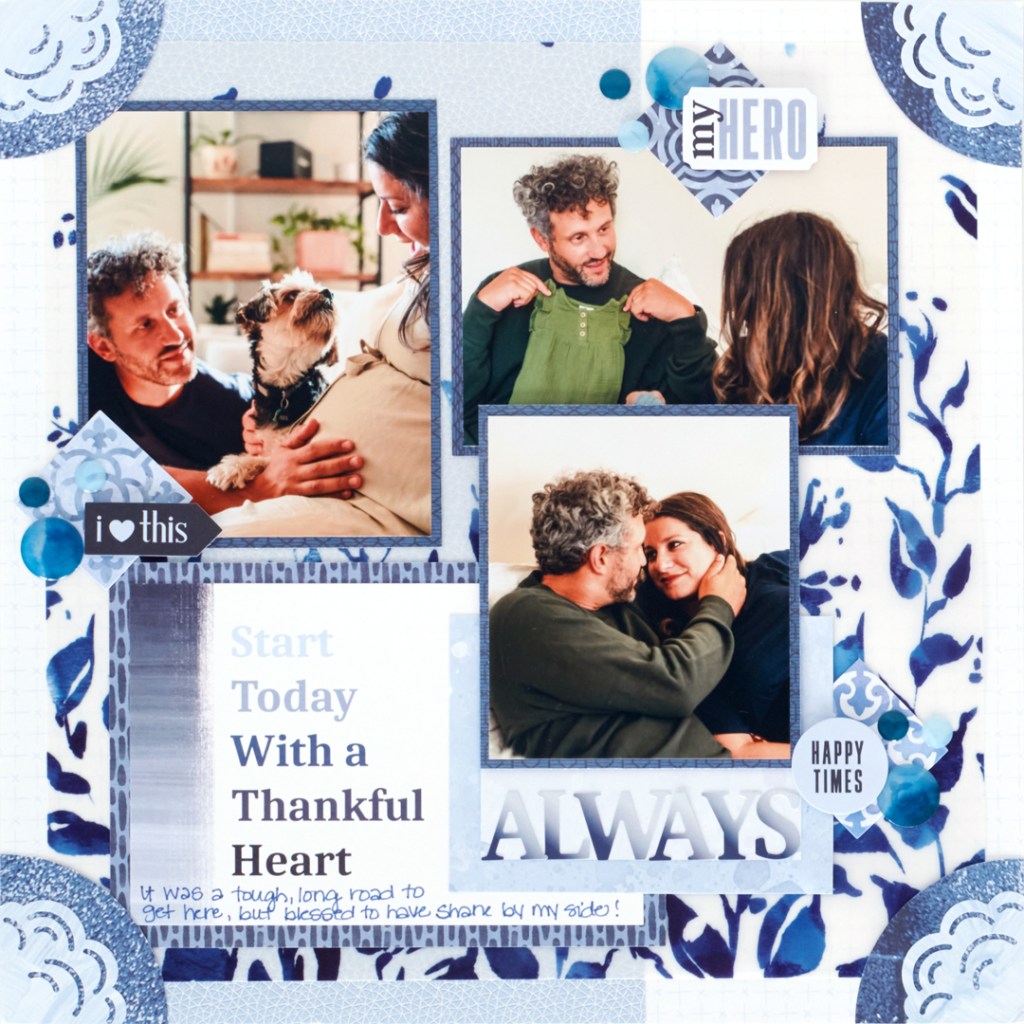
Step 1: Use a piece of white grid paper as the base of the layout.
Step 2: Cut a piece of light blue paper to measure 6″ x 12″. Adhere to the layout, slightly to the left.
Step 3 Cut a piece of vellum paper to measure 11″ x 11″. Adhere to the layout.
Step 4: Adhere a small mat to a larger mat, then adhere to the layout.
Step 5: Cut a large mat in half, then place overlapping the previous mats. Adhere ABC/123 Letter Stickers to the bottom edge of this mat.
Step 6: Cut three photo mats to measure 3-3/4″ x 4-1/4″, 5-1/4″ x 3-3/4″ and 4-1/4″ x 5-1/4″. Adhere to the layout.
Step 7: Cut and adhere photos — (1) 3-1/2″ x 4″, (1) 5″ x 3-1/2″ and (1) 4″ x 5″.
Step 8: Cut a piece of light blue paper to measure 4″ x 4″. Punch along outside edges using the Clouds Frame Punch. Cut into fourths.
Step 9: Using the outside edge of smallest Circle Custom Cutting System Pattern and the Blue Blade, cut a circle from dark blue paper. Cut into fourths.
Step 10: Adhere the fourths of cloud pieces on the circles, then adhere in the corners of the layout.
Step 11: Adhere stickers/embellishments using Foam Squares for added dimension.
Step 12: Journal as desired.
Are you loving this blue scrabook layout? What photos and memories would you put on here?
P.S. Are YOU a member of the Virtual Crop Facebook Group? It’s your go-to place for MONTHLY Virtual Crops, MONTHLY Completed Album Challenges, WEEKLY LIVE STREAMING of Fast & Fun Projects with Noreen, LIVE QUARTERLY Secret Box Openings with project tutorials and so much more! We hope you’ll join our community of more than 30,000 fellow memory-keeping enthusiasts — you’ll feel right at home!

I assume the circle is cut on the outside edge of the CCS…that detail was left out of the instructions.
Yes! Updated the instructions above. Thank you!
I like the idea for the corner embellishments. Very clever! Thanks for sharing.
Could you be more specific on the particular papers that were used? Thanks!